
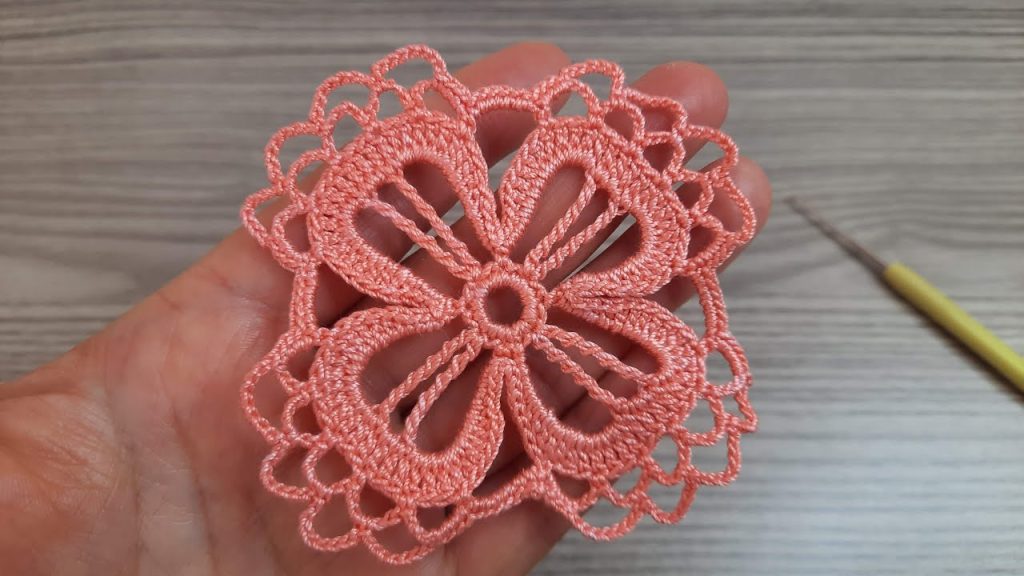
Welcome back to the studio, thread enthusiasts! Today’s pattern takes a classic four-petal bloom design and elevates it with detailed shaping and a lush, ornamental border. This piece is a masterpiece of open lacework, featuring dramatic, sweeping petals that connect seamlessly to a refined scallop edge. It’s the ultimate motif for creating delicate lace curtains, elegant runners, or a stunning shawl.
This pattern is designed to be worked in the round. It is written using U.S. Crochet Terminology.
✨ Part 1: Materials, Gauge & Preparation
| Icon | Item | Details & Notes |
| 🧶 | Yarn/Thread | Use Size 10 or Size 20 Mercerized Cotton Thread for the best result. Using a fine thread highlights the intricate open areas perfectly. For a larger motif, use a Sport Weight yarn. |
| 鉤 | Crochet Hook | A steel hook suitable for your thread. I recommend a 1.5 mm to 2.0 mm hook (or the size recommended on your thread label). |
| ✂️ | Tools | A sharp pair of scissors and a tapestry needle with an eye small enough for your thread, essential for invisible finishing. |
| 📏 | Size | The finished motif should measure approx. 3.5′′ to 4′′ across after blocking when using Size 10 thread. |
📚 Part 2: Essential Stitches and Special Terms
Mastering these stitches is key to achieving the beautiful open structure of the petals.
| Stitch | Abbreviation | Description |
| Chain | ch | Yarn over, pull through loop on hook. |
| Slip Stitch | sl st | Insert hook, yarn over, pull through work and loop on hook. |
| Single Crochet | sc | Standard single crochet. |
| Double Crochet | dc | Standard double crochet. |
| Treble Crochet | tr | Standard treble crochet (yarn over twice). |
| Picot | P | ch 3, sl st into the first ch made. |
| Start-Ch | Start-Ch | When starting a new round, ch 3 counts as the first dc, ch 4 counts as the first tr, and ch 1 does not count as a stitch unless otherwise noted. |
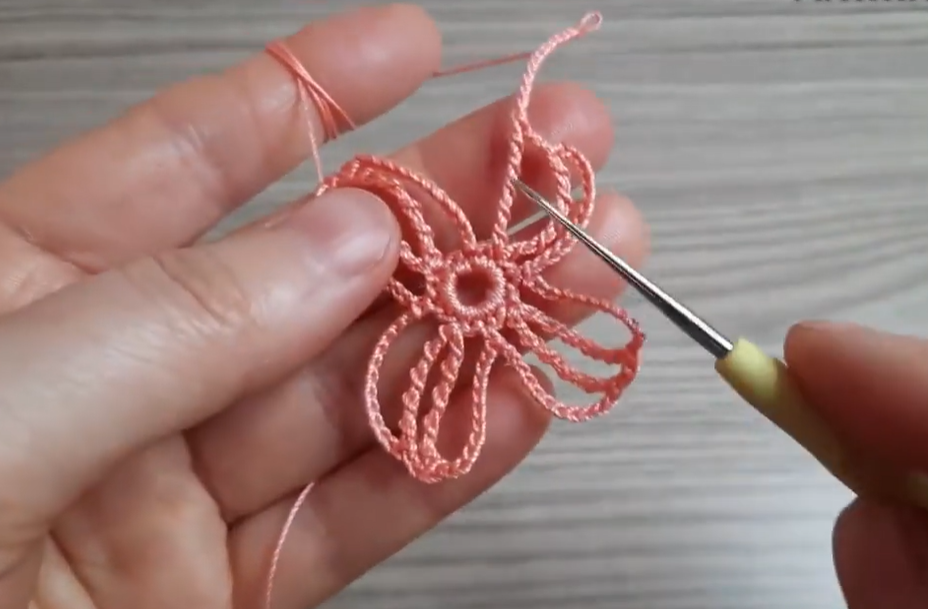
🌸 Part 3: The Open Petals (Rounds 1–4)
We work from the center out, establishing the four main petal divisions immediately.
Foundation:
- ch 6, sl st into the first ch to form a ring.
Round 1 (Center Ring):
- ch 3 (Start-Ch).
- Work 15 dc into the center ring.
- sl st to the top of the starting ch-3 to join. (16 dc)
Round 2 (Dividing the Petals):
- ch 1 (does not count as a stitch).
- sc in the first st.
- ch 5.
- Skip 3 sts.
- sc in the next st.
- Repeat from ** 2 more times.
- ch 5.
- Skip 3 sts.
- sl st to the first sc to join. (4 ch-5 loops)
- This creates the four large, open spaces for the petals.

Round 3 (Forming the Petal Apex):
- sl st into the first ch-5 space until you reach the center (3rd ch).
- ch 4 (Start-Ch, counts as first tr).
- In the center (3rd ch) of the ch-5 space, work (tr, ch 1, tr, ch 1, tr). (4 tr, 3 ch-1 spaces).
- ch 5.
- sc in the sc of Round 2 (between the ch-5 loops).
- ch 5.
- In the center (3rd ch) of the next ch-5 space, work (tr, ch 1, tr, ch 1, tr).
- ch 5.
- sc in the sc of Round 2.
- Repeat from ** around.
- sl st to the top of the starting ch-4 to join. (4 Petal Shells, 8 ch-5 loops)
Round 4 (Inner Structure & Central Bridge):
- ch 1 (does not count as a stitch).
- sc in the first tr.
- sc in the ch-1 space.
- sc in the next tr.
- ch 4 (Central Bridge).
- sc in the next tr.
- sc in the ch-1 space.
- sc in the last tr of the shell.
- ch 3.
- sc in the center (3rd ch) of the first ch-5 loop.
- ch 3.
- sc in the sc between loops.
- ch 3.
- sc in the center (3rd ch) of the second ch-5 loop.
- ch 3.
- Repeat the pattern around: (sc in 3, ch 4, sc in 3), ch 3, sc, ch 3, sc, ch 3, sc, ch 3.
- sl st to the first sc to join.
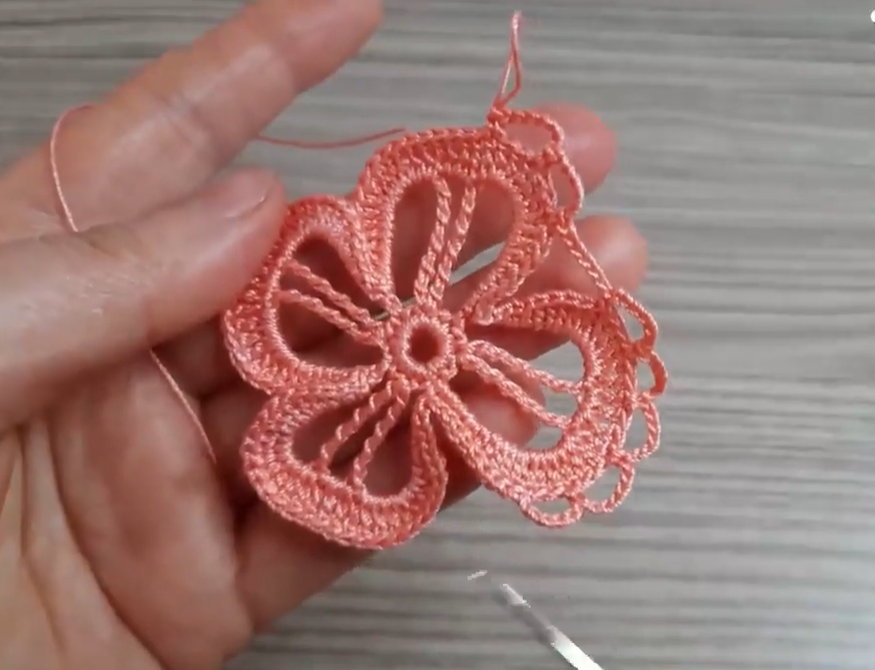
🌿 Part 4: The Scallop Edge Base (Rounds 5–6)
These rounds prepare the edge for the final decorative shells.
Round 5 (Building the Scallop Base):
- ch 1.
- sc in the first 3 sc.
- 7 dc in the ch-4 bridge space (this will form the base of the final large shell).
- sc in the next 3 sc.
- ch 3.
- sc in the next ch-3 space.
- ch 3.
- sc in the next ch-3 space.
- ch 3.
- sc in the next ch-3 space.
- ch 3.
- Repeat the pattern around.
- sl st to the first sc to join.
Round 6 (The Chain Scallop Structure):
- sl st into the next 2 sc.
- ch 1.
- sc in the next sc (the one just before the 7-dc group).
- ch 3.
- sc in the 2nd dc of the 7-dc group.
- ch 3.
- sc in the 4th dc of the 7-dc group.
- ch 3.
- sc in the 6th dc of the 7-dc group.
- ch 3.
- sc in the 2nd sc after the 7-dc group.
- ch 5.
- sc in the next ch-3 space.
- ch 5.
- sc in the next ch-3 space.
- ch 5.
- Repeat the pattern around, alternating the tight ch-3 sections over the shell and the loose ch-5 sections in the valley.
- sl st to the first sc to join.
💎 Part 5: The Final Decorative Border (Rounds 7–8)
We finish with a dense picot shell to define the edge and a joining round for versatility.
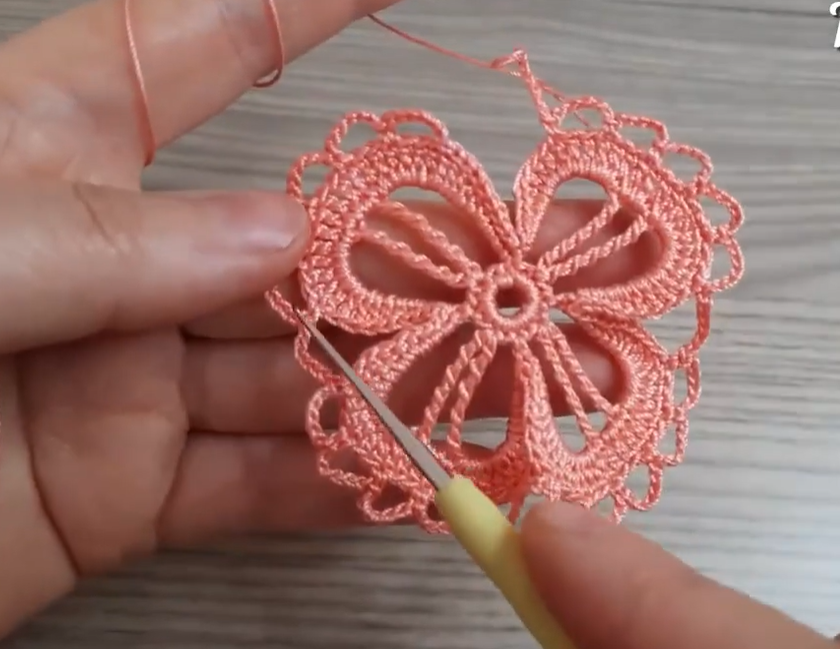
Round 7 (Picot Scallop Shells):
- sl st into the first ch-3 space.
- ch 1.
- In the ch-3 space, work (sc, 3 dc, P, 3 dc, sc) (a Picot Shell).
- sc in the next ch-3 space.
- Picot Shell in the next ch-3 space.
- sc in the next ch-3 space.
- ch 1.
- In the ch-5 space, work (sc, ch 3, sc).
- ch 1.
- In the next ch-5 space, work (sc, ch 3, sc).
- ch 1.
- Repeat the pattern around, working the Picot Shells over the petal points and the (sc, ch 3, sc) in the valleys.
- sl st to the first sc to join.
Round 8 (Joining Round – Optional):
- ch 1.
- sc in each st and 2 sc in each ch-1 space.
- Petal Peak: In the P of the Picot Shell, work (sc, ch 3, sc) (this creates a clean, reinforced joining point).
- Valley Point: In the ch-3 space of the valley, work (sc, ch 5, sc) (this creates another joining point).
- sl st to the first sc to join.
- Fasten off.
🧩 Part 6: Joining Motifs (The Magic of Lace)
This motif is ideal for joining into a continuous project.
Joining Method: Picot-to-Picot Join
When working Round 7 on your second and subsequent motifs, you will replace the final Picots (P) with a Joining Picot (JP) whenever two motifs touch.
- Standard Picot (P): ch 3, sl st into the first ch.
- Joining Picot (JP): ch 1, sl st into the corresponding Picot of the completed motif, ch 1, sl st into the first ch of the initial ch-1 sequence.
Joining Points: You will connect the motifs at two main points:
- The Petal Peak: The central Picot of the Picot Shell (Round 7).
- The Valley Point: The central ch-3 space of the valley (sc, ch 3, sc) (Round 7).
By joining the motifs at the petal peak of one to the valley point of the next, and vice-versa, you will create a beautiful, interlocking fabric.
Video Tutorial:
📌 Part 7: Finishing and Blocking
- Secure Ends: This is delicate lace, so careful finishing is critical. Use your fine tapestry needle to bury all yarn tails deeply and invisibly into the backs of the solid stitches (the petal base/center).
- Blocking (Absolute Necessity!): Without blocking, the motif will curl. Blocking is how you achieve that perfect, professional shape and defined open areas.
- Wet Block: Fully submerge the finished motif in cool water (with a drop of wool wash, if desired) for at least 15 minutes.
- Squeeze: Gently squeeze out excess water. Do not twist or wring. Roll the motif in a clean towel to absorb more moisture.
- Pin: Pin the damp motif to a blocking mat or foam board. Pin out the four large petal peaks and the four valley points to stretch the piece into a perfect, open square/diamond shape.
- Dry: Allow the piece to air dry completely before unpinning.
Your intricate Grand Petal Bloom Motif is ready to enchant! Happy crocheting!


