
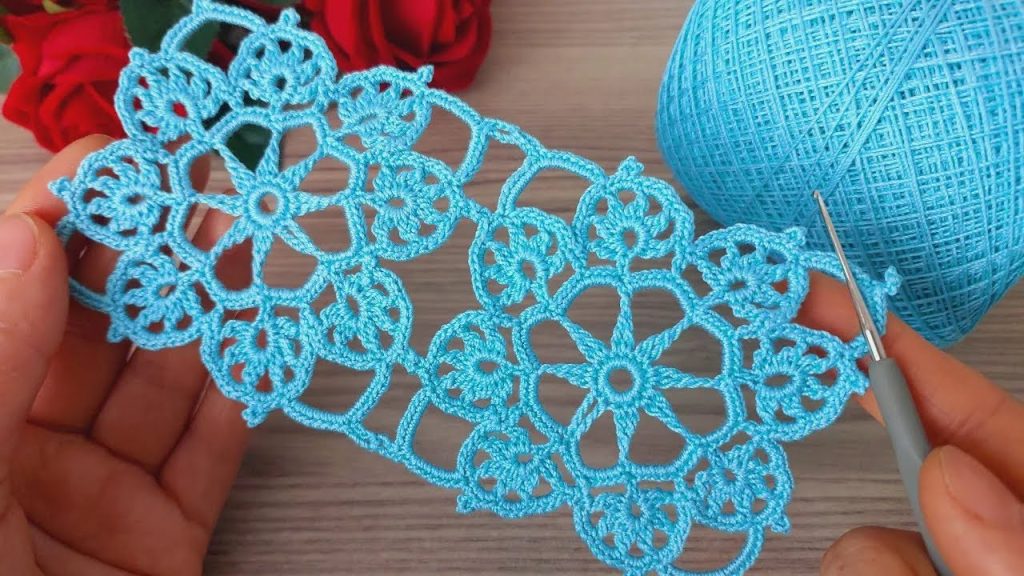
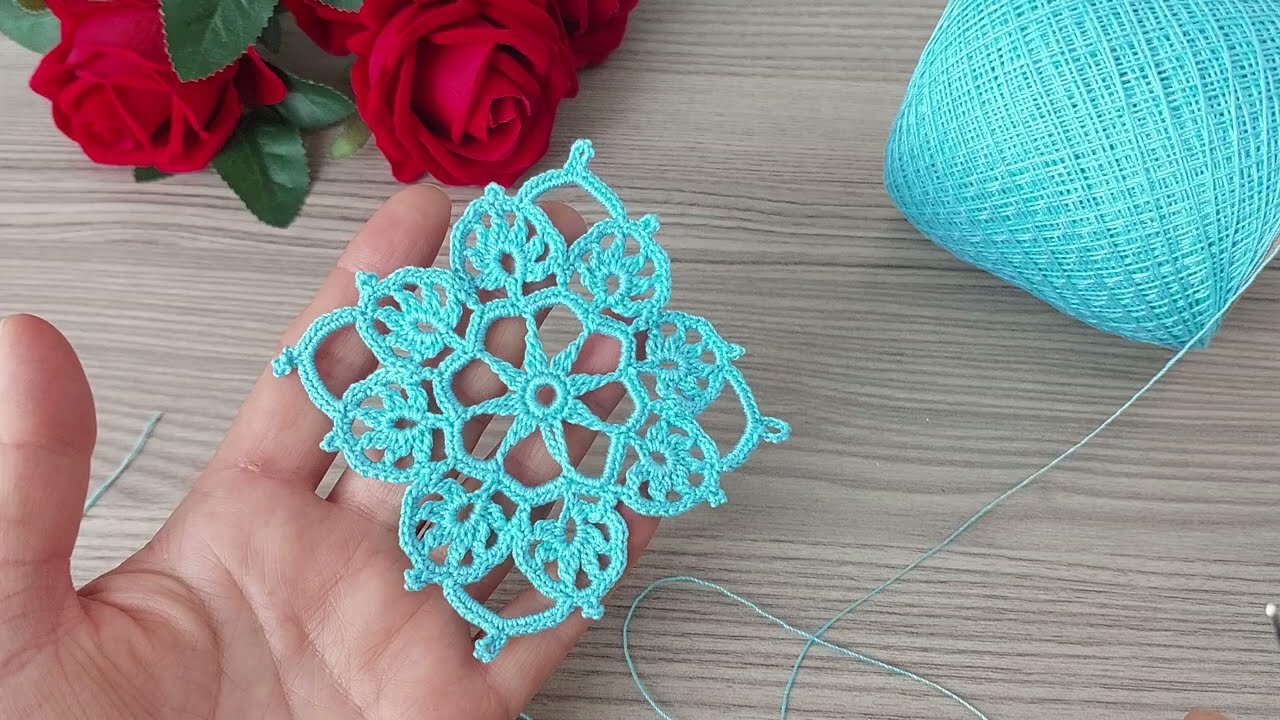
Welcome, crafters! If you’ve been searching for a project that is both meditative and results in a stunning, intricate piece of art, you’ve found it. The beautiful lace motif in the photo is a perfect project for an intermediate crocheter who wants to practice a variety of stitches and work in the round. This design, which I’ve named the Sunburst Mandala, is made of repeating “petals” and open lace, creating a beautiful, sun-like pattern.
You can use a single motif as a coaster or doily, or you can join multiple motifs together to create a larger project like a scarf, table runner, or even a lightweight shawl.
Materials You’ll Need
- Yarn: A lightweight yarn is best for this project to achieve the delicate look. I recommend a fingering weight or sport weight cotton yarn for crisp stitch definition, but you can also use a fine acrylic or wool blend. The color shown is a vibrant, bright pink or fuchsia.
- Crochet Hook: A 3.0mm (D/3) or 3.5mm (E/4) hook will work well with the recommended yarn weights. Adjust your hook size to achieve the desired drape and tension.
- Scissors
- Tapestry Needle: For weaving in ends.
Key Stitches and Abbreviations (US Terms)
- ch: chain
- sl st: slip stitch
- sc: single crochet
- dc: double crochet
- tr: treble crochet (yarn over twice)
- dtr: double treble crochet (yarn over three times)
- yo: yarn over
- st(s): stitch(es)
- sk: skip
- puff st: puff stitch (explained in pattern)
- magic ring: an adjustable loop to begin a project worked in the round.
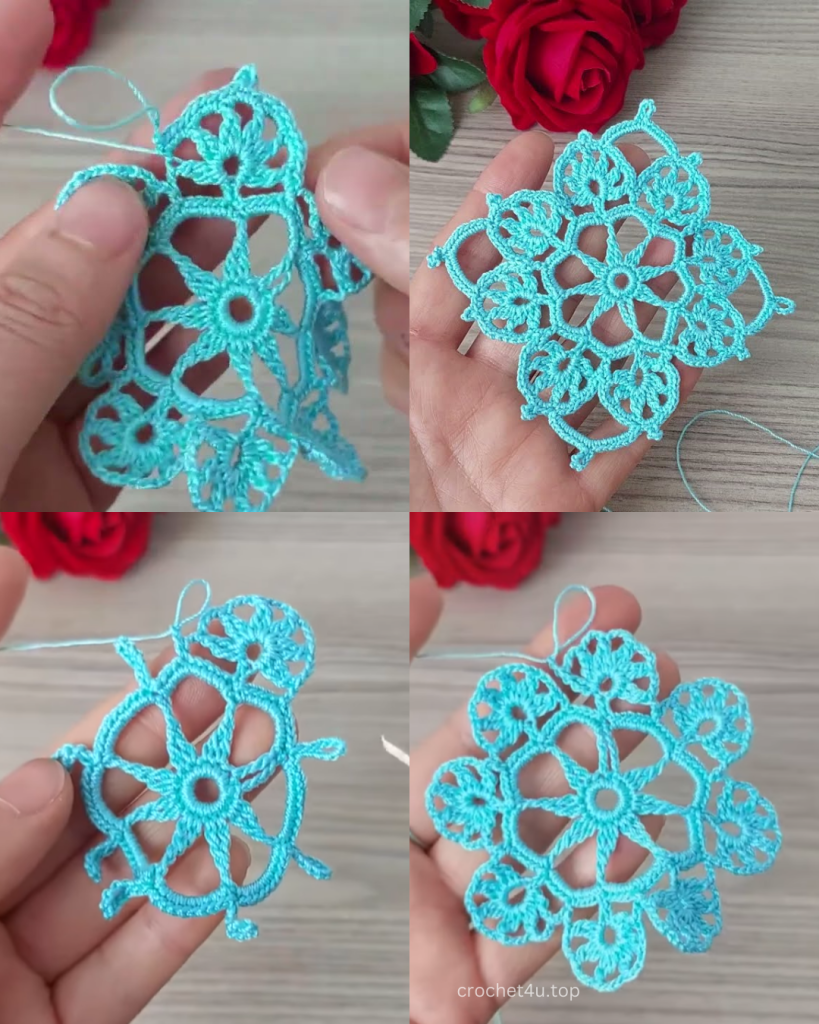
Pattern Instructions
We will be working in rounds, beginning from the center. Each round is a full circle and will be joined with a slip stitch at the end.
Round 1: The Center
- Start with a magic ring. Ch 2 (counts as first dc).
- Work 11 more dc into the magic ring.
- Join with a sl st to the top of the beginning ch-2.
- (12 dc total)
Round 2: The Puff Stitches
This round creates the small, puffy knots that give the motif its texture.
- Ch 1 (does not count as a stitch).
- Make a puff stitch in the same stitch: [yo, insert hook into st, yo, pull up a loop] 4 times. You should have 9 loops on your hook. Yo and pull through all 9 loops. Ch 1 to close the puff stitch.
- Ch 1, sk the next st, make a puff st in the following st.
- Repeat from * to * around the circle.
- You will have 6 puff stitches. Ch 1. Join with a sl st to the top of the first puff stitch.
- (6 puff sts, 6 ch-1 spaces)
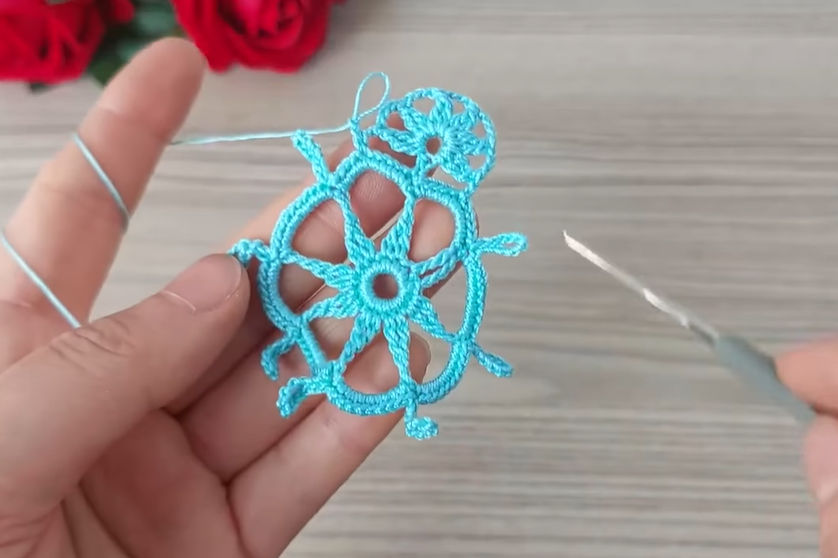
Round 3: The Treble Crochet Points
- Ch 3 (counts as first dc).
- Work 2 dc in the ch-1 space from the previous round.
- 3 dc in the next ch-1 space.
- Repeat from * to * around the circle.
- Join with a sl st to the top of the beginning ch-3.
- (18 dc total)
Round 4: Creating the Star-Like Shape
- Ch 4 (counts as first tr).
- Work 2 tr in the same st.
- Ch 1, sk 2 sts, make 3 tr in the next st.
- Repeat from * to * around the circle.
- Join with a sl st to the top of the beginning ch-4.
- (18 tr total, 6 ch-1 spaces)
Round 5: The Pomegranate-Shaped Petals
This is the main, distinctive part of the pattern.
- Ch 1 (does not count as a stitch).
- sc in the same st as the join.
- Ch 5, sc in the next ch-1 space.
- Repeat from * to * around the circle.
- Join with a sl st to the first sc.
- (6 sc, 6 ch-5 spaces)
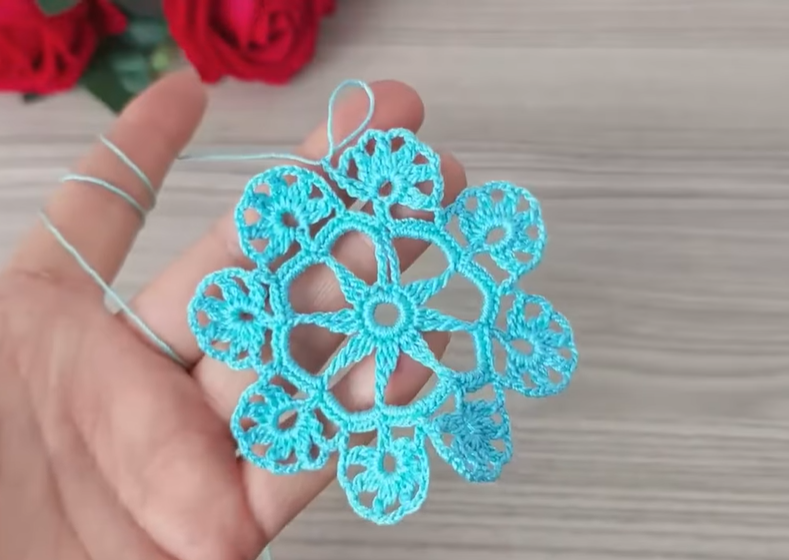
Round 6: Building the Large Petals
- sl st into the first ch-5 space.
- Ch 4 (counts as first tr).
- Make 5 tr in the same ch-5 space.
- Make 6 tr in the next ch-5 space.
- Repeat from * to * around the circle.
- Join with a sl st to the top of the beginning ch-4.
- (36 tr total)
Round 7: Shaping the Edges
- Ch 1 (does not count as a stitch).
- sc in the first st.
- Ch 2, sk 1 st, sc in the next st, ch 2, sk 1 st, sc in the next st, ch 2, sk 1 st, sc in the next st. (You’ll have a cluster of 3 sc separated by ch-2 spaces.)
- Ch 3, sk 3 sts, make a dtr in the next st, ch 3, sk 3 sts, sc in the next st.
- Repeat from * to * around the circle.
- Join with a sl st to the first sc.
- (12 sc, 6 dtr, multiple ch-2 and ch-3 spaces)
Round 8: The Outer Border
This final round creates the beautiful, lacy shell border.
- sl st into the first ch-2 space.
- Ch 3 (counts as first dc).
- Make a shell stitch in the same ch-2 space: 2 dc, ch 1, 3 dc.
- sk the next ch-2 space, make a shell stitch in the next ch-2 space.
- Repeat from * to * around the circle.
- Join with a sl st to the top of the beginning ch-3.
- (6 shell sts)
Finishing Your Motif
Cut the yarn, leaving a long tail, and weave in all loose ends securely with a tapestry needle. To get the best definition and lay flat, gently block your motif. You can do this by misting it with water and pinning it to a blocking board, stretching the points of the star and the edges of the shells so they are perfectly shaped. Allow it to dry completely.
Video Tutorial:
Tips and Variations
- Make it bigger: To create a larger piece like a placemat or table runner, simply repeat the last few rows with increasing stitch counts. You can also sew several finished motifs together using a slip stitch or tapestry needle to create a beautiful, continuous fabric.
- Yarn Choice: Using a heavier yarn, like a worsted weight, will make a much larger and more dense motif, which would be perfect as a centerpiece on a coffee table or a decorative pillow.
- Practice: Don’t be discouraged if the first few rounds don’t look perfect. The beauty of crochet is that you can easily unravel your work and try again.
I hope you enjoy creating this beautiful Sunburst Mandala! It’s a wonderful project to bring a touch of handmade elegance into your home.


