
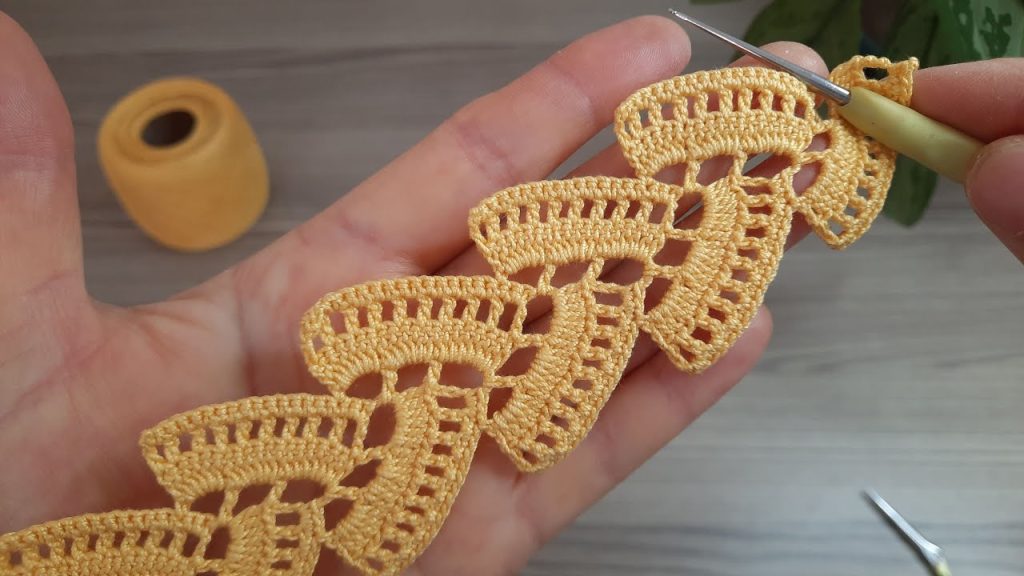
Welcome, crafters! Today we’re creating a stunning, continuous band of lace that looks complex but is surprisingly simple to master. The design features a delicate, repeating leaf or heart shape, edged with tiny shell-like arches. This trim is ideal for finishing towels, curtains, collars, or creating a unique, slender scarf.
This pattern is worked in rows to create a long, linear piece. It is written in U.S. Crochet Terminology.
✨ Materials You’ll Need
| Icon | Item | Notes |
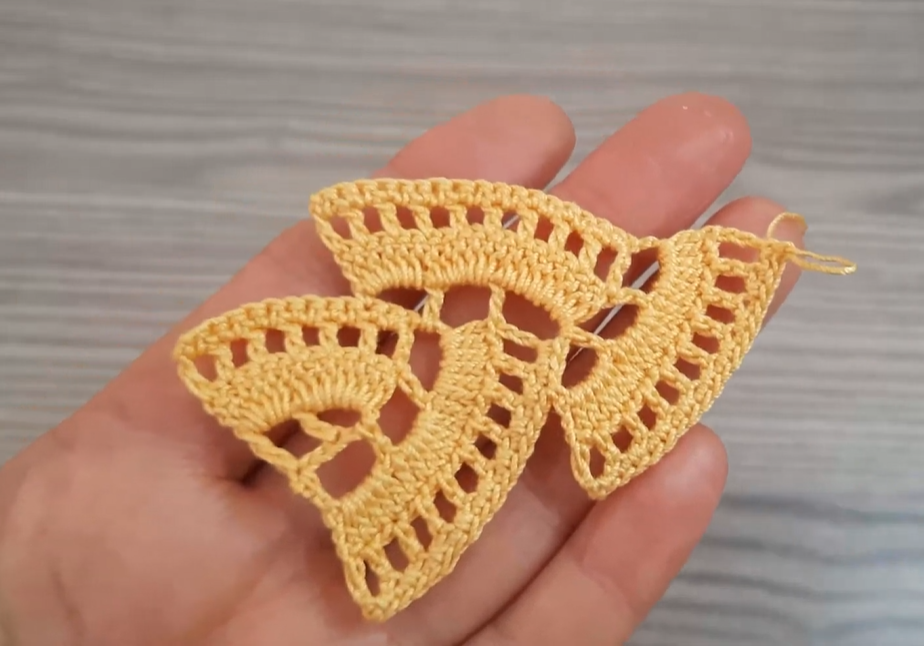
| 🧶 | Yarn | Approx. 100–150 yards of a fingering weight yarn or Size 10 cotton thread. The sunny yellow in the photo is gorgeous, but a crisp white or linen color would also be beautiful. |
| 鉤 | Crochet Hook | A hook size appropriate for your yarn. I recommend a 1.75 mm to 2.5 mm hook for a fine, crisp finish. |
| ✂️ | Tools | Tapestry needle for weaving in ends, and a pair of scissors. |
| 📏 | Gauge | Gauge is not critical, but each finished leaf motif should measure approx. 2′′ tall and 1.5′′ wide before the next motif begins. |
📚 Stitches & Techniques
You’ll be using standard stitches and a key technique for shaping:
| Stitch | Abbreviation | Description |
| Chain | ch | Yarn over, pull through loop on hook. |
| Slip Stitch | sl st | Insert hook, yarn over, pull through work and loop on hook. |
| Single Crochet | sc | Standard single crochet. |
| Double Crochet | dc | Standard double crochet. |
| Treble Crochet | tr | Standard treble crochet (yarn over twice). |
| Picot | P | ch 3, sl st into the first ch made. |
| V-Stitch | V-st | (dc, ch 1, dc) in the same stitch or space. |
🌿 The Filigree Leaf Motif (Worked in Rows)
Each leaf is created over three main rows, with a small number of chaining stitches used between motifs to connect the work.
Motif 1: Starting the First Leaf
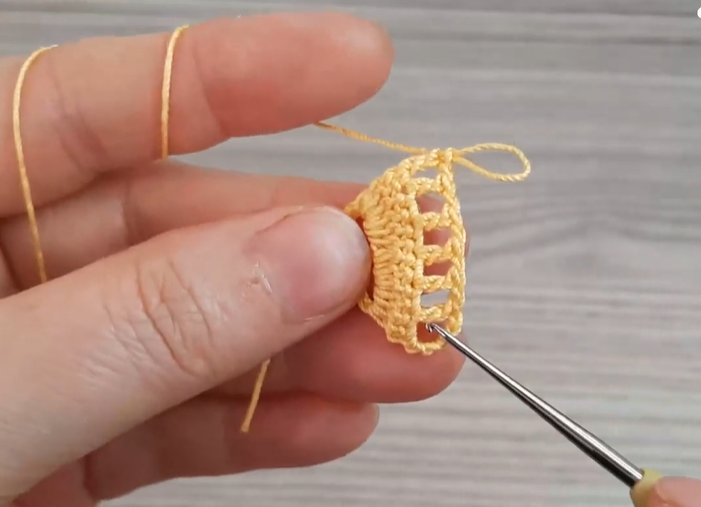
Row 1 (Foundation):
- ch 25.
- sc in the 2nd ch from hook.
- sc in the next 11 ch.
- V-st (dc, ch 1, dc) in the next ch (this will be the tip of the leaf).
- sc in the remaining 11 ch. (24 sc, 1 ch-1 space)
- ch 1, turn.
Row 2 (Shaping the Base):
- sc in the first 11 sc.
- sc in the dc, sc in the ch-1 space, sc in the dc.
- sc in the next 3 sc.
- ch 6 (this creates the first joining bridge).
- Skip 8 sc.
- sl st in the last sc.
- ch 4, turn.
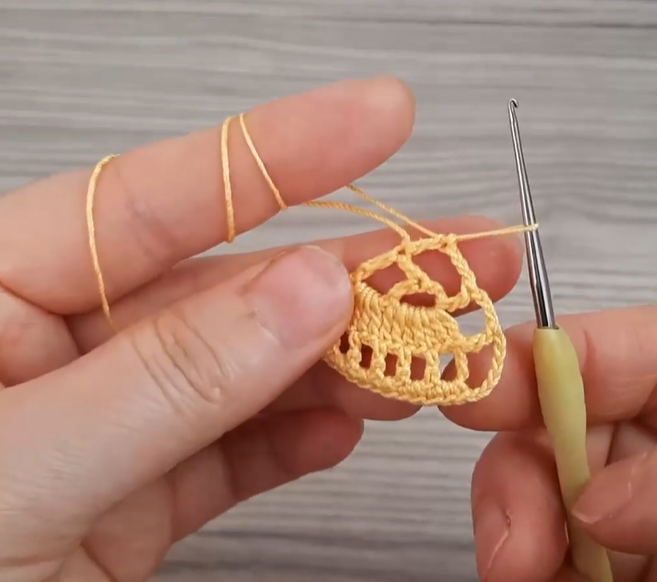
Row 3 (Lace Arches):
- tr in the sc at the base of the ch-6.
- ch 1.
- Skip 1 st. tr in the next st.
- Repeat (ch 1, skip 1, tr) 5 more times across the next 11 sts.
- ch 1.
- In the center sc (the tip of the V-st from Row 1), work (tr, ch 1, tr).
- ch 1.
- Repeat (tr, ch 1, skip 1) 6 times back down the other side.
- ch 1.
- tr in the last sc.
- ch 1, turn.
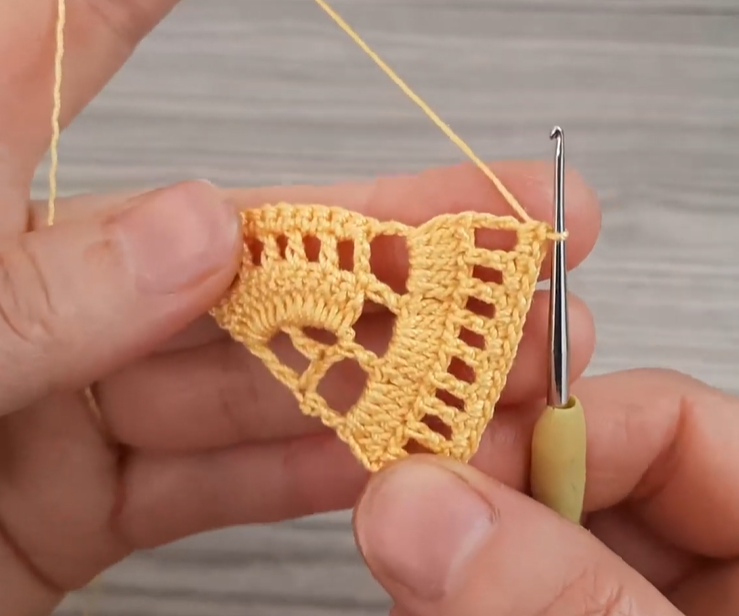
Row 4 (The Decorative Top Edge – Working back towards the base):
- sc in the first ch-1 space.
- In the next ch-1 space, work (sc, P, sc) (where P is a picot).
- sc in the next ch-1 space.
- Repeat (sc, P, sc) in the next ch-1 space, then sc in the next ch-1 space, alternating across the top of the leaf.
- When you reach the central peak, work (sc, P, sc, P, sc) in the ch-1 peak space.
- Continue the alternating pattern down the second side.
- sl st into the last tr at the base.
- ch 8 (This is the Starter Chain for Motif 2).
- turn.
🔄 Repeating the Motif (Motif 2 and Beyond)
The goal is to connect the new leaf to the base of the previous leaf and the ch-6 bridge.
Row 5 (Connecting and Foundation for Leaf 2):
- sc in the first ch-1 space of the previous leaf (the one closest to the base).
- ch 12 (this is the spine/center of the new leaf).
- sc in the 2nd ch from hook.
- sc in the next 11 ch.
- V-st (dc, ch 1, dc) in the next ch.
- sc in the next 11 ch.
- sl st into the 3rd ch of the ch-8 bridge from Row 4.
- ch 1, turn.
Row 6 (Shaping the Base of Leaf 2):
- sl st into the next 2 ch of the ch-8 bridge. (Moves position to the center of the base).
- ch 1, turn.
- sc in the first 11 sc (working on the new leaf).
- sc in the dc, sc in the ch-1 space, sc in the dc.
- sc in the next 3 sc.
- ch 6 (new joining bridge).
- Skip 8 sc.
- sl st in the last sc.
- ch 4, turn.
Row 7 (Lace Arches – Identical to Row 3):
- tr in the sc at the base of the ch-6.
- ch 1, skip 1, tr (5 more times).
- ch 1.
- In the center sc (the tip), work (tr, ch 1, tr).
- ch 1.
- tr, ch 1, skip 1 (6 times).
- ch 1.
- tr in the last sc.
- ch 1, turn.
Row 8 (The Decorative Top Edge – Identical to Row 4):
- Work the entire row of sc and Picots across the top of the leaf, exactly as in Row 4.
- sl st into the last tr at the base.
- ch 8 (Starter Chain for Motif 3).
- turn.
Repeating the Pattern:
- Repeat Rows 5 through 8 until your edging reaches the desired length.
Video Tutorial:
🔚 Finishing the Edging
Once you’ve reached your desired length, you have two options for the final motif:
- Stop after Row 7: Finish with the lace arches, and then work a simple sc border around the final motif to give it a clean finish, rather than starting the next leaf.
- Continue to Row 8: If you want a full decorative edge, finish with Row 8 and then fasten off.
- Weave Ends: Fasten off your yarn and use a tapestry needle to neatly weave in all starting and ending tails.
- Blocking: This lace pattern benefits greatly from blocking. Pin the finished edging, pulling gently to straighten the spine and open up the filigree lace and arches. Steam or wet block the piece and allow it to dry completely.
Enjoy your elegant Filigree Leaf Lace Edging! What will you use this beautiful trim to decorate?


