
Welcome, texture enthusiasts! Today, we’re diving into a captivating stitch pattern that creates a dense, almost three-dimensional fabric resembling rows of overlapping scales or intricate fans. This stitch is incredibly satisfying to watch grow and produces a fabric with fantastic drape and warmth, making it ideal for cozy blankets, stylish scarves, or eye-catching bags.
This pattern is worked in rows, building on the previous row’s fan stitches. It is written using U.S. Crochet Terminology.
✨ Part 1: Materials, Gauge & Preparation
| Icon | Item | Details & Notes |
| 🧶 | Yarn | Approx. 300-500 yards for a medium scarf. Use any worsted weight (Aran/10-ply) yarn that you love. The hot pink in the photo is gorgeous and vibrant! |
| 鉤 | Crochet Hook | A hook size appropriate for your chosen yarn. I recommend a 5.0 mm to 5.5 mm (H/8 or I/9) hook to ensure the fans have enough room to form. |
| ✂️ | Tools | Tapestry needle for weaving in ends, and a pair of scissors. |
| 📏 | Gauge | Gauge is not critical for most projects using this stitch (like blankets or scarves), but for reference: 1 fan (7 dc+1 sc) should measure approximately 1.5′′ wide. |
📚 Part 2: Essential Stitches and Special Terms
This pattern primarily uses double crochet to form the “fan” shapes.
| Stitch | Abbreviation | Description |
| Chain | ch | Yarn over, pull through loop on hook. |
| Slip Stitch | sl st | Insert hook, yarn over, pull through work and loop on hook. |
| Single Crochet | sc | Standard single crochet. |
| Double Crochet | dc | Standard double crochet. |
| Fan Stitch (FS) | FS | 7 dc worked into the same stitch or space. |
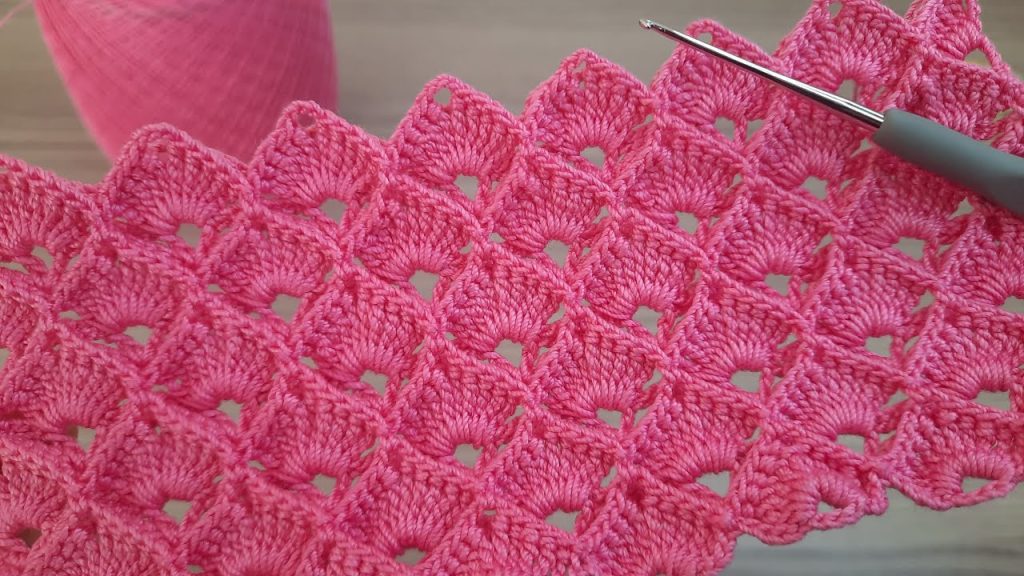
🐲 Part 3: The Dragon Scale Fan Stitch Pattern
This pattern is worked in multiples of 8 + 1 stitches for the starting chain, plus 1 for the turning chain. So, for a project with multiple repeats, your chain will be (number of fans×8)+1 ch+1 ch turning. For example, if you want 5 fans across, you would chain 5×8+1+1=42 ch.
For our detailed example, let’s create a swatch with 4 fans across.
Starting Chain:
- ch 34 (4 fans×8 sts=32 sts+1 st+1 turning ch=34 ch).
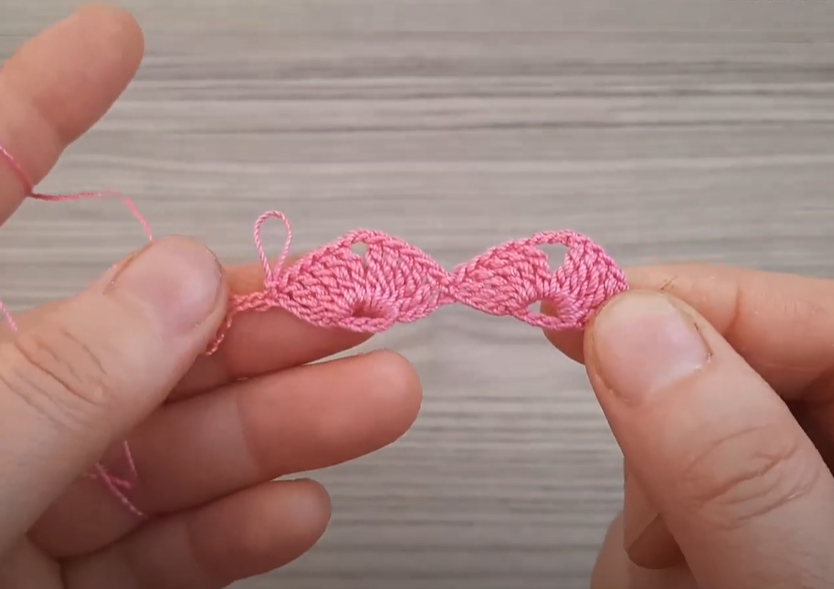
Row 1 (Foundation Row):
- sc in the 2nd ch from hook.
- sc in each ch across. (33 sc).
- ch 1, turn.
Row 2 (Setting up the First Fans – Right Side):
- sc in the first sc.
- Skip 3 sc.
- Work 7 dc into the next sc (this is your first Fan Stitch – FS).
- Skip 3 sc.
- sc in the next sc.
- Repeat from ** across the row: (Skip 3 sc, FS in next sc, Skip 3 sc, sc in next sc).
- You should end with an sc in the last sc.
- ch 3, turn. (The ch 3 counts as the first dc of the next row).
- You should have 4 Fan Stitches and 5 sc separating them.
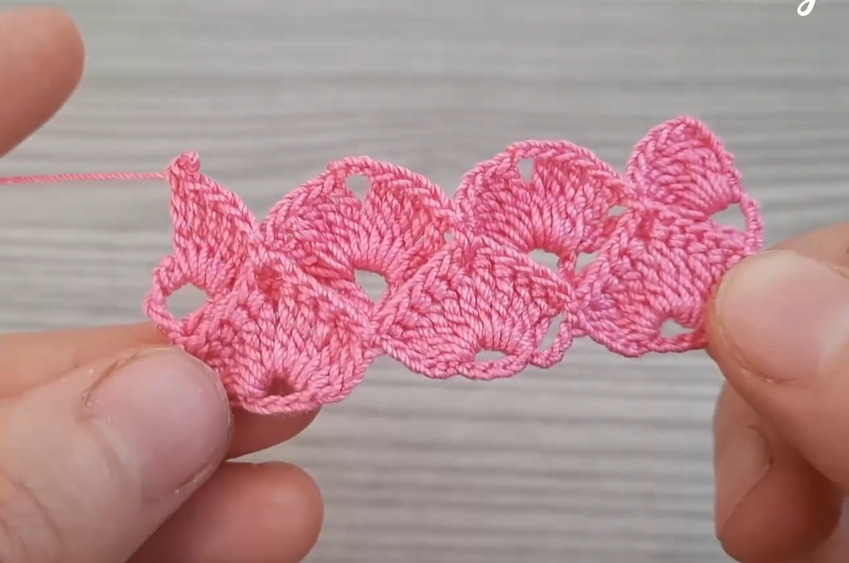
Row 3 (Working into the Fans – Wrong Side):
- dc in the first sc (this completes a half-fan shape at the edge).
- ch 1.
- sc in the 4th dc of the next FS (the middle dc of the 7-dc fan).
- ch 1.
- Work 7 dc into the sc of Row 2 (this is your next FS).
- ch 1.
- sc in the 4th dc of the next FS.
- ch 1.
- Repeat from ** across the row: (Work 7 dc in next sc, ch 1, sc in 4th dc of next FS, ch 1).
- You will end by working 7 dc into the last sc.
- ch 1, turn.
- You should have 4 FS, and 2 half-FS at the edges, along with the sc and ch-1 spaces.

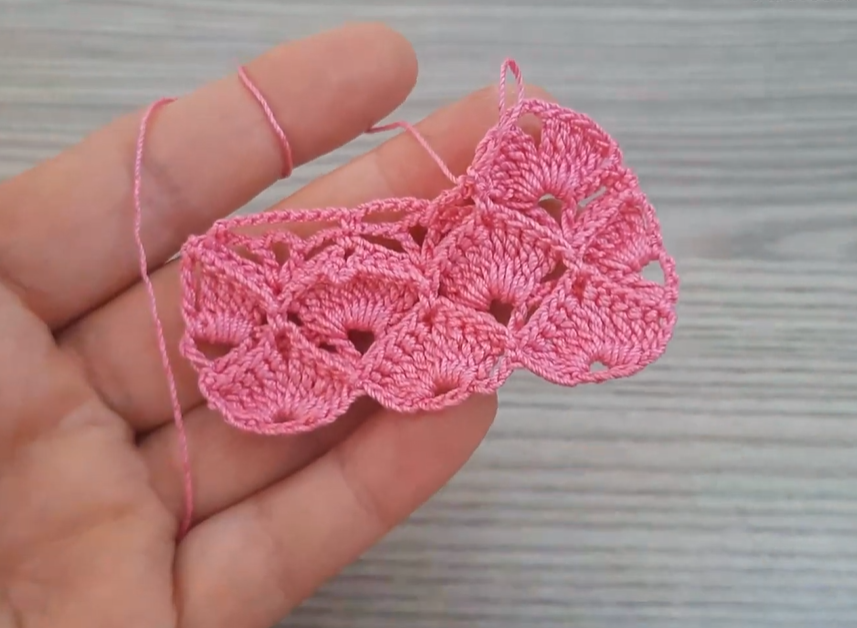
Row 4 (Right Side):
- sc in the first dc (top of turning ch-3).
- ch 1.
- Work 7 dc in the next sc. (This FS is made over the sc that was at the center of the previous fan).
- ch 1.
- sc in the 4th dc of the next FS.
- ch 1.
- Work 7 dc in the next sc.
- ch 1.
- sc in the 4th dc of the next FS.
- Repeat from ** across the row: (ch 1, Work 7 dc in next sc, ch 1, sc in 4th dc of next FS).
- You will end with an sc in the last dc (top of the turning ch-3 from previous row).
- ch 3, turn.
Row 5 (Wrong Side):
- dc in the first sc.
- ch 1.
- sc in the 4th dc of the next FS.
- ch 1.
- Work 7 dc in the next sc.
- ch 1.
- sc in the 4th dc of the next FS.
- ch 1.
- Repeat from ** across the row: (Work 7 dc in next sc, ch 1, sc in 4th dc of next FS, ch 1).
- You will end by working 7 dc into the last sc.
- ch 1, turn.
Repeating the Pattern:
- Repeat Rows 4 and 5 until your project reaches the desired length.
- Notice how the fans always alternate their position, creating the beautiful staggered, scale-like texture.
- Row 4 (RS): You start with sc, making new fans in the sc’s, and ending with sc.
- Row 5 (WS): You start with dc (part of a fan), making new fans in the sc’s, and ending with a full fan.
🔚 Part 4: Finishing Touches (Optional Borders)
This stitch pattern creates a naturally scalloped edge, which can be lovely on its own. However, if you prefer a straighter or more finished edge, here are a couple of simple options:
Option A: Simple Single Crochet Border
- sc evenly around the entire project.
- Place 3 sc in each corner.
- When working along the fan edges (the sides that run parallel to your starting chain), place 1 sc per row, or 2 sc for taller stitches (like dc/tr rows).
- sl st to join and fasten off.
Option B: Picot Trim (for a very decorative edge)
- Work a round of sc as described in Option A.
- In the next round: (sc in 3 sts, P (picot), sc in 3 sts), repeating around. Adjust as needed for corners (e.g., sc, P, sc in corner st).
- sl st to join and fasten off.
Video Tutorial:
📌 Part 5: Finishing and Blocking
- Secure Ends: Fasten off your yarn, leaving a tail long enough to weave in securely. Use your tapestry needle to neatly weave in all starting and ending tails. Take extra care to weave them into the dense parts of the fabric to hide them well.
- Blocking (Recommended for Drape): While this stitch has a wonderful texture on its own, blocking will help relax the fibers, even out the stitch definition, and enhance the drape of your finished piece.
- Wet Block: Gently wash your item or thoroughly dampen it.
- Shape: Lay the damp item flat on a blocking mat or a clean towel. Gently stretch and shape it to your desired dimensions, making sure the “scales” or “fans” are nicely aligned.
- Dry: Allow the piece to air dry completely before handling or using.
Enjoy your beautiful and richly textured Dragon Scale Fan Stitch project! What will you create with this captivating pattern?


