
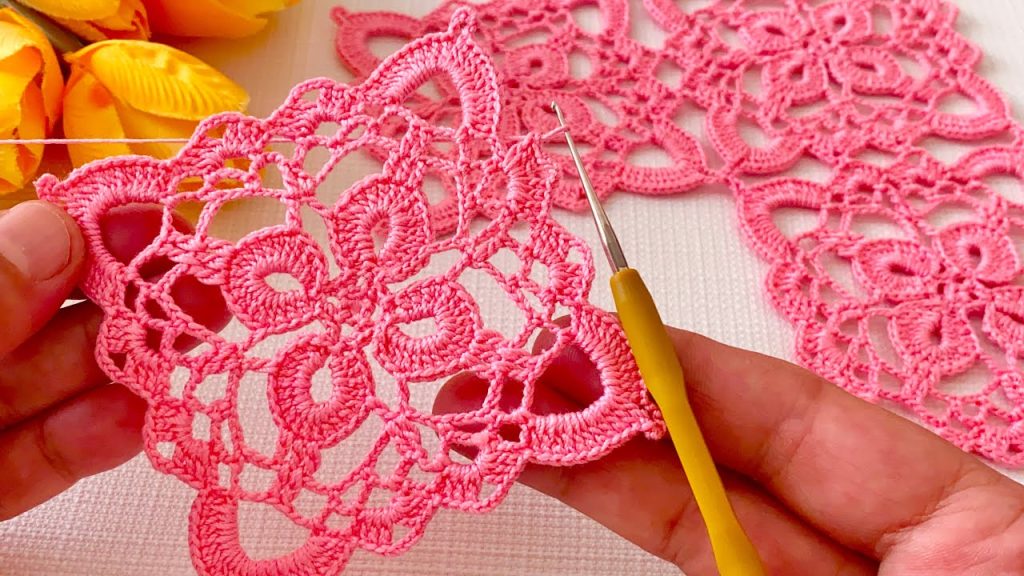
Welcome, fine thread enthusiasts! Today’s project is a captivating lace square that emphasizes texture and open space. The design is constructed around repeating central rings (the rosettes) connected by airy chains and delicate shells, creating a fabric that is both sturdy and ethereal. This motif is ideal for joining into an elegant runner, a stylish shawl, or a gossamer light curtain panel.
This pattern is worked in the round to create one motif, which can then be joined to others. It is written using U.S. Crochet Terminology.
✨ Part 1: Materials, Gauge & Preparation
| Icon | Item | Details & Notes |
| 🧶 | Yarn/Thread | Approx. 40–60 yards per motif. Use Size 10 or Size 20 Mercerized Cotton Thread for a crisp finish. The bright pink in the photo is lovely! |
| 鉤 | Crochet Hook | A steel hook suitable for your thread. I recommend a 1.5 mm to 2.0 mm hook to keep the rings defined. |
| ✂️ | Tools | A sharp pair of scissors and a tapestry needle for weaving ends. |
| 📏 | Size | The finished motif should measure approx. 4.5′′ to 5′′ across after blocking. |
📚 Part 2: Essential Stitches and Special Terms
This pattern relies heavily on chains and shells to create the distinctive open rings and arches.
| Stitch | Abbreviation | Description |
| Chain | ch | Yarn over, pull through loop on hook. |
| Slip Stitch | sl st | Insert hook, yarn over, pull through work and loop on hook. |
| Single Crochet | sc | Standard single crochet. |
| Double Crochet | dc | Standard double crochet. |
| Treble Crochet | tr | Standard treble crochet (yarn over twice). |
| Picot | P | ch 3, sl st into the first ch made. |
| Ring Base (RB) | RB | ch 5, sl st into the first ch to form a ring. |
| Shell | Shell | (dc, ch 2, dc) worked in the same space. |
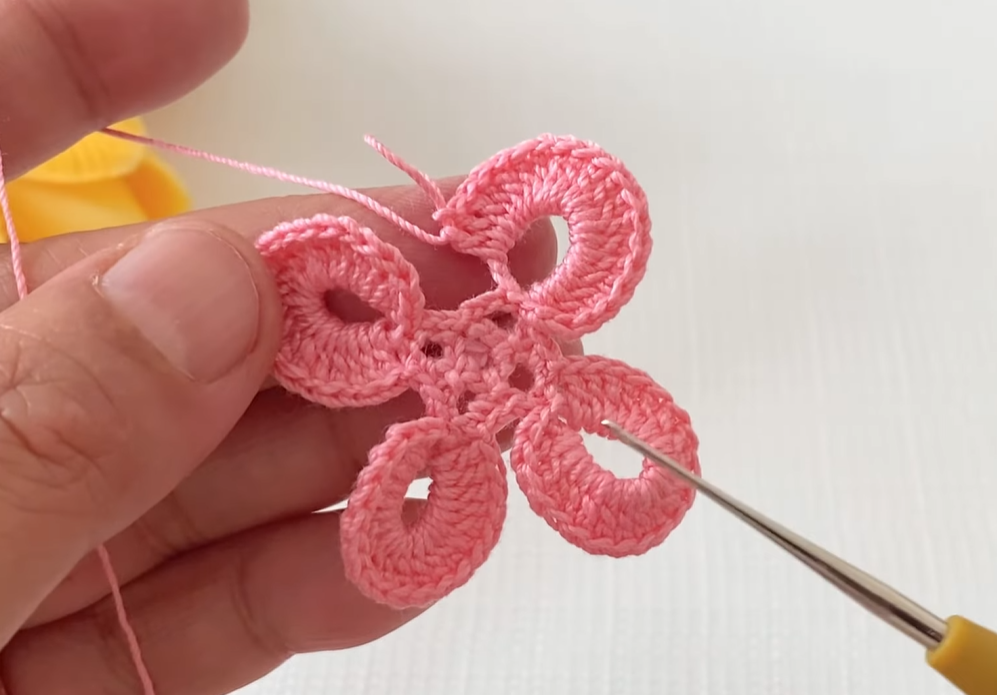
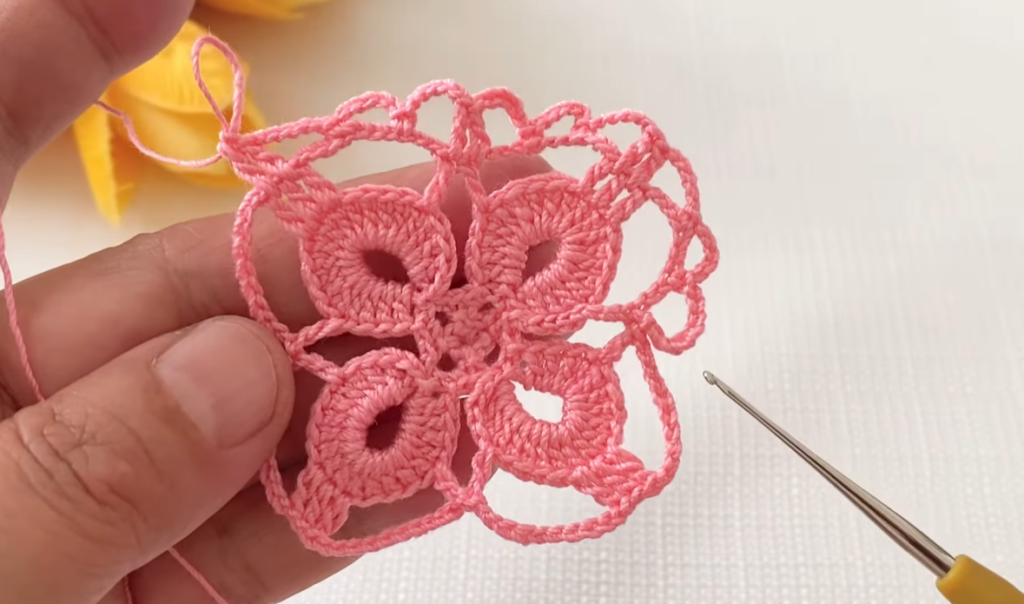
💍 Part 3: The Central Rosette (Rounds 1–3)
We begin with the core rosette and define the four main corners of the motif.
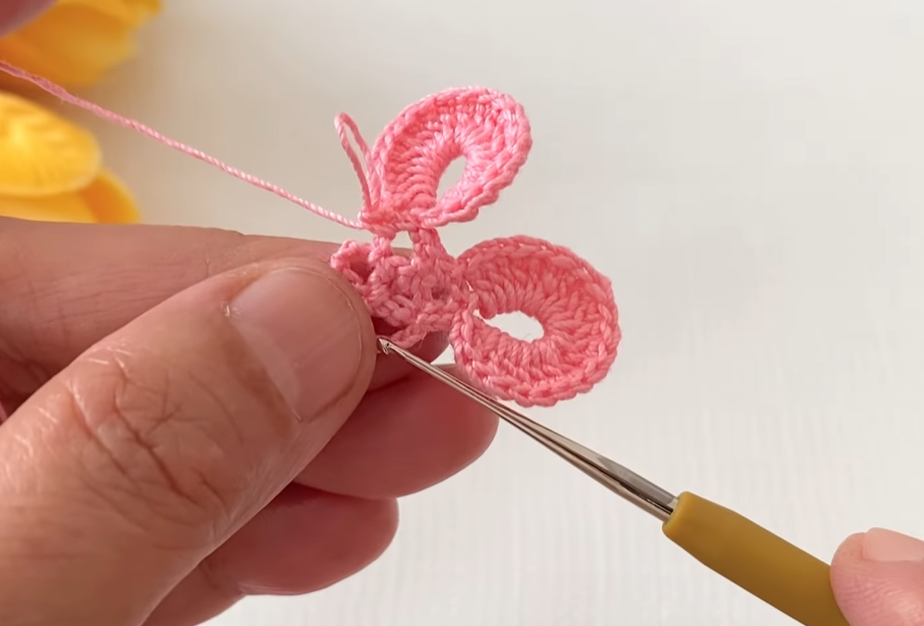
Round 1 (Foundation):
- RB (ch 5, sl st to first ch).
- ch 3 (counts as first dc).
- Work 15 dc into the ring.
- sl st to the top of the starting ch-3 to join. (16 dc)
Round 2 (Rosette Border):
- ch 1 (does not count as a stitch).
- sc in the first dc.
- ch 4.
- Skip 1 dc.
- sc in the next dc.
- Repeat from ** around.
- End with ch 4. sl st to the first sc to join. (8 ch-4 loops)
Round 3 (Establishing the Corners):
- sl st into the ch-4 space.
- ch 1.
- sc in the ch-4 space.
- ch 7 (Corner Chain).
- sc in the next ch-4 space.
- ch 5 (Side Chain).
- sc in the next ch-4 space.
- ch 7 (Corner Chain).
- sc in the next ch-4 space.
- ch 5 (Side Chain).
- Repeat the pattern around: (sc, ch 7, sc, ch 5).
- sl st to the first sc to join. (4 ch-7 corners, 4 ch-5 sides)
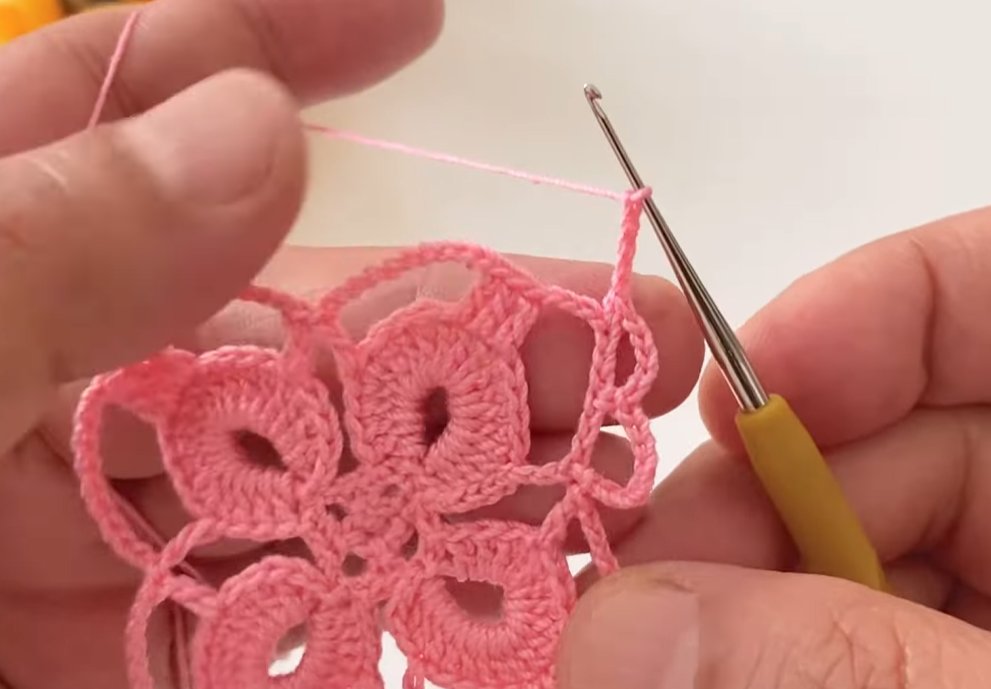
🌐 Part 4: The Connecting Rings (Rounds 4–6)
This section creates the two large, open side rings and connects them to form the mesh.
Round 4 (Large Rings and Corner Shells):
- sl st into the ch-7 corner space until you reach the center (4th ch).
- ch 3 (counts as first dc).
- Work (dc, ch 3, 2 dc) in the center of the ch-7 corner (a Corner Shell).
- ch 7 (Base for side ring).
- sc in the center (3rd ch) of the ch-5 side space.
- ch 7.
- Corner: In the center of the next ch-7 corner, work (2 dc, ch 3, 2 dc).
- Repeat from ** around.
- sl st to the top of the starting ch-3 to join.
Round 5 (Connecting the Side Rings):
- sl st across to the ch-3 corner space.
- ch 3 (counts as first dc).
- Work (dc, ch 3, 2 dc) in the ch-3 corner space.
- ch 3.
- In the ch-7 side loop, work (tr, ch 1) six times, tr. (7 tr, 6 ch-1 spaces).
- ch 3.
- Corner: Work (2 dc, ch 3, 2 dc) in the ch-3 corner space.
- Repeat from ** around.
- sl st to the top of the starting ch-3 to join.
Round 6 (Final Mesh Arches):
- sl st across to the ch-3 corner space.
- ch 1.
- In the ch-3 corner space, work (sc, P, sc) (This will be the main joining point).
- ch 4.
- sc in the first ch-1 space of the 7-tr section.
- ch 4.
- sc in the next ch-1 space.
- Repeat (ch 4, sc) across the 7-tr section (6 ch-4 arches).
- ch 4.
- Corner: In the ch-3 corner space, work (sc, P, sc).
- Repeat from ** around.
- sl st to the first sc to join.
🧩 Part 5: Joining & Bordering (Rounds 7–8)
This final section creates the full square shape and provides key joining instructions.
Round 7 (The Final Scallops):
- ch 1.
- sc in the first sc (at the corner).
- Shell: In the ch-4 space, work (2 dc, ch 1, 2 dc).
- sc in the next sc.
- Repeat (Shell, sc) across the six ch-4 arches of the side.
- When you reach the corner (sc, P, sc): work sc in the first sc, (dc, P, dc) in the P (Picot) space, and sc in the second sc.
- Repeat from ** around.
- sl st to the first sc to join.
Round 8 (Joining Round – Optional):
- This round is for creating a reinforced edge for joining multiple motifs.
- ch 1.
- sc in each st and 1 sc in each ch-1 space across the Shells.
- Corner Joining Point: Over the central (dc, P, dc) of the corner, work (sc, ch 5, sc).
- Side Joining Points: Over the ch-1 space of the side shells, work (sc, ch 3, sc).
- sl st to the first sc to join.
- Fasten off.
Video Tutorial:
📌 Part 6: Finishing and Blocking
- Secure Ends: Fasten off your thread, leaving a tail long enough to weave in securely. Use your tapestry needle to bury all tails invisibly into the backs of the solid stitches (the initial Rosette and Corner Shells).
- Blocking (Absolute Necessity!): Blocking is critical to stretch the chains and open up the mesh, which reveals the true beauty and size of the motif.
- Wet Block: Fully submerge the finished motif in cool water for 15-20 minutes.
- Shape: Gently squeeze out excess water. Pin the damp motif to a blocking mat or foam board. Pin out the four corner joining points (the ch-5 spaces from Rnd 8) to define the square shape. Also, pin out the side joining points (ch-3 spaces) to fully stretch the lace.
- Dry: Allow the piece to air dry completely before unpinning.
Your intricate Rosette Chain Lace Motif is now complete! What stunning lace creation will you begin by joining these delicate squares?


