
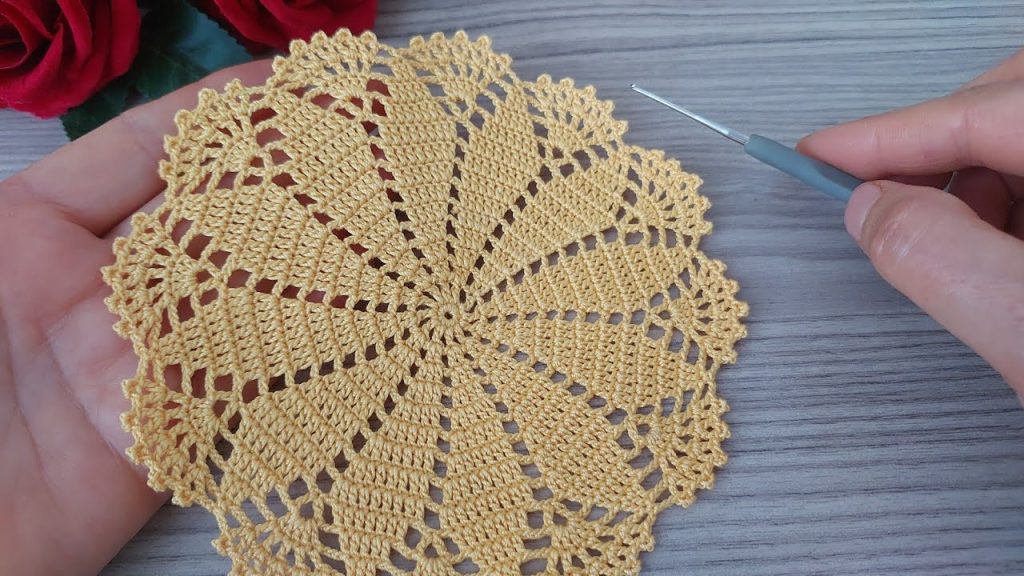
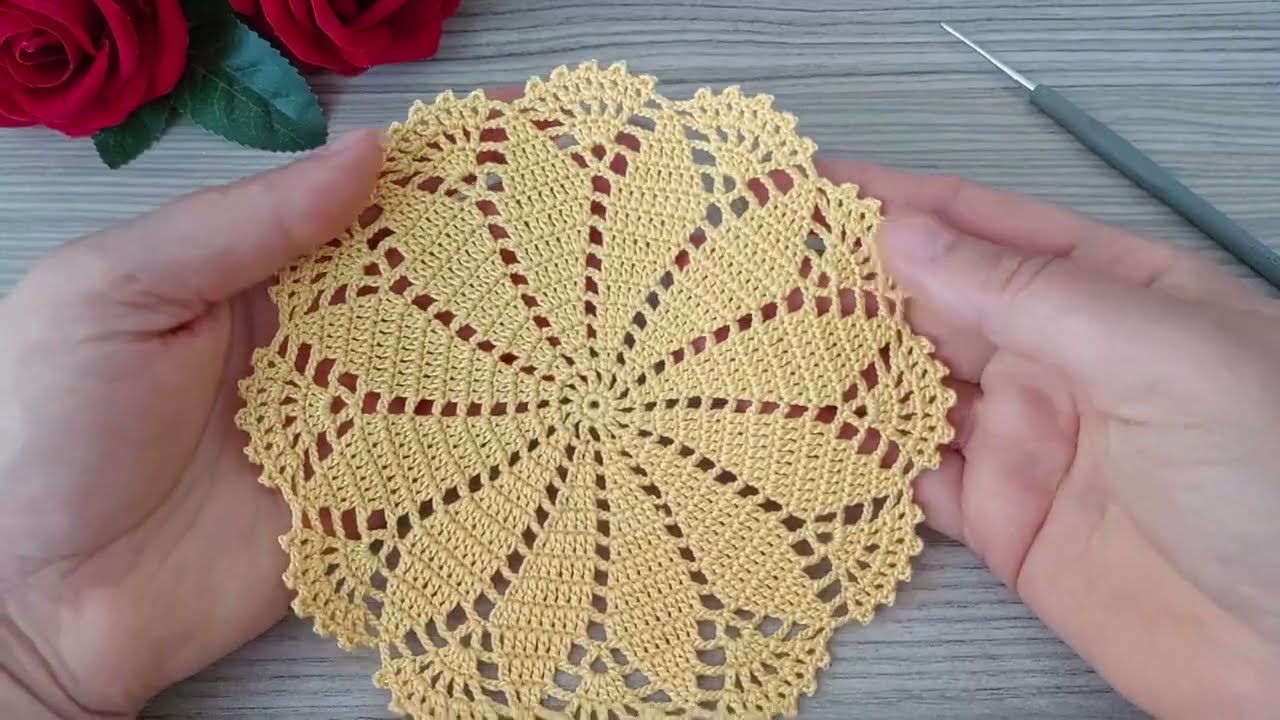
There’s something incredibly satisfying about creating a delicate, intricate doily with your own hands. The round doily in your image, with its captivating spiral design and lovely openwork, is a perfect project to bring a touch of handmade warmth and elegance to your living space. Whether you use it as a coaster, a centerpiece, or a decorative accent under a small vase, its unique pattern is sure to draw compliments.
This pattern will guide you step-by-step through each round, building the beautiful texture and shape you see. The key to a perfect doily lies in consistent tension and careful stitch counting, especially as the pattern expands. Grab your hook and your favorite cotton yarn, and let’s create some magic!
Materials Needed
- Yarn: Approximately 70-80 yards of fine-weight (#1) or sport-weight (#2) mercerized cotton yarn. Mercerized cotton is highly recommended for doilies as it provides excellent stitch definition, a subtle sheen, and blocks beautifully. The sample in the image appears to be a lovely soft yellow, a perfect “sunshine” shade!
- Crochet Hook: A 2.0 mm (US B-1) to 2.5 mm (US C-2) hook, or the size recommended for your chosen yarn. A smaller hook will result in a firmer, more compact doily, while a slightly larger one will create a softer, more draped fabric.
- Tapestry Needle: Essential for neatly weaving in your ends.
- Scissors: For trimming yarn.
- Blocking Supplies: A foam board or blocking mat, rust-proof pins, and a spray bottle or basin for water. Blocking is crucial for doilies to showcase their full beauty!
Skill Level & Notes
- Skill Level: Intermediate. This pattern uses a variety of stitches, requires careful counting, and involves working into specific stitches and spaces to create the desired effect.
- Gauge: Gauge is not critical for this project. The final size will vary depending on your yarn weight, hook size, and personal tension. The finished doily will be approximately 7-8 inches (18-20 cm) in diameter when blocked.
- All rounds are worked in a continuous circle. You will join each round with a slip stitch (sl st) into the top of the beginning chain unless otherwise specified.
- The beginning chain (e.g., ch 3) typically counts as the first stitch (e.g., first dc) of the round. Pay close attention to these instructions.
Abbreviations
- ch: chain
- sl st: slip stitch
- sc: single crochet
- hdc: half double crochet
- dc: double crochet
- tr: treble crochet (yarn over 2 times)
- sk: skip
- st(s): stitch(es)
- sp: space
- beg: beginning
- […]: Repeat the instructions within the brackets the specified number of times.
- (…): Total stitch count at the end of the round.
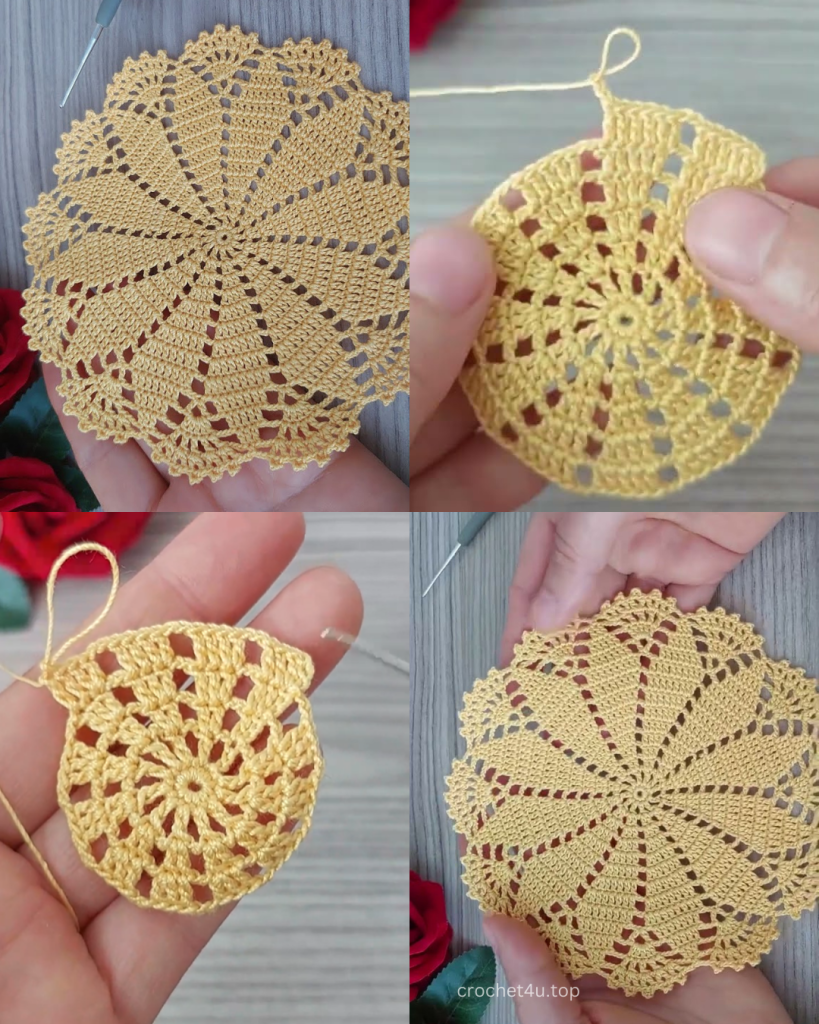
The Pattern: Spiraling Sunshine Doily
Let’s begin crafting this beautiful piece! Take your time with each round, and don’t hesitate to use stitch markers if you find yourself losing count.
Starting the Center
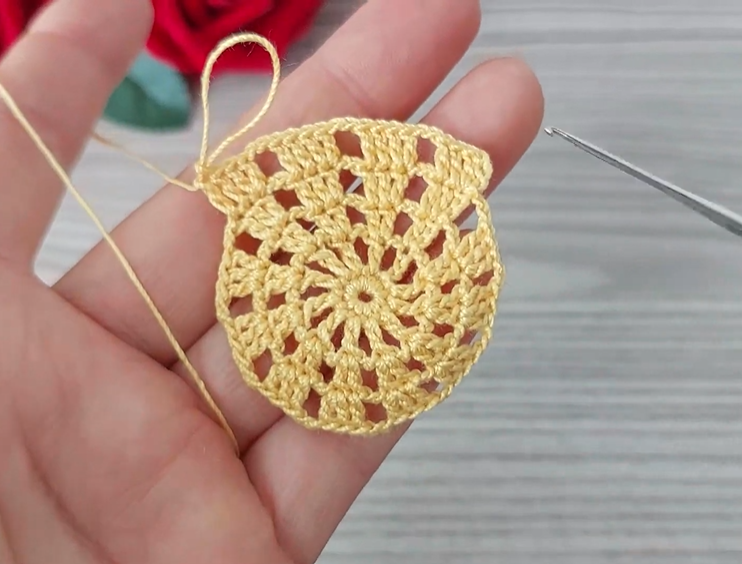
Round 1: Make a magic ring. Ch 3 (counts as first dc), work 11 dc into the ring. Join with a sl st to the top of the beg ch-3. (12 dc)
Round 2: Ch 3 (counts as first dc). Dc in the same st. Work 2 dc in each st around. Join with a sl st to the top of the beg ch-3. (24 dc)
Round 3: Ch 3 (counts as first dc). Dc in the same st. [Dc in the next st, 2 dc in the next st] 11 times. Dc in the last st. Join with a sl st to the top of the beg ch-3. (36 dc)
Round 4: Ch 1, sc in the same st. Ch 3. [Sk 2 sts, sc in the next st, ch 3] 11 times. Join with a sl st to the beg sc. (12 sc, 12 ch-3 sps)
Beginning the Spirals
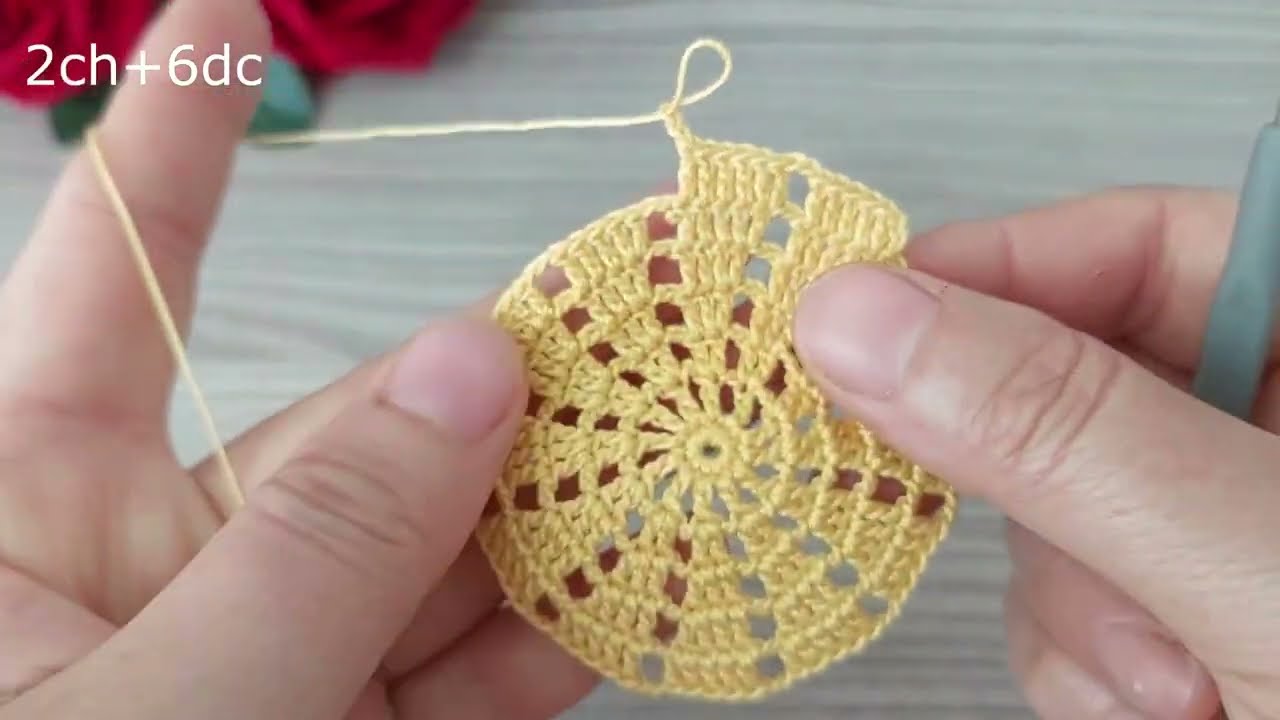
Round 5: Sl st into the first ch-3 sp. Ch 3 (counts as first dc). Work 2 dc into the same ch-3 sp. Ch 2. [Sk next sc, work 3 dc into the next ch-3 sp, ch 2] 11 times. Join with a sl st to the top of the beg ch-3. (36 dc, 12 ch-2 sps)
Round 6: Ch 3 (counts as first dc). Dc in the next st. Dc in the next st. Ch 3. [Dc in each of the next 3 dc, ch 3] 11 times. Join with a sl st to the top of the beg ch-3. (36 dc, 12 ch-3 sps)
Round 7: Sl st into the next dc. Ch 3 (counts as first dc). Dc in the next dc. Ch 3. [Sk next ch-3 sp and next dc, dc in the next 2 dc, ch 3] 11 times. Join with a sl st to the top of the beg ch-3. (24 dc, 12 ch-3 sps)
Round 8: Sl st into the next dc. Ch 3 (counts as first dc). Ch 4. [Sk next ch-3 sp and next dc, dc in the next dc, ch 4] 11 times. Join with a sl st to the top of the beg ch-3. (12 dc, 12 ch-4 sps)
Round 9: Sl st into the first ch-4 sp. Ch 3 (counts as first dc). Work 4 dc into the same ch-4 sp. Ch 2. [Sk next dc, work 5 dc into the next ch-4 sp, ch 2] 11 times. Join with a sl st to the top of the beg ch-3. (60 dc, 12 ch-2 sps)
Expanding the Openwork
Round 10: Ch 3 (counts as first dc). Dc in the next 4 dc. Ch 3. [Dc in the next 5 dc, ch 3] 11 times. Join with a sl st to the top of the beg ch-3. (60 dc, 12 ch-3 sps)
Round 11: Sl st into the next st (2 times). Ch 3 (counts as first dc). Dc in the next 2 dc. Ch 4. [Sk 2 dc and ch-3 sp, dc in the next 3 dc, ch 4] 11 times. Join with a sl st to the top of the beg ch-3. (36 dc, 12 ch-4 sps)
Round 12: Sl st into the next dc. Ch 3 (counts as first dc). Ch 5. [Sk next dc and ch-4 sp, dc in the next dc, ch 5] 11 times. Join with a sl st to the top of the beg ch-3. (12 dc, 12 ch-5 sps)
Round 13: Sl st into the ch-5 sp. Ch 3 (counts as first dc). Work 6 dc into the same ch-5 sp. Ch 3. [Sk next dc, work 7 dc into the next ch-5 sp, ch 3] 11 times. Join with a sl st to the top of the beg ch-3. (84 dc, 12 ch-3 sps)
Final Edging
Round 14: Ch 1, sc in the same st. Sc in the next 6 dc. Ch 3. [Sk ch-3 sp, sc in the next 7 dc, ch 3] 11 times. Join with a sl st to the beg sc. (84 sc, 12 ch-3 sps)
Round 15: Sl st into the next 2 sc. Ch 1, sc in the same sc. Ch 3, sl st into the 3rd ch from hook (picot made). [Sc in the next sc, picot] 2 times. Sc in the next sc. Ch 3. [Sk ch-3 sp and 2 sc, sc in the next sc, picot, sc in the next sc, picot, sc in the next sc, picot. Ch 3] 11 times. Join with a sl st to the beg sc.
Video Tutorial:
Finishing
- Cut the yarn: Leave a tail of about 6-8 inches.
- Fasten off: Pull the tail completely through the last loop on your hook.
- Weave in ends: Use your tapestry needle to carefully weave in both the starting tail (from the magic ring) and the ending tail. Make sure they are securely hidden within the stitches without pulling or distorting the doily.
The Magic of Blocking
Doilies absolutely transform with blocking! This process opens up the stitches, makes the pattern crisp, and gives your doily its final, polished shape.
- Wet your doily: You can gently submerge it in lukewarm water for about 10-15 minutes, or thoroughly spray it with water until it’s saturated.
- Gently squeeze out excess water. Do not wring or twist. Roll it in a clean towel to remove more moisture.
- Lay it flat: Place your damp doily on a foam blocking mat or a thick towel.
- Shape and pin: Carefully stretch the doily to its full size and shape, smoothing out the curves and points. Use rust-proof pins to secure the edges, especially the picots, to define the shape. Pin the doily evenly so it dries symmetrically.
- Dry completely: Allow the doily to air dry completely. This can take several hours or even overnight, depending on humidity.
- Unpin: Once totally dry, carefully remove the pins.
And there you have it! A beautiful, handmade spiraling sunshine doily that will brighten any space. This piece makes a wonderful gift or a lovely addition to your own home decor.
If you create this doily, I’d love to see it! Share your photos and tell me about your experience in the comments below!


