

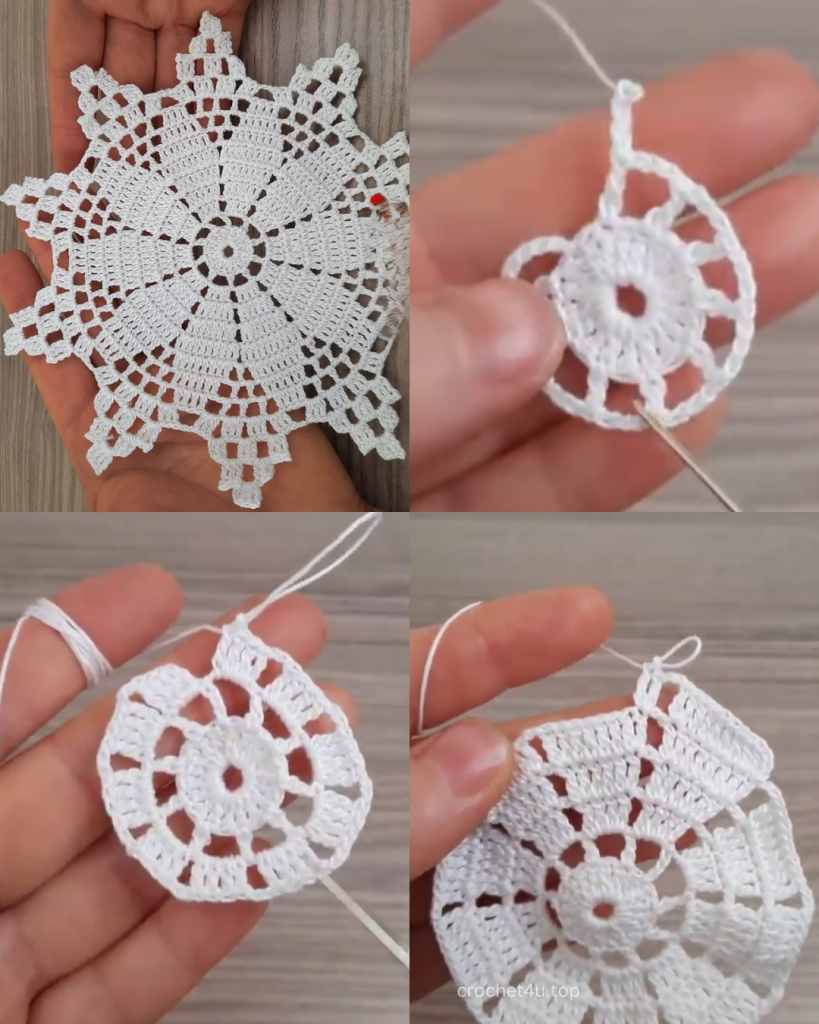
Are you ready to create a stunning piece of home decor that’s both elegant and functional? This lacy star doily is just the project you’ve been looking for. Its intricate, snowflake-like design is perfect for adding a delicate touch to any table as a coaster or a small centerpiece. With six radiating points and a beautiful openwork pattern, this doily is a rewarding challenge for intermediate crocheters and a great way for ambitious beginners to level up their skills.
The pattern is broken down into clear, manageable rounds. Just be sure to count your stitches and follow the instructions carefully, and you’ll have a gorgeous, handmade accent piece in no time.
Materials Needed
- Yarn: Approximately 50-60 yards of a fine-weight (#1) or sport-weight (#2) mercerized cotton yarn. Mercerized cotton is highly recommended as it has a slight sheen and holds its shape beautifully after blocking. A great option is a cotton thread or yarn in a weight suitable for doilies.
- Crochet Hook: A 2.0 mm (US B-1) to 2.5 mm (US C-2) hook, or the size recommended for your chosen yarn. A smaller hook will create a more delicate, tightly-stitched fabric, while a larger one will make a slightly bigger, airier doily.
- Tapestry Needle: For weaving in ends.
- Scissors
- Blocking Supplies: A foam board or blocking mat, rust-proof pins, and a spray bottle or basin for water.
Skill Level & Notes
- Skill Level: Intermediate. This pattern uses a variety of stitches and requires careful counting and attention to detail.
- Gauge: Gauge is not critical for this project. The final size will depend on your yarn and hook choice. The sample doily measures approximately 6 inches (15 cm) across when blocked.
- All rounds are worked in a continuous circle. You will join each round with a slip stitch unless otherwise noted.
Abbreviations
- ch: chain
- sl st: slip stitch
- sc: single crochet
- hdc: half double crochet
- dc: double crochet
- tr: treble crochet (yarn over 2 times)
- sk: skip
- st(s): stitch(es)
- sp: space
- beg: beginning
- […]: Repeat the instructions within the brackets
- (…): Total stitch count at the end of the round
The Pattern
Center Circle
Round 1: Make a magic ring. Ch 3 (counts as first dc), work 11 dc into the ring. Join with a sl st to the top of the beg ch-3. (12 dc)
Round 2: Ch 3 (counts as first dc). Dc in the same st. Work 2 dc in each st around. Join with a sl st to the top of the beg ch-3. (24 dc)
Round 3: Ch 3 (counts as first dc). Dc in the same st. [Dc in the next st, 2 dc in the next st] 11 times. Dc in the last st. Join with a sl st to the top of the beg ch-3. (36 dc)
Round 4: Sl st into the next st. Ch 1, sc in the same st. Ch 3. [Sk 2 sts, sc in the next st, ch 3] 11 times. Join with a sl st to the beg sc. (12 sc, 12 ch-3 sps)
Round 5: Sl st into the first ch-3 sp. Ch 1. In the same ch-3 sp, work [sc, hdc, 3 dc, hdc, sc]. [In the next ch-3 sp, work (sc, hdc, 3 dc, hdc, sc)] 11 times. Join with a sl st to the beg sc. (72 sts)
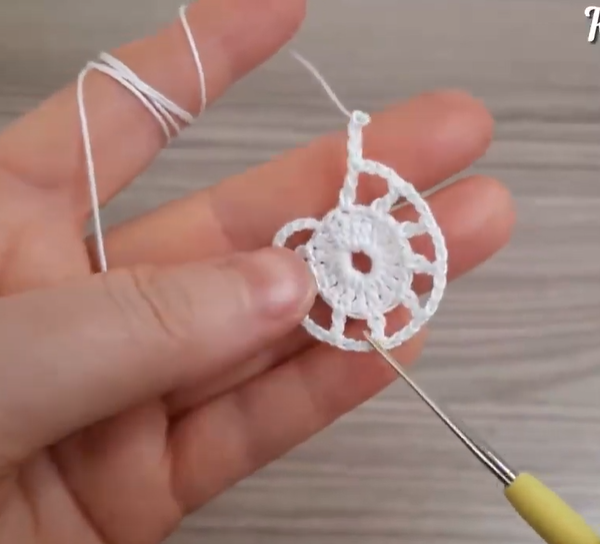
Forming the Star Points
Round 6: Ch 5 (counts as tr). [Sk 6 sts, tr in the next st, ch 2, tr in the same st] 5 times. Sk 6 sts, tr in the next st, ch 2. Join with a sl st to the 3rd ch of the beg ch-5. (6 tr clusters, 6 ch-2 sps)
- Note: These tr clusters with ch-2 sps will form the six points of the star.
Round 7: Sl st into the first ch-2 sp. Ch 3 (counts as dc). In the same ch-2 sp, work [2 dc, ch 3, 3 dc]. [In the next ch-2 sp, work (3 dc, ch 3, 3 dc)] 5 times. Join with a sl st to the top of the beg ch-3. (36 dc, 6 ch-3 sps)
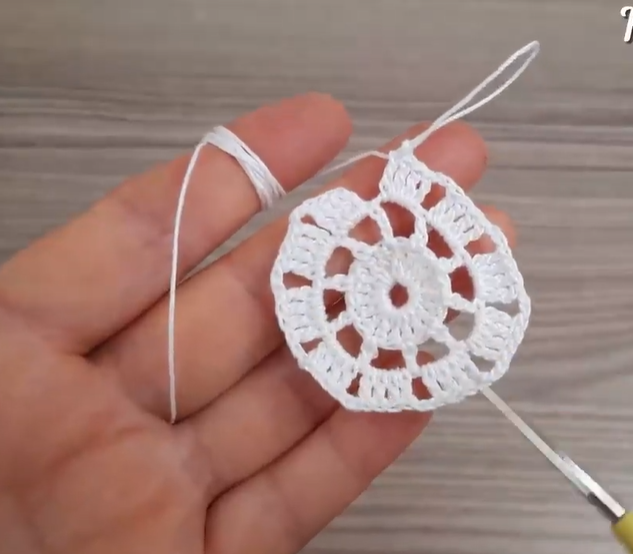
Round 8: Sl st to the center ch-3 sp of the first point. Ch 1, sc in the same ch-3 sp. Ch 5. [Sc in the center ch-3 sp of the next point, ch 5] 5 times. Join with a sl st to the beg sc. (6 sc, 6 ch-5 sps)
Round 9: Sl st into the first ch-5 sp. Ch 3 (counts as dc). In the same ch-5 sp, work [2 dc, ch 3, 3 dc]. [In the next ch-5 sp, work (3 dc, ch 3, 3 dc)] 5 times. Join with a sl st to the top of the beg ch-3. (36 dc, 6 ch-3 sps)
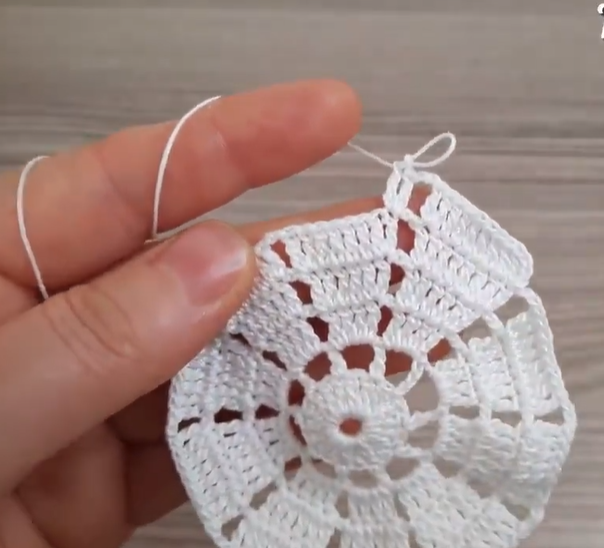
The Outer Lacy Edge
Round 10: Sl st into the next st. Sl st into the center ch-3 sp. Ch 4 (counts as tr). In the same ch-3 sp, work [tr, ch 1, tr, ch 1, tr]. This is the point cluster. Ch 3. Sk 3 sts, sc in the next st. Ch 3. [In the next point’s ch-3 sp, work (tr, ch 1, tr, ch 1, tr, ch 1, tr). Ch 3. Sk 3 sts, sc in the next st. Ch 3] 5 times. Join with a sl st to the top of the beg ch-4.
Round 11 (Final Round): Sl st to the first ch-1 sp of the point cluster. Ch 1, sc in the same ch-1 sp. Ch 3, sl st into the beg ch of the ch-3 (this forms a picot). Sc in the next ch-1 sp, picot. Sc in the next ch-1 sp, picot. [Ch 2, sk 3 sts, sc into the ch-3 sp. Ch 2, sk 3 sts, sc into the next ch-3 sp. Ch 2. Sl st to the first ch-1 sp of the next point cluster. Sc in the same ch-1 sp, picot. Sc in the next ch-1 sp, picot. Sc in the next ch-1 sp, picot] 5 times. Join with a sl st to the beg sc.
Video Tutorial:
Finishing
Cut the yarn and pull the tail through the last stitch to secure. Use your tapestry needle to carefully weave in all loose ends. Make sure they are hidden and secure.
Blocking
Blocking is the most important step for doilies. It will open up the lacy stitches and give your finished piece a crisp, professional look.
- Wet the doily: You can either submerge it in a bowl of lukewarm water or spray it thoroughly with a spray bottle.
- Gently squeeze out excess water. Do not wring or twist the doily.
- Lay the doily flat on a foam board or towel.
- Carefully stretch and pin each of the six points of the star, making sure they are equally spaced. Pin all along the outer edge to help the doily hold its shape.
- Let the doily dry completely. This may take several hours or overnight.
- Unpin and admire your beautiful, finished work!
Enjoy your new, handmade star doily! If you make one, I would love to see it. Share a photo in the comments below!


