
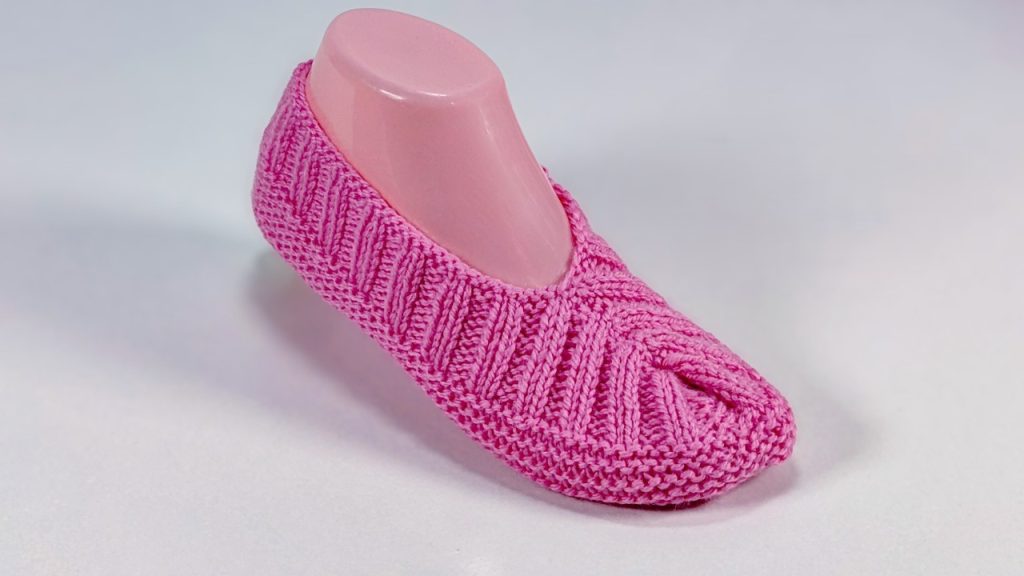
Welcome, passionate knitters! Get ready to create a truly eye-catching and comfortable pair of house slippers with this pattern for the Chevron Zing Slipper. The vibrant pink yarn highlights a unique zigzag ribbing pattern that wraps around the entire foot, offering both stunning visual appeal and exceptional stretch. The construction is clever and creates a contoured, secure fit.
This comprehensive pattern is worked flat, then meticulously seamed, and is designed for Adult Medium (Women’s US size 7-9 / EU 38-40).
🛠️ Materials Needed
- Yarn: Approximately 150 – 180 yards (135 – 165 meters) of a soft, yet robust Worsted weight (Aran/10-ply) yarn in your main color (Vibrant Pink).
- A smooth, slightly elastic yarn (like a wool or acrylic blend) will best showcase the chevron texture.
- Needles: A pair of US size 8 (5.0 mm) straight knitting needles.
- Using a slightly larger needle helps the textured stitch remain flexible and comfortable.
- Notions:
- Tapestry Needle for expert seaming and weaving in ends.
- Sharp Scissors.
- Stitch marker (optional, but helpful for pattern repeats).
📏 Gauge (Essential for Textured Fabric)
- Gauge: 18 stitches and 28 rows equals 4 inches (10 cm) in the Chevron Rib Stitch (see instructions below), measured after a light block.
- Why Gauge is Critical: This textured stitch is dense and can pull in significantly. Achieving the correct gauge ensures the slipper’s length and width are accurate for the intended foot size.
ℹ️ Key Techniques & Abbreviations
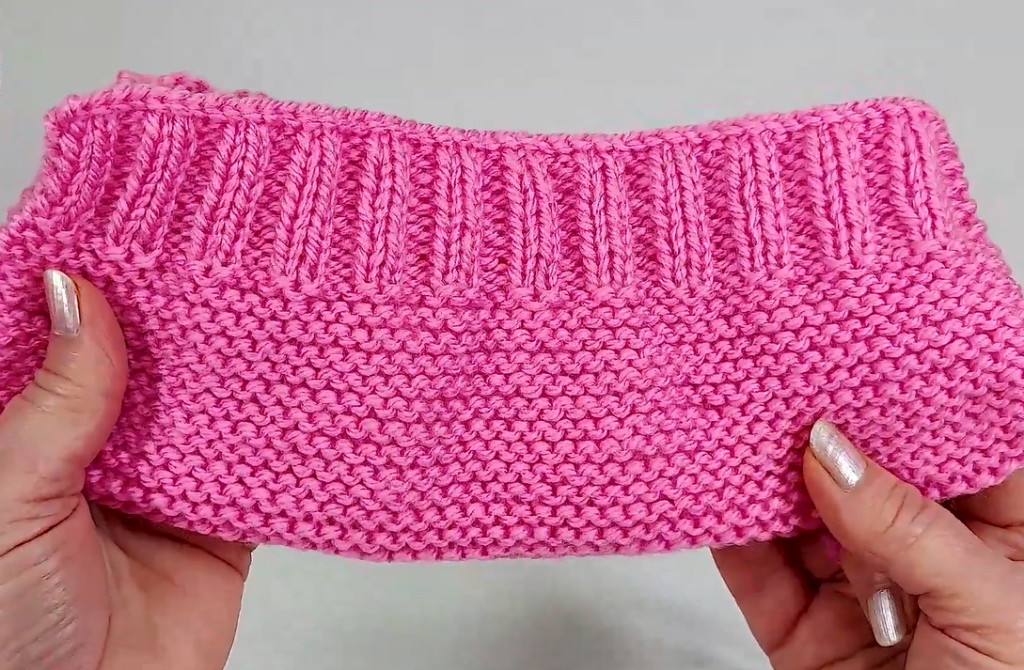
The distinctive chevron texture is achieved through a specific Chevron Rib Stitch, which is a 4-row repeat.
- K = Knit
- P = Purl
- st(s) = Stitch(es)
- RS = Right Side
- WS = Wrong Side
- K2tog = Knit two stitches together (a right-leaning decrease).
- ssk = Slip, Slip, Knit (a left-leaning decrease).
- sl1 = Slip 1 stitch purlwise.
- Chevron Rib Stitch: A 4-row repeat pattern detailed below.
✨ The Chevron Rib Stitch (4-Row Repeat over a multiple of 4 + 2 stitches)
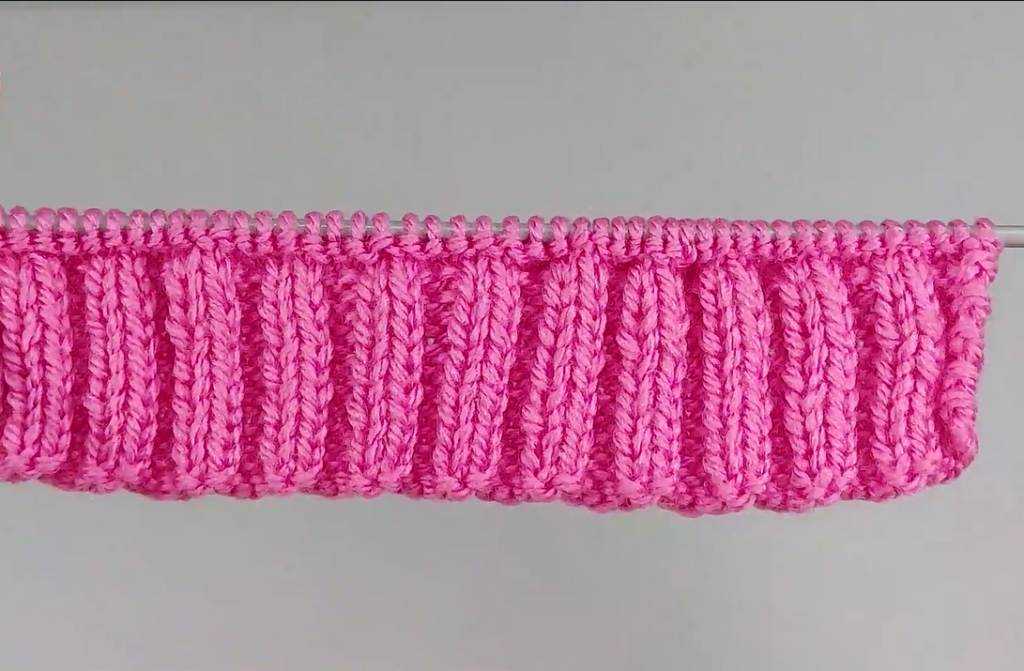
This pattern works well on a multiple of 4 stitches, plus 2 edge stitches.
- Row 1 (RS): K2, *P2, K2*. Repeat from * to * across the row.
- Row 2 (WS): P2, *K2, P2*. Repeat from * to * across the row.
- Row 3 (RS): K2, *sl1, K1, P2*. Repeat from * to * across, ending with K2 instead of P2 for the last two stitches.
- Row 4 (WS): P2, *K2, P1, sl1*. Repeat from * to * across, ending with P2 instead of sl1 for the last two stitches.
Note: This creates a dense, shifted rib pattern that forms the zigzags.
💖 The Pattern: Chevron Zing Slipper (Adult M)
The slipper is worked flat as a single piece, starting at the cuff/ankle opening.
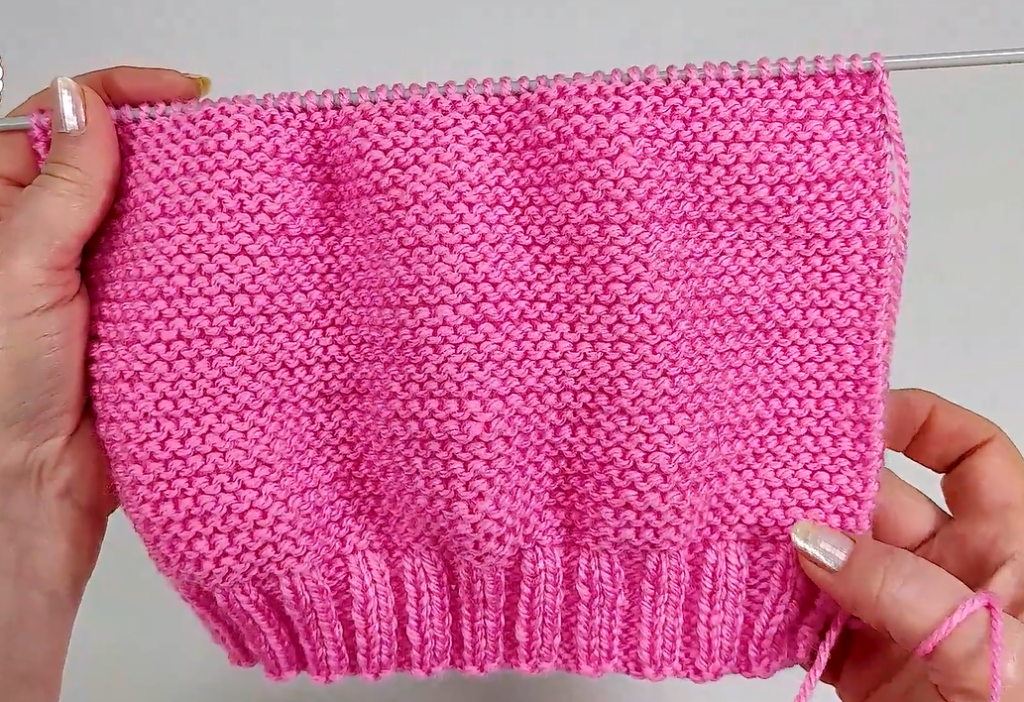
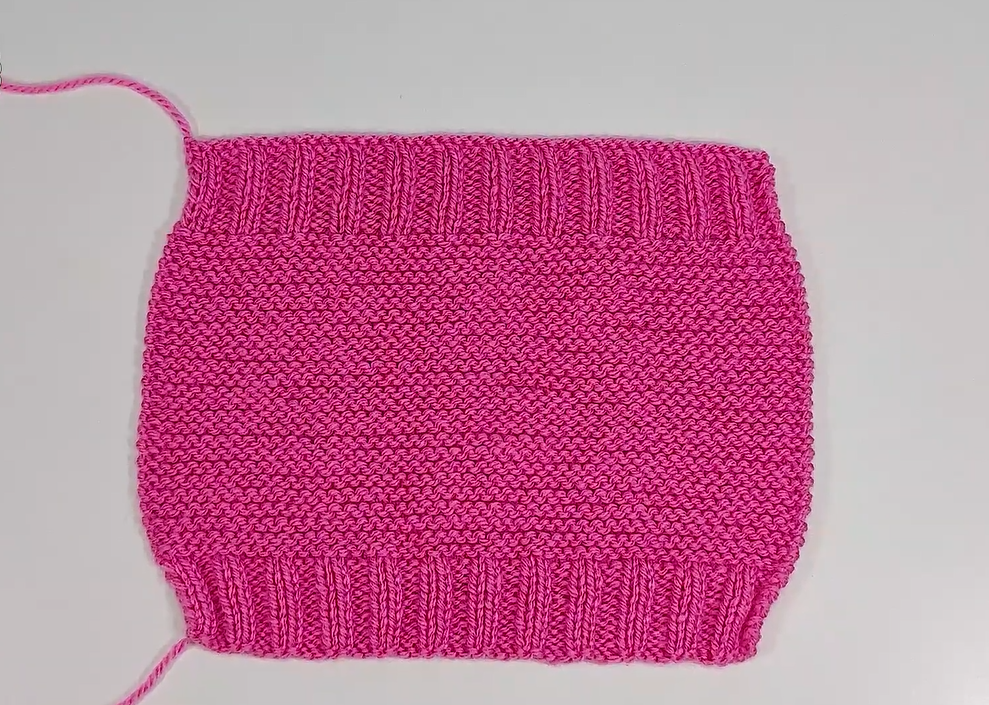
1️⃣ Cuff and Main Body
The body is worked entirely in the Chevron Rib Stitch and is intentionally long to wrap around the foot.
| Step | Instructions | Stitch Count |
| Cast On | Cast on 42 stitches loosely. (This is a multiple of 4 + 2 for the pattern). | 42 sts |
| Rows 1–8 | Cuff Edge: Work the Chevron Rib Stitch (Rows 1–4) twice (8 rows total). This establishes the pattern and creates a sturdy top edge. | 42 sts |
| Rows 9–108 | Continue working the Chevron Rib Stitch (Rows 1–4) for 100 more rows, or until the piece measures approximately 17 inches (43 cm) long. This length determines the total circumference of your foot, from heel to toe. | 42 sts |
| End | End after completing a Row 4 (WS) of the repeat. | 42 sts |
2️⃣ Toe Shaping (The Contoured Tip)
We will now decrease stitches at the toe-end only to create the rounded, slightly pointed tip. The shaping will happen over the next 8 rows.
| Row | Instructions | Stitch Count |
| Row 109 (RS) | K2, K2tog, work in Chevron Rib to last 4 sts (maintaining pattern as best as possible), ssk, K2. | 40 sts |
| Row 110 (WS) | Work in Chevron Rib across (maintaining pattern as best as possible). | 40 sts |
| Row 111 (RS) | K2, K2tog, work in Chevron Rib to last 4 sts, ssk, K2. | 38 sts |
| Row 112 (WS) | Work in Chevron Rib across. | 38 sts |
| Row 113 (RS) | K2, K2tog, work in Chevron Rib to last 4 sts, ssk, K2. | 36 sts |
| Row 114 (WS) | Work in Chevron Rib across. | 36 sts |
| Row 115 (RS) | K2, K2tog, work in Chevron Rib to last 4 sts, ssk, K2. | 34 sts |
| Row 116 (WS) | Work in Chevron Rib across. | 34 sts |
- Finishing Toe: Cut the yarn, leaving a long tail (about 24 inches / 60 cm). Thread the tail onto a tapestry needle.
🧵 Finishing and Seaming (The Transformation)
The unique shape of this slipper comes entirely from how the piece is folded and seamed.
- Closing the Toe Tip:
- Run the yarn tail through the loops of the remaining 34 stitches twice.
- Pull the tail tightly to cinch the toe opening closed, creating a neat, rounded point. Secure the thread on the inside with a firm knot.
- Seaming the Body:
- Fold the long knitted strip in half lengthwise. The cinched toe will be at one end.
- Starting at the cinched toe, use the mattress stitch to seam the entire sole edge, working all the way up to the cuff/cast-on edge. The Chevron Rib will align beautifully.
- Creating the Opening:
- The seam runs from the tip of the toe, across the sole, and up the back of the heel. Stop seaming when you reach the point that creates the desired foot opening (about 3.5–4 inches / 9–10 cm down from the original cast-on edge).
- The unseamed section forms the V-shaped opening and the cuff around the ankle.
- Final Touches: Secure the yarn end at the top of the heel seam. Weave in all remaining tails on the inside of the slipper.
Video Tutorial:
✨ Customization and Sizing
Adjusting the Length (Foot Size)
The total length of the piece (Rows 1–108) determines the total circumference (around the foot and its length).
- For Size S/M (US 5-6): Reduce the length of the main body (Rows 9–108) by approximately 12–16 rows.
- For Size L/XL (US 10-12): Increase the length of the main body (Rows 9–108) by approximately 12–16 rows.
Adjusting the Width (Foot Girth)
The cast-on stitch count determines the height and width of the slipper.
- For a wider foot: Cast on 46 stitches (maintaining the multiple of 4 + 2).
- For a narrower foot: Cast on 38 stitches. You would then adjust the K2tog/ssk counts in the toe shaping accordingly.
Enhancing Durability and Comfort
- Non-Slip Sole: Due to the dense texture, a simple rubberized sole finish works great. Apply a thin layer or dots of liquid latex or non-slip fabric paint to the bottom of the slipper and allow it to dry completely before use.
- Alternative Cuff: If you want a tighter edge around the ankle, after seaming, pick up stitches evenly around the opening and knit 4 rows of 1×1 Rib on smaller needles (US 6/4.0 mm) before binding off.


