
Welcome, texture connoisseurs! You’ve requested maximum detail, and we are going to dive deep into a stitch that delivers incredible warmth and a unique visual appeal. This Vertical Bobble Rib Stitch (VBRS) creates a dense, plush fabric characterized by repeating, raised columns of textured stitches, giving it a soft, ripple-like appearance. It’s perfectly suited for projects requiring significant loft and stability, such as winter garments, blankets, and sturdy scarves.
The key to this pattern is the precise placement of a modified cluster stitch into the back loop of the previous row, which forces the texture to stand up vertically.
🛍️ Materials, Preparation, and Pro-Level Tips
Choosing Your Tools for Maximum Loft
- Yarn Selection: Choose a soft, high-quality Worsted Weight (Aran/10-ply) or Bulky Weight (12-ply) yarn. A light, solid color like the cream shown is essential for allowing the subtle vertical texture to shine.
- Yarn Note: This stitch is very dense and consumes more yarn than basic stitches. Ensure you have ample yarn before starting your project.
- Hook Size: Use a 5.0 mm (H-8 US) to 6.0 mm (J-10 US) hook.
- Critical Detail: Use a hook that allows the yarn to glide easily. If your hook is too small, the fabric will become stiff and difficult to work due to the dense stitch placement.
- Notions Checklist: Sharp Scissors, a Tapestry Needle, and a measuring tape for precise gauge checks.
Gauge and Tension: The Key to Defined Ribs
- Pattern Multiple: This stitch is worked over a multiple of 2 stitches, plus 1 for the foundation chain.
- Example Chain (for a swatch): Ch 27 (2 x 13 = 26, plus 1 = 27).
- Tension Mastery: Maintain a consistent, slightly loose tension on the cluster stitches to ensure they “pop” forward and create the defined bobble appearance. Tight tension will flatten the texture.
📌 Stitch Abbreviations & Technical Definitions (US Terms)
Core Stitches
- ch: Chain
- st(s): Stitch(es)
- sc: Single Crochet
- hdc: Half Double Crochet
- rep: Repeat
- BL: Back Loop Only
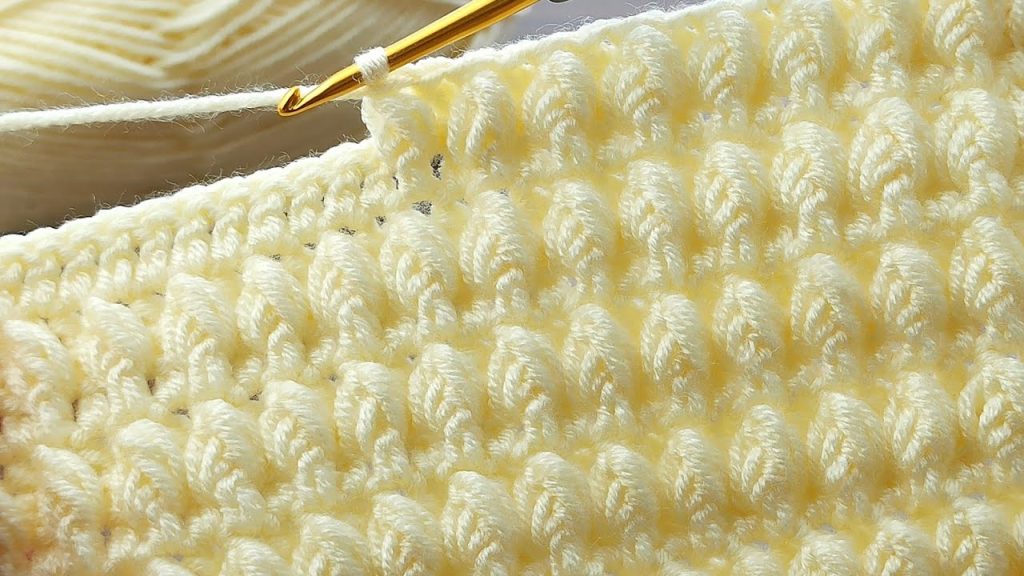
The Key Stitch: Modified Vertical Bobble (MVB)
This is a modified cluster stitch (similar to a puff stitch) worked specifically into the back loop to create the raised, vertical texture. We will use 3 pulls for a good, plump bobble bar.
Modified Vertical Bobble (MVB) Definition (3 pulls, worked in BL):
- Yo, insert hook into the back loop only (BL) of the designated stitch.
- Yo and pull up a loop, extending the loop fully to the height of the row (3 loops on hook).
- [Yo, insert hook into the same BL, Yo, pull up a loop] 2 more times. (You will have 7 loops on the hook after 3 pulls).
- Yo and pull through all 7 loops on the hook.
- Ch 1 to close the bobble. This ch-1 is a securing knot and does not count as a stitch.
➡️ Phase 1: Establishing the Foundation and Base
The first two rows create a stable edge and set up the foundation needed to pull the MVBs forward.
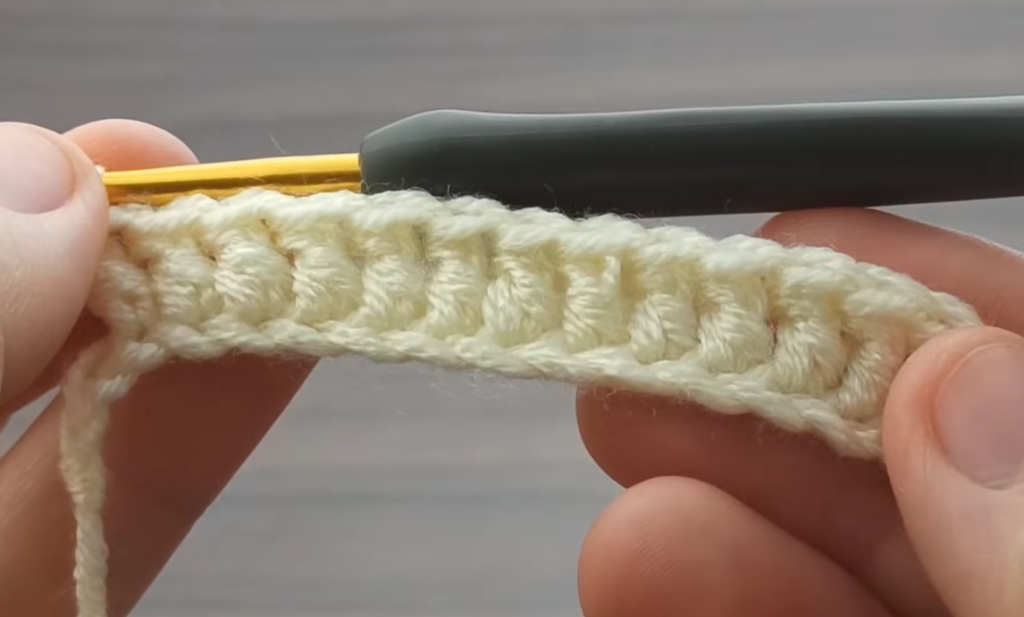
Row 1: Foundation Half Double Crochet (Base)
- Ch the required number (multiple of 2, plus 1).
- Hdc into the 2nd ch from the hook and in every ch across.
- Ch 1 (does not count as a stitch). Turn.
Row 2: The MVB Preparation Row
- Hdc into the first st and into every st across.
- Ch 1 (does not count as a stitch). Turn.
☁️ Phase 2: Creating the Vertical Bobble Texture
This three-row sequence establishes the staggered rib pattern.
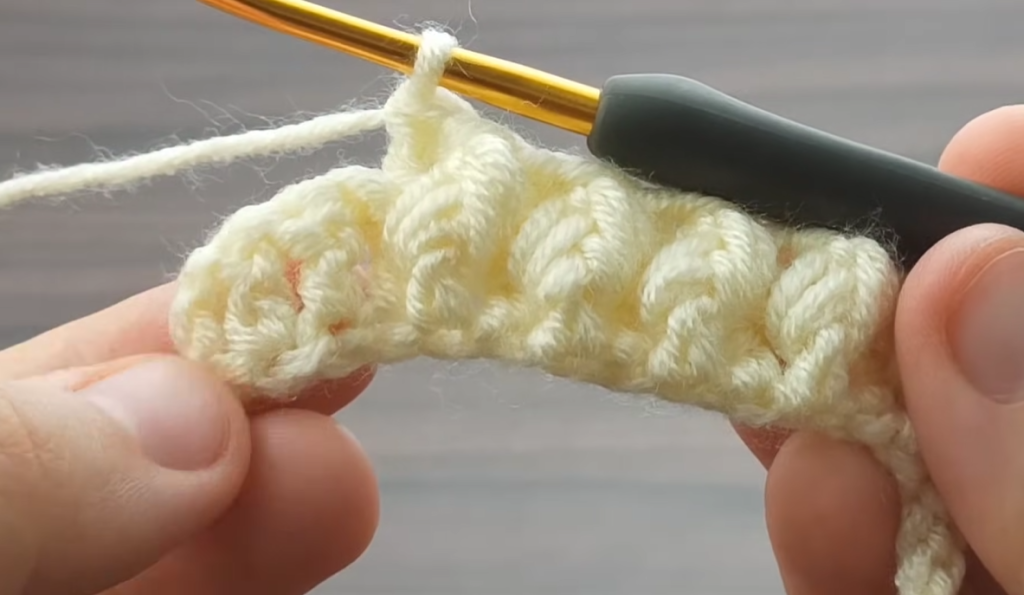
Row 3: First MVB Pass (Creating the Raised Bars)
- Hdc into the first st.
- *MVB (3 pulls) into the BL of the next st.
- Hdc into the BL of the next st.*
- Repeat from * to * across the row.
- End by working a final Hdc into the last st (work under both loops for a clean edge).
- Ch 1 (does not count as a stitch). Turn.
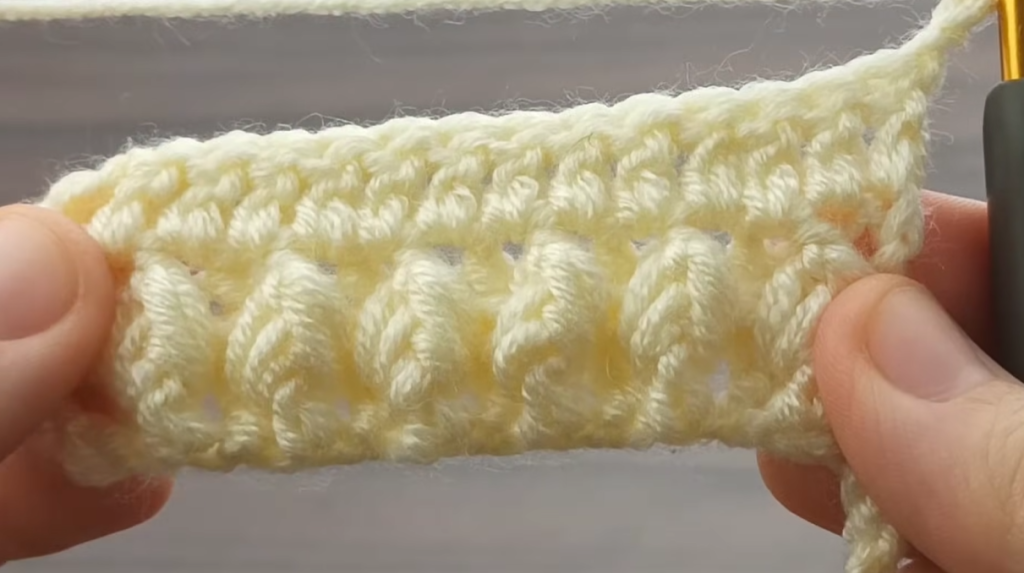
💡 Visual Check: The MVBs should be popping out on the opposite side (the “right side”) of your work, creating a row of distinct, small bumps.
Row 4: The Stabilizing Rib Row
This row works a flat half double crochet across the entire row, stabilizing the MVBs and maintaining the structure.
- Hdc into the BL of the first st.
- Hdc into the BL of every st across, including the top of the previous MVB and the previous Hdc.
- Work the final Hdc under both loops of the last st.
- Ch 1 (does not count as a stitch). Turn.
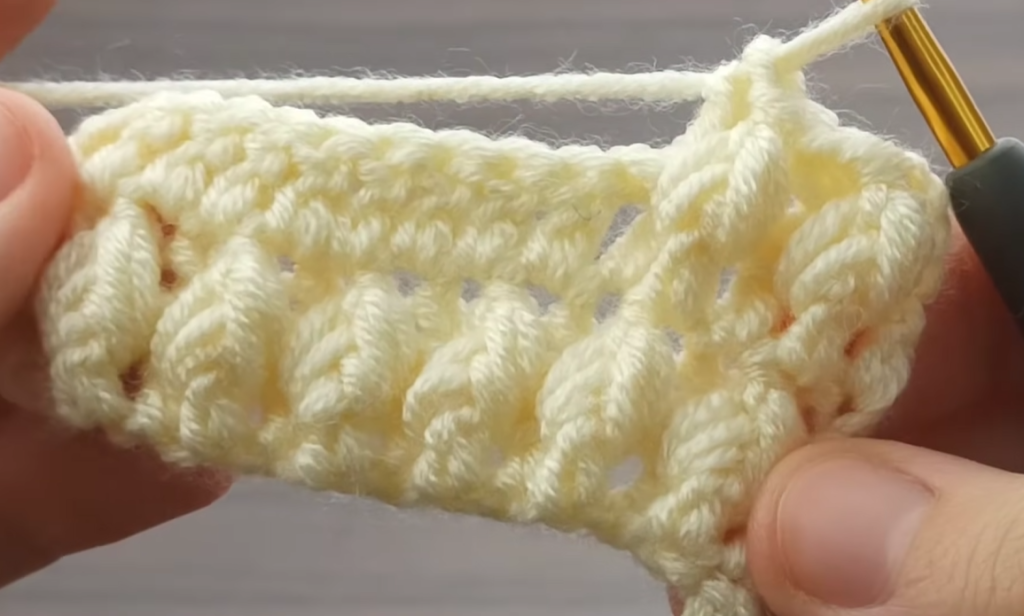
Row 5: Staggered MVB Pass (Offsetting the Ribs)
The bobbles must be offset in this row to ensure the vertical lines interlock.
- MVB (3 pulls) into the BL of the first st.
- Hdc into the BL of the next st.
- *MVB (3 pulls) into the BL of the next st.
- Hdc into the BL of the next st.*
- Repeat from * to * across the row.
- End by working a final MVB (3 pulls) into the BL of the second to last st, and Hdc into the last st (under both loops).
- Ch 1 (does not count as a stitch). Turn.
🔄 Phase 3: The Complete Pattern Repeat
The texture is fully established. To continue the vertical rib pattern, you will repeat the two core texture rows.
- Repeat Row: Repeat Row 4 (Stabilizing Rib) and Row 5 (Staggered MVB Pass) until your piece reaches the desired length.
Stitch Sequence Breakdown:
- Even Rows (Row 4, 6, 8…): Hdc in BL across (The Stabilizing Row).
- Odd Rows (Row 3, 5, 7…): Alternate Hdc in BL and MVB in BL across, ensuring the MVB falls above the previous row’s Hdc, and the Hdc falls above the previous row’s MVB.
Video Tutorial:
✂️ Finishing and Structural Integrity
Fabric Characteristics
The resulting fabric is extremely dense, thick, and plush. The reverse side is a tight, flat rib, making the fabric effectively non-reversible, with the textured bobbles clearly defining the right side.
Creating a Polished Edge
- Final Row: End after any Hdc Stabilizing Row (Row 4). This provides a clean, flat top edge.
- Border: A simple border of Single Crochet (sc) or Slip Stitch (sl st) is sufficient. Work a tight round of SC around the perimeter, paying special attention to the side edges to ensure the fabric does not pull in.
Your Vertical Bobble Rib Stitch fabric is complete—a masterclass in soft, yet structured texture!


