
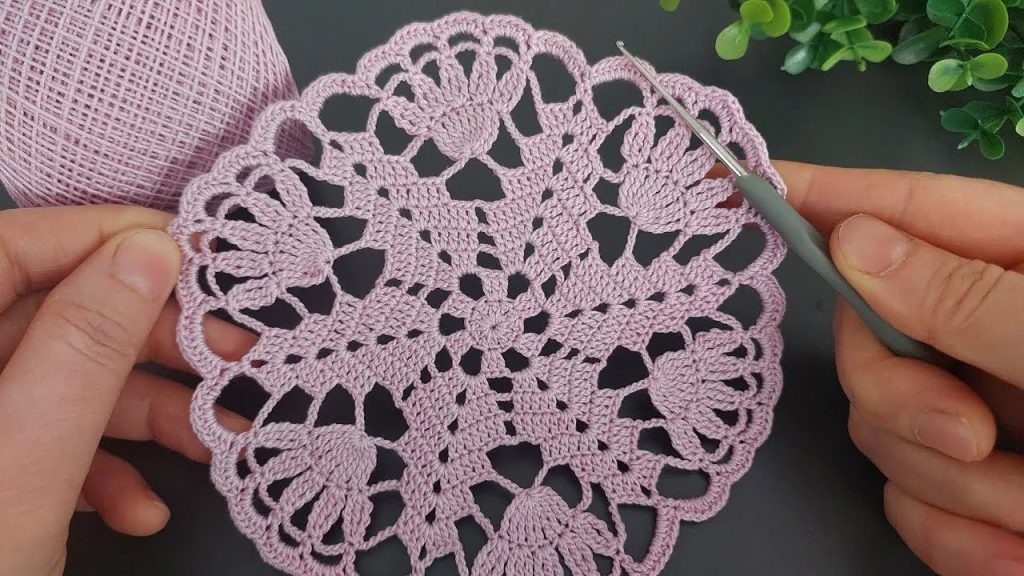
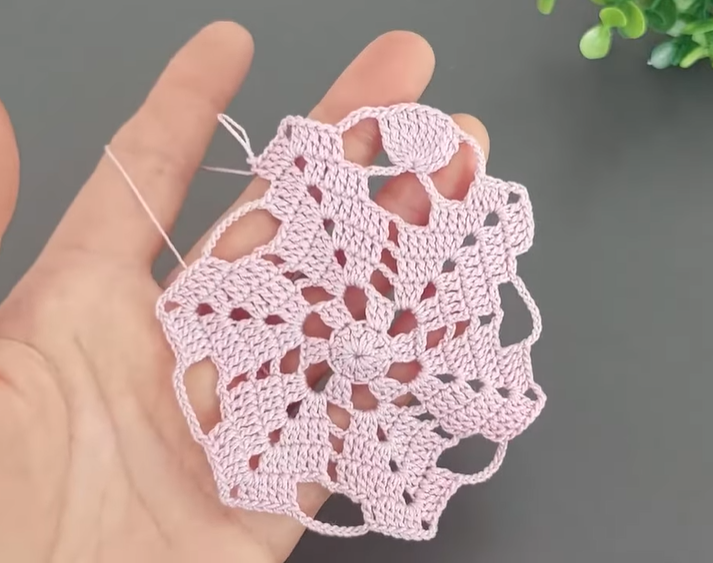
Welcome, fellow crafters! Have you ever seen a doily and wondered how such a beautiful, intricate piece could be made? The piece in the photo is a perfect project for an intermediate crocheter who wants to create something truly special. The pattern uses a combination of classic stitches to form elegant “petals” and open lace, resembling a blooming hydrangea.
This pattern is designed to be a centerpiece doily, but you can also use a single motif as a coaster or join several together to create a stunning table runner.
Materials You’ll Need
- Yarn: A lightweight yarn is essential for this project to achieve the delicate look. I recommend fingering weight or size 10 crochet thread for the best result. Cotton is ideal as it holds its shape well. The color shown is a soft lilac or light pink.
- Crochet Hook: A 1.75mm or 2.0mm hook will work well with thread. Adjust your hook size based on your tension to get a flat, even piece.
- Scissors
- Tapestry Needle: For weaving in ends.
- Stitch Marker (optional): To mark the beginning of your rounds.
Key Stitches and Abbreviations (US Terms)
- ch: chain
- sl st: slip stitch
- sc: single crochet
- dc: double crochet
- tr: treble crochet (yarn over twice)
- sk: skip
- sp: space
- [ ]: Work the instructions in brackets as a set.
- magic ring: an adjustable loop to begin a project worked in the round.
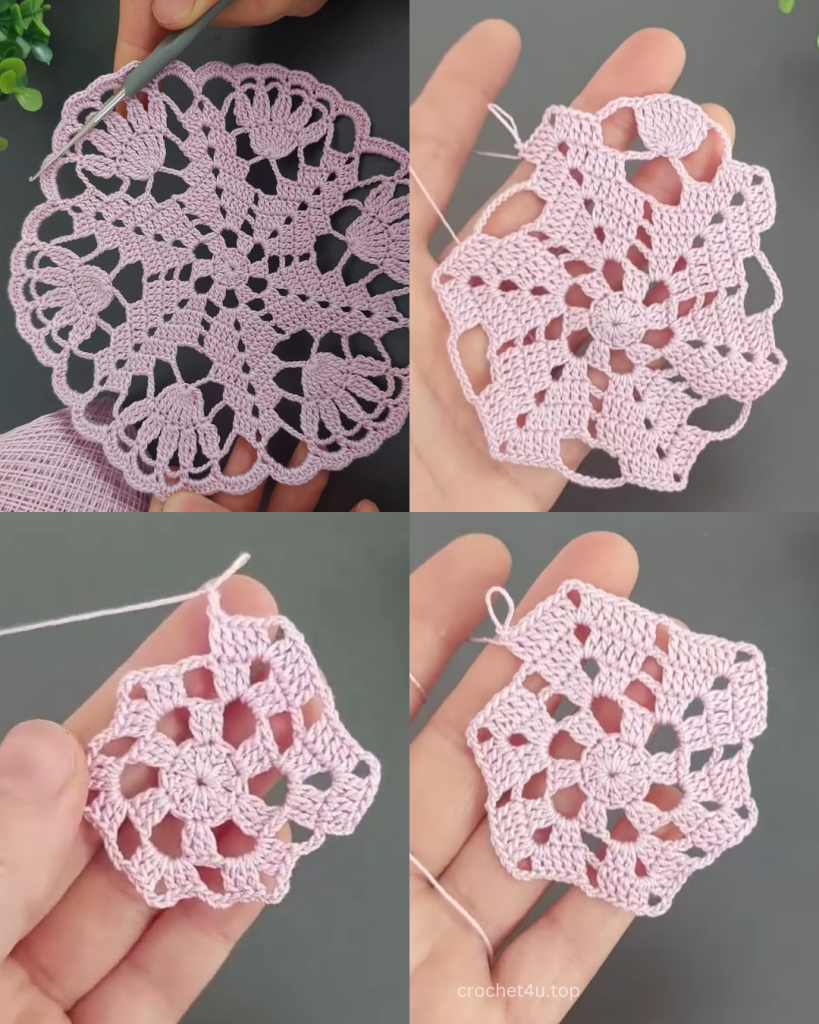
Pattern Instructions
We’ll be working in rounds, beginning from the center. Each round is a full circle and will be joined with a slip stitch at the end.
Round 1: The Center
- Start with a magic ring. Ch 3 (counts as first dc).
- Work 15 more dc into the magic ring.
- Join with a sl st to the top of the beginning ch-3.
- (16 dc total)
Round 2: Creating the First Lace Ring
- Ch 1 (does not count as a stitch).
- sc in the same stitch.
- Ch 3, sk 1 st, sc in the next st.
- Repeat from * to * around the circle. You will create 8 ch-3 spaces.
- Join with a sl st to the first sc.
- (8 sc, 8 ch-3 sps)
Round 3: The Treble Crochet Base
- sl st into the first ch-3 space.
- Ch 4 (counts as first tr).
- Work 3 more tr into the same ch-3 space.
- Make 4 tr in the next ch-3 space.
- Repeat from * to * around the circle.
- Join with a sl st to the top of the beginning ch-4.
- (32 tr total)
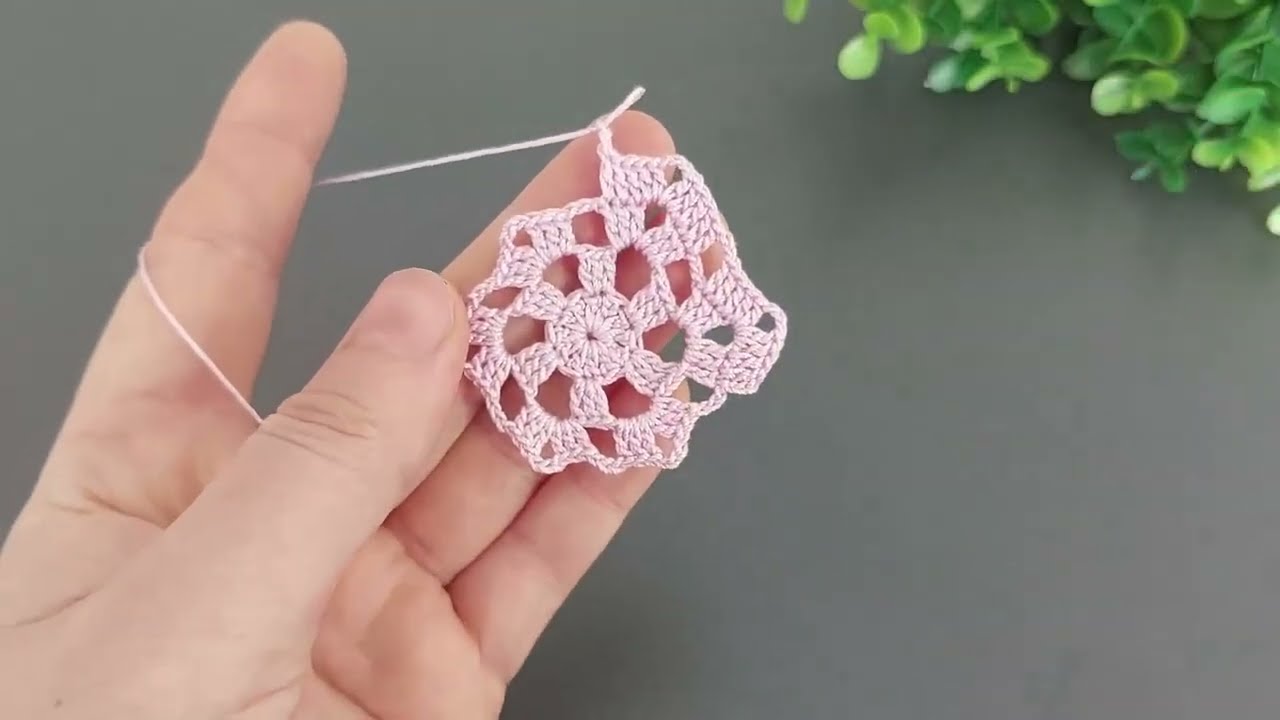
Round 4: Creating the Hydrangea Petals
This is where the main floral shapes begin.
- Ch 1 (does not count as a stitch).
- sc in the same stitch.
- Ch 3, sk 3 sts, sc in the next st.
- Repeat from * to * around the circle. You will create 8 ch-3 spaces.
- Join with a sl st to the first sc.
- (8 sc, 8 ch-3 sps)
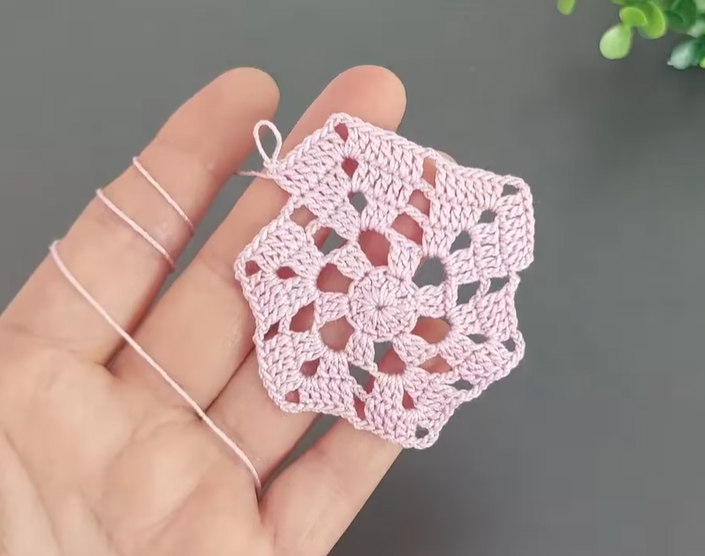
Round 5: Building the Fan Stitches
- sl st into the first ch-3 space.
- Ch 3 (counts as first dc).
- Work 2 dc, ch 2, 3 dc in the same ch-3 space. (This is your first “fan” or “shell” stitch).
- Make a fan stitch (3 dc, ch 2, 3 dc) in the next ch-3 space.
- Repeat from * to * around the circle.
- Join with a sl st to the top of the beginning ch-3.
- (8 fan stitches)
Round 6: The Treble Crochet Clusters
- sl st into the first 2 dc, and then into the ch-2 space of the first fan stitch.
- Ch 4 (counts as first tr).
- Work [tr, ch 1] 4 times into the same ch-2 space, then make one more tr. (You’ll have a cluster of 5 tr separated by ch-1 spaces.)
- Make a tr cluster (5 tr separated by ch-1 spaces) in the ch-2 space of the next fan stitch.
- Repeat from * to * around the circle.
- Join with a sl st to the top of the beginning ch-4.
- (8 tr clusters)
Round 7: Shaping the Petal Edges
This round gives the petals their distinct, pointed shape.
- sl st into the first ch-1 sp.
- Ch 1 (does not count as a stitch).
- sc in the same ch-1 sp.
- Ch 3, sc in the next ch-1 sp, ch 3, sc in the next ch-1 sp. (This creates two small scallops on one petal.)
- Ch 5, sc in the first ch-1 sp of the next tr cluster.
- Repeat from * to * around the circle.
- Join with a sl st to the first sc.
- (16 sc, 8 ch-3 sps, 8 ch-5 sps)
Round 8: The Final Scalloped Border
This round ties the whole piece together with a beautiful scalloped edge.
- sl st into the first ch-3 sp.
- Ch 3 (counts as first dc).
- Work [dc, ch 1] 2 times, then make one more dc into the same ch-3 sp.
- Make a shell (3 dc separated by ch-1 sps) in the next ch-3 sp.
- Make 10 tr into the next ch-5 sp.
- Repeat from * to * around the circle.
- Join with a sl st to the top of the beginning ch-3.
Video Tutorial:
Finishing Your Doily
Cut the yarn, leaving a long tail, and weave in all loose ends securely with a tapestry needle.
To get the doily to lay perfectly flat and to open up the delicate lace, blocking is a must. This process is simple but makes a huge difference.
- Soak your doily in lukewarm water for about 20 minutes, either with a little wool wash or just plain water.
- Gently squeeze out the excess water. Do not wring or twist.
- Lay the doily on a blocking mat or a foam board covered with a towel.
- Pin the doily into a perfect circle, making sure to stretch each point and fan stitch to its full size.
- Allow the doily to dry completely, which may take up to 24 hours.
Once dry, you’ll have a stunning piece of handmade art that is ready to be a beautiful accent in your home.
I hope you enjoy creating this elegant pattern! Please share your finished doilies in the comments below!


