
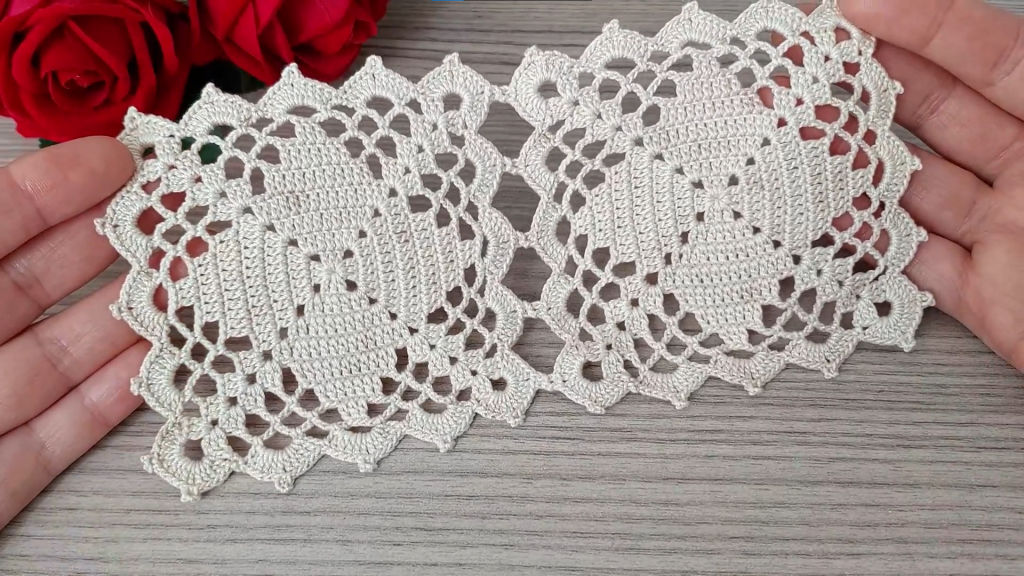
Welcome, crafters! Are you looking for a project that combines classic design with modern charm? This elegant square motif is perfect for creating a vintage-inspired piece. The pattern features a solid center, surrounded by open lace and delicate corners, making it a wonderful way to practice your skills and create something beautiful.
This pattern is for a single motif, but you can join multiple squares to make a larger item, like a table runner, a bedspread, or even a lightweight shawl.
Materials You’ll Need
- Yarn: To achieve the detailed, lacy look of the photo, I recommend using fingering weight yarn or size 10 crochet thread. Cotton is an excellent choice because it holds its shape and shows off the stitches beautifully. The color in the image is a classic off-white or cream.
- Crochet Hook: A 1.75mm to 2.0mm hook will work well. The final size and tension of your motif will depend on your hook size and how tightly you crochet.
- Scissors
- Tapestry Needle: For weaving in your ends.
Key Stitches and Abbreviations (US Terms)
- ch: chain
- sl st: slip stitch
- sc: single crochet
- dc: double crochet
- tr: treble crochet (yarn over twice)
- sk: skip
- sp: space
- magic ring: an adjustable loop to begin a project worked in the round.
- beg-ch: beginning chain
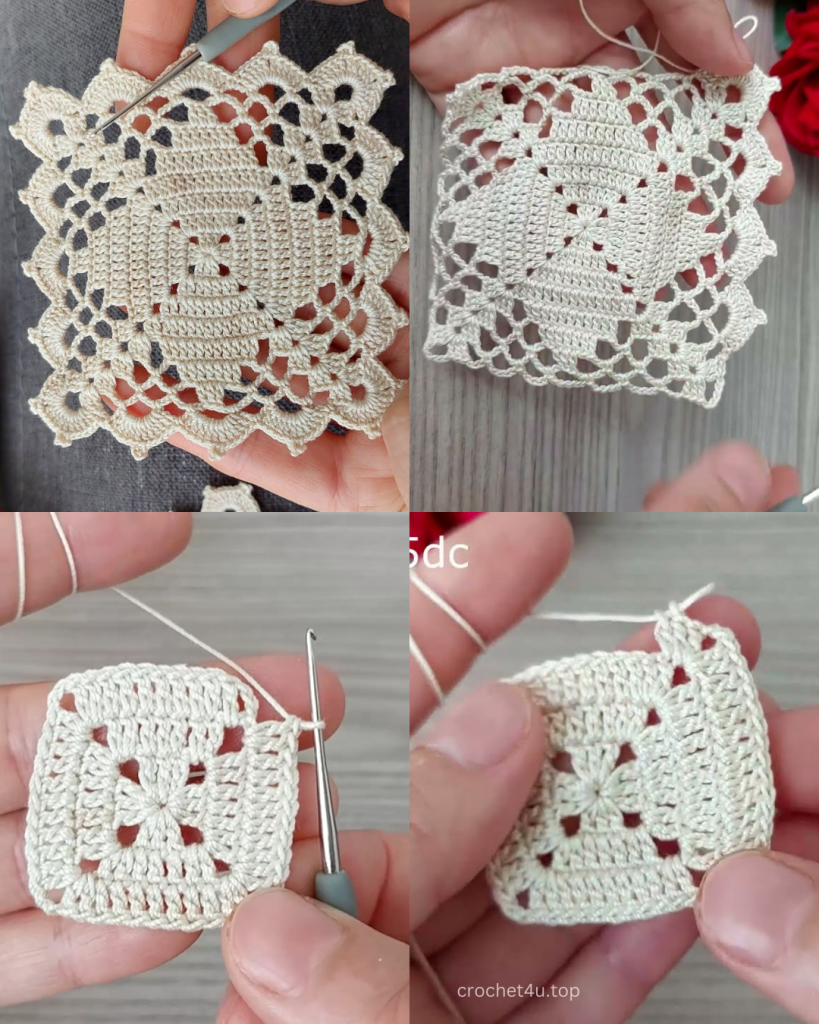
Pattern Instructions
We’ll work in rounds from the center outward. Each round will be joined with a slip stitch.
Round 1: The Center Square
- Start with a magic ring. Ch 3 (counts as the first dc).
- Work 2 dc into the ring. Ch 2.
- [3 dc, ch 2] 3 times.
- Join with a sl st to the top of the beg-ch 3.
- [12 dc, 4 ch-2 sps]
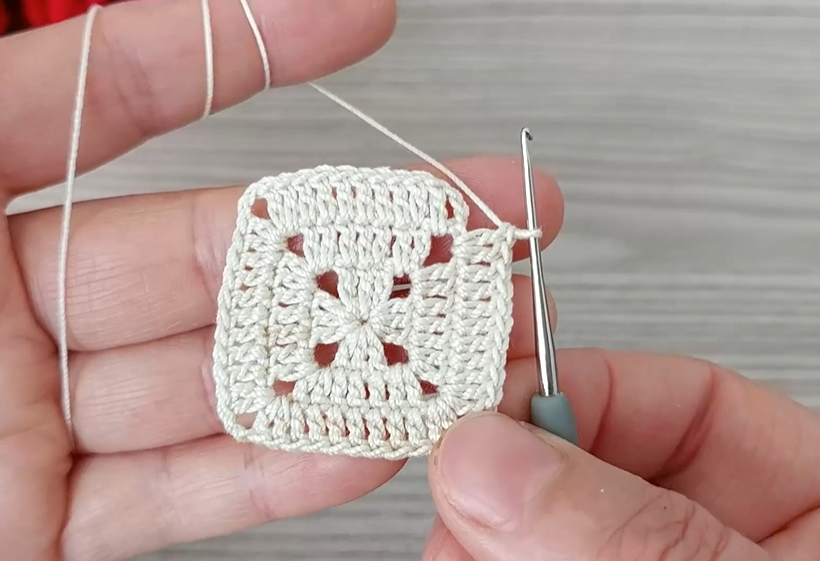
Round 2: Building the Square
- Ch 3 (counts as first dc).
- Work 1 dc in each of the next 2 sts.
- [2 dc, ch 2, 2 dc] in the ch-2 corner sp. dc in each of the next 3 sts.
- Repeat from * to * 2 more times.
- In the last corner, work [2 dc, ch 2, 2 dc].
- Join with a sl st to the top of the beg-ch 3.
- [28 dc, 4 ch-2 sps]
Round 3: The First Lace Ring
- Ch 1 (does not count as a stitch).
- sc in the same st.
- sc in each of the next 4 sts.
- In the corner ch-2 sp, work [sc, ch 2, sc]. sc in each of the next 7 sts.
- Repeat from * to * 2 more times.
- In the last corner, work [sc, ch 2, sc]. sc in the next 2 sts.
- Join with a sl st to the first sc.
- [44 sc, 4 ch-2 sps]

Round 4: Creating the First Openwork Layer
- Ch 4 (counts as first tr).
- tr in the next 4 sts.
- In the corner ch-2 sp, work [2 tr, ch 2, 2 tr]. tr in each of the next 11 sts.
- Repeat from * to * 2 more times.
- In the last corner, work [2 tr, ch 2, 2 tr]. tr in the next 6 sts.
- Join with a sl st to the top of the beg-ch 4.
- [60 tr, 4 ch-2 sps]
Round 5: The Fan Stitch Border
This round creates the small decorative arches that begin the lacy border.
- Ch 1 (does not count as a stitch).
- sc in the same st.
- sc in the next 5 sts.
- In the corner ch-2 sp, work [sc, ch 3, sc]. sc in the next 15 sts.
- Repeat from * to * 2 more times.
- In the last corner, work [sc, ch 3, sc]. sc in the next 9 sts.
- Join with a sl st to the first sc.
- [68 sc, 4 ch-3 sps]

Round 6: The Large Corner Arches
- sl st into the next 2 sts.
- Ch 1 (does not count as a stitch).
- sc in the same st.
- Ch 6, sk 5 sts, sc in the next st.
- Repeat from * to * around the side until you reach the corner ch-3 sp.
- In the corner ch-3 sp, work [sc, ch 6, sc].
- Repeat from * to * for the next side.
- Repeat this pattern for all four sides.
- Join with a sl st to the first sc.
Round 7: Finishing the Border
This is the final round, which adds the delicate scallops and picots to the edges.
- sl st into the first ch-6 sp.
- Ch 3 (counts as first dc).
- Work 6 dc into the same ch-6 sp.
- Make 7 dc into the next ch-6 sp.
- Repeat from * to * around the side until you reach the corner.
- In the corner ch-6 sp, work [4 dc, ch 3, 4 dc].
- Repeat this pattern for all four sides.
- Join with a sl st to the top of the beg-ch 3.
Video Tutorial:
Finishing and Joining
Cut the yarn, leaving a long tail, and weave in all loose ends. For a crisp, flat finish, blocking is highly recommended. Simply pin the square out on a foam mat, mist it with water, and let it dry completely.
To join multiple squares, you can use a slip stitch or single crochet stitch on the final round. Work one slip stitch into the corresponding corner of the previous motif, then continue your final round. When you get to the next corner, slip stitch into the next corner of the previous motif to join.
Happy crocheting! I’d love to hear what project you plan to make with these beautiful squares.


