
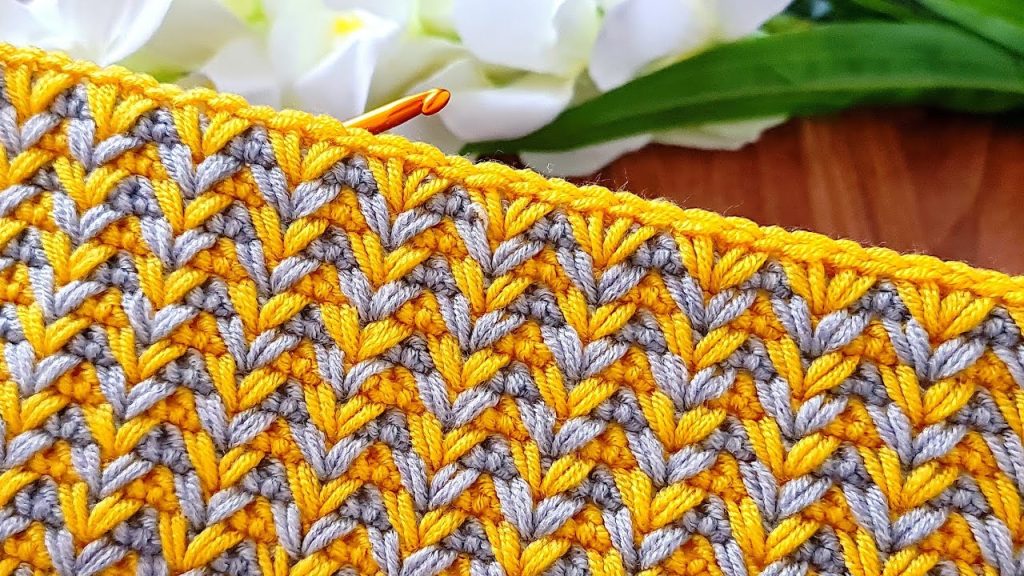
Welcome, crochet lovers! Today, we’re diving into a stunning technique that creates a dense, plush fabric with incredible visual movement. This two-color stitch—which we’ll call the Woven V-Stitch—uses simple stitches placed strategically to mimic weaving, resulting in a beautiful, interlocking pattern perfect for scarves, bags, and blankets.
The key to this pattern is the color change on every row and placing the long V-stitches into the row two below. Let’s get started on this exciting texture!
🛍️ Materials & Setup
Choosing Your Tools
- Yarn: You will need two contrasting colors of yarn. A Worsted Weight (Aran/10-ply) or DK Weight (8-ply) yarn works best. The density of the stitch means this fabric will be warm!
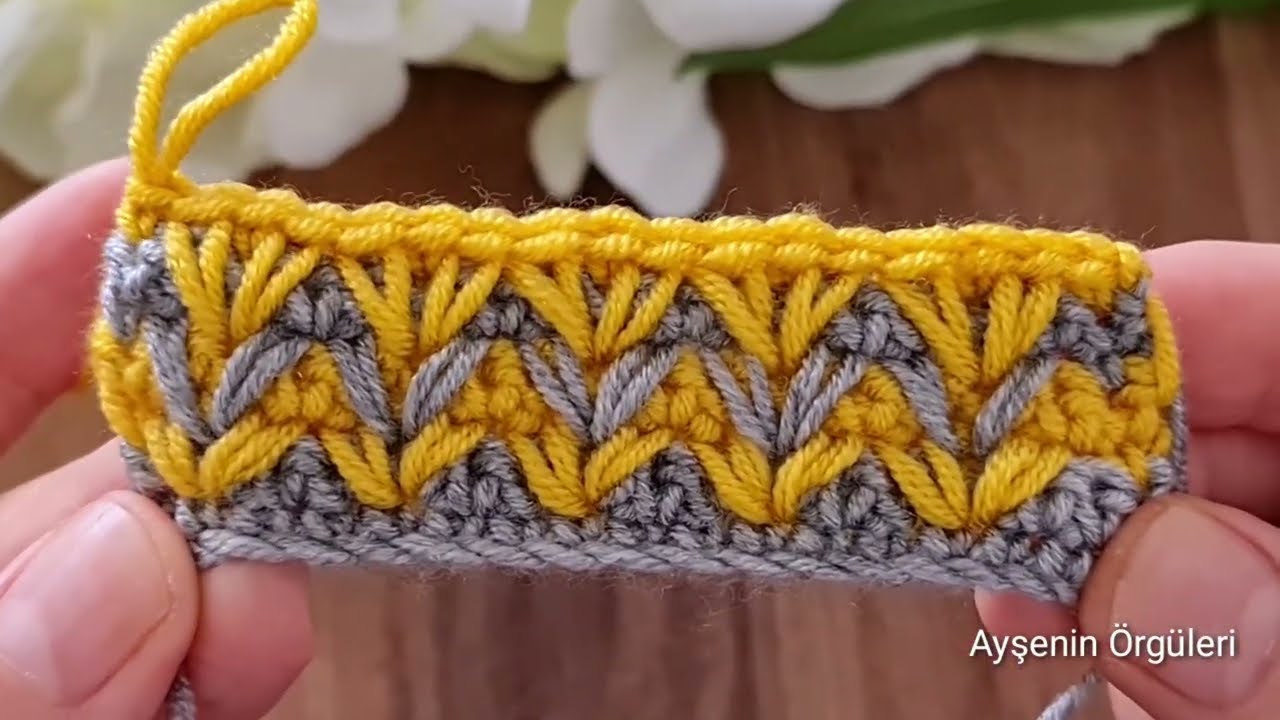
- Color A (CA): The primary color (Yellow in the photo).
- Color B (CB): The accent color (Gray in the photo).
- Hook: A crochet hook size appropriate for your yarn. A 4.5 mm to 5.0 mm (H-8 US) hook is generally a good starting point for worsted weight.
- Notions: Scissors and a tapestry needle. You will be dropping and picking up yarn at the edge of every row, so having a good technique for carrying or cutting the yarn is important.
Gauge and Multiple
- Pattern Multiple: This pattern is worked over a multiple of 2 stitches, plus 1 for the foundation chain.
- Example Chain (for a swatch): Ch 27 (2 x 13 = 26, plus 1 = 27).
📌 Stitch Abbreviations & Technical Definitions (US Terms)
Standard Abbreviations
- ch: Chain
- st(s): Stitch(es)
- sk: Skip
- sc: Single Crochet
- dc: Double Crochet
- CA: Color A (Yellow)
- CB: Color B (Gray)
- rep: Repeat
The Key Stitch: The Woven V-Stitch (W-V-St)
The textured element is created by working a Long Double Crochet V-Stitch into the Single Crochet spaces of the row two below.
Woven V-Stitch (W-V-St) Definition:
- Dc into the designated sc space from the row two rows below (this means you skip the immediate previous row).
- Ch 1 (this small chain creates the ‘V’ center).
- Dc into the same sc space from the row two rows below.
Result: A long (dc, ch 1, dc) grouping that spans two rows.
🎨 Phase 1: Establishing the Foundation
The first two rows set up the perfect base for the woven texture.
Row 1 (CA): Foundation Single Crochet
- Using CA, Ch the required number (multiple of 2, plus 1).
- Sc into the 2nd ch from the hook and in every ch across.
- Drop CA, leaving it attached at the edge.
- Pick up CB, Ch 1 (does not count as a stitch). Turn.
Row 2 (CB): The SC Base
- Using CB, sc into the first st and in every st across.
- Drop CB, leaving it attached at the edge.
- Pick up CA, Ch 3 (counts as the first dc). Turn.
🔄 Phase 2: Building the Texture (Color A)
This row introduces the key textured element, placing the V-stitches into the very first foundation row (Row 1).
Row 3 (CA): First Woven V-Stitch Row
- Using CA, dc into the first sc of Row 2.
- Sk 1 st (the sc from Row 2).
- *W-V-St into the next sc of Row 1 (the row two below).
- To clarify: Insert your hook into the sc space of Row 1, pull up a loop to the height of Row 3, complete your dc, ch 1, then dc again in the same Row 1 sc.
- Sk 2 sts (the two scs from Row 2 that sit directly above the sc you worked into).
- W-V-St into the next sc of Row 1.*
- Repeat from * to * across the row.
- End the row by working dc into the last sc of Row 2.
- Drop CA.
- Pick up CB, Ch 1 (does not count as a stitch). Turn.
💡 Visual Check: The W-V-Stitches in CA should appear to be ‘standing’ tall, weaving down into the foundation row. They will push the SC stitches of Row 2 slightly out of sight.
〰️ Phase 3: Joining and Setting the Stagger (Color B)
The joining row uses single crochets to secure the V-stitches and create the base for the next layer of staggered V-stitches.
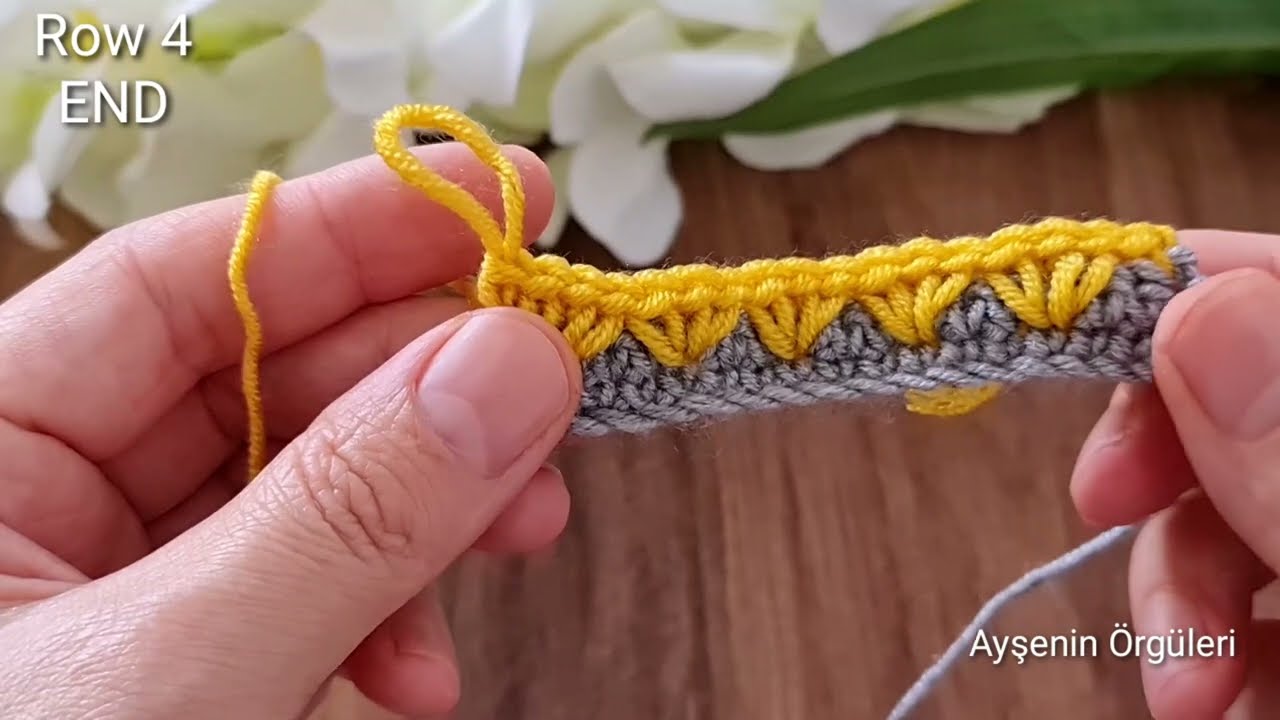
Row 4 (CB): The Joining SC Row
- Using CB, sc into the first dc.
- *Sc into the first dc of the W-V-St.
- Sc into the ch-1 space of the W-V-St.
- Sc into the second dc of the W-V-St.*
- Repeat from * to * across the row.
- End by working sc into the last dc (the turning Ch 3) from Row 3.
- Drop CB.
- Pick up CA, Ch 3 (counts as the first dc). Turn.
Stitch Count Check: If you started with 26 sc in Row 1, you should have 26 sc in Row 4. Count carefully!
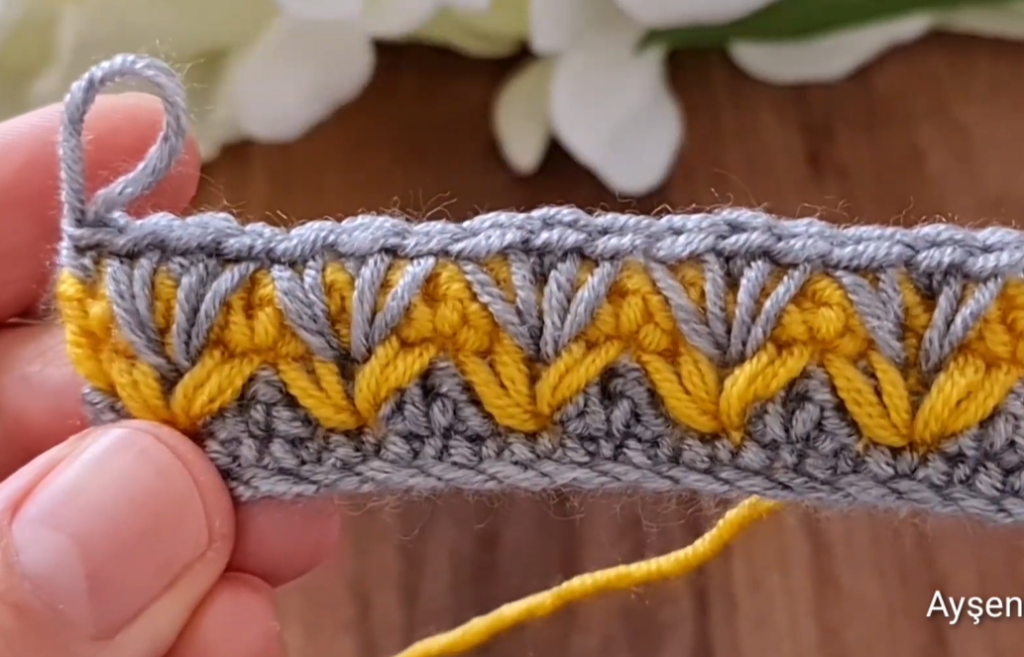
🔀 Phase 4: Staggering the Texture (The Repeat)
To create the woven, interlocking diamond pattern seen in the image, the V-stitches must be staggered on every subsequent textured row.
Row 5 (CA): Staggered Woven V-Stitch Row
Now, the V-stitches will be placed into the scs of Row 3 (the row below the SC row).
- Using CA, W-V-St into the first sc of Row 3 (the sc you skipped in Row 3).
- Sk 2 sts (the two scs from Row 4).
- *W-V-St into the ch-1 space of the W-V-St from Row 3.
- Sk 2 sts (the two scs from Row 4).*
- Repeat from * to * across the row.
- End the row by working W-V-St into the last sc of Row 3.
- Drop CA.
- Pick up CB, Ch 1 (does not count as a stitch). Turn.
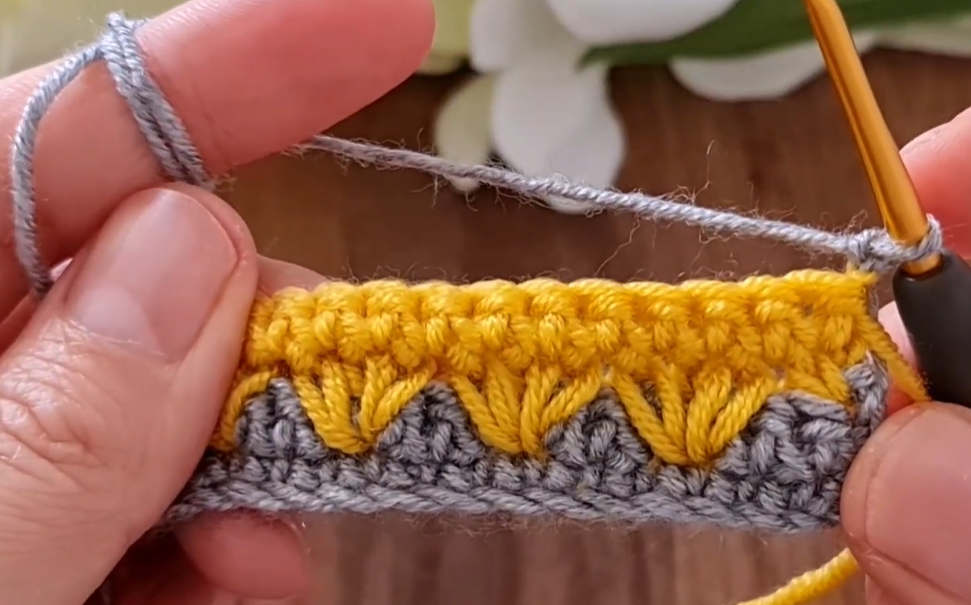
Row 6 (CB): The Next Joining SC Row
This row is a straight repeat of Row 4.
- Using CB, sc into the first dc of the W-V-St.
- *Sc into the ch-1 space of the W-V-St.
- Sc into the second dc of the W-V-St.
- Sc into the first dc of the next W-V-St.*
- Repeat from * to * across the row.
- End by working sc into the last dc (the turning Ch 3) from the previous row.
- Drop CB.
- Pick up CA, Ch 3 (counts as the first dc). Turn.
The Full Pattern Repeat
The pattern is now set! To continue your fabric, repeat Rows 3-6 in sequence.
- Next Row (CA): Repeat Row 3 (Starting with a dc at the edge).
- Following Row (CB): Repeat Row 4 (SC Joining Row).
- Next Row (CA): Repeat Row 5 (Starting with a W-V-St at the edge).
- Following Row (CB): Repeat Row 6 (SC Joining Row).
Video Tutorial:
🧶 Finishing & Advanced Tips
Managing Color Changes
Because you change color at the end of every row, you can either:
- Cut the yarn: Snip the yarn, leaving a tail, and weave in all ends later. This is tedious but creates the cleanest, flattest edge.
- Carry the yarn: Run the non-working yarn loosely up the edge of the fabric. The dense nature of the stitch will help hide the carried yarn, but it will make the edge slightly thicker.
Creating a Straight Edge
The pattern naturally creates a slightly uneven scalloped edge due to the height difference between the SC rows and the DC V-stitch rows. To fix this for a border:
- Work a final SC Row: After your last textured row (Row 3 or Row 5), work an additional SC row in the contrasting color (CB or CA) for a few rows to create a smooth band.
- Blocking: Due to the dense texture, blocking is highly recommended. It will soften the fabric, make the stitches uniform, and help the W-V-Stitches lay beautifully.
This Woven V-Stitch is a stunning way to introduce colorwork and texture into your projects!


