
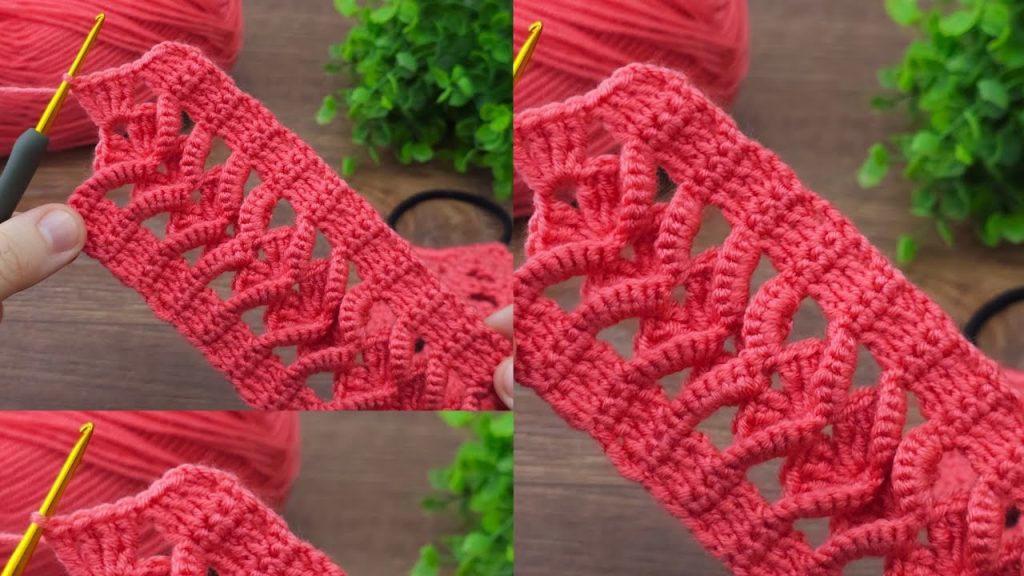
✨ Introduction: Adorning Yourself with Interwoven Lace
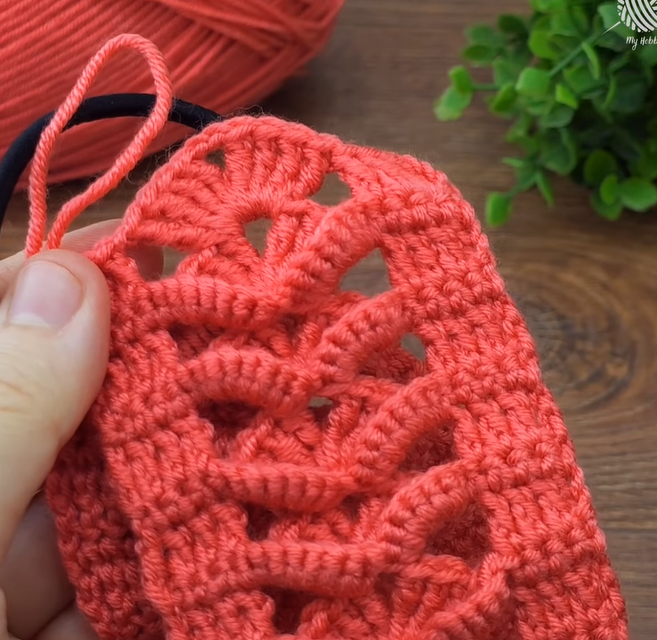
The piece in your image is a stunning example of crochet that mimics intricate Celtic knotwork or a detailed woven lattice. This narrow lace band is absolutely ideal for a stylish and elegant headband or ear warmer. It provides a unique texture that stands out beautifully against hair.
This pattern is written for a standard adult size but includes detailed instructions on how to customize the length for a perfect fit, and how to create a seamless, professional finish using a single crochet seam. It’s an excellent project for intermediate crocheters or those who want to level up their stitch repertoire!
📋 Materials You’ll Need
- Yarn: Approximately 100-120 yards of DK Weight (Category 3) or Sport Weight (Category 2) yarn. Use a yarn that has good stitch definition (like cotton, cotton blend, or wool blend) to make the weave truly pop. The coral color is vibrant and lovely!
- Hook: A US Size G/6 (4.0 mm) or H/8 (5.0 mm) crochet hook, depending on your yarn choice, to achieve a firm but not too stiff fabric.
- Scissors
- Tapestry Needle (for weaving in ends and seaming).
- Measuring Tape (essential for custom sizing).
📏 Sizing and Gauge
A headband needs to fit snugly to stay on. We will customize the length based on your head circumference.
- Head Circumference Guideline (Approximate):
- Teen/Small Adult: 20-21 inches (51-53 cm)
- Medium Adult (Standard): 21-22 inches (53-56 cm)
- Large Adult: 23-24 inches (58-61 cm)
- Target Finished Length: The finished length of the crocheted band, before seaming, should be your head circumference minus 1 to 2 inches (2.5 to 5 cm) to allow for the natural stretch of the yarn and to ensure a snug fit.
- Gauge (Motif): One completed 4-row motif repeat (Rows 3-6) should measure approximately 1.5 inches (4 cm) tall and 2.5 inches (6.5 cm) wide.
📝 Key Crochet Abbreviations (US Terms)
The post stitches are crucial for the woven look.
| Abbreviation | Meaning |
| ch | Chain |
| st(s) | Stitch(es) |
| sk | Skip |
| sl st | Slip Stitch |
| sc | Single Crochet |
| dc | Double Crochet |
| FPdc | Front Post Double Crochet (Special Stitch) |
| rep | Repeat |
🧶 Special Stitch Tutorial: Front Post Double Crochet (FPdc)
The FPdc creates the raised, interwoven cables.
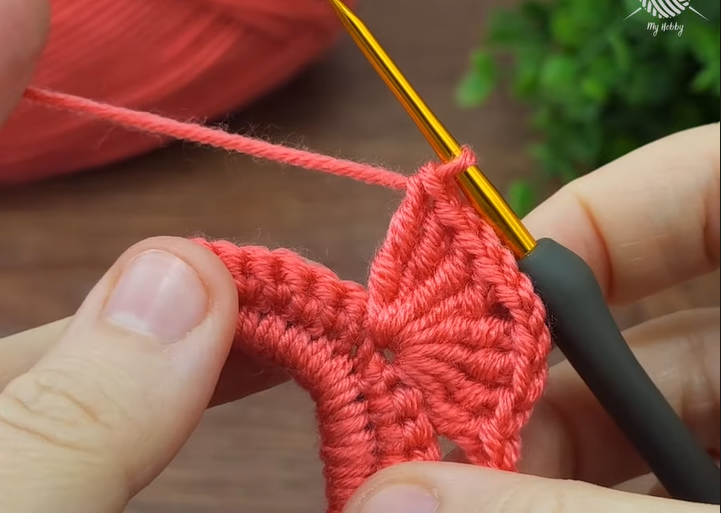
- YO (Yarn Over).
- Insert your hook from the front to the back, around the post (the vertical body) of the indicated stitch in the previous row, and then back out to the front.
- YO and pull a loop through (3 loops on hook).
- YO and pull through 2 loops (2 loops on hook).
- YO and pull through the final 2 loops.
🎀 Headband Pattern Instructions
The stitch pattern is a 4-row repeat, with solid single crochet borders on the sides to keep the edges neat and stable. The starting chain must be a multiple of 12, plus 7 for the side borders.
Step 1: Starting the Foundation and Borders
- Ch 31 (This provides two full 12-stitch repeats, plus the 7 stitches needed for the borders, resulting in a width of approximately 7 inches. This width is fixed.)
- Row 1 (Foundation): Sc in the 2nd ch from the hook and in each ch across. (30 sc).
- Row 2 (Base Row): Ch 3 (counts as a dc), turn. Dc in each sc across. (30 dc).
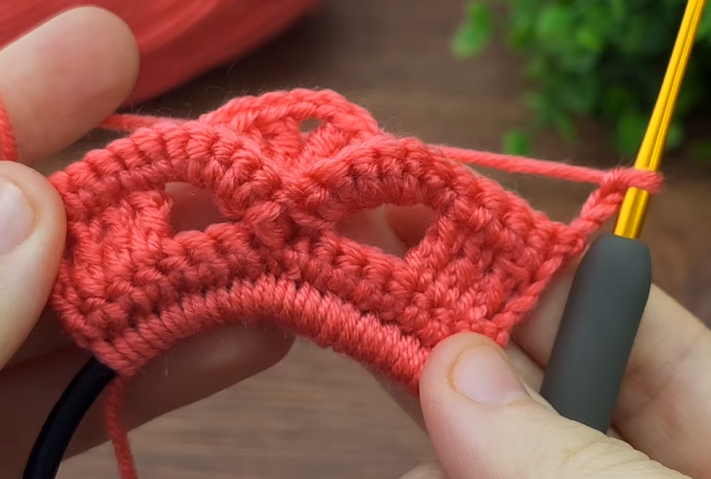
Step 2: Working the Celtic Weave Repeat
The pattern is worked across the 30 stitches. The first 3 and last 3 stitches of every row will form the single crochet (sc) side borders.
Pattern Repeat: Rows 3 through 6
- Row 3 (Lace Setup Row):
- Ch 1, turn. Sc in the first 3 dc (Side Border).
- *Ch 3, sk next 3 dc, dc in the next dc, ch 3, sk next 3 dc, FPdc around the post of the next dc*.
- Repeat from * to * until 7 dc remain.
- Ch 3, sk next 3 dc, dc in next dc, ch 3, sk next 3 dc.
- Sc in the last 3 dc (Side Border).
- Row 4 (Interlock Row 1):
- Ch 1, turn. Sc in the first 3 sc (Side Border).
- *FPdc around the post of the dc from the previous row, Ch 3, sk the ch-3 sp, FPdc around the post of the FPdc from the previous row, Ch 3, sk the ch-3 sp*.
- Repeat from * to * until 4 sts remain.
- FPdc around the post of the dc from the previous row, Ch 3.
- Sc in the last 3 sc (Side Border).
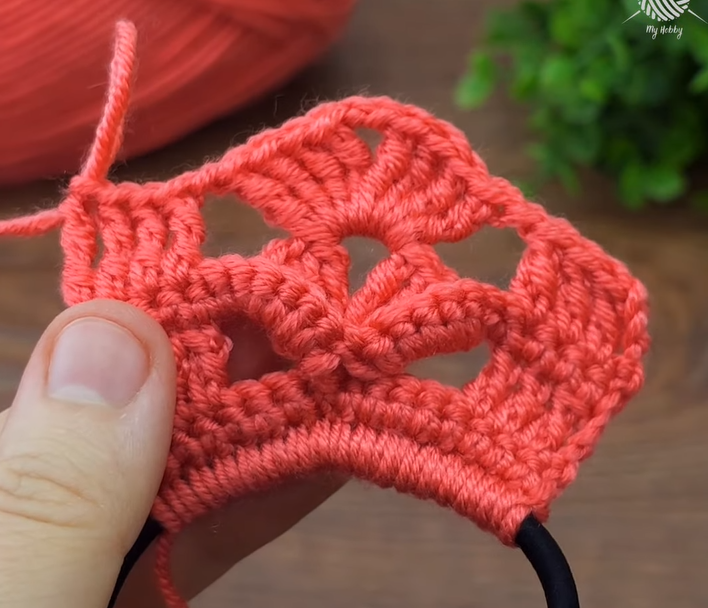
- Row 5 (Interlock Row 2 – Crossover):
- Ch 1, turn. Sc in the first 3 sc (Side Border).
- FPdc around the post of the first FPdc from Row 3 (skipping the FPdc from Row 4), Ch 3.
- *FPdc around the post of the DC from Row 3 (skipping the FPdc from Row 4), Ch 3, FPdc around the post of the FPdc from Row 3 (skipping the FPdc from Row 4), Ch 3*.
- Repeat from * to * across, ensuring your posts cross over the previous row’s posts to create the weave.
- FPdc around the post of the next DC from Row 3, Ch 3.
- Sc in the last 3 sc (Side Border).
- Row 6 (Closure Row):
- Ch 3 (counts as a dc), turn. Dc in the next 2 sc. (Side Border).
- Dc in the ch-3 sp, dc in the next FPdc, Dc in the ch-3 sp, dc in the next FPdc.
- Repeat the sequence “Dc in the ch-3 sp, dc in the next FPdc” across until you reach the final 3 sc.
- Dc in the last 3 sc (Side Border). (Total 30 dc).
Step 3: Continuing for Custom Length
- Repeat Rows 3 – 6 until the piece measures your Target Finished Length (Head Circumference minus 1 to 2 inches).
- Finish on a Row 6 (a full double crochet row) for a clean, sturdy end.
Step 4: Seaming for a Headband
- Final Edge: Work Row 1 (Foundation) one last time: Ch 1, turn. Sc in each dc across. (30 sc). Do not fasten off.
- Joining: Bring the two short ends of the headband together, making sure the piece is not twisted. The last row of single crochet should align with the foundation chain edge.
- Seam: Insert your hook through the first stitch of the final sc row and the first loop of the starting chain. Sl st through both layers.
- Continue Sl St through both layers across the entire width to create a flat, nearly invisible seam.
- Fasten Off, weave in the tail securely.
Video Tutorial:
🧺 Finishing and Care
- Blocking: Although headbands are small, wet blocking is highly recommended for this lace pattern. Pin the headband out to the correct circumference and width on a blocking mat. This will open up the chain spaces, define the interwoven posts, and allow the headband to lay smoothly.
- Care: Hand wash or machine wash gentle (if using acrylic yarn) and lay flat to dry.
Congratulations on finishing your exquisite Celtic Knotwork Headband!


