
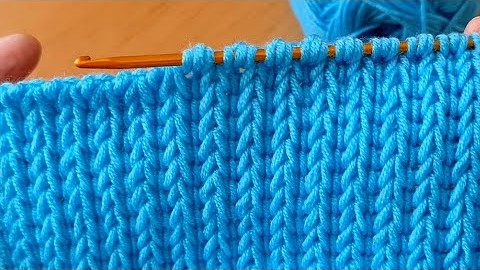
Welcome, fiber innovators! Today, we’re diving into the structured world of Tunisian Crochet to create this gorgeously dense, ribbed fabric. The stitch in your photo—which we’ll call the Tunisian Vertical Rib Stitch—achieves a look strikingly similar to stockinette or brioche knitting, but with the ease of a crochet hook. This technique results in a thick, warm, and highly stable fabric, perfect for garments, bags, or reversible blankets.
The key to Tunisian Crochet is working in two passes: the Forward Pass (FwP) where loops are picked up, and the Return Pass (RetP) where they are worked off. Let’s master this ribbed texture!

🛍️ Materials & Setup
Choosing Your Tools
- Hook: You must use a Tunisian crochet hook (also called an afghan hook). This hook is longer than a standard hook, usually has a stopper at the end, and sometimes has a cable to hold many loops. A 5.5 mm (I-9 US) or 6.0 mm (J-10 US) hook is a great size for worsted weight yarn.
- Yarn: A smooth Worsted Weight (Aran/10-ply) yarn works best. Avoid fuzzy yarns, as they make it difficult to see the vertical bars.
- Notions: Scissors and a tapestry needle.
Gauge and Multiple
- Pattern Multiple: The pattern is worked across a simple multiple of 1 stitch, plus 1 for the foundation chain.
- Example Chain (for a swatch): Ch 20.
📌 Stitch Abbreviations & Technical Definitions (Tunisian Terms)
Standard Abbreviations
- ch: Chain
- st(s): Stitch(es)
- Tss: Tunisian Simple Stitch
- Tfs: Tunisian Full Stitch
- FwP: Forward Pass
- RetP: Return Pass
- yo: Yarn Over
- Lp: Loop
Key Tunisian Components
- Last Stitch: Always worked under both the front and back vertical bars of the last stitch of the previous row to create a clean, sturdy edge.
- Tunisian Simple Stitch (Tss): Insert hook under the vertical bar, yo, pull up a loop.
➡️ Phase 1: The Foundation Row
This process is unique to Tunisian crochet and creates your starting grid of vertical bars.
Row 1: Foundation Row (Tss)
- Ch the required number (e.g., Ch 20).
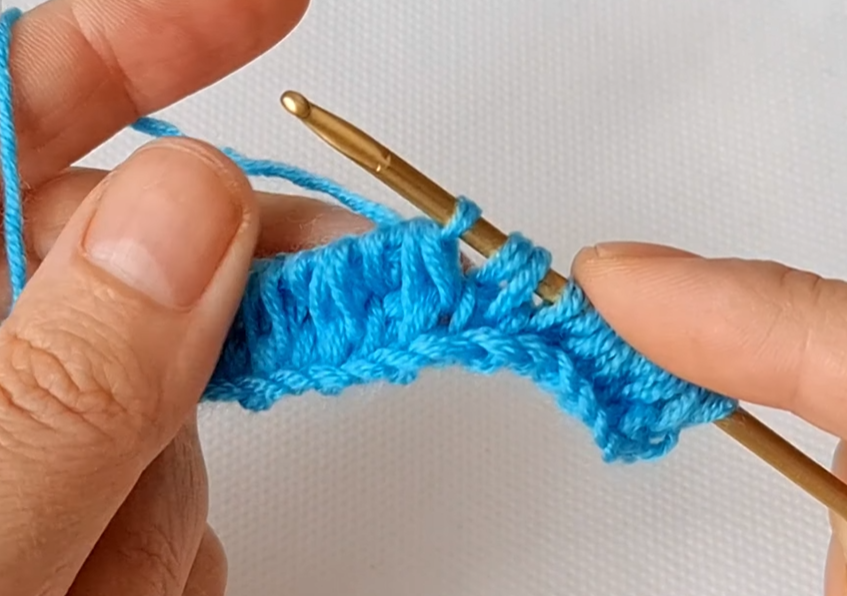
- FwP: Insert hook into the 2nd ch from the hook, yo, pull up a loop. Keep the loop on the hook. Repeat across the row, inserting hook into the back bump of each chain. You should have 20 loops on your hook.
- RetP: Yo, pull through 1 loop (chaining the first loop). *Yo, pull through 2 loops.* Repeat from * to * until only 1 loop remains on the hook.
〰️ Phase 2: Building the Vertical Ribs
This pattern combines the basic Tss with an extra step (a yarn over) to enhance the vertical ribbing and stretch.
Row 2: Setting the Ribbed Texture
- Ch 1 (this ch-1 does not count as a stitch but adds slack).
- FwP:
- Tss into the first vertical bar.
- *Yo. (This extra yarn over is the key to the pattern’s stretch and density).
- Tss into the next vertical bar.*
- Repeat from * to * across the row until you reach the last stitch.
- Work the Last Stitch (under both vertical bars), yo, pull up a loop.
- Count your loops! You should have almost double your original number (19 Tss + 1 Last St + 19 yo = 39 loops).
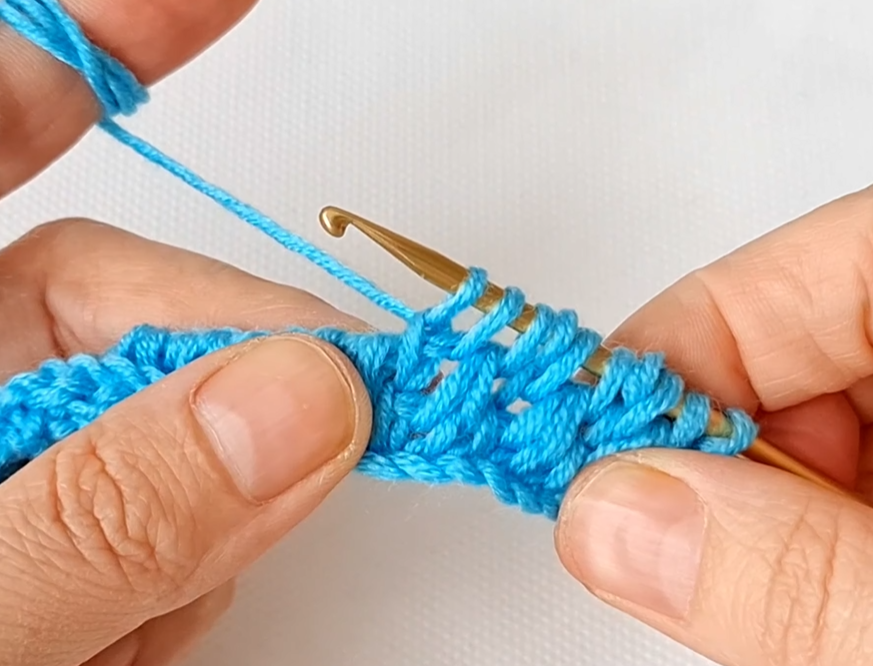
- RetP: Yo, pull through 1 loop. *Yo, pull through 2 loops (treating the Tss and the yo together as one unit).* Repeat from * to * until only 1 loop remains on the hook.
Row 3: Continuing the Ribs
This row works back into the spaces created by the previous row’s Tss and yo.
- Ch 1.
- FwP:
- Tss into the first vertical bar (this is the vertical bar of the Tss from Row 2).
- *Yo.
- Tss into the next vertical bar.*
- Repeat from * to * across the row, always placing the Tss into the vertical bar of the previous row’s Tss.
- Work the Last Stitch, yo, pull up a loop.
- RetP: Yo, pull through 1 loop. *Yo, pull through 2 loops.* Repeat from * to * until only 1 loop remains on the hook.
🔁 Phase 3: The Complete Pattern Repeat
The texture is fully created by simply repeating Row 3 for the remainder of the project.

- Repeat Row: Repeat Row 3 until your piece reaches the desired length.
🧶 Advanced Tip: The tension in Tunisian crochet is key. If your fabric is curling severely (a common issue), you should either use a much larger hook or try blocking the fabric thoroughly as you work.
Video Tutorial:
✂️ Finishing and Edging Details
Binding Off (Creating a Final Edge)
To finish your work and prevent unraveling, you must complete a final Bind Off row.
- FwP (Bind Off): Work the Forward Pass exactly as you have been (Tss, yo, Tss, yo…).
- When you pull up the second loop for the Tss, sl st through the loop already on the hook (instead of leaving it on the hook). This creates a simple slip stitch bind-off that mimics the ribbing.
- Continue this method (Tss and immediately bind off with a sl st) until the last stitch.
- Fasten off and weave in the end.
Fabric Characteristics
The resulting fabric is very thick and will have a defined vertical texture on the front and a slightly bumpy, dense back. Due to the technique, this fabric often has a natural tendency to slant or curl slightly, which is characteristic of the Tunisian Simple Stitch base. Blocking is essential to square the final piece.
This Tunisian Vertical Rib Stitch creates a gorgeous, dense, and warm material. Happy Tunisian crocheting!


