
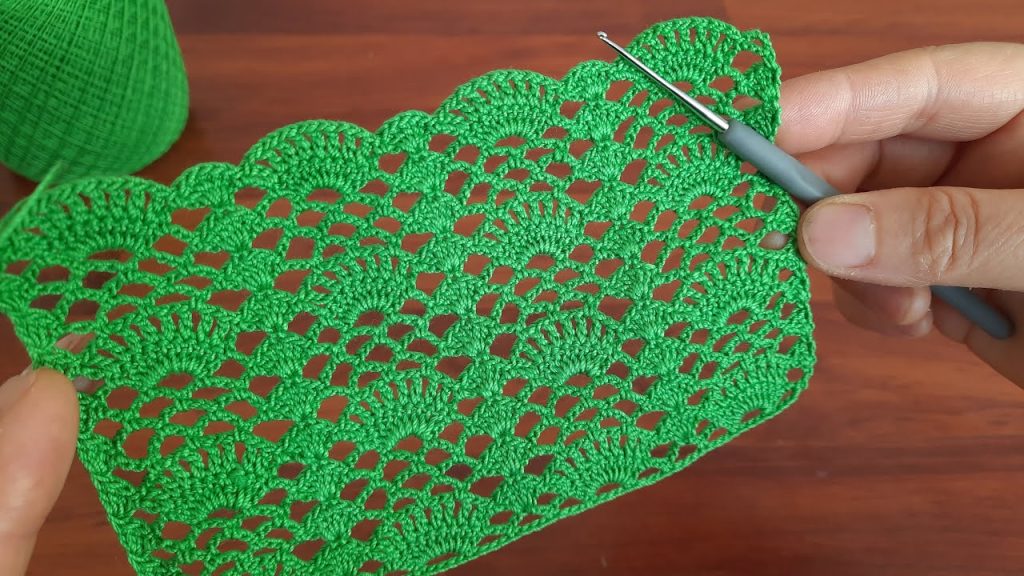
Welcome, yarn enthusiasts! Today we’re diving into a project that combines delicate lace with a vibrant color, resulting in a stunning, versatile panel perfect for scarves, shawls, bookmarks, or adding an elegant trim to clothing or home decor. The pattern features a lovely repeating fan and shell motif that creates a beautifully open, airy fabric.
This pattern is written in U.S. Crochet Terminology.
✨ Materials You’ll Need
| Icon | Item | Notes |
| 🧶 | Yarn | Approx. 100–150 yards of a sport or fingering weight cotton yarn in a solid color (the vibrant green in the photo is stunning!). The weight is important to achieve the delicate, lacy drape. |
| 鉤 | Crochet Hook | A hook size appropriate for your yarn weight. I recommend a 2.5 mm or 3.0 mm hook to keep the fabric light and airy. |
| ✂️ | Tools | Tapestry needle for weaving in ends, and a pair of scissors. |
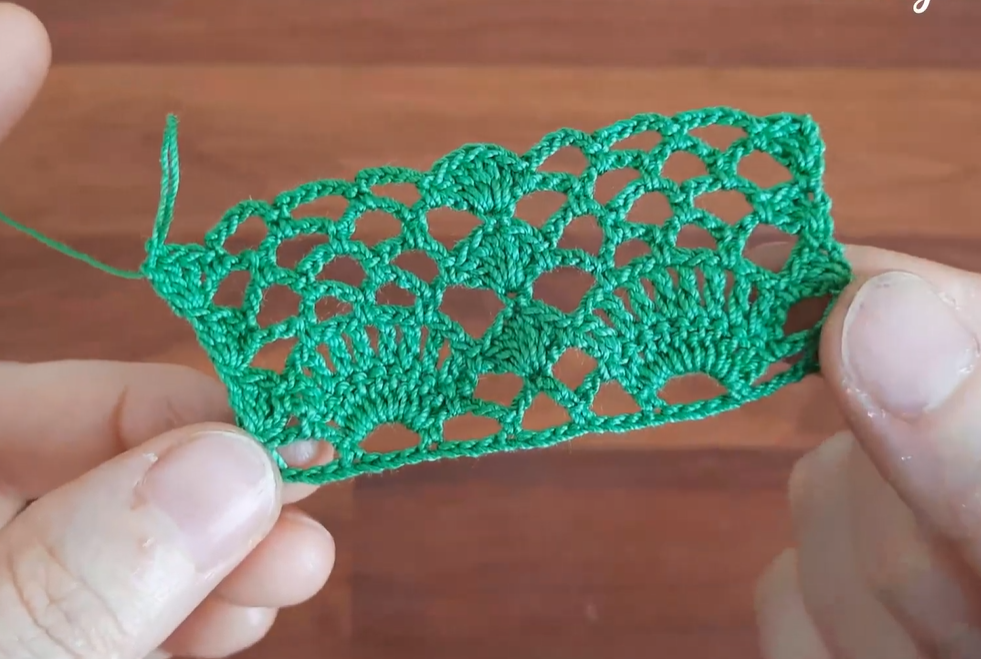
| 📏 | Gauge | Gauge isn’t critical, but for reference, the finished panel should measure approx. 5.5′′ wide and 8′′ long before the final edging. |
📄 Understanding the Stitches
To successfully complete this pattern, you’ll need to know the following basic and intermediate crochet stitches:
| Stitch | Abbreviation | Description |
| Chain | ch | Yarn over, pull through loop on hook. |
| Slip Stitch | sl st | Insert hook, yarn over, pull through work and loop on hook. |
| Single Crochet | sc | Insert hook, yarn over, pull through stitch (2 loops on hook), yarn over, pull through both loops. |
| Double Crochet | dc | Yarn over, insert hook, yarn over, pull through stitch (3 loops on hook), yarn over, pull through 2 loops, yarn over, pull through last 2 loops. |
| Treble Crochet | tr | Yarn over twice, insert hook, yarn over, pull through stitch (4 loops on hook), yarn over, pull through 2 loops (3 left), yarn over, pull through 2 loops (2 left), yarn over, pull through last 2 loops. |
| Shell | Shell | Typically refers to multiple stitches worked into the same space to create a scallop shape. |
🧵 The Main Fan Lace Body Pattern
The foundation chain needs to be a multiple of 12 plus 4 chains.
For a panel roughly the size shown in the image, you’ll need to chain 40 (which is 3×12+4).
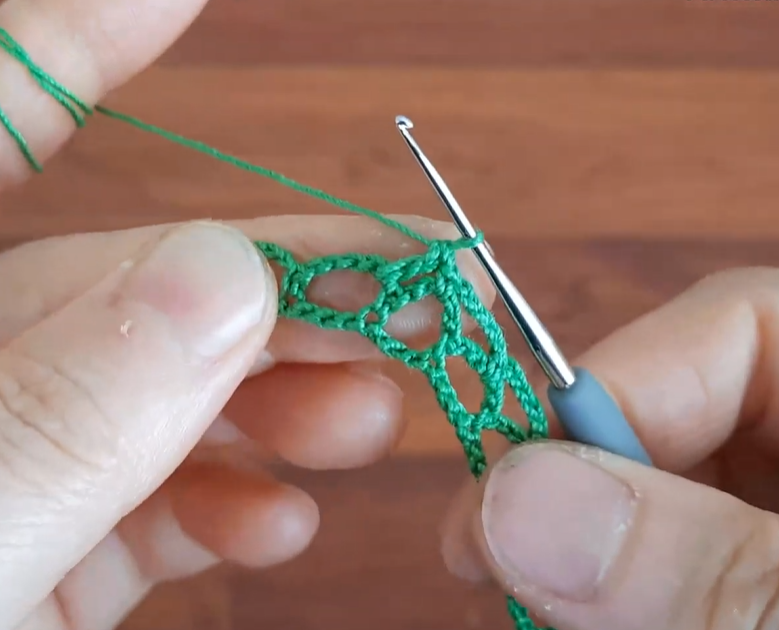
Foundation Row (Row 1 – RS):
- ch 40.
- dc in the 4th ch from hook (counts as first dc).
- dc in each ch across. (38 dc)
- This row establishes a solid base for the lace pattern.
Row 2 (WS):
- ch 1 (does not count as a stitch).
- sc in the first st.
- ch 3.
- Skip 3 sts.
- In the next st, work (dc, ch 1, dc, ch 1, dc) (this is your V-Stitch Group).
- ch 3.
- Skip 3 sts.
- sc in the next st.
- Repeat from ** across the row.
- End with sc in the last st. (You should have 3 full V-Stitch Groups and a final sc).
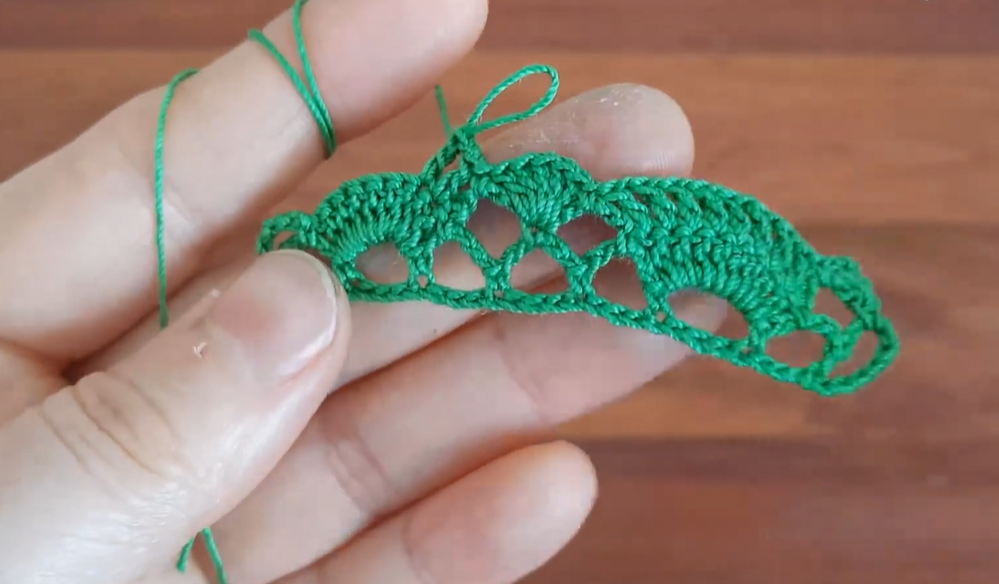
Row 3 (RS):
- ch 3 (counts as first dc).
- 3 dc in the first sc.
- ch 1.
- Skip ch-3 space.
- In the central dc of the V-Stitch Group from the row below, work (tr, ch 1) five times, tr (this creates a 6-tr Fan).
- ch 1.
- Skip ch-3 space.
- In the next sc, work 7 dc (this is a Shell).
- Repeat from ** across, until the last V-Stitch Group.
- In the central dc of the last V-Stitch Group, work (tr, ch 1) five times, tr (a 6-tr Fan).
- ch 1.
- Skip ch-3 space.
- In the final sc, work 4 dc.
Row 4 (WS):
- ch 1 (does not count as a stitch).
- sc in the first st.
- ch 3.
- Skip 3 dc and ch-1 space.
- sc in the first ch-1 space of the Fan.
- ch 3.
- Skip ch-1 space.
- sc in the next ch-1 space of the Fan.
- ch 3.
- Skip ch-1 space.
- sc in the next ch-1 space of the Fan.
- ch 3.
- Skip ch-1 space.
- sc in the next ch-1 space of the Fan.
- ch 3.
- Skip ch-1 space and 3 dc.
- sc in the central (4th) dc of the 7-dc Shell.
- Repeat from ** across, until the last Fan.
- Finish the last Fan with a final sc in the last st (the top of the turning ch-3).
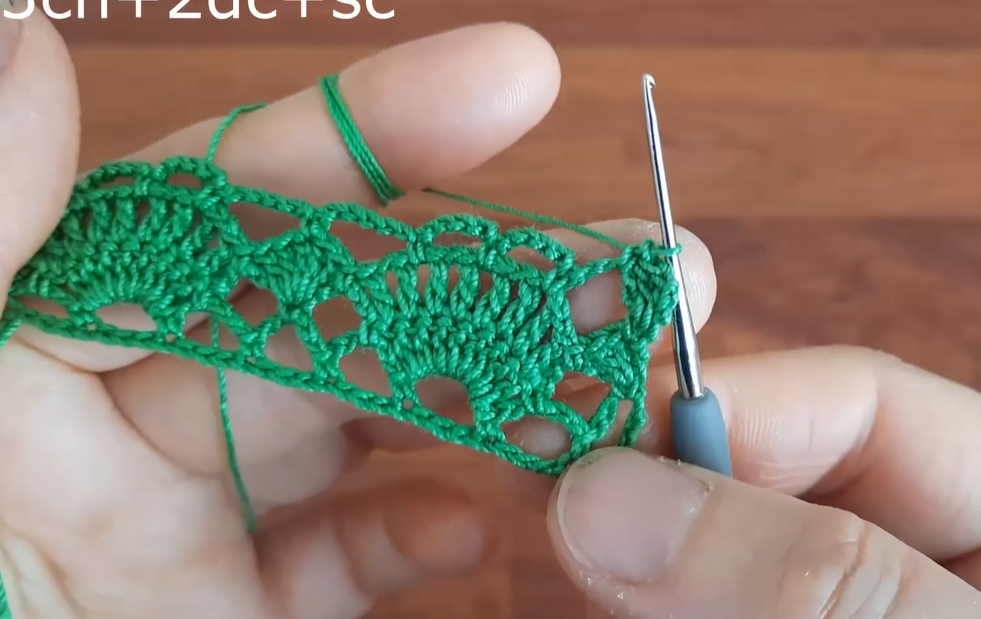
Row 5 (RS):
- ch 3 (counts as first dc).
- 3 dc in the first sc.
- ch 1.
- Skip ch-3 space.
- In the central sc (the second one) of the Fan’s loop section, work (tr, ch 1) five times, tr (a 6-tr Fan).
- ch 1.
- Skip ch-3 space.
- In the sc worked into the center of the previous row’s shell, work 7 dc (a Shell).
- Repeat from ** across, working the Fan into the central sc of the previous Fan and the Shell into the sc of the previous Shell.
- End with 4 dc in the final sc.
Repeating the Pattern:
- Repeat Row 4 and Row 5 until your panel reaches the desired length. The image appears to show 4 full rows of the Fan/Shell motif.
🔱 The Final Scalloped Edging
The image shows a distinct, uniform scalloped edge along the top and bottom of the panel. This is a common Picot Shell Edging.
Edging Row 1 (Working Along the Long Edge):
- After your last main row, ch 1 (does not count as a stitch).
- sc evenly along the entire long edge, placing 1 sc in each dc or sc, and 2 sc in each ch-3 space, and ensuring you have an even number of stitches.
- Turn your work.
Edging Row 2 (The Scallop):
- ch 1.
- sc in the first st.
- Skip 1 st.
- sc in the next st.
- Skip 1 st.
- In the next st, work a Scallop: (dc, ch 3, sl st in the 3rd ch from hook (Picot), dc).
- Skip 1 st.
- sc in the next st.
- Repeat from ** across the entire long edge.
- Finish with a sc in the last st.
Finishing the Other Edges:
- Corners: When you reach a corner, work (sc, ch 1, sc) into the corner stitch to help the edging lie flat.
- Short Ends: Work a simple sc border along the short ends.
- Starting Edge: Repeat Edging Row 2 along the Foundation Edge (Row 1) of the panel. This will give you the matching scalloped look on both long sides.
Video Tutorial:
🫧 Blocking and Finishing
- Secure Ends: Fasten off your yarn and use your tapestry needle to carefully weave in all loose ends on the wrong side of your work.
- Blocking (Highly Recommended!): Lace work must be blocked to open up the pattern and achieve that crisp, professional look.
- Dampen your panel using cool water (you can spray it or soak it gently).
- Carefully squeeze out excess water (do not wring).
- Pin the panel to a flat, padded surface (like a foam board or towel) using rust-proof T-pins, gently stretching the piece until the fan and shell motifs are fully opened and defined.
- Allow the piece to dry completely before unpinning.
Enjoy your beautiful new Emerald Fan Lace Panel! What do you plan to make with your finished piece—a delicate scarf, a tablecloth insert, or maybe a decorative trim?


