
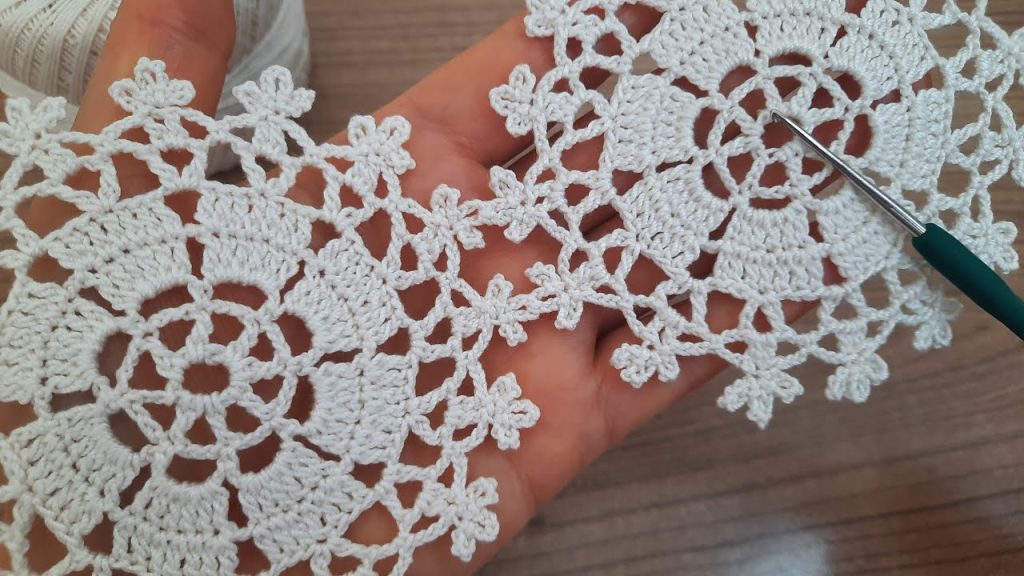
Welcome, lace lovers! Today, we’re diving into a project that yields a stunning, complex-looking motif, perfect for joining into a large, elegant textile like a table runner, scarf, or even delicate curtains. The motif combines a solid center with delicate chain-work and adorable clover-shaped picots.
This pattern is written in U.S. Crochet Terminology.
✨ Materials You’ll Need
| Icon | Item | Notes |
| 🧶 | Yarn | Approx. 30–50 yards of a fine thread yarn (Size 10 or similar cotton thread) for a crisp, delicate look. The white is traditional and beautiful! |
| 鉤 | Crochet Hook | A very small steel hook appropriate for your thread. I recommend a 1.5 mm to 2.0 mm hook. |
| ✂️ | Tools | Tapestry needle for weaving in ends, and sharp scissors. |
| 📏 | Gauge | Gauge is less crucial than size uniformity for joining. Each finished motif should measure approximately 3.5′′ across after blocking. |
📚 Stitches & Special Techniques
To successfully complete this pattern, you’ll need to know the following stitches and special abbreviations:
| Stitch | Abbreviation | Description |
| Chain | ch | Yarn over, pull through loop on hook. |
| Slip Stitch | sl st | Insert hook, yarn over, pull through work and loop on hook. |
| Single Crochet | sc | Standard single crochet. |
| Double Crochet | dc | Standard double crochet. |
| Treble Crochet | tr | Standard treble crochet (yarn over twice). |
| Picot | P | ch 3, sl st into the first ch made. |
| 3-dc Cluster | 3-dc CL | (Yarn over, insert hook, yarn over, pull up loop, yarn over, pull through 2 loops) three times in the same stitch/space. Yarn over, pull through all 4 loops on hook. |
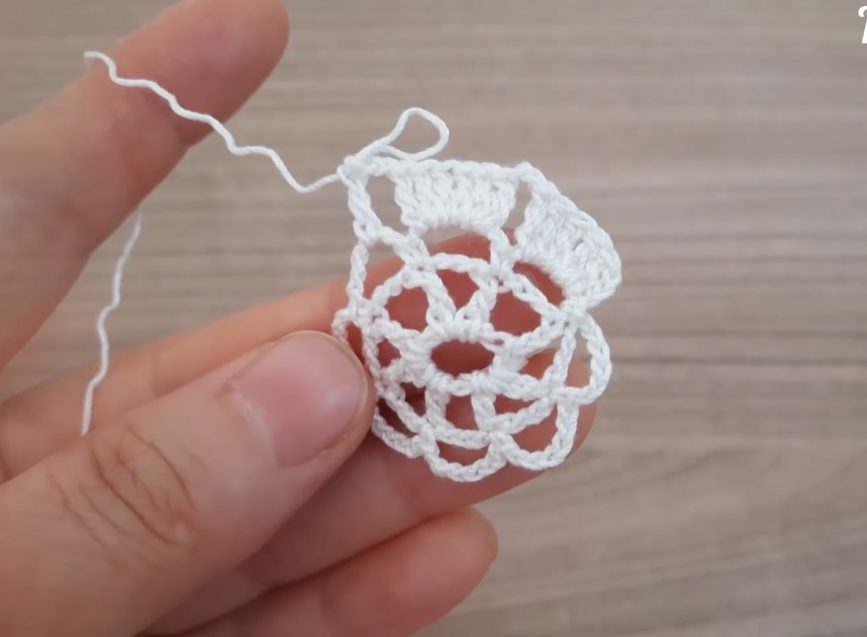
💠 Part 1: The Central Medallion (Rounds 1–4)
This section creates the dense, solid core of the snowflake.
Foundation:
- ch 5, sl st into the first ch to form a ring.
Round 1:
- ch 3 (counts as first dc).
- Work 15 dc into the ring.
- sl st to the top of the starting ch-3 to join. (16 dc)
Round 2:
- ch 1 (does not count as a stitch).
- sc in the first st.
- ch 3.
- Skip 1 st.
- sc in the next st.
- Repeat from ** around.
- End with ch 3. sl st to the first sc to join. (8 ch-3 loops)
Round 3:
- sl st into the first ch-3 space.
- ch 3 (counts as first dc).
- Work 2 dc in the same ch-3 space.
- ch 2.
- Work 3 dc in the next ch-3 space.
- Repeat from ** around.
- End with ch 2. sl st to the top of the starting ch-3 to join. (8 clusters of 3 dc, 8 ch-2 spaces)
Round 4 (Setting up the Spokes):
- ch 4 (counts as dc + ch 1).
- dc in the next dc.
- ch 1.
- dc in the next dc.
- ch 1.
- In the ch-2 space, work dc, ch 3, dc (this creates a large corner chain).
- ch 1.
- dc in the next dc.
- Repeat from ** around.
- End with ch 1 and work dc in the final st. ch 3 and sl st to the 3rd ch of the starting ch-4 to complete the last ch-3 space. (8 large ch-3 spaces, 24 dc, 24 ch-1 spaces)
- Note: The ch-3 spaces will be the center of your 8 main spokes.
🕸️ Part 2: The Spoked Webbing (Rounds 5–6)
This section creates the open, lacy spokes that radiate from the center.
Round 5:
- sl st into the first ch-3 space.
- ch 1 (does not count as a stitch).
- sc in the ch-3 space.
- ch 5.
- sc in the next ch-3 space.
- Repeat from ** around.
- End with ch 5. sl st to the first sc to join. (8 ch-5 loops)
Round 6 (Longer Chains):
- sl st into the first ch-5 space.
- ch 1 (does not count as a stitch).
- sc in the ch-5 space.
- ch 7.
- sc in the next ch-5 space.
- Repeat from ** around.
- End with ch 7. sl st to the first sc to join. (8 ch-7 loops)
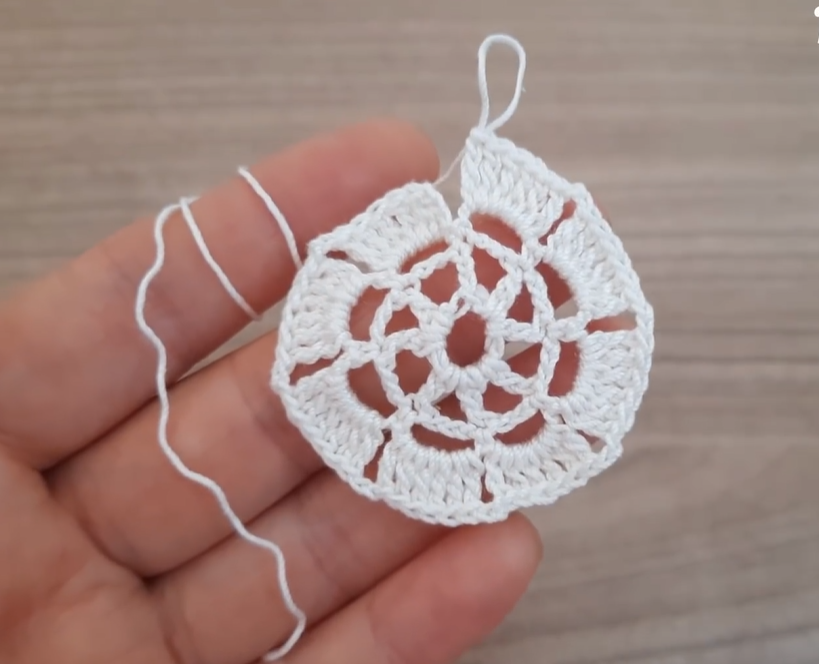
🍀 Part 3: The Clover Edging (Round 7 – Final Round)
This is the final round that defines the unique scalloped, clover-like edge and provides the joining points.
Round 7:
- sl st into the first ch-7 space until you reach the 4th ch (the peak of the chain).
- ch 1 (does not count as a stitch).
- sc in the 4th ch.
- ch 3.
- In the next ch-7 space, work (dc, P, dc, P, dc, P, dc). (This is the Clover Shell).
- ch 3.
- sc in the center (4th ch) of the next ch-7 space.
- Repeat from ** around.
- End with ch 3. sl st to the first sc to join. (8 Clover Shells)
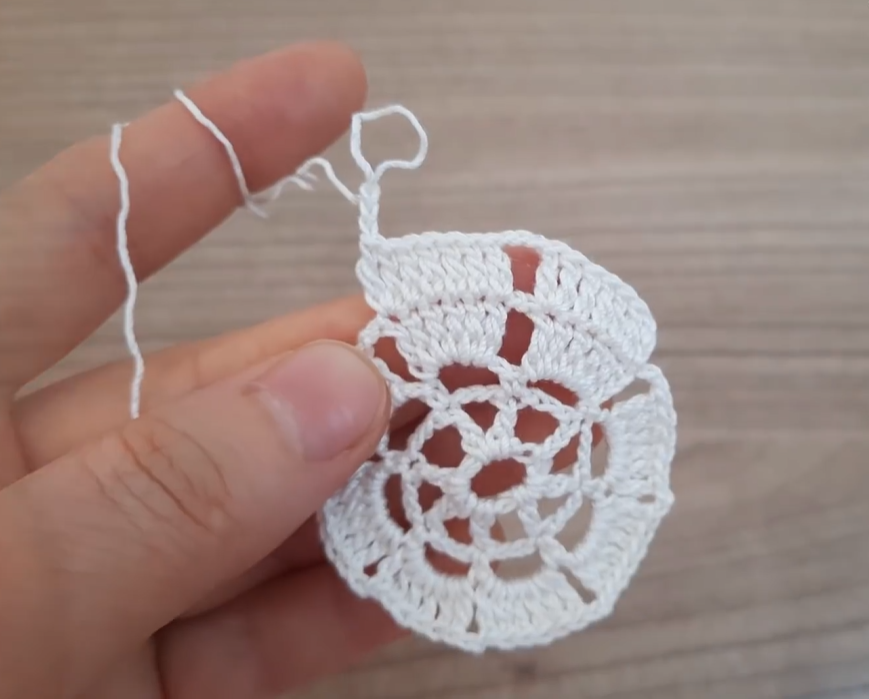
To Join Motifs:
- If you are joining this motif to another completed motif, replace the center Picot (P) of the Clover Shell with a Join Picot (JP).
- JP: ch 1, sl st into the corresponding Picot of the adjoining motif, ch 1, sl st into the first ch made to form the Picot.
Video Tutorial:
📌 Finishing and Blocking
- Secure Ends: Fasten off your thread, leaving a tail long enough to weave in securely. Use your tapestry needle to carefully weave in all loose ends on the wrong side of your motif. Since this is lace, weaving carefully is important to keep the edges clean.
- Blocking (Crucial!): This motif must be blocked to open up the webbed spokes and define the clover picots. Without blocking, the piece will look bunched.
- Dampen the motif thoroughly (submerging in cool water is best for cotton).
- Gently squeeze out excess water—do not wring.
- Pin the motif to a padded surface (like a foam board). Starting with the center, stretch gently and pin out the 8 points of the Clover Shells until the piece forms a perfect circle and the chain spaces are open and visible.
- Allow the motif to dry completely before unpinning.
Enjoy your beautiful, delicate Snowflake Clover Lace Motif! Do you plan to join several together for a larger piece, or use them as individual coasters or ornaments?


