

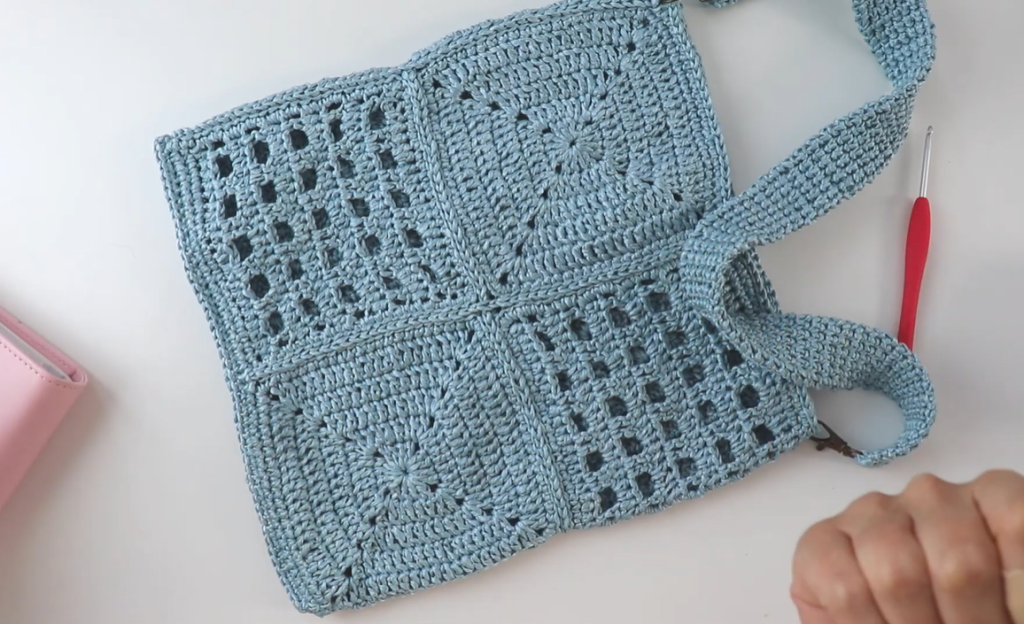
Embrace the breezy style of summer with The Seaside Granny Square Crossbody Tote! This structured bag is constructed from just four stunning Lacy Window Squares, giving it a beautiful openwork texture that’s perfect for warm weather. Using a stiff yarn like cotton or raffia provides the necessary structure, while the flat, durable strap ensures comfortable, hands-free carrying.
This detailed pattern is written for a Medium Tote Bag (approx. 15 inches wide x 15 inches high, excluding strap) and is best suited for the Intermediate crocheter familiar with traditional Granny Square construction and joining techniques.
Materials Needed 🧶
- Yarn: Approximately 400-500 yards of Worsted Weight (or equivalent) structured yarn. Raffia, paper yarn, or stiff cotton/linen blend is highly recommended for structure, as seen in the image.
- Main Color (MC): Light Denim Blue/Washed Blue
- Crochet Hook: 5.0 mm (US H-8), or the size needed to obtain gauge.
- Tapestry Needle: For weaving in ends and seaming.
- Metal Hardware (Optional): Two rectangular or D-rings (approx. 1 inch wide) for strap attachment.
- Scissors.
Skill Level & Notes 💡
- Skill Level: Intermediate. Requires knowledge of working in the round, creating a large granny square, joining motifs, and executing a dense strap stitch.
- Construction: The bag is made from four identical squares (two for the front panel, two for the back panel) which are joined together. The sides and bottom are seamed, and the strap is added last.
- Stiffness: The structure of this bag relies heavily on the yarn choice and tight tension. If using standard acrylic or soft cotton, the bag may require a lining to hold its shape.
- Chains: Ch 3 at the beginning of DC rounds always counts as the first DC.
Gauge 📏
In Lacy Window Square pattern (Part 1): One finished square should measure approximately 7.5 inches x 7.5 inches.
Abbreviations 📚
| Abbreviation | Description |
| ch | chain |
| sl st | slip stitch |
| sc | single crochet |
| dc | double crochet |
| st(s) | stitch(es) |
| rep | repeat |
| sp | space |
| DC-CL | Double Crochet Cluster |
Special Stitches ✨
DC Cluster (DC-CL)
- DC-CL: Work 3 dc into the same chain space or stitch.
Flat Strap Stitch (SC-BLO)
- SC-BLO: Single Crochet worked into the Back Loop Only of the stitch from the previous row. This creates a dense, ribbed, and sturdy strap.
Part 1: The Lacy Window Square 🟪
Make 4 total.
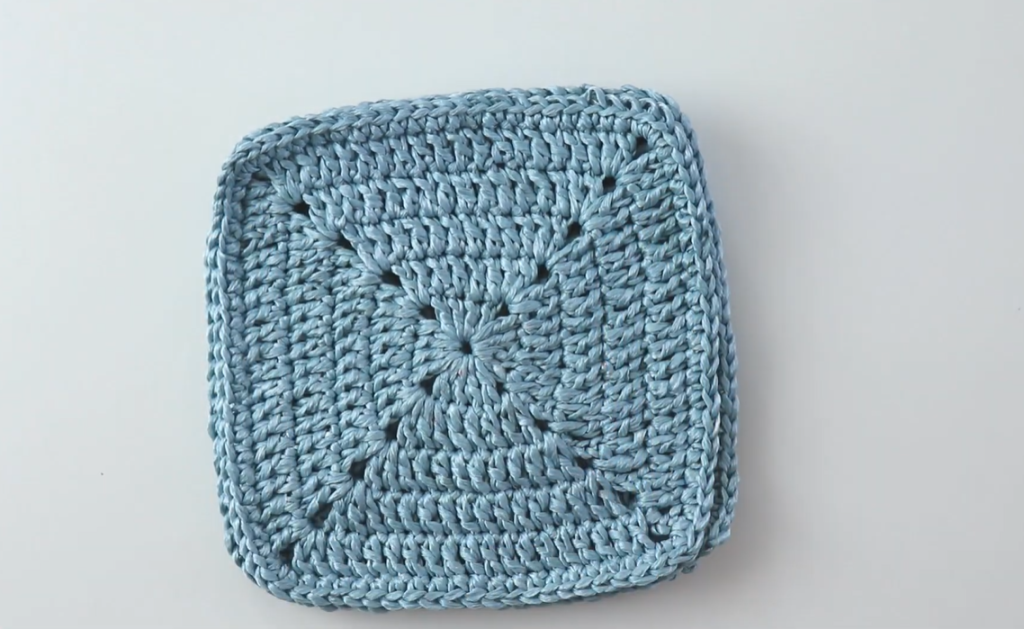
Round 1 (Solid Center): Ch 4, sl st to first ch to form a ring. Ch 3 (counts as dc). Work 11 dc into the ring. Sl st to the top of the beg ch-3. (12 dc)
Round 2: Ch 3. Dc in the same st (DC-INC). [Dc in the next st, 2 dc in the next st] rep around. Sl st to join. (18 dc)
Round 3: Ch 3. Dc in each st around. Sl st to join. (18 dc)
Round 4 (Corner Setup): Ch 3. [Dc in the next 2 sts, ch 2, dc in the next 3 sts] rep around. Sl st to join. (4 sides of 3 dc, 4 ch-2 corners)
Round 5 (Classic Granny): Sl st into the next st and into the ch-2 sp. Ch 3 (counts as dc). [DC-CL in the same sp, ch 1, DC-CL in the next sp] rep around. Sl st to join.
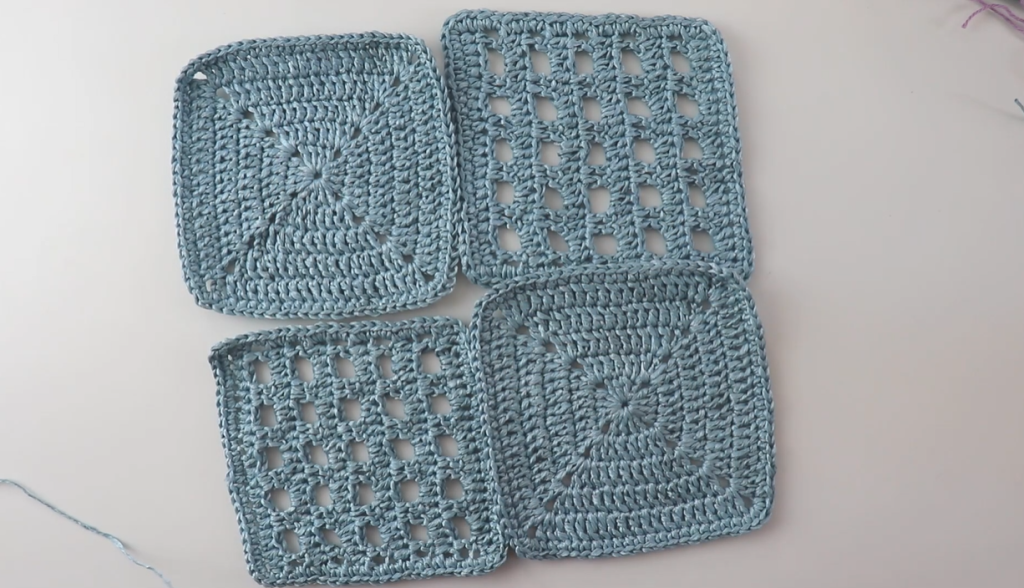
Round 6 (First Window Row): Ch 4 (counts as dc + ch 1). Dc in the ch-1 sp. Ch 1. (Corner) [Dc, ch 2, dc, ch 1, dc] in the ch-2 corner sp. (Side) [Ch 1, dc in the ch-1 sp] rep until the next corner sp. Rep from (Corner) to (Side) around. Sl st to join.
Round 7 (Solid Border): Sl st into the ch-1 sp. Ch 3 (counts as dc). Dc in the same sp. [Dc in the next dc, 2 dc in the next ch-1 sp] rep around the side until the corner sp. (Corner) [2 dc, ch 2, 2 dc] in the ch-2 corner sp. Rep the side and corner sequence around. Sl st to join. (The stitch count should be increasing uniformly.)
Round 8 (Second Window Row): Ch 1, sc in the first st. Sc in each st until the corner. (Corner) [Sc, ch 3, sc] in the ch-2 corner sp. Sc in each st along the side. Rep the corner and side sequence around. Sl st to join.
Round 9 (Final Border): Ch 3. Dc in each st around the side. (Corner) [2 dc, ch 2, 2 dc] in the ch-3 corner sp. Rep the side and corner sequence around. Sl st to join.
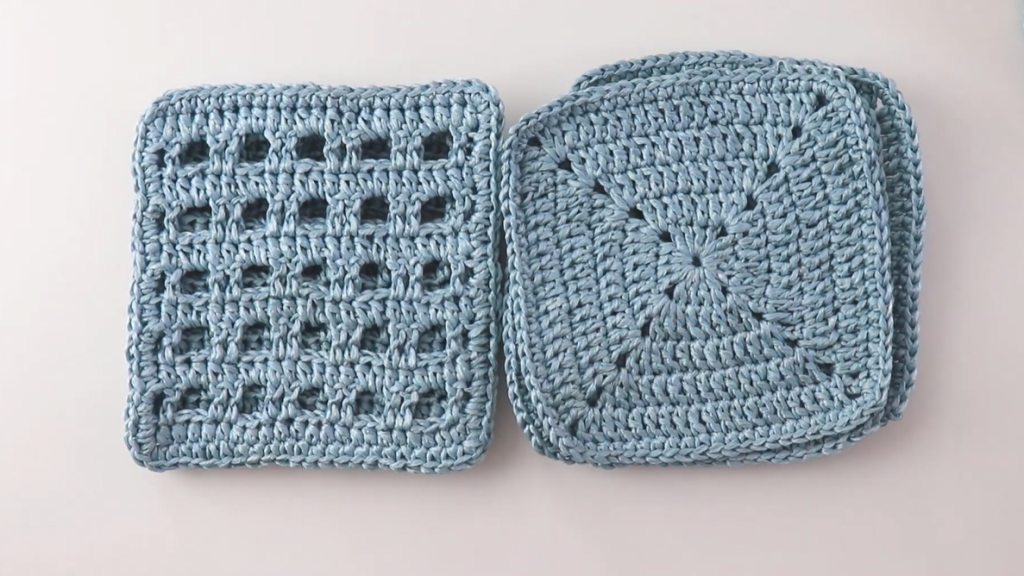
Fasten off. Weave in all ends on the 4 squares.
Part 2: Assembly 👜
The bag is made of two panels: Panel A (Square 1 and 2) and Panel B (Square 3 and 4).
- Panel Creation: Lay two squares side-by-side (Square 1 and 2). Using a tapestry needle and yarn, whipstitch or mattress stitch the inner edges together neatly to form a 15-inch x 7.5-inch rectangle. Repeat for Panel B (Square 3 and 4).
- Joining Panels: Lay Panel A on top of Panel B (right sides facing).
- Side and Bottom Seam: Using the tapestry needle, whipstitch the side edges and the bottom edge together, leaving the top edge open. Use a tight stitch for maximum structure. Turn the bag right-side out.
- Top Edge Edging: Attach yarn to one side of the top opening. Ch 1. Sc evenly around the entire top opening of the bag. Sl st to join. This gives a clean finish and reinforces the top.
Part 3: The Shoulder Strap 🔗
The strap is worked flat in a dense, simple stitch to prevent stretching.
- Strap Foundation: Ch 11 (determines strap width). Sc in the 2nd ch from hook and in each ch across. (10 sc)
- Rows 2 – 140 (or desired length): Ch 1, turn. Work SC-BLO in each st across. (10 sc)
- Tip: Measure the strap against your body to ensure the right crossbody length. 140 rows is approximately 48-50 inches for Worsted Weight yarn.
- Fasten off.
Attaching the Strap:
- If using rings: Sl st the working yarn back onto the last row. Sc around one of the metal rings. Sl st through the strap end to secure it permanently around the ring. Fasten off.
- If sewing directly: Position the strap ends neatly on the inside top corners of the bag and securely sew them in place with the tapestry needle.
Video Tutorial:
Finishing and Final Touches 🫧
- Weave in all remaining ends very carefully. Since the bag is openwork, knots can show through.
- Blocking (Crucial for structure!): Gently steam block the entire bag, paying special attention to flattening the Lacy Window Squares and setting the shape of the seams. You may wish to stuff the bag tightly with towels or plastic bags while it cools to ensure it holds a firm square shape.
Your beautiful and sturdy Seaside Granny Square Crossbody Tote is ready for your next outing!


