
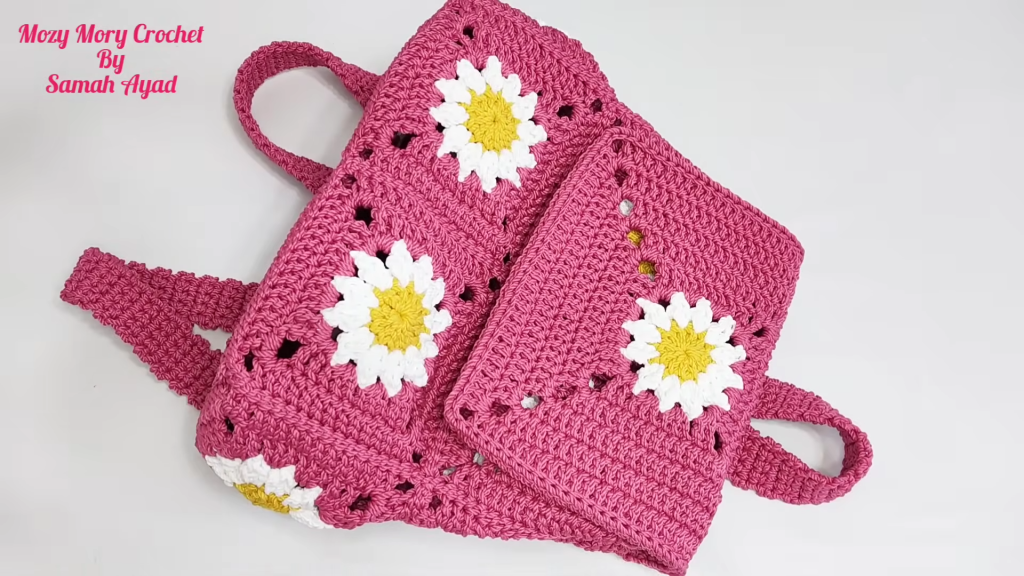
Welcome to this comprehensive guide for crafting the ultimate Daisy Meadow Crochet Backpack. This trendy 2024 design combines the classic charm of granny squares with the practicality of a backpack. It features the “Daisy Heart” motif, making it perfect for school, nursery, or a stylish weekend outing.
In this long-form blog post, we will walk through every step: from crocheting the individual daisy squares to assembling the structural panels and adding the finishing straps. Let’s get our hooks ready!
🧶 Materials & Tools Needed
To ensure your backpack is sturdy and maintains its shape, we recommend using a durable cord-style yarn.
- Yarn:Egyptian Macrame Cord (medium thickness, approx. 3mm). You will need three colors:
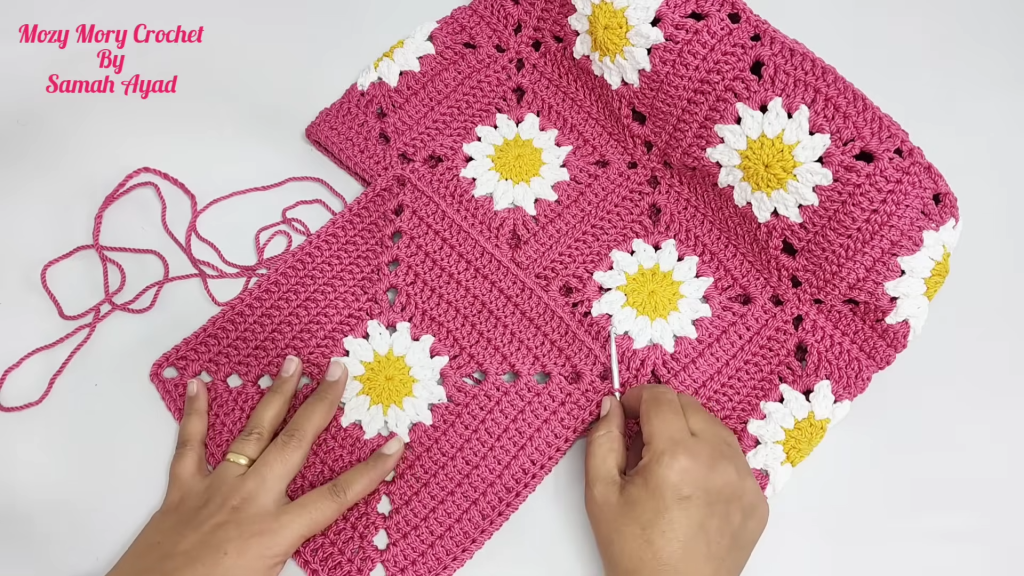
- Yellow: For the flower centers.
- White: For the daisy petals.
- Main Color (e.g., Lavender or Teal): For the square borders and backpack body.
- Hook: 5.0 mm crochet hook.
- Notions: Tapestry needle, scissors, stitch markers, and a set of backpack hardware (optional: magnetic clasp or button).
🌼 Section 1: The Daisy Heart (Granny Square)
The heart of this project is the Daisy Square. You will need to make 14 squares in total.
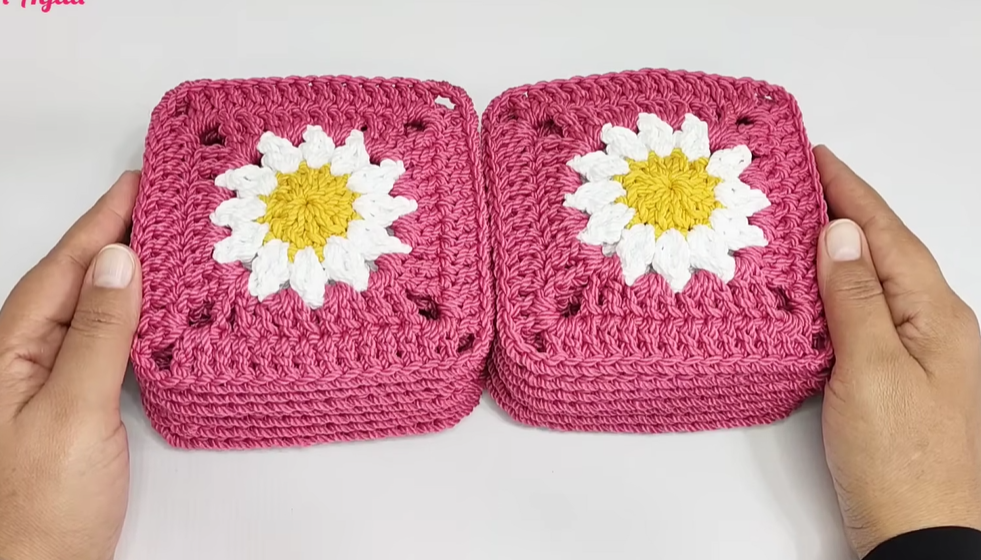
Step 1: The Sun (Yellow Center)
- Start with a Magic Ring.
- Work 3 chains (counts as first Double Crochet).
- Work 11 Double Crochets (DC) into the ring. (Total: 12 DC).
- Pull the ring tight. Fasten off and join with an invisible join for a perfect circle.
Step 2: The Petals (White)
- Attach white yarn into any DC stitch.
- Petal Pattern: In the same stitch, work 2 DC together (cluster). To do this: Yarn over, pull up a loop, yarn over, pull through 2 loops (2 loops left). Yarn over again, pull up a loop, pull through 2 (3 loops left). Yarn over and pull through all 3 loops.
- Chain 2.
- Repeat the cluster in every stitch around. You should have 12 white petals separated by Ch-2 spaces. Fasten off.
Step 3: Turning the Circle into a Square (Main Color)
- Attach your main color in any Ch-2 space.
- Corner: Ch 4 (counts as first Treble Crochet), 2 Treble Crochets (TR), Ch 3, 3 TR in the same space.
- Side: In the next Ch-2 space, work 3 DC. In the next Ch-2 space, work 3 DC.
- Corner: 3 TR, Ch 3, 3 TR in the next space.
- Repeat around. You now have a square with a daisy center!
- Optional: Work one final round of 1 DC in every stitch (and 3 DC in the corner spaces) to make the square slightly larger and more stable. Each square should measure approximately 15 cm x 15 cm.
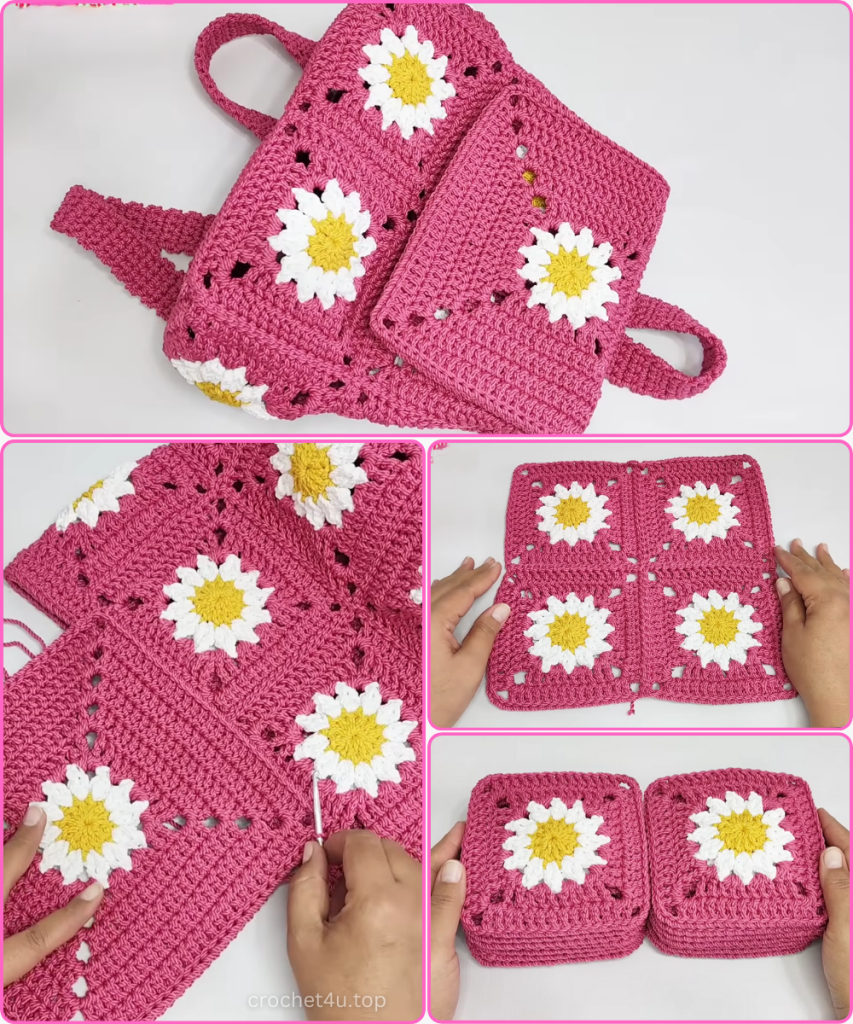
🧱 Section 2: Mapping the Backpack Structure
The 14 squares are divided into five specific panels:
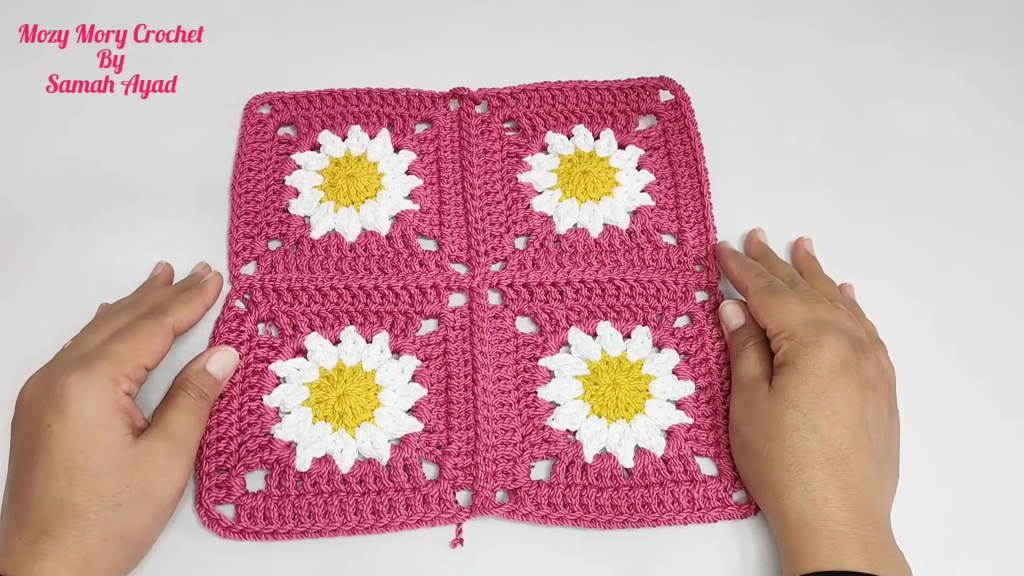
- Front Panel: 4 squares (sewn into a 2×2 grid).
- Back Panel: 4 squares (sewn into a 2×2 grid).
- Side Panels: 2 squares each (1×2 strip).
- Bottom Panel: 2 squares (1×2 strip).
🪡 Section 3: Assembly & Construction
We use a Tapestry Needle and a Mattress Stitch (or whip stitch) to join the squares. Working through the back loops only (BLO) creates a flat, professional seam.
- Join the Front & Back: Assemble your 2×2 grids.
- The “U-Shape” Gusset: Sew the side panels to the bottom panel to create one long strip.
- The 3D Join: Sew the Front Panel to one side of the “U-strip.” Then, sew the Back Panel to the other side. You now have a rectangular bag body!

🌊 Section 4: The Top Border & Opening
To create a clean opening for the backpack:
- Attach yarn to the top edge.
- Work 2 rounds of Single Crochet (SC) all the way around the mouth of the bag.
- Round 3: Work a round of Slip Stitches through both loops to reinforce the opening and prevent stretching.
🎒 Section 5: The Flap (The Lid)
The flap is essentially another large square or rectangle.
- Crochet one more Daisy Square.
- Instead of stopping, continue adding rounds of DC around three sides of the square until the flap is wide enough to cover the opening.
- Joining: Align the flap to the top edge of the Back Panel. Use Slip Stitches or a tapestry needle to attach it securely.
🎗️ Section 6: Straps & Finishing Touches
The Shoulder Straps:
- Work a long strip of SC (4 stitches wide) until it reaches 1.5 meters (or your desired length for a child/adult).
- Alternatively, use a Roman Lace Cord for a thicker, non-stretch handle.
- Attachment: Sew the top of the straps to the back of the bag (near the flap join) and the bottom of the straps to the lower corners.
Final Details:
- Closure: Sew a large button or attach a magnetic clasp to the flap and front panel.
- Weaving Ends: Ensure all yarn tails are woven deeply into the stitches, especially the color-change points in the flowers.
- Lining (Optional): If you want to carry heavy items, you can sew a simple fabric lining to the inside of the squares.
Congratulations! You’ve just created a beautiful, trend-setting Daisy Backpack. It’s durable, colorful, and completely unique to your handiwork!


