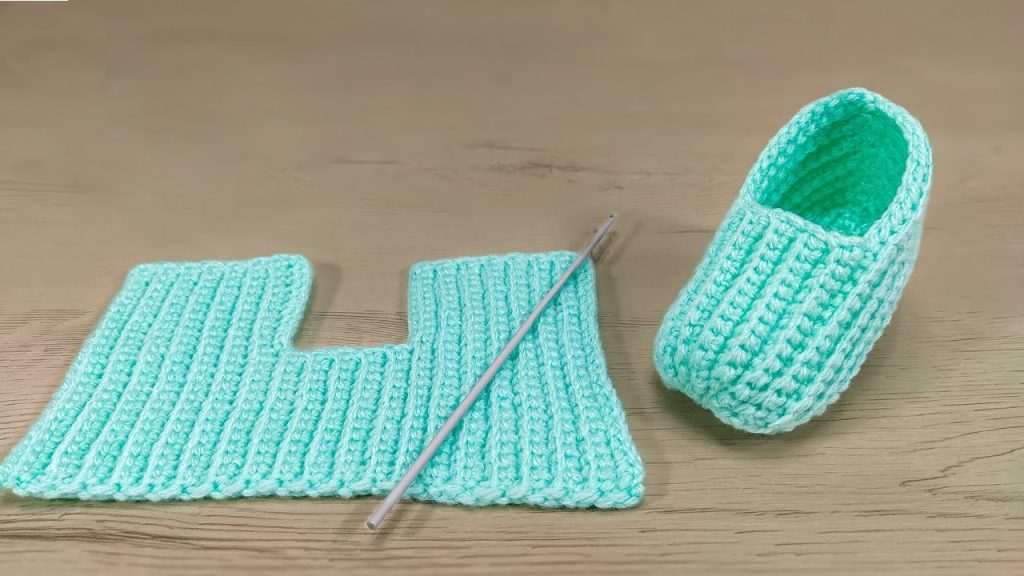
The ultimate in comfort and simplicity, these ribbed slippers are a fantastic project for crocheters of all skill levels. They are constructed from a single flat piece, which is then magically seamed into a perfectly fitting, wonderfully stretchy house slipper. The beautiful vertical texture is created using a simple technique that gives the finished slipper a professional, store-bought look. Get ready to have a new pair of cozy footwear ready in just a few hours!
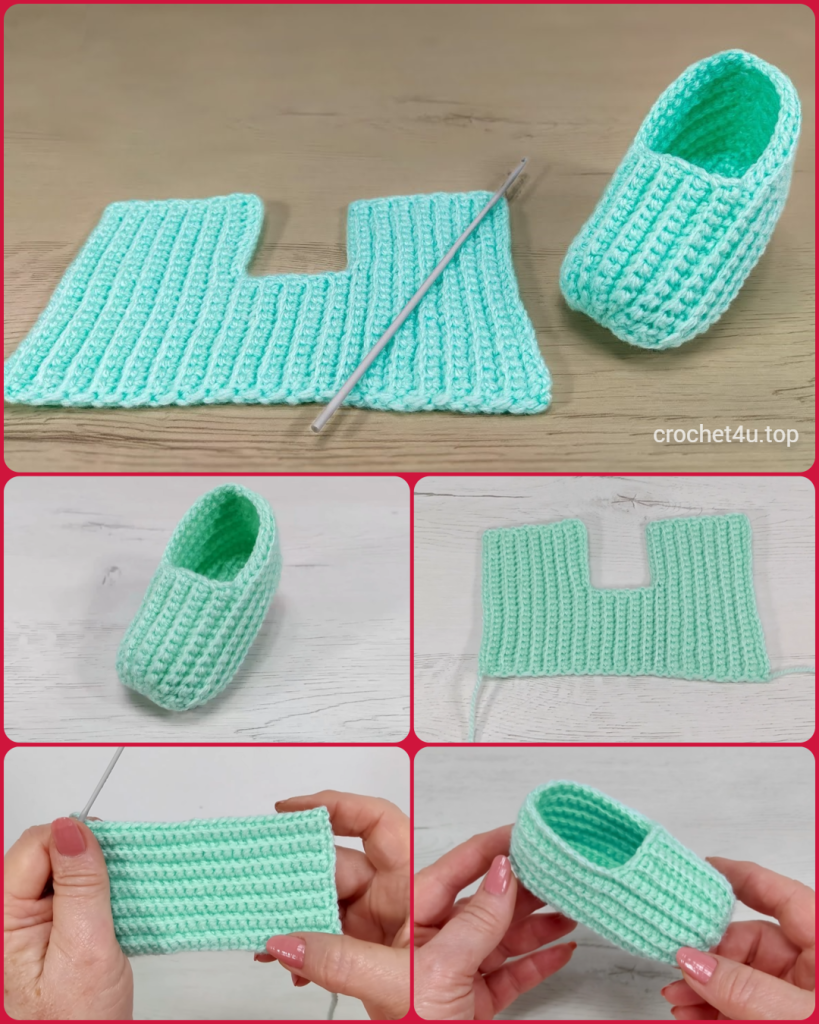
⭐️ Project Overview and Skill Check
| Feature | Detail |
| Skill Level | Easy – Great for confident beginners! |
| Stitches Used | Chain (ch), Slip Stitch (sl st), Single Crochet (sc), Single Crochet Back Loop Only (sc BLO) |
| Construction | Crocheted flat, then seamed. The ribbing runs vertically from the toe to the heel. |
| Sizing | Easily adjustable. Instructions are detailed for a Women’s Medium (US size 7-8). |
| Time to Complete | Approximately 2−4 hours per slipper. |
Export to Sheets
🧵 The Anatomy of Yarn: Choosing the Best Fiber
Choosing the right yarn is key to a comfortable, long-lasting slipper.
The Best Fibers
- Acrylic: This is an excellent choice for slippers. It’s durable, washable, and comes in every color imaginable. It also has great memory and bounce, helping the slipper maintain its shape after wearing and washing.
- Wool/Wool Blend: If warmth is your main goal, a wool blend offers superior insulation. Look for a superwash wool if you want to machine wash your slippers easily.
- Cotton Blend: This is a good option for a lighter, cooler summer slipper. Be aware that cotton doesn’t have as much stretch as acrylic or wool, so sizing must be more precise.
Yarn Weight and Hook Size
The pattern calls for a Worsted Weight (Category 4) yarn.
- Recommended Hook: 5.0 mm (H-8) or 5.5 mm (I-9). Using a hook slightly smaller than what’s recommended on the yarn label is often better for slippers, as it creates a denser fabric that stands up better to wear and tear on the floor.
- Yardage: You’ll need about 100-150 yards per slipper, so ensure you have at least 300 yards for a pair.
📏 Sizing Deep Dive: How to Customize Your Fit
The beauty of this design is that it’s highly customizable. You only need two simple measurements of the intended wearer’s foot:

Measurement A: Slipper Length (The Starting Chain)
This measurement determines the length of your foot.
- Measure from the tip of the longest toe to the back of the heel.
- Add 1 to 1.5 inches (∼2.5−4 cm) to this measurement for comfort and seam allowance.
- To Adjust: Chain until your chain measures this total length.
- For Women’s Medium (Size 7-8): ∼9.5 inches total length. The starting ch 38 should yield this measurement.
Measurement B: Slipper Height/Width (The Number of Rows)
This measurement determines how high the slipper comes up on your ankle and how wide the footbed will be.
- Measure the circumference around the widest part of your foot (across the ball of the foot and the instep).
- Divide this measurement by two, then add 1 to 2 inches (∼2.5−5 cm) for the necessary overlap and the top cuff height.
- To Adjust: Work rows until your flat piece measures this width.
- For Women’s Medium (Size 7-8): ∼7.5 inches total width. The 38 rows in the pattern are designed to achieve this.

📝 Pattern Instructions (Make 2)
1. The Main Flat Piece
The piece is worked back and forth in rows.
Row 1 (Foundation Row): Chain 38 (adjust based on Measurement A). sc in the 2nd ch from the hook and in each ch across. (37 sc)
Row 2 (Ribbing Setup): ch 1 (does not count as a stitch), turn. sc in the back loop only (BLO) of the first stitch and in the BLO of each stitch across. (37 sc)
Rows 3 – 38 (Body): Repeat Row 2 until the piece measures approximately 7.5 inches wide (or the desired width/height based on Measurement B). End after a Row 2 repeat.
- Your piece is a long rectangle that measures ∼7.5 inches wide ×10.5 inches long.
2. Shaping the Instep (Creating the “L” Shape)
This creates the opening for the ankle and foot insertion.

Row 39 (Split Row – Determining Flap Size): This step is key for fit! The total stitch count is 37. We’ll split it into 20 stitches for the longer, outer flap and 17 stitches for the shorter, inner flap. This slight difference makes the slipper curve better over the foot.
ch 1, turn. sc BLO in the first 20 stitches only. (20 sc)
Rows 40 – 46 (First Flap Length): ch 1, turn. sc BLO in the 20 stitches across. (20 sc). Repeat this row 6 times more (for a total of 7 rows for this flap).
- Fasten off the yarn for the first flap.
Reattach Yarn and Second Flap: With the right side facing, join your yarn with a sl st to the 21st stitch of Row 38 (skipping the 20 stitches you just worked over).
Row 47 (Second Flap Start): ch 1 (does not count as a stitch), sc BLO in the 21st stitch and in the BLO of the remaining stitches across. (17 sc)
Rows 48 – 54 (Second Flap Length): ch 1, turn. sc BLO in the first 17 stitches across. (17 sc). Repeat this row 6 times more (for a total of 7 rows for this flap).
- Do NOT fasten off. You will use this working yarn for seaming.
- You now have a flat, L-shaped piece with two short sections sticking up.
✂️ Finishing and Seaming: The Magic Transformation
The seaming is what turns the flat piece into the 3D slipper. Use your yarn needle for all seaming.
1. The Toe Seam
This seam runs along the bottom of your foot.

- Fold the piece in half lengthwise, matching the long edges (the 37-stitch edge).
- Identify the end of the longer flap (the 20-stitch side) and the end of the original starting chain.
- Using the yarn needle, start at the corner of the longer flap and sew the two layers together using a secure and neat stitch. Sew only the length of the long flap (20 stitches). This creates the closed toe box.
- The remaining stitches on the original chain edge will be the sole of the slipper.
2. The Heel Seam
This seam closes the back of the slipper.
- Bring the two short edges of the flaps together—the final row of the long flap and the final row of the short flap.
- Stitch these two edges together to form the heel. Securely fasten off the yarn once complete.
3. The Instep/Ankle Opening
The open edges of the flaps (the 7 rows you worked) naturally create the opening for your foot. You can leave this edge as is, or you can add a simple border for a tidier look:
Optional Edging: Join yarn with a sl st anywhere on the ankle opening. ch 1, sc evenly around the entire opening. sl st to the first sc to join. Fasten off.
4. Final Touches
- Weave in all your loose ends securely into the inside of the slipper.
- Turn the slipper right-side out. The vertical ribs will now be running correctly along the length of the foot.
- Gently stretch the slipper to help the stitches settle. Repeat all steps for the second slipper!
Video Tutorial:
🚫 Common Troubleshooting and Tips
| Issue | Cause | Solution |
| Slipper is too tight | Fabric is too dense, or too few rows were worked. | Use a larger hook (6.0 mm or 6.5 mm) or add 4−8 more rows to the body section (before splitting the flaps). |
| Slipper falls off my heel | The starting chain (length) was too long. | Reduce the number of foundation chains by 2−4 chains on your next slipper. |
| The toe is pointy | Seaming was too tight at the end. | Use a Whipstitch instead of a sl st seam, and loosen your tension slightly when seaming the toe. |
| Seam looks bumpy | Using sl st or sc to seam. | Switch to the Mattress Stitch. It’s nearly invisible from the right side and creates a clean join. |
Export to Sheets
I hope this expanded pattern guide gives you all the details you need to confidently crochet your pair of cozy, ribbed fold-over slippers! Happy hooking!
Do you have a specific yarn color in mind for your project?

