
🌟 Introduction: Building a Continuous Lace Fabric
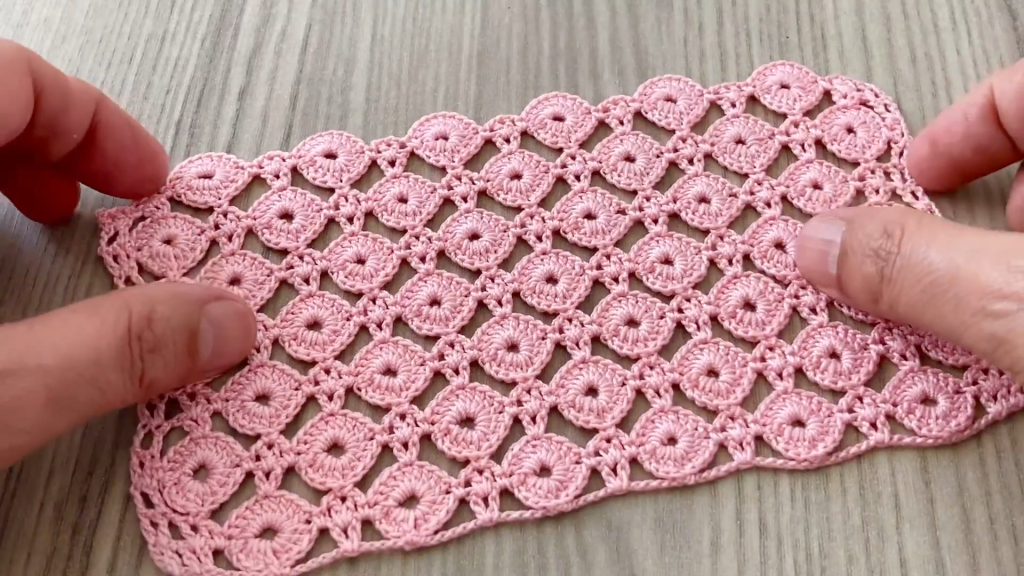
Welcome, fiber artist! The stitch pattern in this image is a gorgeous example of modular, continuous lace fabric. It uses repeating solid circles, or ‘rings,’ connected by a delicate lattice of chains to create an all-over texture. This pattern is incredibly versatile, perfect for lightweight scarves, table runners, blankets, or even curtains.
The key to this design is mastering the tight little ring motif and then the simple three-row repeat that connects them diagonally to form the continuous sheet of fabric. This pattern works up quicker than you might think once you find your rhythm! We’ll be using standard US crochet terms.
Skill Level: Intermediate
Requires comfort with working in the round (for the rings) and accurately placing stitches into chain spaces across straight rows.
🛍️ Materials: Your Essential Supplies
To achieve the precise, repeating detail and the soft drape of the pink fabric, thread or fine yarn is recommended.
- Yarn: Choose a Fingering/Sock Weight yarn (Weight 1) or a Lace Weight/Thread (Size 10 or 20). The sample uses a lovely, soft pink.
- Hook: A steel crochet hook or small metal hook appropriate for your thread. For a fingering weight yarn, try a 2.5mm (US C/2) or 2.75mm hook.
- Tapestry Needle: For weaving in ends.
- Scissors
📋 Abbreviations (US Terms)
- ch: chain
- sl st: slip stitch
- sc: single crochet
- dc: double crochet
- tr: treble crochet (or triple crochet)
- sk: skip
- sp: space
- ch-sp: chain space
- Ring (R): The central solid circle motif (defined in Round 1 below).
- **: Instructions between asterisks are repeated.
- ( ): Instructions in parentheses are worked into the same stitch or space.
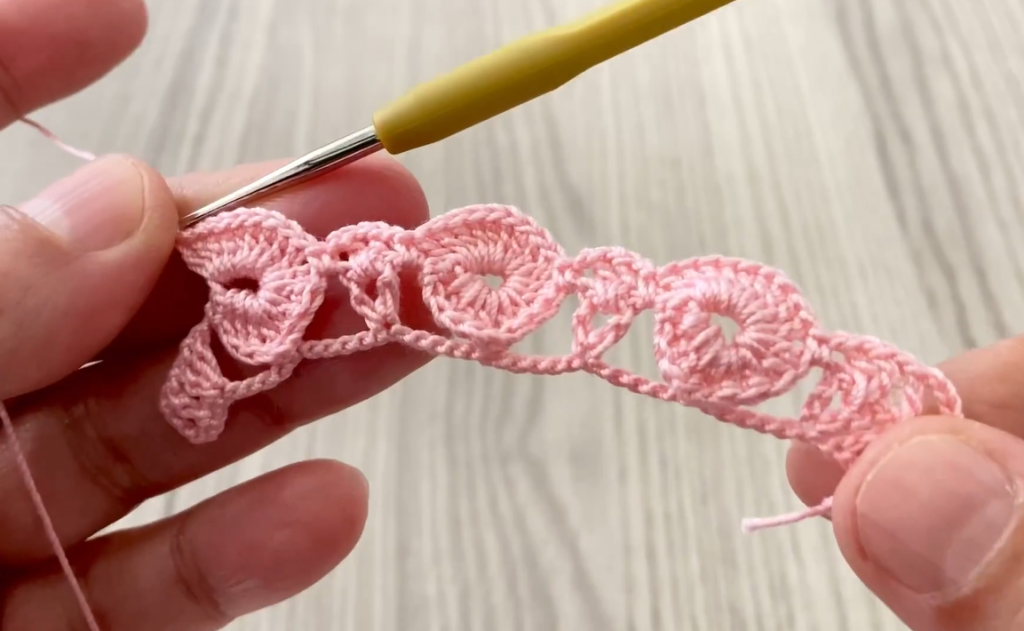
💍 The Base Motif: The Lace Ring (R)
This small motif forms the heart of the entire fabric and is worked entirely in one step.
Ring Motif (R):
- Ch 4, sl st into the first ch to form a ring. (Or use a Magic Ring).
- Ch 3 (counts as first dc), work 15 dc into the ring.
- Sl st to the top of the beginning ch 3 to join. [16 dc]
📐 Pattern Instructions: The Continuous Fabric
This pattern is worked in rows, linking the rings in a staggered pattern. The pattern repeat is worked over 3 rows.
Foundation Row (Row 1): Setting the First Row of Rings
This row establishes your width and creates the first row of solid rings.
- Chain a multiple of 8 plus 4 for the initial spacing (example: Ch $28$).
- Row 1: Sc in the 4th ch from hook.
- *Ch 4, sk 3 chs, sc in the next ch.* (This creates the base for the connecting lattice.)
- Repeat from * to * across the row. The last sc should be in the final ch. Turn.
Row 2: Working the Rings (Odd Row)
This row creates the rings and connects them to the foundation chain.
- Ch 1 (does not count as a stitch), sc in the first sc.
- Ch 2, R (work a complete Ring motif).
- Sl st into the center of the first ch-4 sp from the previous row. Ch 2.
- *Sc in the next sc.
- Ch 2, R (work a complete Ring motif).
- Sl st into the center of the next ch-4 sp from the previous row. Ch 2.*
- Repeat from * to * across the row.
- End with sc in the last sc. Turn.

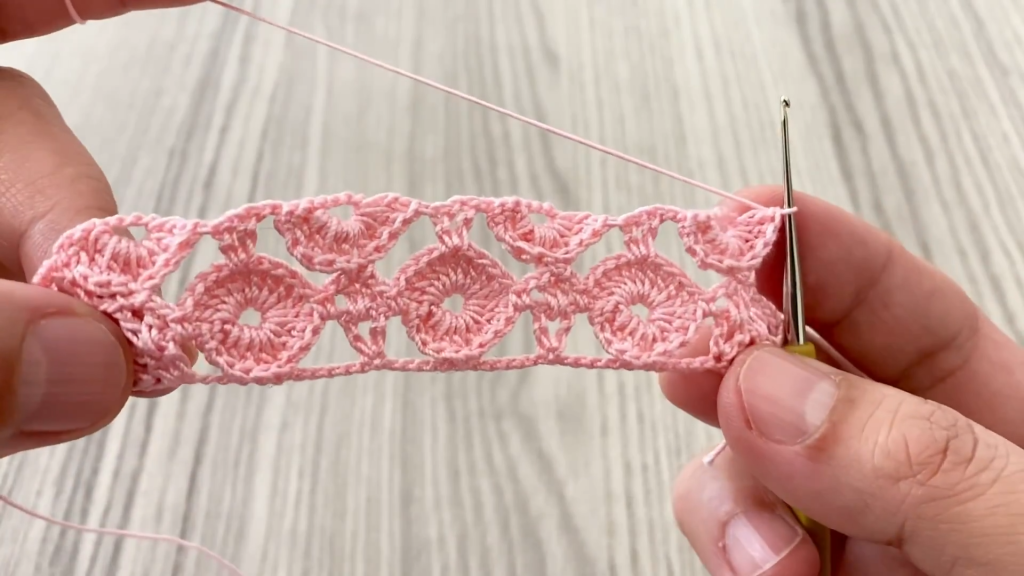
Row 3: Lattice Connection (Chain Row)
This row secures the rings and sets the foundation for the next row of rings, offsetting them.
- Ch 4 (counts as 1 dc, ch 1). Dc in the first sc.
- Ch 4, sc in the center of the Ring (find the 8th or 9th dc of the 16 dc circle).
- *Ch 4, dc in the next sc. Ch 4, sc in the center of the next Ring.*
- Repeat from * to * across the row.
- End with Ch 4, dc in the final sc. Turn.
Row 4: Working the Rings (Even Row)
This row is staggered to fit into the spaces created by Row 3.
- Ch 1 (does not count as a stitch), sc in the first dc.
- Ch 2, sl st into the center of the ch-4 sp below. Ch 2.
- R (work a complete Ring motif).
- *Sl st into the center of the next ch-4 sp below. Ch 2, sc in the next dc.
- Ch 2, sl st into the center of the next ch-4 sp below. Ch 2, R (work a complete Ring motif).*
- Repeat from * to * across the row.
- End with sc in the 3rd ch of the turning ch 4 from the previous row. Turn.
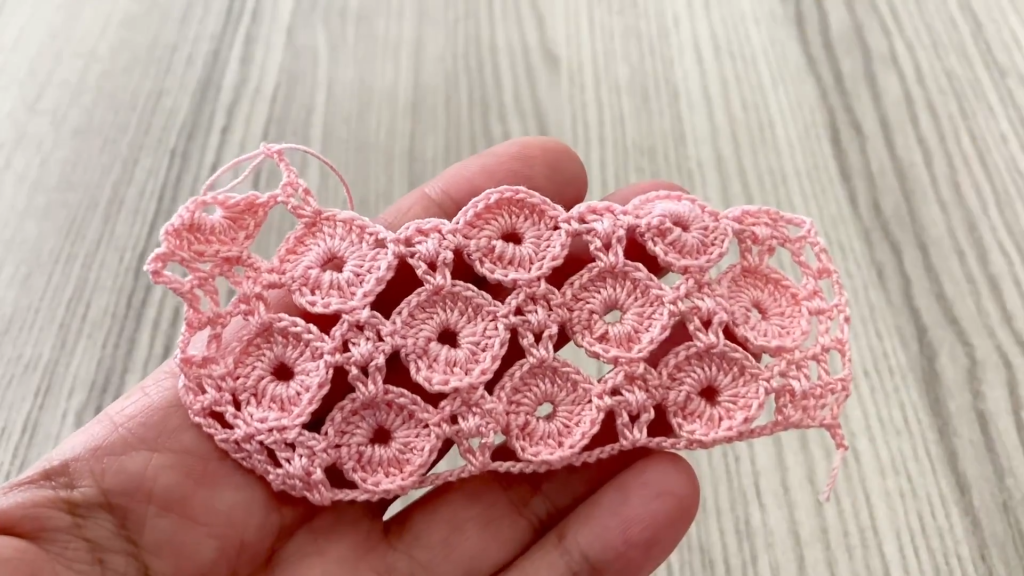
🔁 The Repeat and Continuing the Fabric
The core of the Chain of Rings Lace pattern is the three-row repeat that alternates the placement of the rings.
To Continue the Fabric:
- Repeat Row 2 (Odd Ring Row), Row 3 (Lattice Row), and Row 4 (Even Ring Row) until your piece reaches the desired length.
Important Notes on Repeat:
- Alternating Placement: Row 2 places the rings over the sc points from the foundation. Row 4 places the rings over the dc points from the lattice row, creating the diagonal stagger.
- The Sl St Join: The sl st into the ch-4 space is critical, as it cinches the ring to the lattice, creating the diamond opening.
Video Tutorial:
✂️ Finishing: Edging and Blocking
Edging
To give your fabric a finished, stable look, work a simple edging row around the entire perimeter.
- Top and Bottom Edges: These edges already have a scalloped look. You can work a final row of sc or sl st across the raw chain edges for firmness.
- Side Edges: Work a neat, even row of sc stitches down the raw edges of your piece. Work 1 sc into each sc, and 2 or 3 sc into the side of the dc/turning chain columns, adjusting to keep the edge flat.
Blocking: Opening the Diamonds
Blocking is highly recommended to open up the lattice and define the diamond shape between the rings.
- Dampen: Wet the fabric completely or use steam.
- Pin: Gently stretch the piece width-wise and length-wise. Pin out the center of each large diamond (the ch-4 spaces) to define the geometric pattern.
- Dry: Allow the piece to dry completely before unpinning.
Your beautiful Chain of Rings Lace fabric is now complete! What will you create with this gorgeous texture?


