
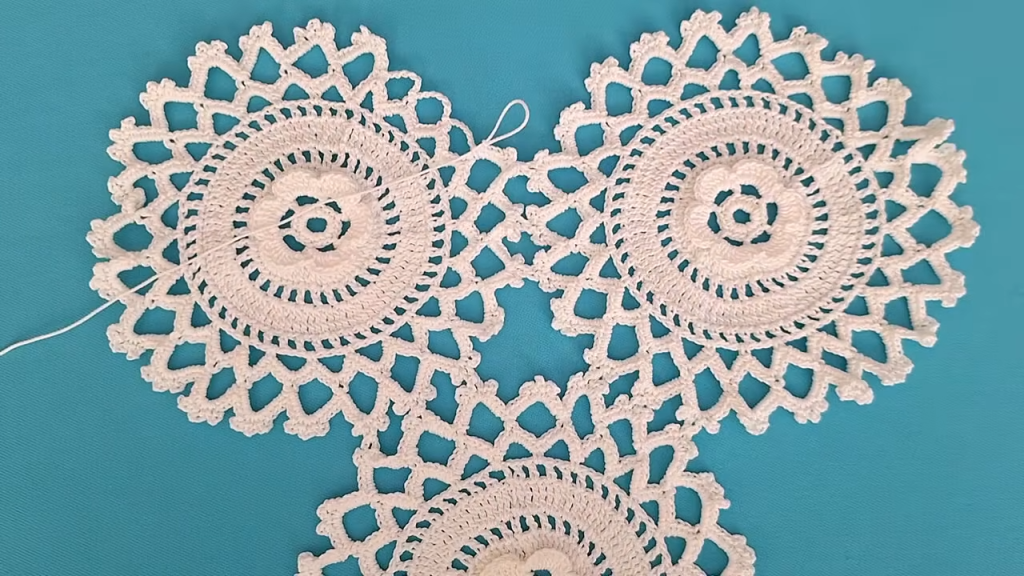
Welcome, diligent fiber artists, to a project that epitomizes elegance and delicate construction! The motif featured in the video is a breathtaking piece of lacework, transitioning from a dense, floral center into an airy, geometrically squared frame. I’ve translated this complex beauty into the Star Blossom Lace Square, a versatile motif perfect for joining into heirloom-quality lace projects like tablecloths, lightweight shawls, or intricate runners.
This pattern is a celebration of classic filet and shell techniques, demanding precise counting but rewarding you with a stunning, durable, and highly decorative finished square.
✨ Project At a Glance
| Skill Level | Intermediate to Advanced Intermediate |
| Finished Size | Approximately 7 x 7 inches (18 x 18 cm) after blocking (using fine thread and a small hook) |
| Construction | Worked in the round from the center out |
| Stitches Used | Double Crochet, Treble Crochet, Shells, Chain Mesh, Pico |
| Project Ideas | Tablecloths, Lace Curtains, Decorative Runners, Light Summer Shawls. |
🧶 Materials and Preparation
To achieve the fine, delicate look shown in the video, lightweight materials are recommended.
- Yarn/Thread: Size 10 Crochet Thread (Fine Weight) or Fingering Weight (Size 1) yarn. Cotton or a cotton blend is highly recommended for sharp stitch definition and blocking success.
- Hook: Steel Hook size 7 (1.5 mm) for thread, or B/1 (2.25 mm) for fingering weight yarn, or size needed to obtain an open, delicate gauge.
- Notions: Tapestry needle for weaving in ends, scissors, liquid starch (optional, for stiffening table linens), and T-pins for blocking.
📝 Essential Stitch Abbreviations (US Terms)
This pattern utilizes Treble Crochet (Tr) to achieve the necessary height for the open lace.
- Ch: Chain
- St(s): Stitch(es)
- Sl St: Slip Stitch
- Sc: Single Crochet
- Dc: Double Crochet
- Tr: Treble Crochet (Yarn over twice)
- Sk: Skip
- Sp: Space
- Shell: 5 Dc in the same stitch or space.
- Pico: Ch 3, Sl St into the first Ch.
🌸 The Star Blossom Lace Square Pattern
This motif is worked in 8 rounds, starting with a dense center and gradually opening into the intricate lace square.
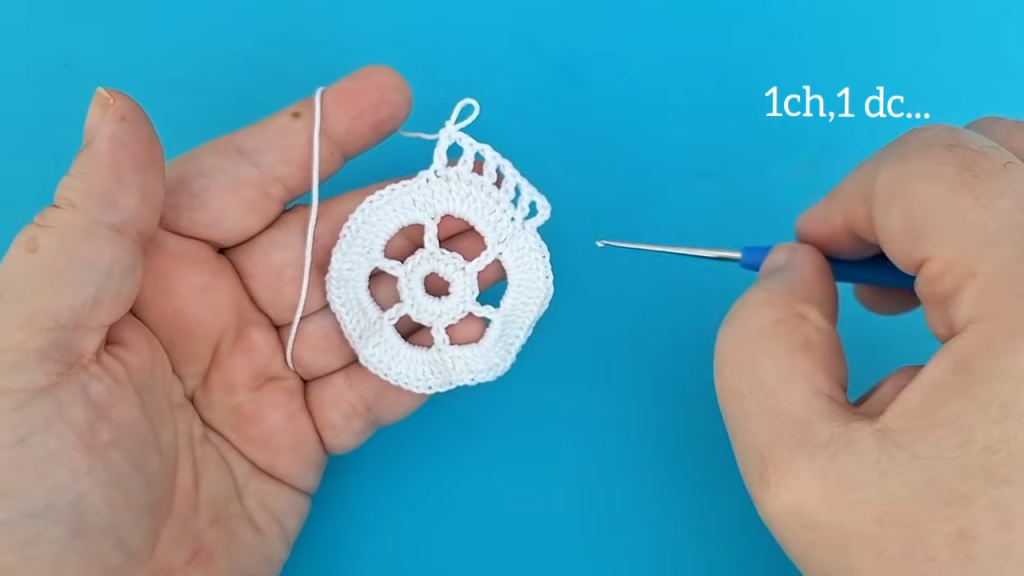
Central Flower Foundation (Rounds 1-3)
Start: Make a Magic Ring (or Ch 6, Sl St to first Ch to form a ring).
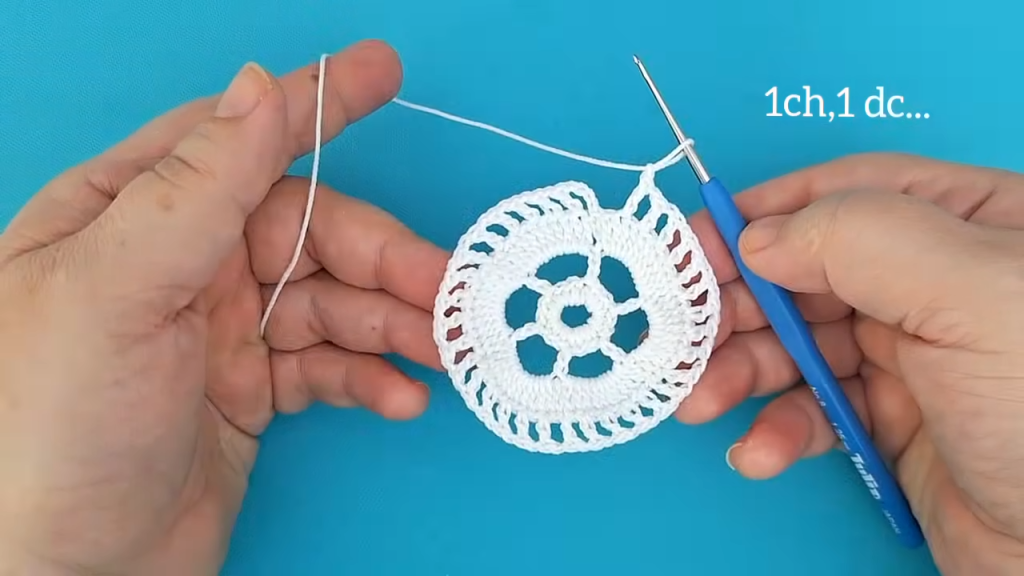
Round 1: Solid Center
Ch 3 (counts as 1 Dc). Work 15 Dc into the ring. Join with a Sl St to the top of the beginning Ch 3. (16 Dc)
Tighten the Magic Ring gently to close the center hole.
Round 2: Defining the Petal Base
Ch 4 (counts as 1 Tr). Work 1 Tr in the same St.
Ch 2, Sk 1 Dc, 2 Tr in the next Dc.
Repeat from * to * 7 more times. Ch 2, join with a Sl St to the top of the beginning Ch 4. (16 Tr, 8 Ch-2 Sps)
This creates 8 pairs of Treble Crochets separated by open chains.
Round 3: Layered Shell Detail
Sl St into the next Tr and into the corner Ch-2 Sp.
Ch 3 (counts as 1 Dc). Work 2 Dc in the same Ch-2 Sp (First 3-Dc Shell).
Ch 3, Sk 2 Tr. Work 3 Dc in the next Ch-2 Sp.
Repeat from * to * 6 more times. Ch 3, join with a Sl St to the top of the beginning Ch 3. (8 x 3-Dc Shells, 8 Ch-3 Sps)
This layer forms the solid foundation of the “blossom” element.
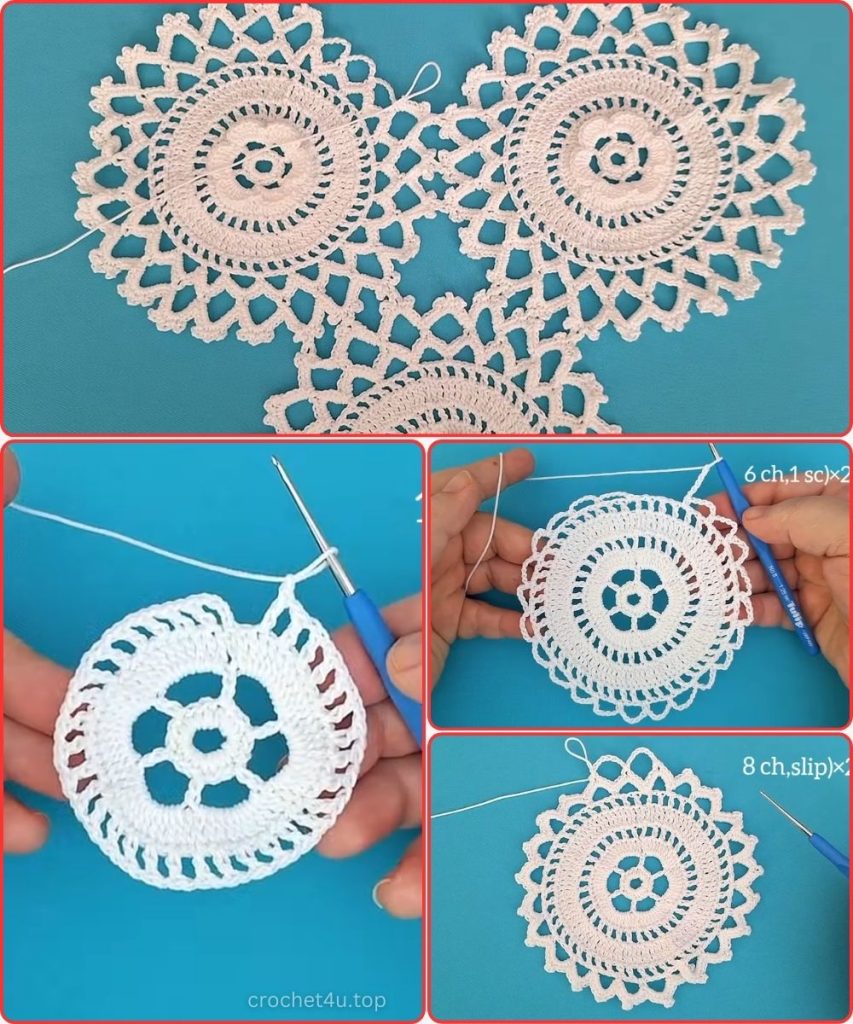
Squaring and Lace Frame (Rounds 4-8)
Round 4: First Squaring Arches
Ch 1 (does not count as a St). 1 Sc in the first 3 Dc.
Ch 5 (Side Arch). 1 Sc in the next 3 Dc.
Repeat from * to * 2 more times (4 x 3-Sc groups total).
Corner: Ch 7, 1 Sc in the next 3 Dc.
Repeat the sequence of (Ch 5 Side Arch x 3, Ch 7 Corner Arch x 1) 3 more times. Join with a Sl St to the first Sc. (4 Corner Ch-7 Sps, 12 Side Ch-5 Sps)
The Ch 7 arches clearly mark the four corners.
Round 5: Treble Frame Expansion
Sl St into the first Ch-5 Sp.
Ch 4 (counts as 1 Tr). Work 4 Tr in the same Ch-5 Sp.
Work 5 Tr in each of the next 2 Ch-5 Sps.
Corner: Work (5 Tr, Ch 3, 5 Tr) in the corner Ch-7 Sp.
Repeat the sequence of (5 Tr in next 3 Ch-5 Sps, Corner) 3 more times. Work 5 Tr in the remaining 3 Ch-5 Sps. Join with a Sl St to the top of the beginning Ch 4. (4 Corners, 4 x 25-Tr sides)
The Treble Crochets add height and structure for the subsequent lace layers.
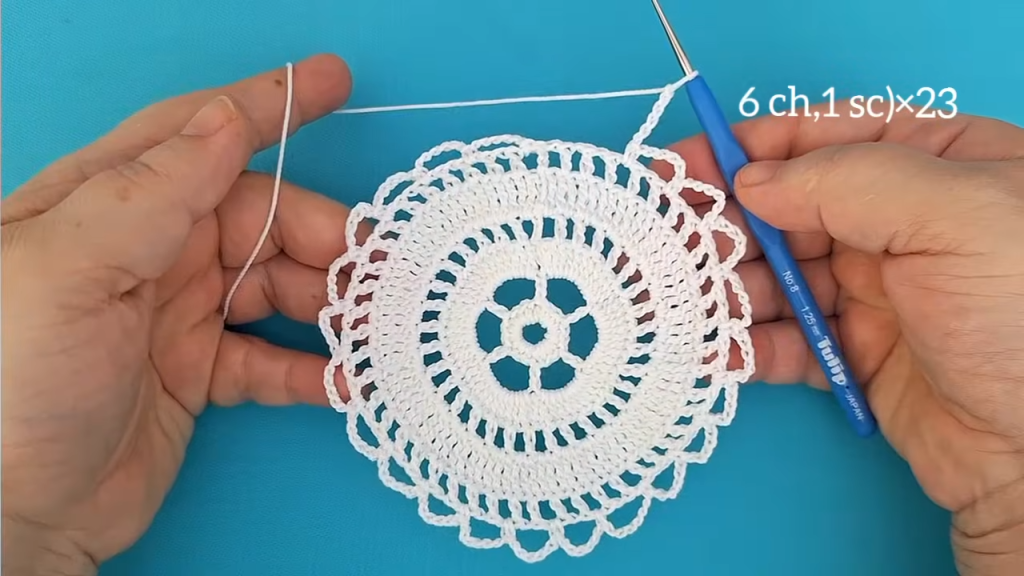
Round 6: Lace Mesh Window
Ch 1 (does not count as a St). 1 Sc in the first 2 Tr.
Ch 3, Sk 2 Tr, 1 Sc in the next Tr. [Ch 3, Sk 2 Tr, 1 Sc in the next 3 Tr] 3 times.
- Corner: Ch 3, Sk 2 Tr. In the corner Ch-3 Sp, work (1 Sc, Ch 5, 1 Sc) (Corner made).
- Side: [1 Sc in the next 3 Tr, Ch 3, Sk 2 Tr] 3 times. 1 Sc in the next Tr. Ch 3, Sk 2 Tr. 1 Sc in the next 2 Tr.*Repeat from * to * 3 more times. Join with a Sl St to the first Sc.
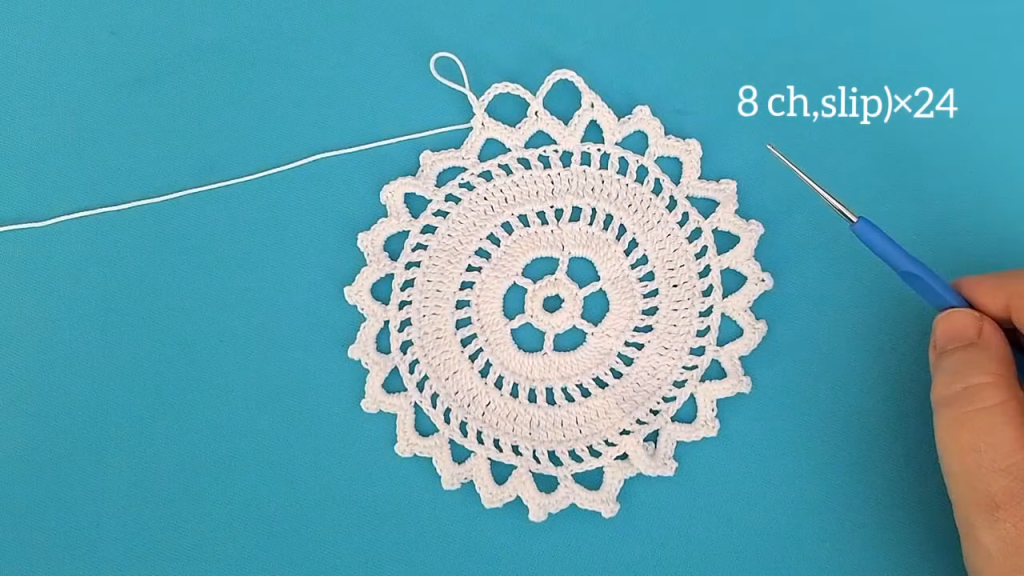
Round 7: Scalloped Edging
Sl St into the next Sc and into the first Ch-3 Sp.
Ch 1 (does not count as a St). 1 Sc in the same Sp.
- Side: [Ch 5, 1 Sc in the next Ch-3 Sp] Repeat across the side until the corner Ch-5 Sp.
- Corner: In the corner Ch-5 Sp, work (Shell, Pico, Shell) (Shell = 5 Dc).
- Side: 1 Sc in the next Ch-3 Sp. [Ch 5, 1 Sc in the next Ch-3 Sp] Repeat across the side.*Repeat from * to * 3 more times. Join with a Sl St to the first Sc.
Round 8: Final Pico Trim
Sl St into the center Ch of the Ch-5 Sp.
Ch 1 (does not count as a St). 1 Sc in the Sp.
- Side: [Ch 3, Pico, Ch 3, 1 Sc in the center of the next Ch-5 Sp] Repeat across the side until the corner.
- Corner: Sl St to the center Pico of the corner (from previous round). Work (3 Dc, Pico, 3 Dc) into that Pico.
- Side: 1 Sc in the center of the next Ch-5 Sp. [Ch 3, Pico, Ch 3, 1 Sc in the center of the next Ch-5 Sp] Repeat across the side.*Join with a Sl St to the first Sc.Fasten off.
💡 Tips for Crafting Excellence
- Lace Tension: Maintaining consistent and slightly loose tension is paramount, especially for the chain spaces (Ch 5 and Ch 7). Tight chains will cause the square to cup and buckle.
- Pico Definition: When working the Pico (Ch 3, Sl St into the first Ch), pull the loop through firmly but not tightly. This ensures the little decorative point stands up neatly.
- Counting Clusters: Always ensure you have the correct number of stitches and chain spaces on each side before moving to the next round. Miscounting in a lace pattern can require frog-stitching several rounds back.
- Joining Method: For joining multiple squares, the Join-As-You-Go (JAYG) Pico Method is ideal, where the Picos in the final round are slip-stitched into the corresponding Picos of a finished square.
Video Tutorial:
🛁 Finishing and Care
- Weaving Ends: Securely weave in all yarn tails on the back side of the work using your tapestry needle. Due to the openness of the lace, hide the tails within the dense DC groups of the central rounds.
- Blocking (Crucial): For any lace motif, blocking is non-negotiable. It opens the chain spaces, sharpens the corners, and fully reveals the geometric beauty of the lace.
- Method: Wet the square thoroughly (or steam lightly). Pin the motif tautly and precisely to a foam blocking mat, securing all four corners and gently pulling the chain arches to open them up.
- Drying: Allow the square to dry completely before unpinning.
- Starching (Optional for Linens): If using the squares for a tablecloth or runner, applying a light coat of liquid starch after the squares are dry will give them a stiff, professional finish that holds their shape beautifully.
Enjoy the sheer elegance and delicate structure of your new Star Blossom Lace Square project!


