
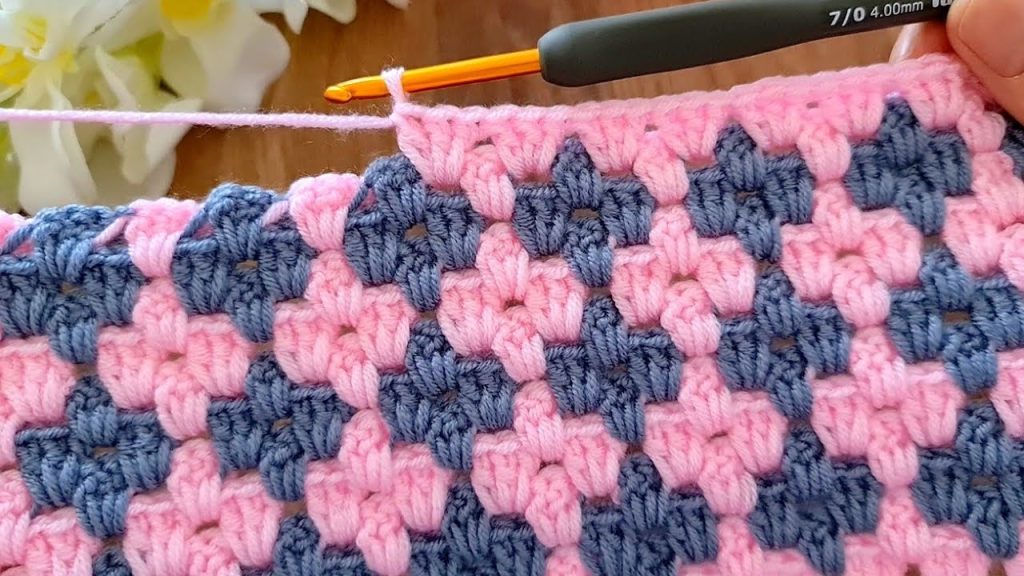
Welcome back, creative crocheters! Today, we’re diving into a pattern that brings a timeless charm and a wonderful pop of color to your projects. The fabric you see above—a delightful alternating block design in pink and blue, made with dense cluster stitches—is what I call the “Checkerboard Cluster Stitch.”
This stitch creates a thick, plush, and reversible fabric with excellent drape and warmth, making it absolutely perfect for blankets, scarves, cushion covers, or sturdy placemats. You asked for long and detailed, and this pattern, while simple in concept, requires careful attention to color changes. Let’s conquer this 2-row, 2-color repeat!
🛍️ Materials & Tools: Your Color-Changing Kit 🛍️
For this pattern, selecting the right yarn and hook will ensure your checkerboard blocks are well-defined.
- Yarn: I highly recommend Worsted Weight (Weight 4) acrylic or a soft wool blend. The stitch definition is excellent with these fibers, and they handle color changes beautifully. You’ll need two contrasting colors (e.g., Color A: Pink, Color B: Blue).
- Crochet Hook: A hook size appropriate for your chosen yarn. For Worsted weight, a 5.0 mm (H/8) or 5.5 mm (I/9) hook works well, as it keeps the clusters defined without being too stiff.
- Scissors: For trimming yarn.
- Tapestry Needle: Essential for neatly weaving in ends, especially important with color changes.
- Stitch Markers (Optional): Useful for marking the first and last stitch of the row, particularly when managing multiple yarn strands.
📚 Stitch Glossary: The Language of Clusters 📚
This pattern primarily uses standard US Crochet Terms. The key element is the 3 dc-cluster, which forms the “blocks” of the checkerboard.
| Abbreviation | Stitch Name | Description |
| ch | Chain | Standard chain. |
| st(s) | Stitch(es) | |
| sk | Skip | |
| sl st | Slip Stitch | Standard slip stitch. |
| sc | Single Crochet | Standard single crochet. |
| dc | Double Crochet | Standard double crochet. |
| 3 dc-Cl | 3 Double Crochet Cluster | Work 3 dc into the same stitch or space. This forms one solid block. |
| Color A | Your first chosen color (e.g., Pink). | |
| Color B | Your second chosen color (e.g., Blue). |
Export to Sheets
📐 Gauge and Pattern Repeat: Critical for Checkerboard 📐
Achieving an even tension is important so your blocks are square and consistent.
Pattern Repeat:
The pattern is worked over a multiple of 6+2 chains for the starting foundation. This accounts for the repeating 3 dc-Cl block with 1 ch-sp in between, plus starting/ending stitches.
- For our detailed swatch, we will start with Ch 32. (6×5=30+2=32).
- The ch 3 at the beginning of rows counts as 1 dc.
Gauge (Approximate):
- One full checkerboard square (one block of Color A next to one block of Color B) should measure approximately 1.5 inches (3.8 cm) wide and 1.5 inches (3.8 cm) high after a few rows.
🎨 The “Checkerboard Cluster Stitch” Pattern: Row by Row 🎨
This pattern is a fascinating 2-row repeat, but the color changes make it effectively a 4-row “cycle” to get the checkerboard effect. We will be carrying or dropping yarn at the end of rows, as shown in the image.
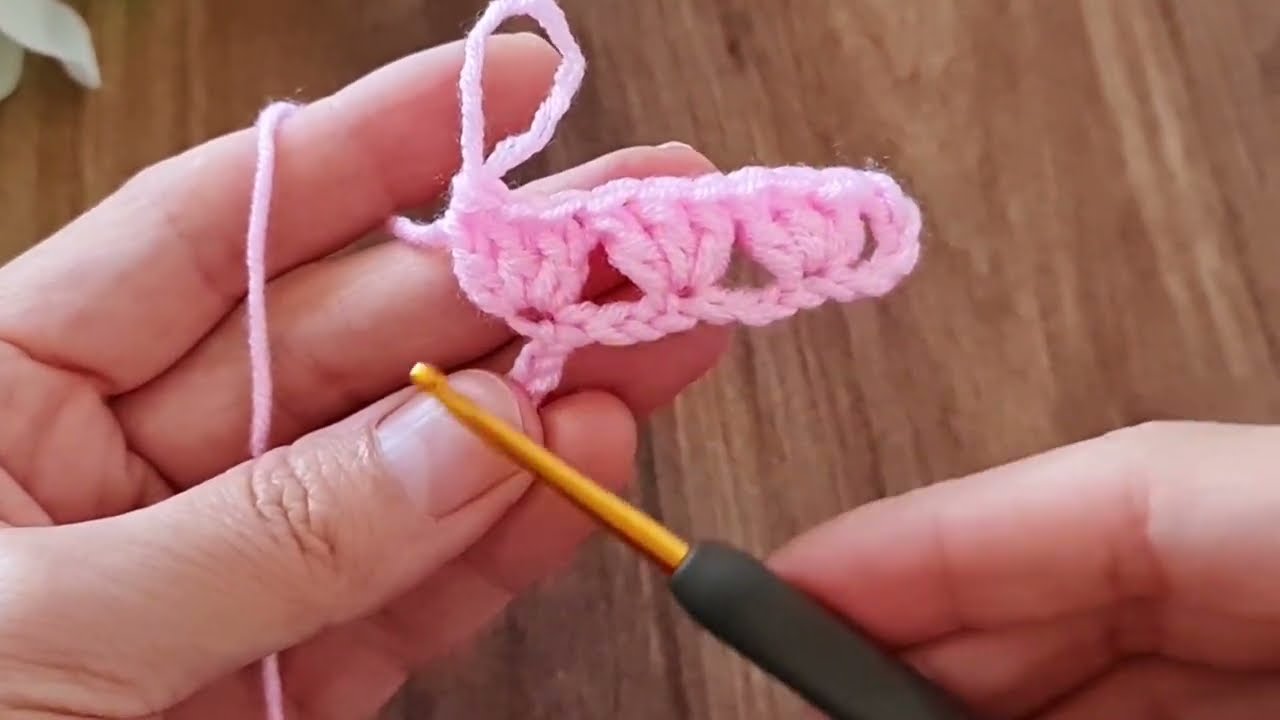
▶️ Foundation Row:
- With Color A, Ch a multiple of 6+2. (For swatch, Ch 32).
Row 1 (RS – First Color Clusters):

- Dc in the 4th ch from the hook (counts as 2 dc).
- 2 dc in the same ch (first 3 dc-Cl completed).
- *Sk 2 ch, 3 dc-Cl in the next ch.*
- Repeat from * to * across the row until 2 chs remain.
- Sk 1 ch, dc in the last ch.
- DO NOT TURN. Drop Color A, pick up Color B.
This row creates the first layer of clustered blocks in Color A, with alternating open spaces.
Row 2 (WS – Second Color Clusters – First Pass):
- With Color B, Ch 3 (counts as 1 dc). This chain is worked behind the Color A fabric.
- 3 dc-Cl in the first ch-sp from Row 1. (This ch-sp is the space created by the skipped 2 chs or the turning ch-3 from Row 1).
- *Ch 1, 3 dc-Cl in the next ch-sp from Row 1.*
- Repeat from * to * across the row, ending with 3 dc-Cl in the last ch-sp (the top of the turning ch-3 from Row 1).
- Dc in the top of the turning ch-3.
- Turn. Drop Color B, pick up Color A.
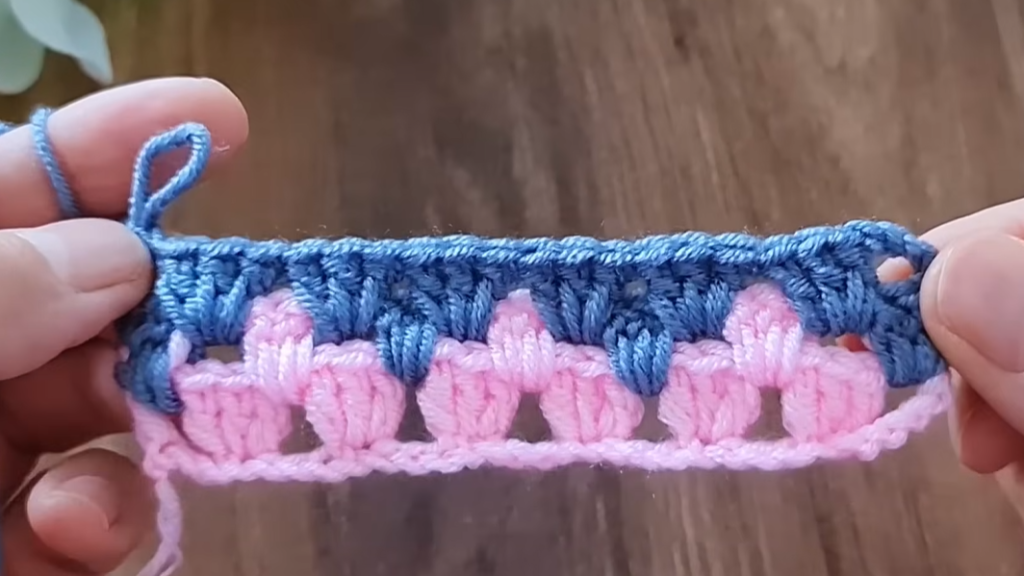
This row places the Color B clusters into the spaces created by Row 1. The ch 1 in between clusters creates the new spaces.
Row 3 (RS – First Color Clusters – Second Pass):
- With Color A, Ch 3 (counts as 1 dc).
- 3 dc-Cl in the first ch-1 sp from Row 2.
- *Ch 1, 3 dc-Cl in the next ch-1 sp from Row 2.*
- Repeat from * to * across the row, ending with 3 dc-Cl in the last ch-1 sp.
- Dc in the top of the turning ch-3.
- DO NOT TURN. Drop Color A, pick up Color B.
This row places the Color A clusters directly on top of the Color B clusters from the previous row, filling the empty squares.

Row 4 (WS – Second Color Clusters – Second Pass):
- With Color B, Ch 3 (counts as 1 dc). This chain is worked behind the Color A fabric.
- 3 dc-Cl in the first ch-1 sp from Row 3.
- *Ch 1, 3 dc-Cl in the next ch-1 sp from Row 3.*
- Repeat from * to * across the row, ending with 3 dc-Cl in the last ch-1 sp.
- Dc in the top of the turning ch-3.
- Turn. Drop Color B, pick up Color A.
This row completes the second layer of blocks in Color B, filling the remaining empty squares and creating the full checkerboard effect.
Video Tutorial:
🔄 The Repeat Sequence: Building the Fabric 🔄
The pattern is now fully established! To continue the Checkerboard Cluster Stitch, you will repeat Rows 1-4 until your project reaches your desired size.
- The repeating cycle is Rows 1, 2, 3, and 4.
- Crucial Tip: Remember to drop the inactive yarn to the back of your work to keep your edges neat, and then pick it up when you’re ready to use it for the next row. This avoids having to cut and reattach constantly.
🚿 Finishing and Blocking: Polishing Your Pattern 🚿
While this stitch is dense and holds its shape well, a light block can help even out any tension discrepancies from the color changes.
- Final Edge: For a clean, straight edge, finish after a Row 4 (or any even-numbered row).
- Weave in Ends: This pattern generates a few ends from the color changes, so weave them in meticulously with your tapestry needle.
- Light Blocking: A light steam block is ideal for acrylic or wool blends. Gently lay out your fabric, steam it, and lightly pat it into shape, ensuring the checkerboard squares are even. Avoid heavy stretching.
- Dry: Allow the piece to cool and dry completely.
🌟 Project Inspiration 🌟
- Warm Blanket or Throw: The dense texture and color changes are perfect for a cozy blanket.
- Reversible Scarf or Cowl: Looks great from both sides!
- Cushion Cover: Adds a bold, graphic element to home decor.
- Sturdy Placemats: The thick fabric is practical and stylish.
Happy crocheting! I know you’ll love the vibrant, classic look of the Checkerboard Cluster Stitch!


