
✨ Introduction: Elegance in Every Fan
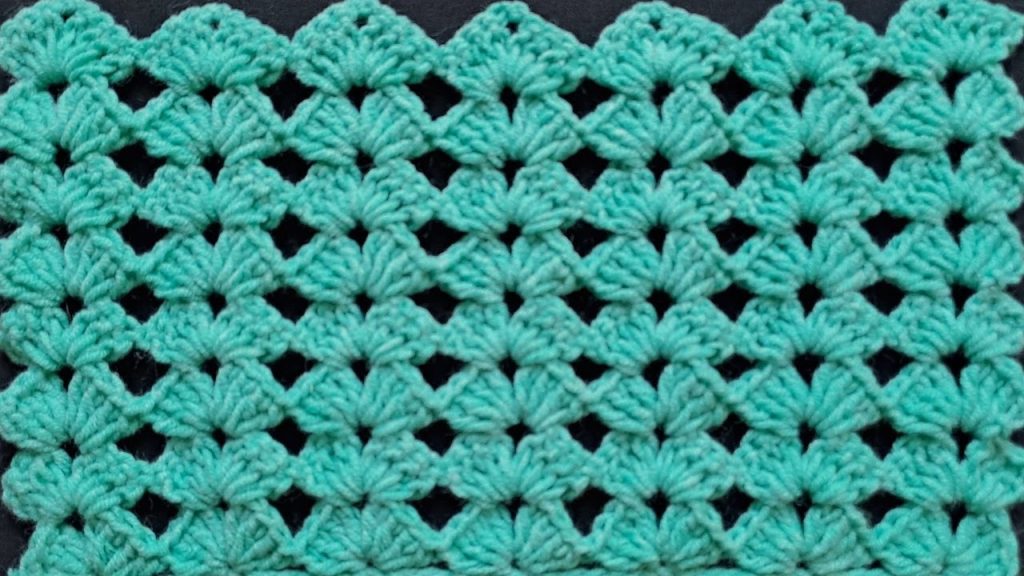
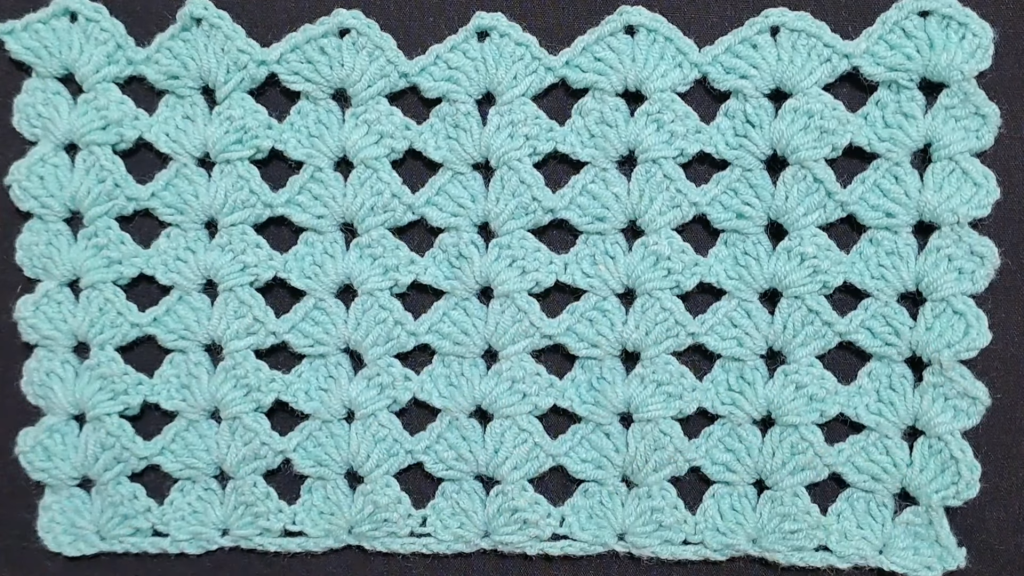
Welcome to a pattern that proves that simplicity can be absolutely stunning! The Quick Fan Shell Lace (or Puntada Abanico) is an elegant, open-work stitch featured in the video tutorial that works up quickly and creates a beautiful, continuous scallop effect. It utilizes a repeating, one-row pattern, making it highly relaxing once you get the hang of the initial setup.
This stitch is fully reversible, meaning it looks identical and gorgeous on both the front and back. Its airy structure and exceptional drape make it a perfect choice for lightweight accessories and garments.
Why You’ll Love This Stitch
- Fast Workup: The large shell motifs cover distance quickly.
- Fully Reversible: No “wrong side” means it’s perfect for scarves, cowls, and blankets.
- Excellent Drape: Ideal for fine or lightweight yarns, creating a soft, flowing fabric.
- Beginner-Friendly: Uses only basic Double Crochet (DC) and Chain stitches.
Suggested Projects
| Project Type | Ideal Yarn Weight | Notes |
| Elegant Shawls & Wraps | Fingering (1) or Sport (2) | The drape is phenomenal for these projects. |
| Lightweight Scarf/Cowl | DK (3) or Light Worsted | Shows off the reversible texture beautifully. |
| Lace Curtains or Mantels | Cotton Thread | Provides an heirloom, decorative touch to home goods. |
| Summer Top/Vest Panel | Cotton or Bamboo Blend | The open work is breathable for warm weather. |
📌 Pattern Notes & Gauge
The pattern is structured around a large, symmetrical shell motif that uses 7 stitches of the foundation chain for each repeat.
Stitch Multiple
Chain a multiple of $7 + 4$ for the initial foundation row.
(Example: For 3 motif repeats: $7 \times 3 = 21$, plus $4 = 25$ starting chains.)
(The video sample uses 21 chains, which is $7 \times 3$, but then adds 4 more for a total of 25 to start the first motif.)
Abbreviations (US Terms)
| Abbreviation | Meaning |
| ch | Chain |
| st(s) | Stitch(es) |
| sl st | Slip Stitch |
| dc | Double Crochet |
| sk | Skip |
| Shell | Fan Shell Motif: (4 DC, Ch 3, 4 DC) |
| ch-sp | Chain Space |
Materials
- Yarn: A light, smooth yarn is recommended. The video uses a 3-strand cotton blend yarn.
- Hook: A size appropriate for your yarn. For the cotton yarn shown, a 2.0 mm (B/1) hook is used. If using a DK weight yarn, a 3.5 mm (E/4) hook is a good substitute.
- Tools: Scissors and a tapestry needle for weaving in ends.
Tension and Gauge
Tension is key to the overall drape. A slightly looser tension will help the fabric flow. Work your shells evenly, ensuring the four Double Crochets on each side of the Ch-3 space are uniform in height and spacing.
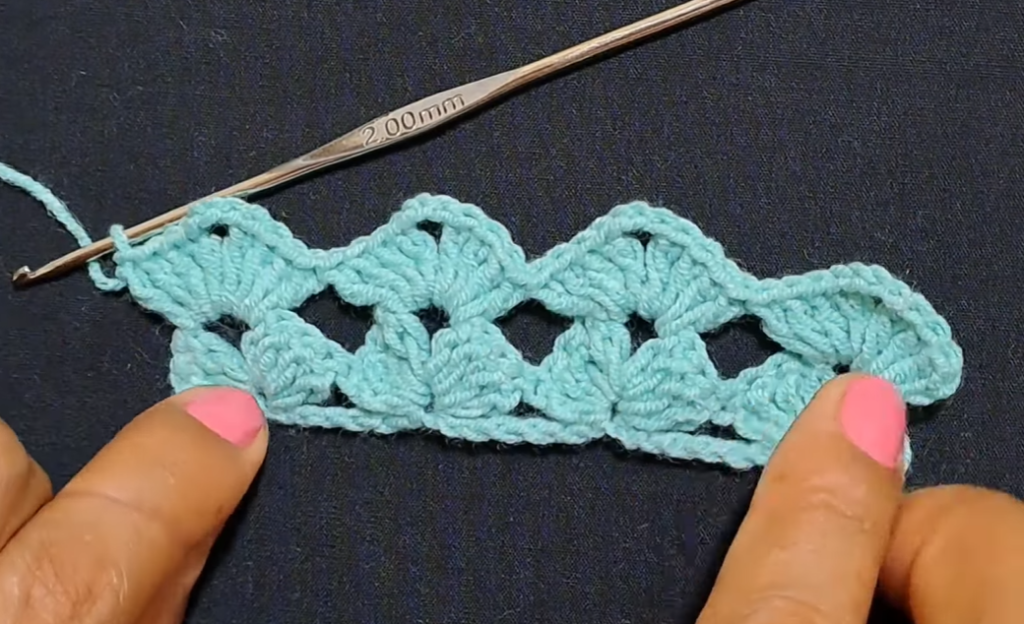
⛓️ Foundation Row: Creating the First Shells (Row 1)
This row establishes the pattern width and the placement of your first row of fan shells.

- Chain: Ch a multiple of $7 + 4$ to your desired width. (e.g., Ch 25).
- Row 1 (Foundation Motifs):
- Sk 3 ch from the hook (counts as 1 DC).
- Work 3 DC into the 4th ch from the hook (total of 4 DC).
- Ch 3.
- Work 4 DC into the same 4th ch from the hook. (First Shell Completed)
- Repeat Motif:
- Sk 6 ch.
- Work a Shell (4 DC, Ch 3, 4 DC) into the 7th ch from the hook.
- Continue: Rep the motif sequence [Sk 6 ch, work Shell into the 7th ch] across the row.
- End: Your last shell should be worked into the final chain stitch.
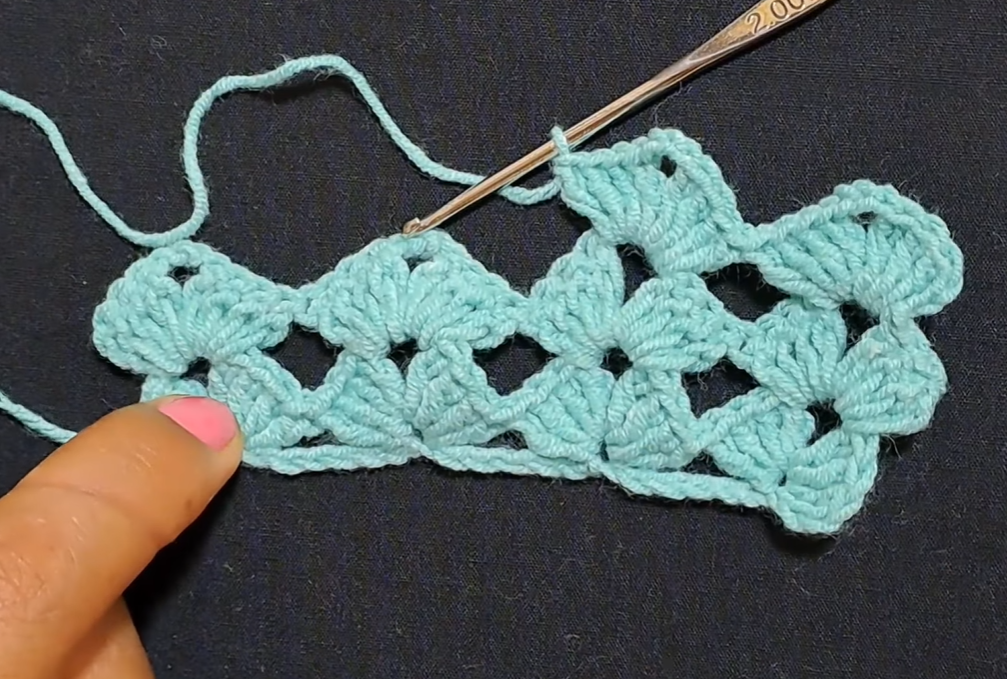
🐚 The Continuous Repeat: Building the Fabric (Row 2 Onwards)
This pattern works by placing the new shell directly into the open Ch-3 space of the shell below it, creating a continuous, offset scallop.
Row 2 (The Slip Stitch Start)
- Start: Turn your work. You must now position your hook into the center Ch-3 space of the previous row’s first shell.
- Move to Center: Sl st into the top of the first DC, sl st into the top of the second DC, sl st into the top of the third DC, and sl st into the Ch-3 space.
- First Shell: Ch 3 (counts as 1 DC). Work 3 DC into the same Ch-3 space (total of 4 DC).
- Ch 3.
- Work 4 DC into the same Ch-3 space. (First Shell Completed)
- Motif Repeat: Work a Shell (4 DC, Ch 3, 4 DC) directly into the Ch-3 space of the next shell.
- Continue: Rep the motif sequence [Work Shell (4 DC, Ch 3, 4 DC) into the Ch-3 space of the next shell] across the row.
- End: Your last shell will be worked into the Ch-3 space of the very last shell from the previous row.
All Subsequent Rows (Row 3, 4, 5, etc.)
All subsequent rows are worked exactly the same as Row 2:

- Start: Turn your work.
- Move to Center: Sl st into the first 4 stitches/spaces to reach the center Ch-3 space.
- Work Shell: Work a Shell (4 DC, Ch 3, 4 DC) into the Ch-3 space you just reached.
- Repeat: Work a Shell (4 DC, Ch 3, 4 DC) into the Ch-3 space of every shell across the row.
- End: Finish with a Shell in the last Ch-3 space.
💡 Tips & Troubleshooting
Straight Edges
The repetitive action of slip stitching to the center ensures that the top edge of your fabric remains consistently scalloped, while the foundation chain forms a straight bottom edge. The side edges, due to the structure, will be naturally wavy or scalloped.
Counting is Critical
The success of this pattern relies on finding the exact center of the previous shell. If you find your edges start to get wobbly or your shells aren’t lining up, check your slip stitch count at the beginning of the row to ensure you’re landing in the center Ch-3 space.
Alternative Start (For a Straighter Side Edge)
If you dislike the look of the slip stitches at the beginning of each row, you can modify the start:
- Ch 3 (counts as 1 DC), turn.
- Shell Placement: Work your Shell (4 DC, Ch 3, 4 DC) into the Ch-3 space of the previous row’s shell.
- End: Work your final shell, and then work 1 DC into the last DC of the previous row’s shell (or the third chain of the starting Ch-3) for a cleaner anchor.
✂️ Finishing & Styling
Finishing
When your project has reached the desired length:
- End after a complete shell row.
- Fasten off, leaving a long tail for weaving.
- Weave in all ends securely using a tapestry needle.
Video Tutorial:
Blocking
Due to the open lace and the natural scallop created by the shells, blocking is highly recommended.
- Wet or Steam Block: Dampen the finished piece thoroughly (or steam it, depending on the fiber).
- Shape: Gently pull and shape the piece, ensuring all the fan motifs are evenly opened up and the chains are aligned. Pin the edges to keep them straight while drying.
- Dry: Allow the piece to dry completely before unpinning. Blocking will significantly enhance the drape and definition of your lace.
Border Suggestions
Since the pattern naturally creates a bold, scalloped edge on the top and bottom, often no border is needed. However, if you desire a clean side edge, a simple row of Single Crochet (SC) worked evenly along the wavy side edges will provide a finished, stabilizing frame.


