
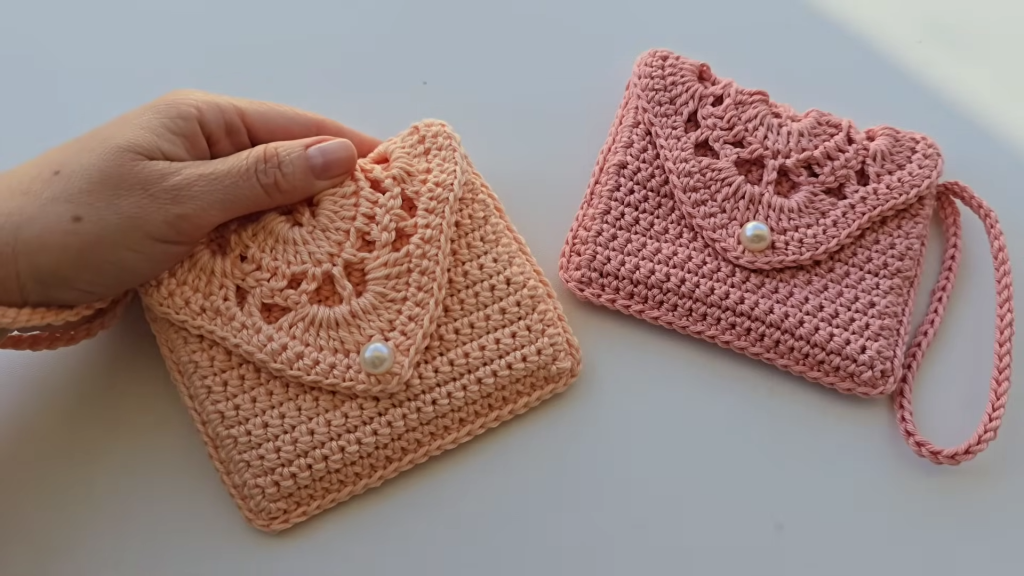
Welcome to a pattern that takes the stress out of finishing! The “Trilogy” wallet is named for its three main panels—the seamless outer shell and the internal divider—which are ingeniously joined together using a special single crochet technique. This piece features two roomy internal compartments, perfect for cash, cards, and coins, all secured by a structured, fan-shaped lattice flap.
This comprehensive guide is designed for intermediate crocheters looking to master the art of seamless construction.
🧶 Materials & Key Tools
| Icon | Item | Details |
| Hook | Crochet Hook | 3.0 mm (or size needed to achieve a very dense, sturdy fabric). |
| Yarn | Main Color (MC) | Approximately 80-100g of lightweight (Fingering/Sport) but firm yarn, such as cotton, cotton blend, or fine cord. A tight tension is crucial. |
| Hardware | Button/Pearl | One decorative button or pearl (approx. 10mm-15mm) for closure. |
| Notions | Markers & Needle | Stitch Markers, Scissors, and a Tapestry Needle. |
| Size | Finished Wallet | Approx. 11.5 cm (Width) x 9.5 cm (Height). |
| Weight | Approximate Weight | 36-37 grams. |
📝 Abbreviations & Gauge Notes
| Abbreviation | U.S. Terminology | Description |
| ch | Chain | |
| sl st | Slip Stitch | |
| sc | Single Crochet | |
| dc | Double Crochet | |
| st(s) | Stitch(es) | |
| rep | Repeat | |
| BLO | Back Loop Only | Working into the loop furthest from you. |
Gauge Note: Due to the structured nature of the piece, the target gauge is very firm. Your finished work should be dense enough that it stands on its own. The final panel should measure approximately 10 cm wide.
🧱 Part 1: The Pouch Body & Divider Panels
We create the two rectangular panels in plain Single Crochet. Panel A acts as the divider, and Panel B forms the outer shell.
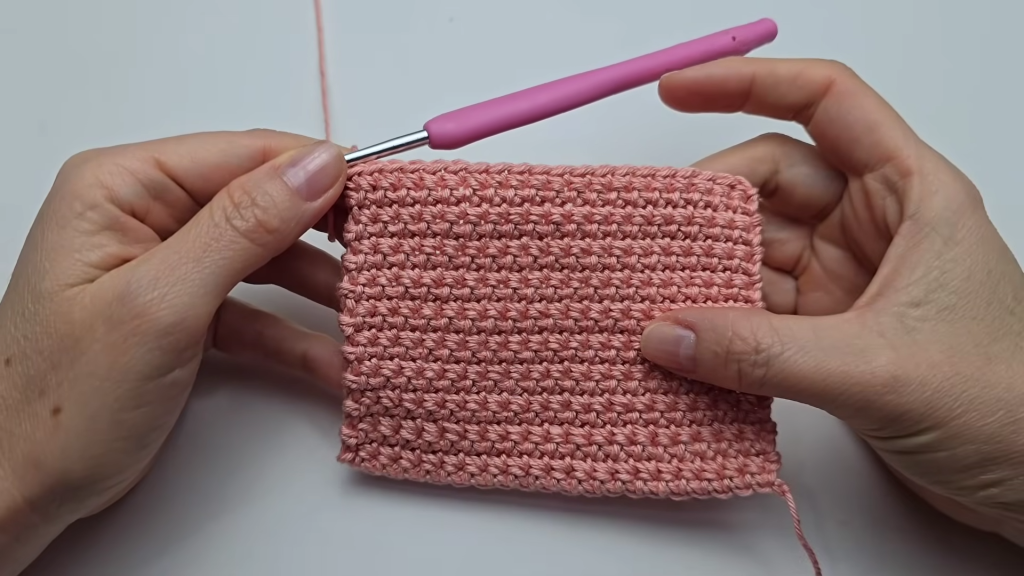
Panel A: The Internal Divider (20×20 SC)
- Foundation: Ch 21.
- Row 1: Sc in the 2nd ch from the hook and in each ch across. (20 sc).
- Row 2: Ch 1, turn. Sc in each st across. (20 sc).
- Repeat Row 2 until you have completed 20 rows total.
- Fasten off and weave in ends.
Panel B: The Outer Shell (40 Rows, including Hinge)
This piece is twice as long as Panel A to allow it to fold perfectly around the divider.
- Foundation: Ch 21.
- Row 1 – 20: Work 20 rows of 20 SC, exactly as for Panel A.
- Row 21 (The Hinge Row): Ch 1, turn. Sc into the BLO of each st across. (20 sc).
- This BLO row creates a subtle crease, marking the bottom of the wallet where the fabric will fold cleanly.
- Row 22 – 40: Ch 1, turn. Sc in each st across (working under both loops now). Work 19 more rows for a total of 40 rows.
- Do not fasten off. Proceed immediately to the Edging step.
Pouch Edging (SC Border)
- Side Edge: Ch 1, turn. Work 1 SC into the end of each of the 40 rows down the side. (40 sc).
- Bottom Edge: Work 1 SC into each of the 20 foundation chain stitches along the bottom. (20 sc).
- Second Side Edge: Work 1 SC into the end of each of the 40 rows up the second side. (40 sc).
- Top Edge: Work 1 SC into the front loop of each of the 20 stitches along the top (the top of Row 40). (20 sc).
- Sl st to the first SC to join. (Total 120 SC).
- Do not fasten off. The piece is ready for assembly.
🔗 Part 2: Triple-Layer Seamless Assembly
This unique step joins the two pieces together to form the divided pouch, with no sewing required for the sides and bottom.
- Positioning: Fold Panel B at the Hinge Row (Row 21). Insert Panel A (the Divider) into the center of the folded Panel B, aligning the edges.
- The Starting Point: The join will start at the corner of the two open sides of the pouch.
- Triple-Layer SC Join:
- Insert hook through the top loop of the front wall (Panel B).
- Insert hook through the top loop of the divider (Panel A).
- Insert hook through the top loop of the back wall (Panel B).
- Yarn over, pull through all three loops (leaving a large loop on the hook).
- Yarn over, pull through the two loops on the hook to complete the SC.
- Repeat the Triple-Layer SC Join for all 40 stitches down the side edge.
- Corner Turn: Work 2 SC into the very corner stitch to turn smoothly.
- Bottom Edge Join: Work SC through the corresponding stitches of the front wall, the divider’s bottom edge, and the back wall. The divider’s bottom edge is also 20 stitches, which fits perfectly.
- Second Side Edge: Repeat the Triple-Layer SC Join for all 40 stitches up the second side edge.
- Sl st to the first SC of the join.
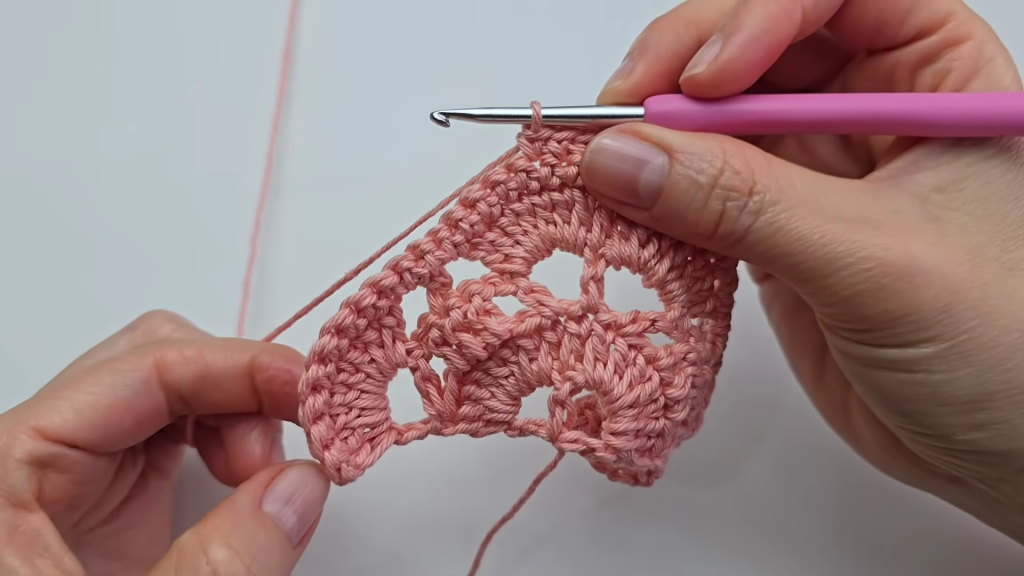
👑 Part 3: The Lattice Flap (Decorative Closure)
This flap is worked in increasing rows to achieve the fan or triangle shape.
- Foundation (MR): Ch 3 (counts as 1 DC). Work (ch 4, 1 dc) into the ring. Repeat (ch 4, 1 dc) one more time. (3 DC, 2 ch-4 loops). Pull MR tight.
- Row 2 (7-DC Shells): Ch 3 (counts as 1 DC), turn. Work 7 dc into the first ch-4 space. Work 1 dc into the middle dc. Work 7 dc into the next ch-4 space. Work 1 dc into the top of the starting ch-3.
- Row 3 (Lattice Setup): Ch 7 (counts as 1 DC + ch 4), turn. DC in the same st.
- *(Ch 1, skip 2 sts, 3 dc in next 3 sts). Rep from * one more time. Ch 1.
- In the middle DC: (1 dc, ch 4, 1 dc).
- Ch 1. *(Skip 2 sts, 3 dc in next 3 sts). Rep from * one more time. Ch 1.
- In the last DC (top of ch-3): (1 dc, ch 4, 1 dc).
- Row 4 (Final Shell Row): Ch 3 (counts as 1 DC), turn. Work 7 dc in the ch-4 space.
- Ch 1. Sk 1 st. DC in the middle DC of the 3-DC block. Ch 1.
- Work 7 dc into the next ch-1 space. DC into the next DC. Work 7 dc into the corner ch-4 space.
- Ch 1. Sk 1 st. DC in the middle DC of the 3-DC block. Ch 1.
- Work 7 dc in the last ch-4 space. DC into the top of the ch-3.
Flap Edging:
- Ch 1, turn. Work SC evenly around the entire three sides of the flap (top, side, bottom point, second side).
- Buttonhole: On the final pass, at the corner, ch 3 (or the required size for your button/pearl) and sl st back into the same stitch to create a loop.
- Continue SC back to the starting edge.

🧵 Part 4: Final Closure & Wristlet
The flap is now joined to the pouch, and the accessory strap is attached.
Seamless Flap to Pouch Join:
- Align the straight edge of the Flap with the open back edge of the Pouch Body.
- Insert hook through the BLO of the flap’s SC edge and the BLO of the Pouch Body’s top back edge.
- Sl st through both back loops across all 20 corresponding stitches.
- Fasten off and secure the tail. The flap is now seamlessly attached.
Optional Wristlet Strap:
- Attach yarn to the triple-layer side seam near the top corner.
- Ch 50 (or desired length).
- Insert hook into the 2nd ch from hook and sl st into each ch back down the entire chain.
- Sl st back into the original attachment point on the side seam.
- Fasten off and weave in the tail.
Closure:
- Fold the completed flap over the front of the wallet.
- Locate the perfect position for the button or pearl to secure the flap, centered beneath the buttonhole loop/ch-space you created in the Flap Edging.
- Sew the decorative button/pearl securely to the front of the pouch body using a strong thread.
Video Tutorial:
Your “Trilogy” Seamless Divided Wallet is now complete! Enjoy the professional finish and the satisfaction of a truly seamless creation.


