
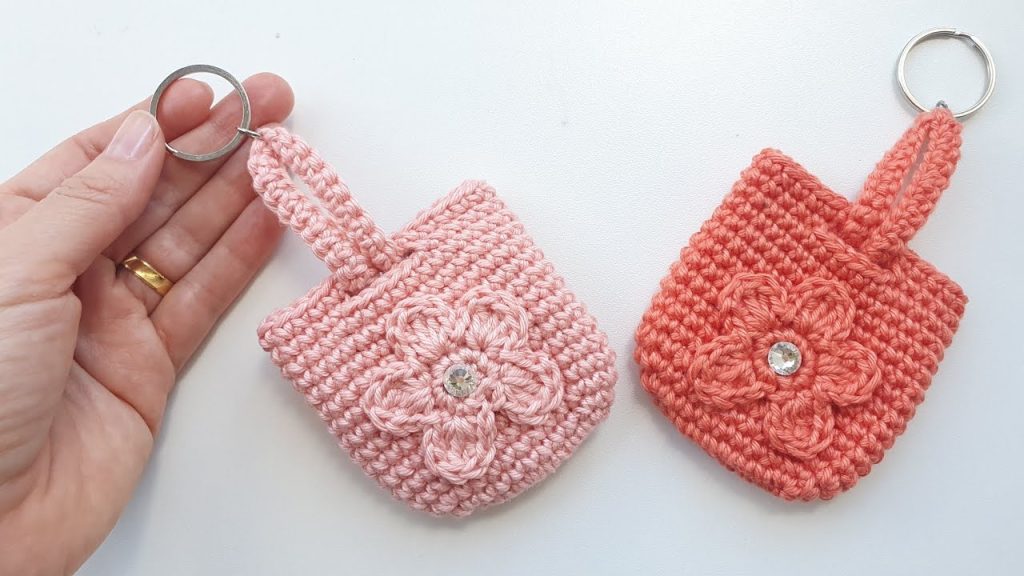
Welcome to the ultimate guide for creating a quick, elegant, and highly practical small pouch! This design is a favorite for its seamless construction, which eliminates visible join lines, giving it a flawless, shell-like structure. Perfect for carrying change, earphones, lipstick, or as a thoughtful gift. The entire project uses minimal yarn and can be completed in an afternoon!
🧶 Materials & Key Tools
| Icon | Item | Details |
| Hook | Crochet Hook | 3.0 mm (or size needed to achieve a dense gauge). |
| Yarn | Main Color (MC) | Approx. 14-20g of Sport/Fingering Weight cotton or cotton blend yarn (e.g., Amigurumi yarn). |
| Yarn | Accent Color (AC) | Small amount of matching yarn for the flower appliqué. |
| Notions | Markers & Needle | Stitch Markers (essential for continuous rounds), Scissors, Tapestry Needle, and Keyring/Clasp. |
| Embellishment | Center Gem | Optional: A small pearl, bead, or rhinestone for the flower center. |
| Final Size | Approximate | 7 cm (Width) x 7 cm (Height). |
📝 Abbreviations & Gauge Notes
Familiarize yourself with these standard U.S. crochet terms before starting:
| Abbreviation | U.S. Terminology | Description |
| ch | Chain | |
| sl st | Slip Stitch | |
| sc | Single Crochet | |
| inc | Increase | Working 2 SC into the same stitch. |
| st(s) | Stitch(es) | |
| rep | Repeat | |
| MR | Magic Ring | |
| Tr | Treble Crochet | Yarn over twice. |
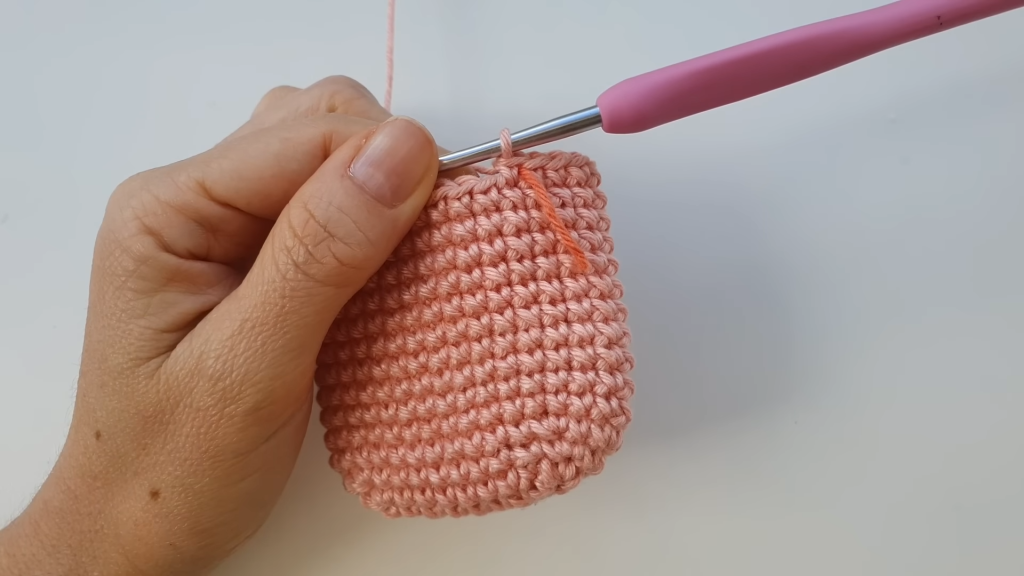
Important Note on Construction: The main body of the pouch is worked in a continuous spiral (no slip stitching to join rounds) to achieve a smooth, seamless finish. ALWAYS use a stitch marker to track the first stitch of each round.
👝 Part 1: The Seamless Oval Base
The base starts with an oval shape that quickly increases the stitch count to form the flat bottom of the pouch.
- Foundation: Ch 9.
- Round 1: Sc in the 2nd ch from the hook. Sc in the next 6 chains. In the last chain, work 3 sc (first corner turn). Now, working up the opposite side of the chain, sc in the next 6 stitches. In the final chain (where the first SC was placed), work 3 sc (second corner turn). (20 stitches total). Place your stitch marker in the next stitch to begin Round 2.
- Round 2: Sc in the next 7 stitches. Work 3 increases (sc 2 in the next 3 stitches). Sc in the next 7 stitches. Work 3 increases (sc 2 in the next 3 stitches). (26 stitches total). Move marker to the new first stitch.
- Round 3: Sc in the next 7 stitches. (Sc 1, inc) three times. Sc in the next 7 stitches. (Sc 1, inc) three times. (32 stitches total). Move marker.
📏 Part 2: The Pouch Walls & Loop
After establishing the base, you will work straight up to create the height of the pouch, then incorporate the key loop and keyring slot.
Creating the Walls:
- Rounds 4 – 14: Sc in each stitch around. (32 sc per round).
- Work a total of 11 rounds straight to create the height. Ensure your tension is tight for a sturdy finish.
- Round 15 (Loop & Slot Setup):
- Sc in the next 3 stitches.
- Work 1 sl st into the next stitch.
- Chain 24 (This forms the main wristlet loop/strap).
- Sl st into the next stitch on the body.
- Sc in the next 13 stitches.
- Ch 4 (This creates the slot/buttonhole).
- Skip the next 6 stitches below.
- Sc in the remaining 6 stitches until the marker.
The Final Shaping Round:
- Round 16 (Finishing Edge): Sc in each stitch up to the strap.
- Work 24 sc evenly around the entire Ch-24 loop.
- Sc in the next 13 stitches up to the Ch-4 slot.
- Work 4 sc into the Ch-4 space.
- Sc in the remaining 6 stitches to the marker.
- Invisible Finish: Cut the yarn, leaving a long tail. Remove the stitch marker. Use a tapestry needle to create an invisible join across the first stitch of the round. (See Part 4 for details).
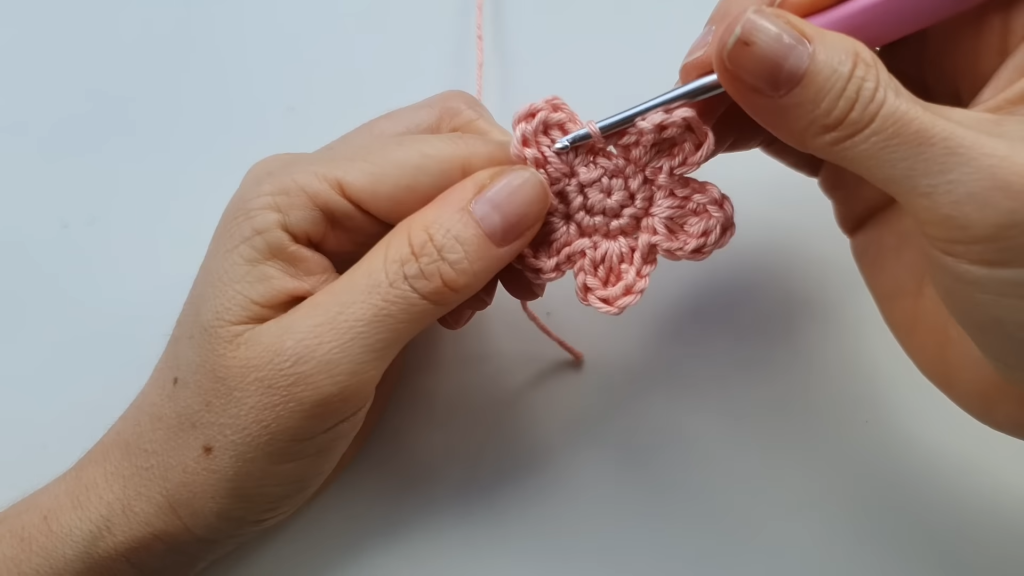
🌸 Part 3: The Five-Petal Floral Appliqué
This small flower is traditionally stitched to the center front of the pouch.
Yarn: Accent Color (AC).
- Round 1 (Center): Make a MR. Ch 1 (does not count as a stitch). Work 5 sc into the ring. Pull ring tight. Sl st to the first sc to join. (5 sc).
- Round 2 (Petal Base): Ch 1. Work 2 sc in each stitch around. (10 sc). Sl st to the first sc to join.
Creating the Petals (Worked in the next 5 stitches):
- Petal 1: Sl st into the next stitch. In the next stitch, work (Sc 1, Ch 1, Dc 1, Tr 1, Dc 1, Ch 1, Sc 1).
- Petal 2: Sl st into the next stitch. In the next stitch, work (Sc 1, Ch 1, Dc 1, Tr 1, Dc 1, Ch 1, Sc 1).
- Petals 3 – 5: Repeat the sequence for Petals 1 and 2 three more times, using a sl st in between each petal set. You should have 5 full petals.
- Fasten off, leaving a long tail for assembly or securing.
✨ Part 4: Finishing & Assembly
Your pouch is almost complete! This section handles the final details and decorations.
Invisible Join:
- Thread the tail of your main body yarn onto a tapestry needle.
- Skip the first stitch of the round and insert the needle under both loops of the second stitch, pulling through.
- Insert the needle back down into the center of the last stitch you worked (where the tail came from), going through the back loop only. This mimics the final V-stitch, making the transition seamless.
- Secure the tail inside the pouch.
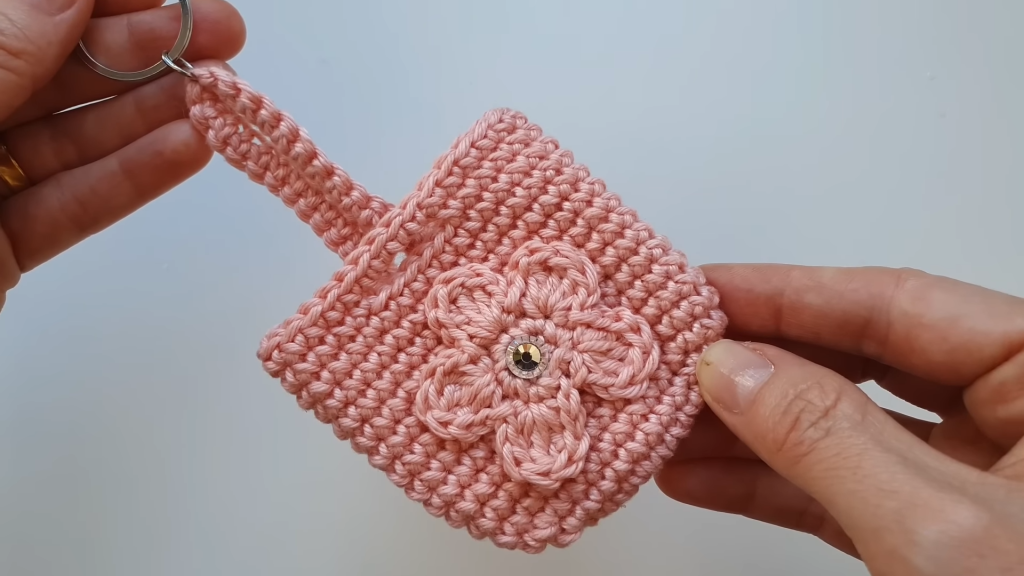
Appliqué Attachment:
- Position the five-petal flower centered on the front of the pouch body.
- Using the tail of the flower and a tapestry needle, secure it by stitching through the center of the pouch. Alternatively, use a strong fabric glue or silicone glue to adhere it.
- If using a pearl or rhinestone, attach it to the center of the flower.
Strap Use:
- Thread your keyring, carabiner, or clasp through the small Ch-4 slot (created on Round 15).
- The large Ch-24 loop serves as a wristlet strap.
Video Tutorial:
Congratulations on creating your beautiful and seamless “Shell” Coin Pouch!


