
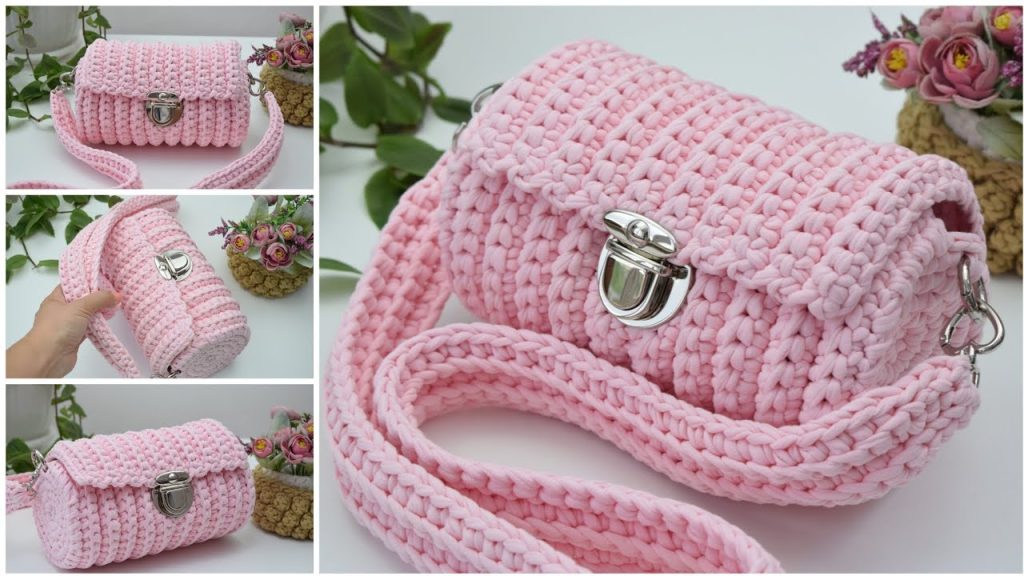
Hello, makers! Are you ready to dive into a project that’s quick to work up and results in a stunning, structured bag? The Cylinder Baguette, or “Bag-ette,” is the ultimate beginner-friendly project, requiring only a single skein of T-shirt yarn and two simple shapes: a rectangle and a circle.
This pattern is designed to create a firm, stylish bag perfect for everyday essentials. We’ll be using the V-Stitch Single Crochet (or “crochet in the split”) technique on the side panels to keep them dense and round, while the body uses an alternating stitch placement to give it a neat, woven texture. Let’s gather our supplies and start crafting!
🛒 Materials & Tools
| Icon | Item | Details |
| Yarn | Main Yarn (MC) | 1 Skein of T-shirt yarn (approx. 300–350g, 7–9 mm thickness). Pure cotton or a blend is ideal for structure. |
| Hook | Main Hook | 6.0 mm (for the main body and circle rounds). |
| Hook | Finishing Hook | 4.0 mm (or smaller hook for weaving in ends and seaming). |
| Hardware | Lock | 1 Round Snap Lock (approx. 4.5 cm diameter, with prong/tooth attachment). |
| Hardware | Rings | 2 x 20 mm Split Rings or D-rings. |
| Hardware | Strap Clasps | 2 x Carabiner Clasps (e.g., heart-shaped, as shown in the video). |
| Notions | Finishing Tools | Scissors, Tapestry Needle (large enough for the yarn), Stitch Markers. |
📏 Sizing & Gauge
Achieving the correct density is crucial for this bag to hold its cylinder shape. If your fabric feels loose, drop down a hook size.
| Measurement | Result |
| Main Panel | Approx. 46 cm (length) x 20 cm (width). |
| Finished Bag | Approx. 21 cm (length) x 15 cm (height). |
| Side Circle | 10 cm diameter. |
| Gauge | A single row of the main panel should measure approximately 1 cm high. |
📚 Abbreviations & Special Stitches
| Abbreviation | U.S. Terminology | Description |
| ch | Chain | |
| sl st | Slip Stitch | |
| sc | Single Crochet | |
| sc-v | V-Stitch SC | Insert hook directly into the center of the “V” of the stitch below (splitting the yarn strands) and complete a Single Crochet. Used for the Side Circles. |
| BLO | Back Loop Only | |
| st(s) | Stitch(es) | |
| rep | Repeat | |
| inc | Increase | Two stitches worked into the same stitch/space. |
🧵 Part 1: The Main Body Panel & Flap
The bag is constructed from a single rectangle that will fold into the bag body and a closing flap. Leave a long starting tail (approx. 1 meter) for later seaming.
- Foundation Chain: Ch 46.
- Row 1 (Foundation): Sk 1 ch. SC into the BLO of the remaining 45 chains. (45 SC). Ch 1, turn.
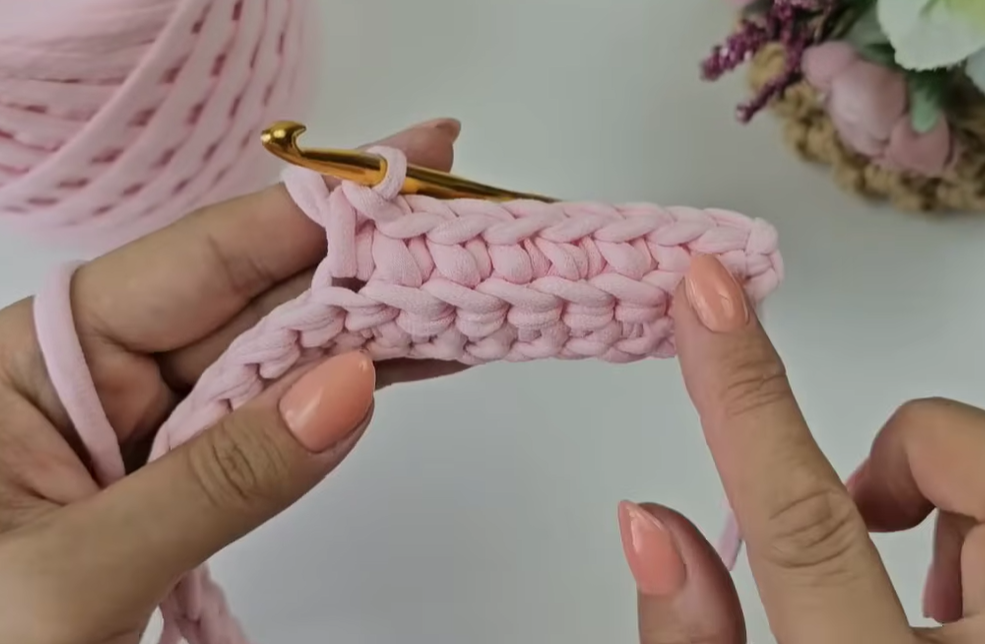
- Row 2 (Texture Start):
- SC into the first st, inserting hook through both loops.
- SC into the next st, inserting hook through the BLO only.
- Rep [SC in next st through both loops, SC in next st through BLO] across until the last stitch.
- SC into the last st, inserting hook through both loops. (45 SC). Ch 1, turn.
- Rows 3–20 (Continuing Texture): Rep Row 2.
- Tip: The goal is to alternate the stitch insertion method (both loops / BLO) in every stitch across, and across every row. This creates the neat, woven horizontal bar texture.
- Continue until you have a total of 20 rows.
Finishing Panel: Cut the yarn, leaving a short tail (approx. 10 cm). Use the smaller 4.0 mm hook to weave the tail neatly into the stitches of the last row.
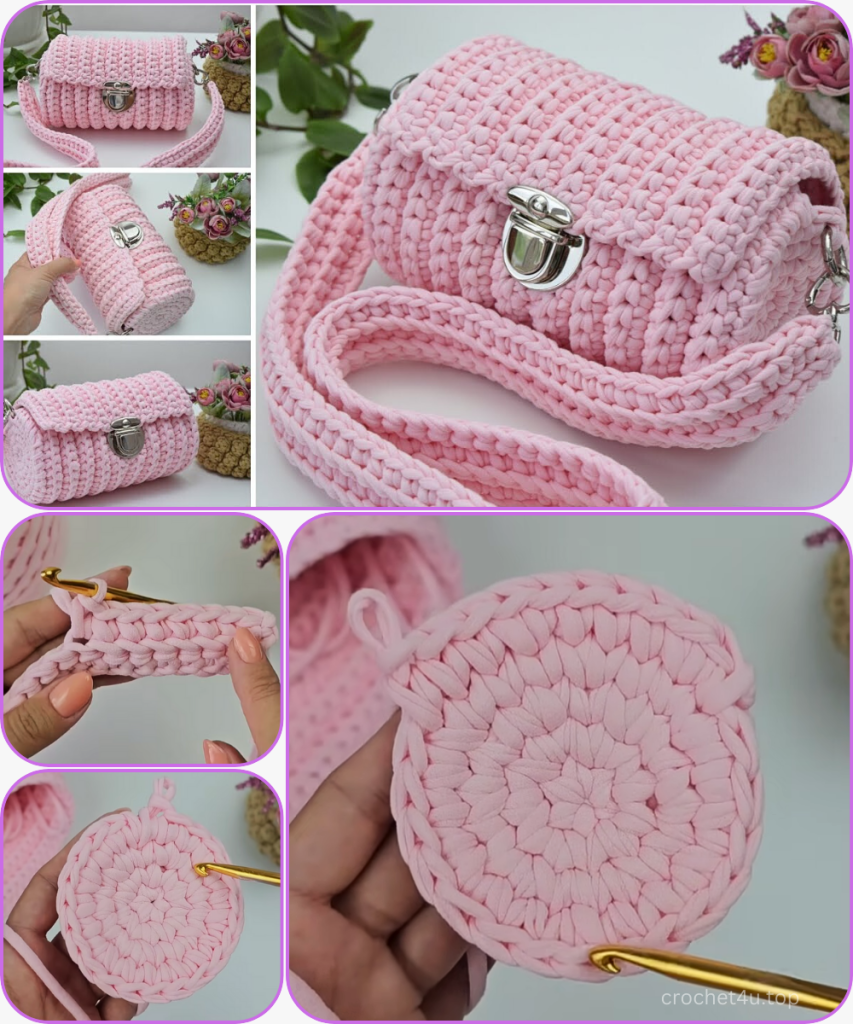
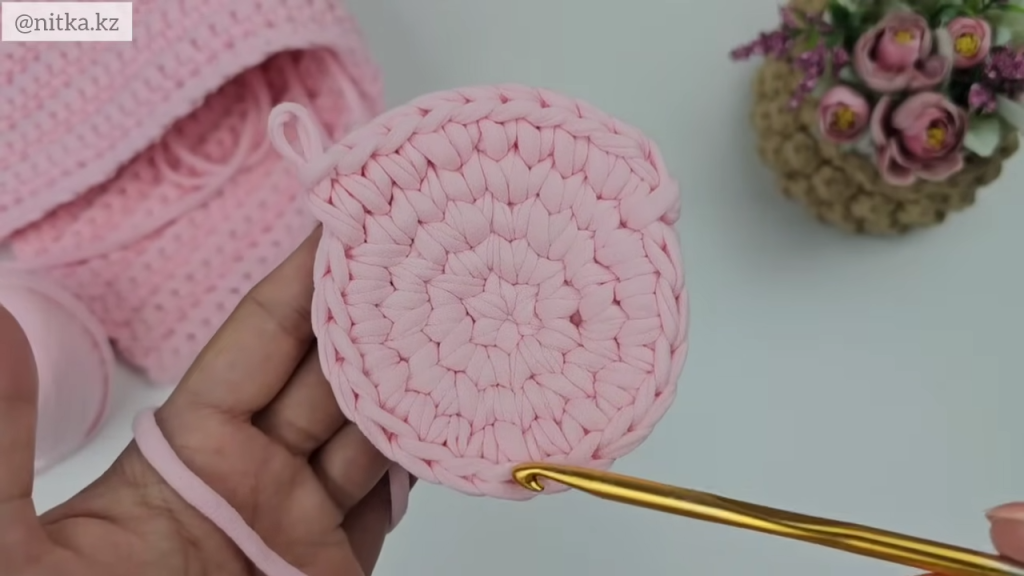
⚪ Part 2: The Side Circles (Gussets)
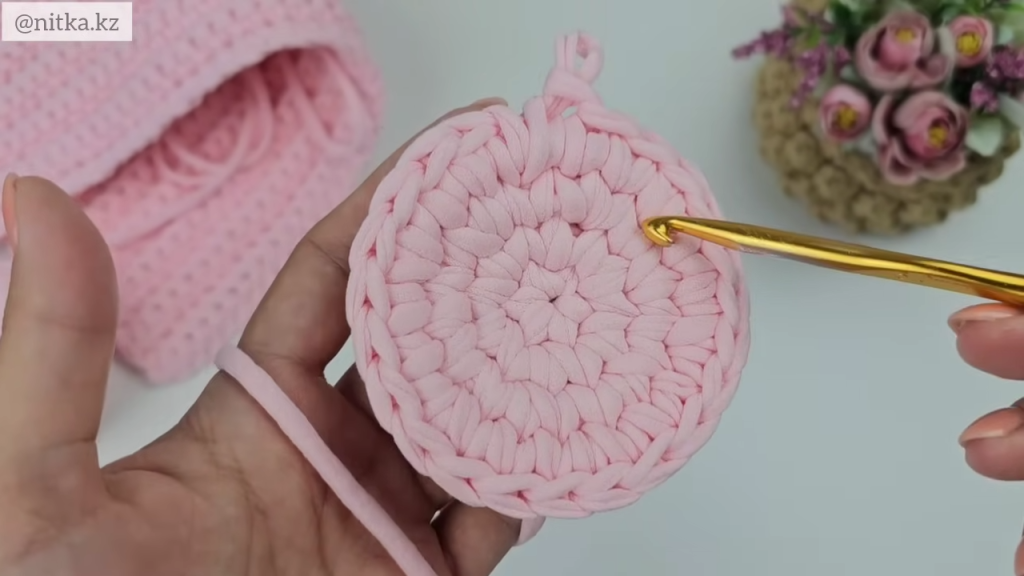
You will need to make two identical circles for the bag’s gussets. Use the 6.0 mm hook for all rounds. The V-Stitch SC is essential here to keep the circle tight and flat.
- Round 1 (6 sts):
- Create a Magic Ring (Amigurumi Ring). Ch 1 (does not count as a stitch).
- SC into the ring 6 times.
- Pull the tail tight to close the ring. Sl st to the first SC to join. (6 SC).
- Round 2 (12 sts):
- Ch 1 (does not count as a stitch).
- Work sc-v inc (2 sc-v) in the center of the joining sl st, then work sc-v inc in each st around. (12 sc-v). Sl st to the first sc-v to join.
- Round 3 (18 sts):
- Ch 1.
- Rep [sc-v inc in next st, sc-v in next st] 6 times around. (18 sc-v). Sl st to join.
- Round 4 (24 sts):
- Ch 1.
- Rep [sc-v in next 2 sts, sc-v inc in next st] 6 times around. (24 sc-v). Sl st to join.
- Round 5 (30 sts):
- Ch 1.
- Rep [sc-v inc in next st, sc-v in next 3 sts] 6 times around. (30 sc-v). Sl st to join.
Finishing Circles:
- Circle 1: Cut yarn, leaving a short tail. Use the smaller hook to create an invisible join and weave in all ends.
- Circle 2: Cut yarn, leaving a long tail (approx. 1 meter) for seaming. Create an invisible join.
🔗 Part 3: Assembly & Seaming
The main panel will be folded into a U-shape, and the circles will be seamed to the sides.

- Marking Seam Points: The bag uses 30 stitches of the main panel to wrap around the circle, leaving 15 stitches for the flap.
- Starting from the edge opposite the long tail: Count 15 rows up (this is the fold point).
- Place markers every 5 stitches along the first half of the main panel (the bottom/body section). Mark 5 stitches, skip 1 stitch, repeat 5 times. (5 markers placed).
- Mark 30 stitches for the curved section.
- Side Circle 1 Seaming (Using the long starting tail):
- Fold the main panel with the foundation chain at the bottom.
- Align Circle 1 with the side edge: Start the seam where the panel folds (Row 15) and work down one side, across the bottom, and up the other side.
- Using the long starting tail and the smaller 4.0 mm hook, Sl st through the outermost loop of the Circle AND the edge of the Main Panel row.
- Seam Strategy: Sew 5 rows of the main panel to 5 stitches of the circle. Skip the marked stitch on the main panel, then sew the next 5 rows to the next 5 stitches of the circle. This creates a slight easing to ensure the circle fits the curve.
- Sew around the entire 30-stitch curve. Secure the tail and weave it in neatly.
- Side Circle 2 Seaming (Using the circle’s long tail):
- Repeat the marking process on the unseamed side of the main panel.
- Use the long tail from Circle 2 and the smaller 4.0 mm hook to Sl st the second circle to the open side, using the exact same skip/seam strategy.
🎀 Part 4: The Flat Shoulder Strap (Crossbody Style)
This flat strap is 4 rows high and is reinforced with slip stitches on the edges to prevent stretch.
- Foundation: Leave a 20 cm tail. Ch 91.
- Row 1: Sk 1 ch. Sl st into the next 3 ch. SC into the next 86 ch (the body of the strap). Sl st into the last 3 ch. (90 sts total). Ch 1, turn.
- Row 2: Sl st into the first 3 sts (working into the BLO). SC into the next 84 sts (working into the BLO). Sl st into the last 3 sts (working into the BLO). (90 sts total). Ch 1, turn.
- Rows 3–4: Rep Row 2.
Finishing Strap: Cut the yarn, leaving a 20 cm tail. Use the smaller 4.0 mm hook to carefully weave the end through the last row for a secure finish.
🔒 Part 5: Hardware & Finishing
- Lock Installation (Female Part):
- Locate the center of the flap (the unseamed 15 rows). Measure and find the precise center.
- Attach the round lock to the flap according to the manufacturer’s instructions, using the prongs/teeth to secure it through the fabric.
- Lock Installation (Male Part):
- Close the bag flap and mark the point on the bag’s body (front side) where the lock tongue hits.
- Attach the corresponding male/base piece of the lock to the bag body.
- Strap Attachment:
- Using the smaller 4.0 mm hook and the long tails on the strap ends, attach the Carabiner Clasps to the strap ends by wrapping the yarn tightly through the clasp and sewing the strap tail firmly back into the strap body.
- Final Assembly:
- Use the 20 mm Split Rings to attach to the top edge of the bag (sew them on or use a thin cord loop to anchor them).
- Clip the finished strap to these rings.
Video Tutorial:
Your stylish Cylinder Baguette is complete!


