

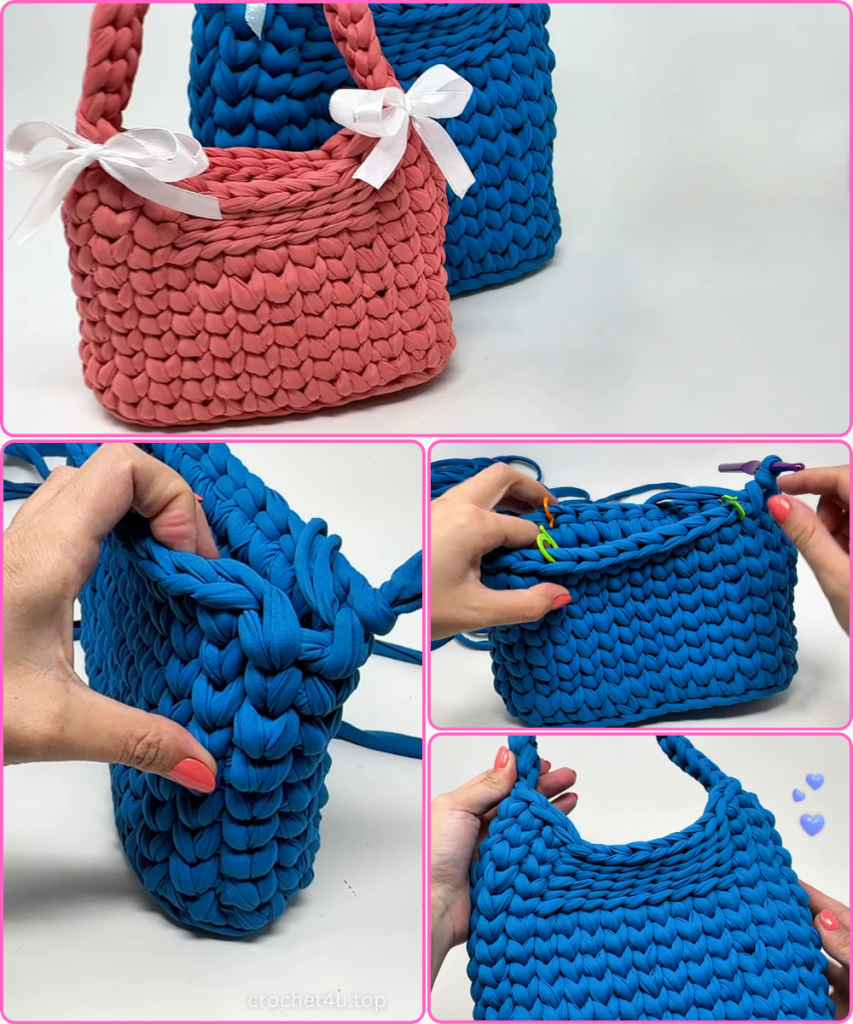
Welcome to your next favorite crochet project! Today, we are diving deep into the world of the “Coquette” Bag—a trendy, chic, and incredibly sturdy handbag made with t-shirt yarn (fettuccia). This design, created by Simona from Momì’s, features a sophisticated “knit-look” texture and delicate ribbon accents that make it the perfect accessory for any season.
Whether you want to make a statement with the large version or go for a cute “mini” look, this detailed guide will walk you through every stitch and secret technique used in the tutorial.
🧵 Materials & Preparation
Before we pick up our hooks, let’s gather the essentials. The quality of your t-shirt yarn can vary, so Simona shares several “tricks” to ensure a perfect finish even if your yarn is a bit stiff.
- Yarn: T-shirt yarn (fettuccia).
- Large Bag: Approximately 700g.
- Small Bag: Approximately 250g.
- Hooks: Size 8mm and 9mm (Size L and M).
- Accessories: Satin ribbon (approx. 50-60cm per bow), stitch markers, fabric glue or needle and thread, and a lighter (to seal ribbon ends).
- Tools: Tapestry needle and scissors.
📋 Abbreviations & Special Stitches
- Ch: Chain
- SC: Single Crochet
- Sl St: Slip Stitch
- Knit Stitch (Waistcoat Stitch): A single crochet worked into the center “V” of the stitch below rather than under the top two loops. This creates a dense, non-stretch fabric that looks like knitting.
- Invisible Join: A technique to close rounds without a visible seam.
🧶 Step 1: Crafting the Oval Base
The foundation of the bag is a sturdy oval. We use a specific increase pattern to keep it flat and symmetrical.
For the Large Bag:
- Foundation: Start with 12 chains.
- Round 1: Starting in the second chain from the hook, work 10 SC. In the very last chain, work 3 SC (this turns the corner). Rotate your work to crochet along the underside of the foundation chain. Work 9 SC. In the final stitch (where you started), work 1 SC to complete the end curve.
- Invisible Join: Pull the loop long, insert the hook from back to front through the first SC, grab the loop, and pull it through to the back.
For the Small Bag:
- Follow the same steps but start with 10 chains.
Expanding the Base (Round 2):
- Switch to the Knit Stitch (Waistcoat Stitch) for a firmer structure.
- Increase at the ends: Work 2 Knit Stitches into each of the 3 stitches at both curves. The straight sides should remain 9 stitches long (for the large bag).
- At the end of this round, you will have a perfect oval with 6 stitches at each curved end.
🧱 Step 2: Transitioning to the Body
This is where the magic happens! To ensure the walls of your bag rise perfectly vertical without bulging, we use a “frame” technique.
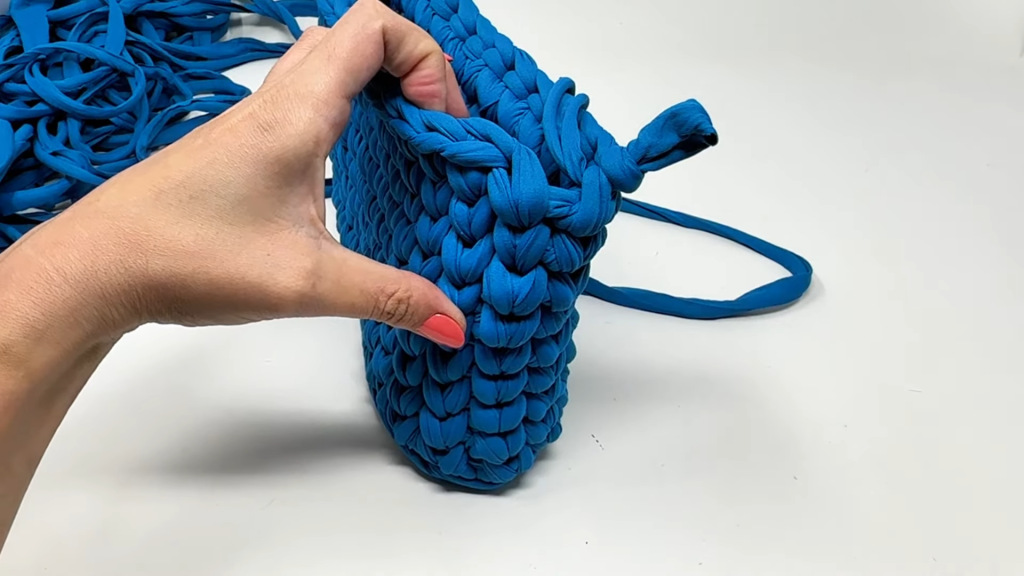
- The Ridge Round: Work a round of Slip Stitches around the entire oval. However, you aren’t just going through the top loops; you are grabbing the back loop and the small horizontal bar behind the stitch.
- Tip: If your yarn is stiff, drop down to a smaller hook (like a 7mm or 8mm) for this specific round to make it easier to pierce the stitches.
- The Lift: Once the slip stitch “frame” is done, work your first round of the body by crocheting SC into the back loops of that frame. This creates a clean, 90-degree corner that defines the bottom of your bag.
👜 Step 3: Growing the Body
Now we build the height using the signature “Knit Look.”
- The Body Rounds: Continue working in the Knit Stitch (Waistcoat Stitch) in continuous rounds. This makes the bag incredibly rigid—no lining or plastic reinforcement is needed!
- The Height: * Large Bag: Work a total of 9 rounds for the body. This will result in a height of approximately 23 cm.
- Small Bag: Work roughly 4 rounds of the body for a “mini” height of about 15 cm.
- Invisible Closures: Always use the invisible join at the end of each round to avoid a messy seam crawling up the side of your bag.
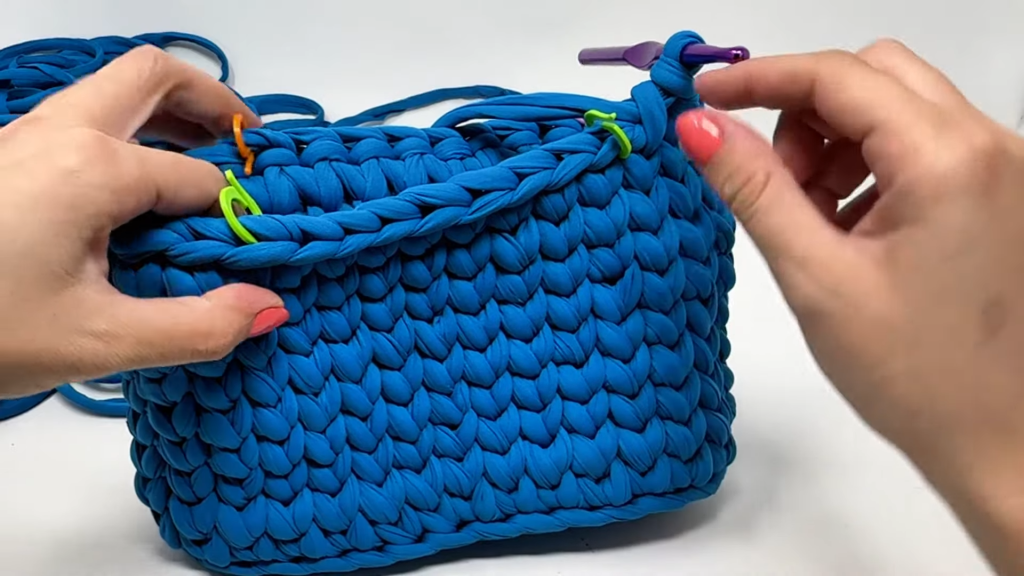
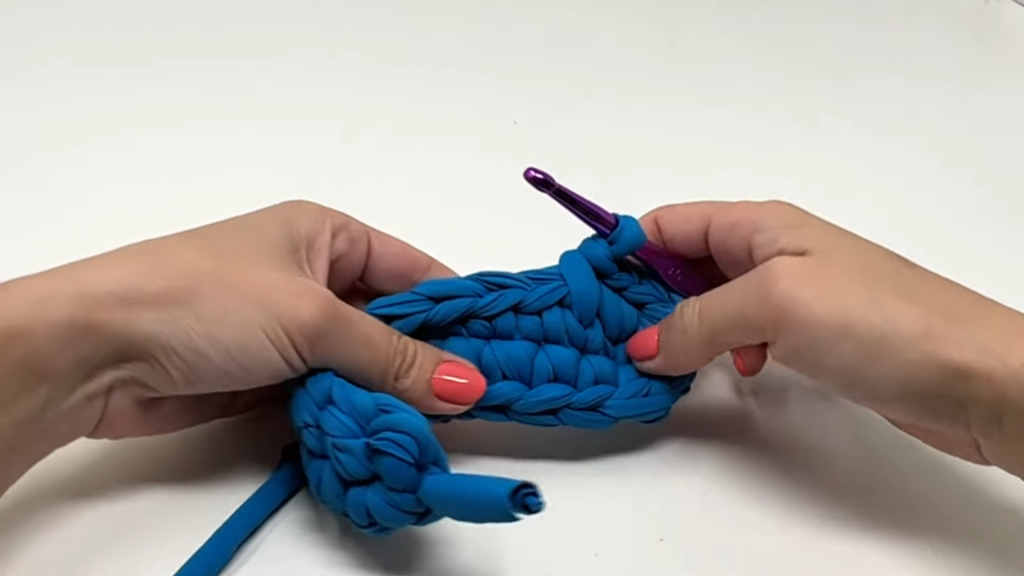
🥨 Step 4: The Seamless Handles
One of the best parts of this pattern is that the handles are worked directly into the bag without cutting the yarn.
- Placement: Lay the bag flat and use stitch markers to identify the center points on both sides. For the large bag, leave 9 stitches centered on the front and back for the handles.
- Handle Foundation: When you reach the first marker, Chain 25.
- Joining the Handle: Without twisting the chain, attach it to the opposite marker on the same side using a slip stitch.
- No-Cut Technique: To get to the other side of the bag, continue working slip stitches or knit stitches along the side rim of the bag until you reach the next handle position. Repeat the 25-chain process.
- Reinforcement: Work a final round of Slip Stitches across the rim and into the back of each chain on the handles. This makes the handles thick, comfortable, and professional-looking.

🎀 Step 5: The “Coquette” Ribbon Bows
The defining feature of this bag is the ribbon work. We aren’t just tying a simple bow; we are creating a “Double Bow” look.
- Cut your Ribbon: You will need two lengths of satin ribbon, each about 50-60 cm.
- The Double Bow: * Fold the ribbon to create two loops on each side (a “double-winged” bow).
- Tie a knot in the center to secure the loops.
- Trim the tails at a diagonal angle and carefully use a lighter to singe the edges to prevent fraying.
- Attachment: You can sew these onto the base of the handles using a needle and thread, or for a faster finish, use a high-quality fabric glue.
Video Tutorial:
✨ Final Specifications
Once you weave in your ends, your bag is ready to show off!
- Large Bag Dimensions: 22 cm wide by 23 cm high.
- Small Bag Dimensions: 17 cm wide by 15 cm high.
This “Coquette” style bag is a perfect blend of structural crochet and feminine detail. Because of the density of the waistcoat stitch and the thickness of the t-shirt yarn, your bag will maintain its beautiful shape for years to come!


