
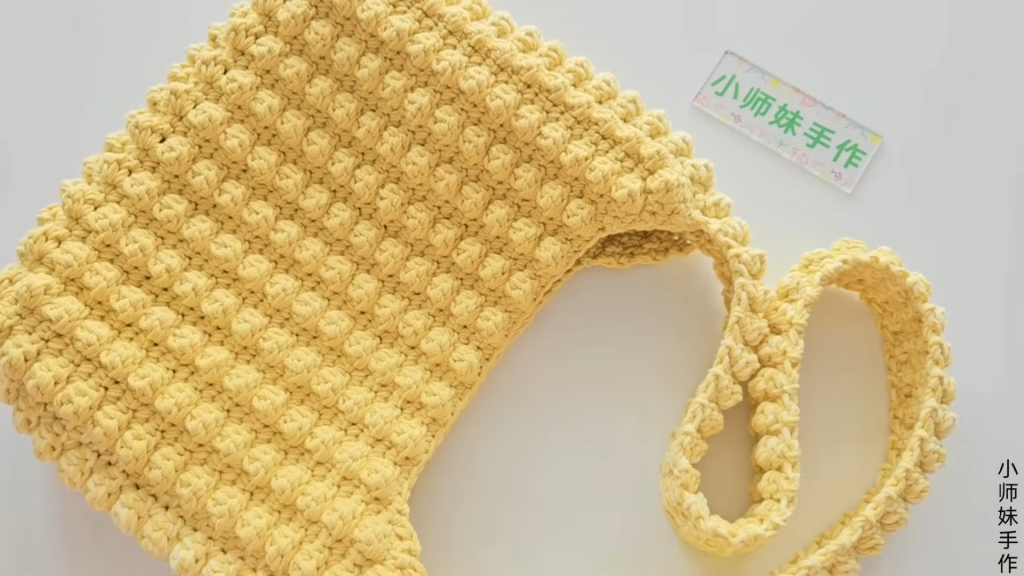
Welcome to the ultimate guide for creating the Obsidian Bobble Messenger Bag! This isn’t just a bag; it’s a durable, high-capacity masterpiece designed for everyday use. Whether you’re carrying textbooks, a laptop, or your daily essentials, the dense “Bobble Stitch” (or Puff Stitch) ensures your bag maintains its shape without sagging.
In this detailed blog post, we’ll walk through the process of creating two textured panels, a continuous strap-and-gusset piece, and a clever internal pocket for your phone. Let’s pick up our hooks and get started!
🧶 Materials & Tools
To achieve the luxurious “Obsidian” look, choose high-quality materials:
- Yarn: 5-ply Milk Cotton, used double-stranded for extra thickness and durability.
- Hook: 5.5 mm crochet hook.
- Notions: Tapestry needle, scissors, stitch markers, and an optional zipper for the top closure.
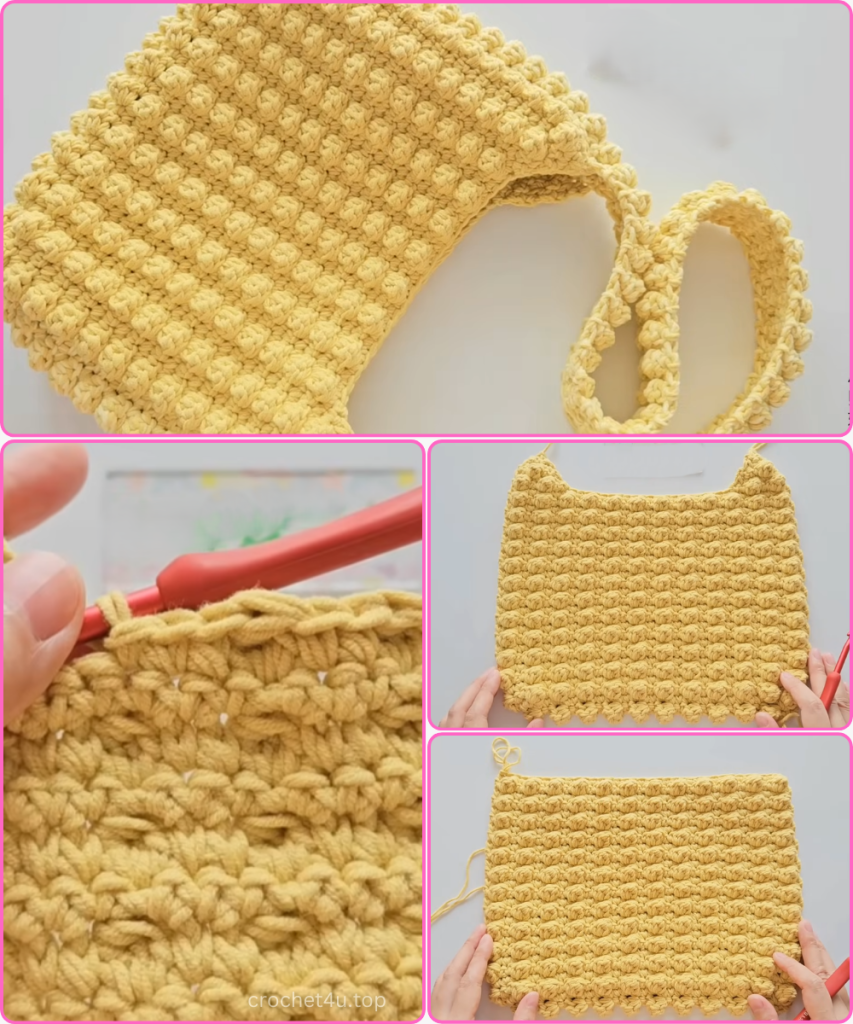
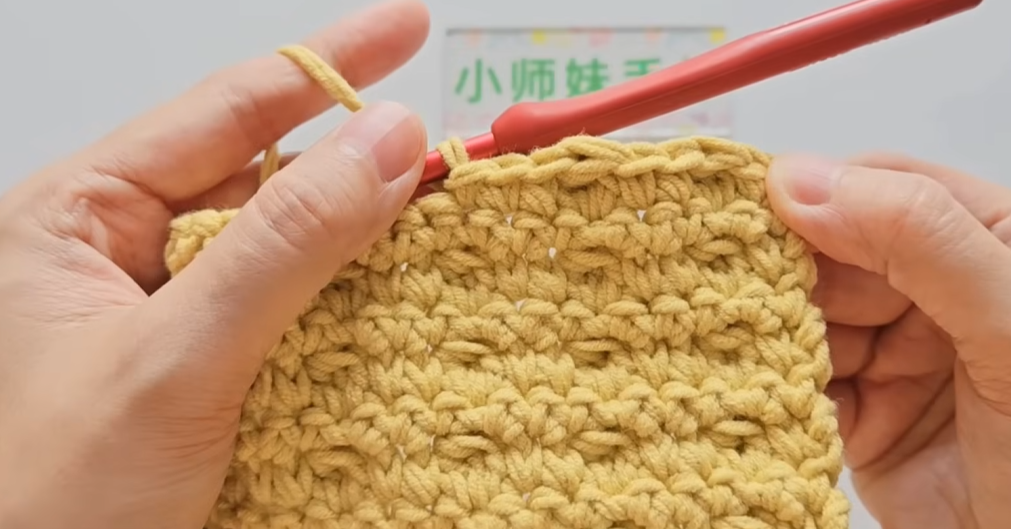
🧱 Section 1: The Foundation & The “Bobble” Logic
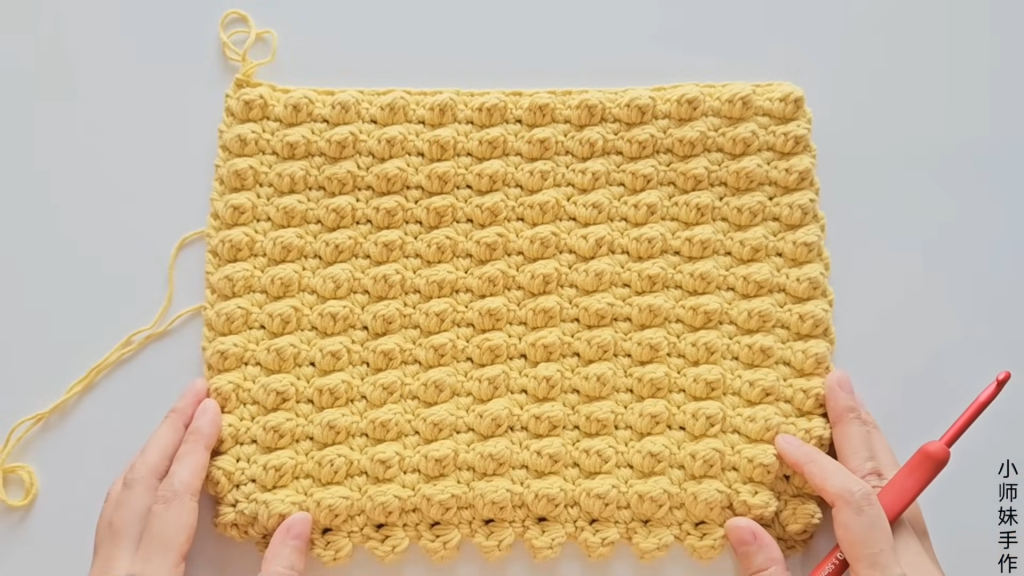
The body of the bag is made of two identical large panels. The “Bobble Stitch” (3-DC cluster) is the star of the show here.
- Foundation: Start with a slip knot and Chain 31. (The pattern is a multiple of 3 + 1, so you can adjust the width here).
- Row 1 (Right Side): Skip 2 chains. In the 3rd chain from the hook, work a 3-Double Crochet Bobble:
- Yarn over, insert hook, pull up a loop, yarn over, pull through 2 loops (2 loops on hook). Repeat this 2 more times in the same stitch (4 loops on hook).
- Yarn over and pull through all 4 loops.
- Work 1 SC in each of the next 2 stitches.
- Repeat [1 Bobble, 2 SC] across. You should have 10 Bobbles in total.
- Row 2 (Wrong Side – Increases): Chain 2, turn. This is a solid SC row to stabilize the work. Work increases at the edges:
- 2 SC in the first 3 stitches.
- 1 SC in each of the next 25 stitches.
- 2 SC in the last stitch, plus 2 SC in the side turning chain space. (Total: 36 stitches).
- Rows 3–26: Continue alternating Bobble rows and SC rows. Keep your Bobbles aligned vertically.
- Each Bobble row should now have 12 Bobbles.
- Continue until you reach Row 26.
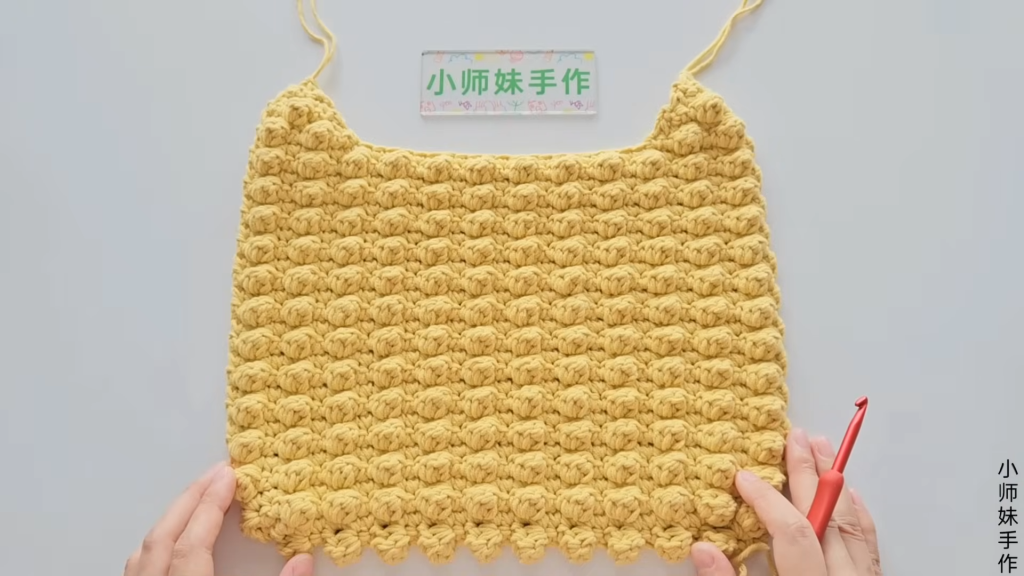
📐 Section 2: Shaping the “V-Top” Horns
To give the bag its modern “messenger” shape, we taper the top edges into two sharp points.
- Left Horn:
- On the top left edge, work across only the first few stitches to create 2 Bobbles.
- Decrease by skipping the first stitch and working SC2tog (Single Crochet 2 Together) in the following rows.
- Finish with a final SC2tog and fasten off.
- Right Horn:
- Reattach yarn to the opposite top corner (count 8 stitches in).
- Repeat the same decrease pattern as the left horn until you have a symmetrical point.
- Final Panel: Repeat Section 1 and 2 to create a second identical panel for the back.
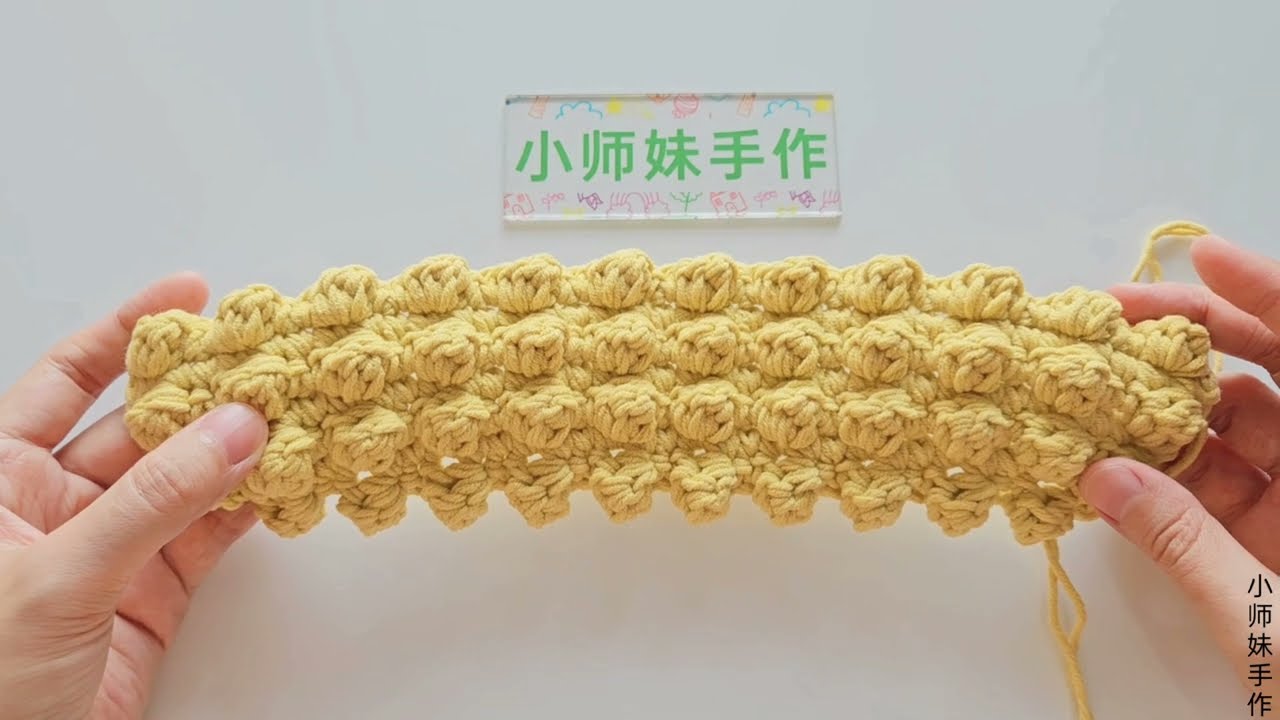
🎗️ Section 3: The Continuous Strap & Gusset
Unlike bags with sewn-on straps, this pattern uses a long “ribbon” that acts as both the side/bottom of the bag (the gusset) and the shoulder strap.
- Foundation: Chain 7.
- Row 1: Skip 1 chain. Work 1 SC, 1 Bobble, 2 SC, 1 Bobble, 1 SC.
- Row 2: Chain 1, turn. Work 6 SC across.
- Repetition: Continue alternating these two rows until the strap is long enough to wrap around the sides and bottom of your bag panels AND reach over your shoulder (the length of your preference).
🪡 Section 4: Assembly & The “Invisible” Join
We will join the panels to the strap/gusset using a sturdy SC join for a clean, piped look.
- Place the back panel and the strap piece together.
- The Join: Insert hook through both the panel edge and the strap edge. Work SC all the way around the perimeter.
- Placement: * The first 16 Bobbles of the strap go down the first side.
- The next 14 Bobbles go across the bottom.
- The next 16 Bobbles go up the second side.
- Repeat for the front panel.
- Shoulder Join: Use a tapestry needle to sew the two ends of the strap together at the top of the shoulder using a mattress stitch for comfort.
📱 Section 5: The Secret Internal Pocket
A functional bag needs a place for your phone!
- Panel: Crochet a simple rectangle using Double Crochet (DC) that is slightly larger than your smartphone.
- Attachment: Position this rectangle on the inside of the back panel. Sew it on three sides (left, bottom, right) using a tapestry needle.
Video Tutorial:
💡 Expert Tips for the “Obsidian” Finish
- Tension: Keep your Bobbles tight. If they feel loose, try a 3-DC cluster instead of 4.
- The “Black” Challenge: Since black yarn can be hard to see, work in bright natural light or use a light-colored stitch marker to mark the start of your rows.
- Lining: While the Bobble stitch is very dense, you can add a fabric lining for extra security if you plan to carry heavy coins or keys.
Congratulations! You are now the owner of a stunning, handmade Obsidian Bobble Messenger Bag. It’s bold, textured, and ready for whatever your day brings!


