
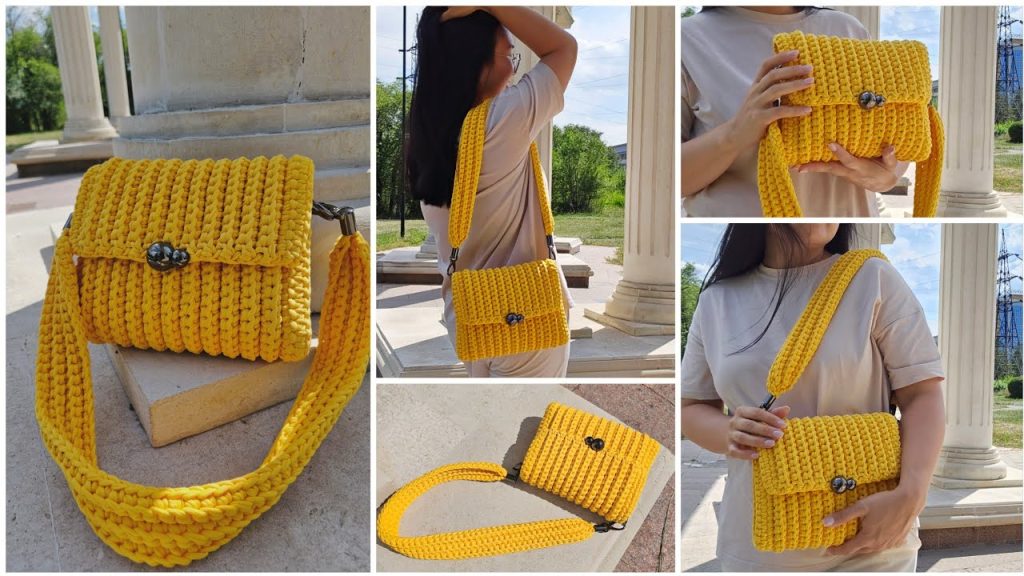
This bag is built from three main pieces: one large rectangular piece that forms the front, back, bottom, and flap; and two smaller gussets that form the sides. The pieces are seamlessly joined with single crochet, eliminating the need for sewing the body.
🧶 Materials & Key Tools
| Icon | Item | Details |
| Yarn | Main Yarn (MC) | Approximately 650-700 grams (2 full skeins) of T-Shirt Yarn (e.g., Altyn Tricky Yarn). Total length needed is around 200 meters. |
| Hook | Main Hook | 6.0 mm (or size needed to create a very tight fabric). |
| Hook | Seaming Hook | 4.0 mm (for joining pieces, helps with a tight seam). |
| Hardware | Portfolio Lock | One Magnetic Portfolio Snap Lock (or a similar decorative closure). |
| Hardware | D-Rings (2) | Two 32 mm internal diameter D-Rings (or similar half-rings). |
| Hardware | Strap Holders (2) | Two Screw-on Handle Holders/Clips for the strap ends. |
| Notions | Markers & Needle | Stitch Markers, Scissors, and Tapestry Needle (for T-shirt yarn ends). |
| Notions | Tape/Thread | Double-sided adhesive tape or needle and thread for invisible yarn joining. |
| Size | Finished Bag | Approx. 27 cm (Width) x 21 cm (Height). |
📝 Abbreviations & Special Stitches
| Abbreviation | U.S. Terminology | Description |
| ch | Chain | |
| sl st | Slip Stitch | |
| sc | Single Crochet | |
| st(s) | Stitch(es) | |
| rep | Repeat | |
| BLO | Back Loop Only |
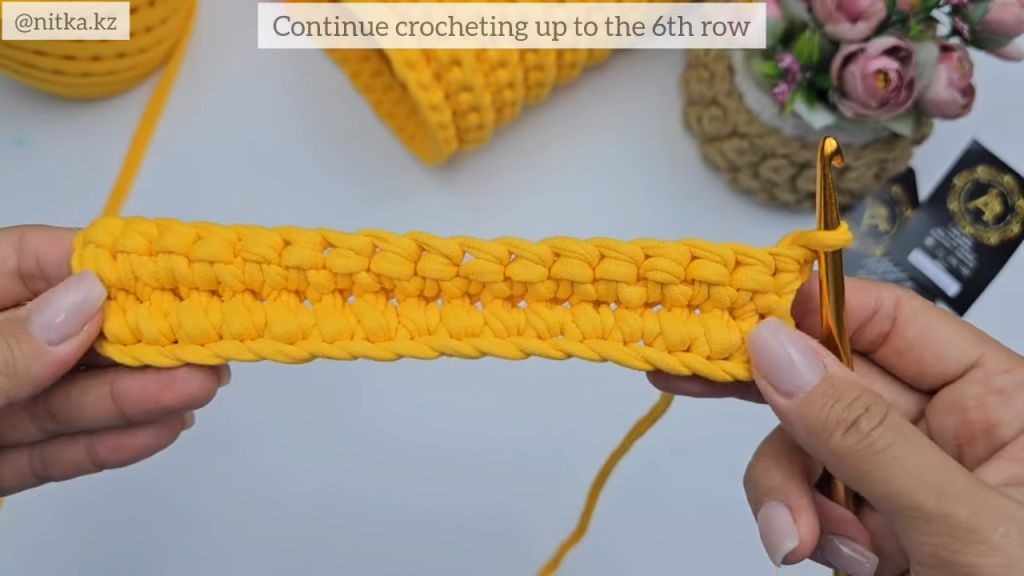
Special Stitch: Modified Single Crochet (Modified SC)
This technique ensures a dense, basket-weave-like texture:
- Insert the hook under the back loop of the designated stitch.
- Yarn over and pull a loop through. Stretch this loop to approximately twice the height of a normal SC loop.
- Yarn over and pull through both loops on the hook.
- Note: Always maintain tight tension, and work into the back loop of each stitch unless otherwise noted.
Preparation Note: Before starting, unroll the T-shirt yarn and gently stretch it 2-3 meters ahead. This helps create uniform tension and reduces the finished bag’s tendency to stretch over time.
✉️ Part 1: The Main Body Panel (Front, Back, Bottom, & Flap)
This piece is worked flat in rows and makes up the core of the bag.
- Foundation: Using the 6.0 mm hook, chain 56.
- Row 1 (Establish Base): Sk 1 ch. Work 1 SC into the second chain from the hook and in each chain across, working under the back bar/loop of the chain. (55 SC).
- Row 2: Ch 1, turn. Work 1 Modified SC (see Special Stitch note) in the back loop of each stitch across. (55 SC).
- Rows 3 – 24 (Body and Flap): Ch 1, turn. Rep Row 2 for a total of 24 rows.
- Yarn Change Tip: If you run out of yarn, join the new skein using double-sided tape or by securely stitching the two ends together before continuing the row. Do not knot the T-shirt yarn.
Panel Dimensions Check: The finished panel should measure approximately 50 cm in length and 24 cm in width/height before assembly.
Placement Markers:
Once the 24 rows are complete, your panel has two “faces.”
- The Flap Side: The end where you worked the final row (Row 24).
- The Front/Back Side: The side with the beginning chain (Row 1).
We need to section off the panel using markers:
- Start/Back Side: Mark the stitch 15 rows in from the end of the flap (this is the back top edge).
- Bottom Fold: Mark 5 rows down from the back top edge (this is the bottom fold).
- Front/Flap: The remaining rows form the front of the bag and the flap.
For reference, the gussets will attach along the 40-stitch circumference (15 rows for the front, 10 rows for the bottom, 15 rows for the back). The remaining 15 rows form the flap.
🔳 Part 2: The Side Gussets (x2)
The two side panels are worked flat. You will need to make two identical pieces.

- Foundation: Using the 6.0 mm hook, chain 18.
- Row 1: Sk 1 ch. Work 1 SC into the second chain from the hook and in each chain across, working under one loop. (17 SC).
- Row 2 – 6: Ch 1, turn. Work 1 Modified SC in the back loop of each stitch across. (17 SC).
- Finish: You should have 6 rows of 17 stitches. Cut the yarn on the first gusset and secure the tail. Do not cut the yarn on the second gusset; proceed to Part 3.
Gusset Dimensions Check: The finished gusset should measure approximately 18 cm in length and 7 cm in width/height.
🔗 Part 3: Bag Assembly (Seamless Seaming)
Using the 4.0 mm hook (or the 6.0 mm hook with very tight tension) and the yarn attached to the second gusset, we will join the body and gussets with single crochet.
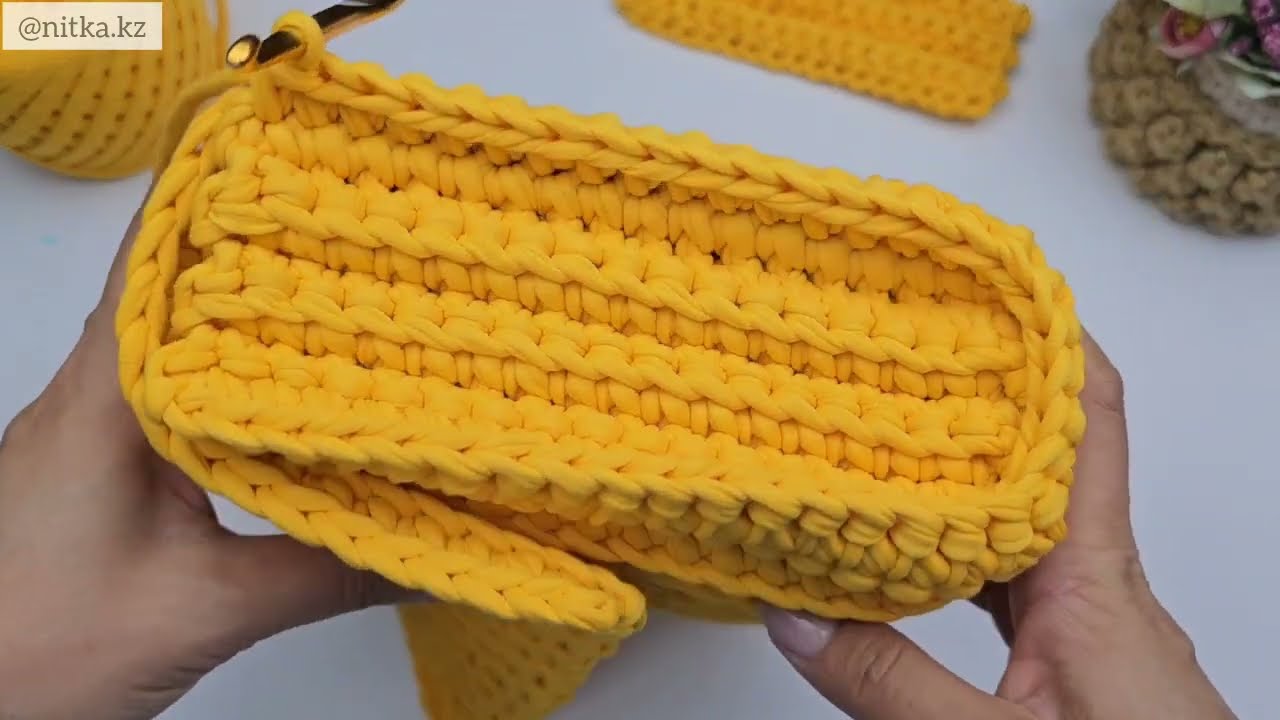
- Preparation: Fold the Main Body Panel at the bottom fold (Row 5 from the bottom edge). The “Flap Side” (Row 24) should be free.
- Joining Gusset 1 (Pre-made):
- Align the Gusset’s 17-stitch side with the first 17 side-rows of the Main Body Panel (starting at the back top corner).
- Thread a new piece of yarn through a tapestry needle and carefully whipstitch or single crochet the first side (17 rows) of the gusset to the 17 rows of the main body, matching one gusset stitch to one body row. Fasten off and hide the tail securely.
- Joining Gusset 2 (Live Yarn):
- Side Seam (17 stitches): With the yarn still attached to the second gusset, align the gusset’s first 17-stitch side with the corresponding 17 rows on the Main Body Panel.
- Working through both layers, SC one stitch into the end of each row on the gusset and the corresponding row on the body panel. (17 SC).
- Corner Turn: Work 2 SC into the corner stitch.
- Bottom Seam (6 stitches): Work 1 SC through the bottom of the gusset (6 stitches) and the bottom fold of the body panel. (6 SC).
- Corner Turn: Work 2 SC into the corner stitch.
- Final Side Seam (17 stitches): Work 1 SC through the final side of the gusset and the remaining 17 rows of the main body panel. (17 SC).
- The total stitches joined are 17+6+17 = 40 stitches.
- Continuing on the Flap:
- Continue working SC stitches along the remaining edge of the main body panel (which is the flap section). Work 1 SC into the end of each of the 15 flap rows. (15 SC).
👑 Part 4: Flap Edging and Hardware Placement
We now create the decorative edge along the top of the bag and around the flap.
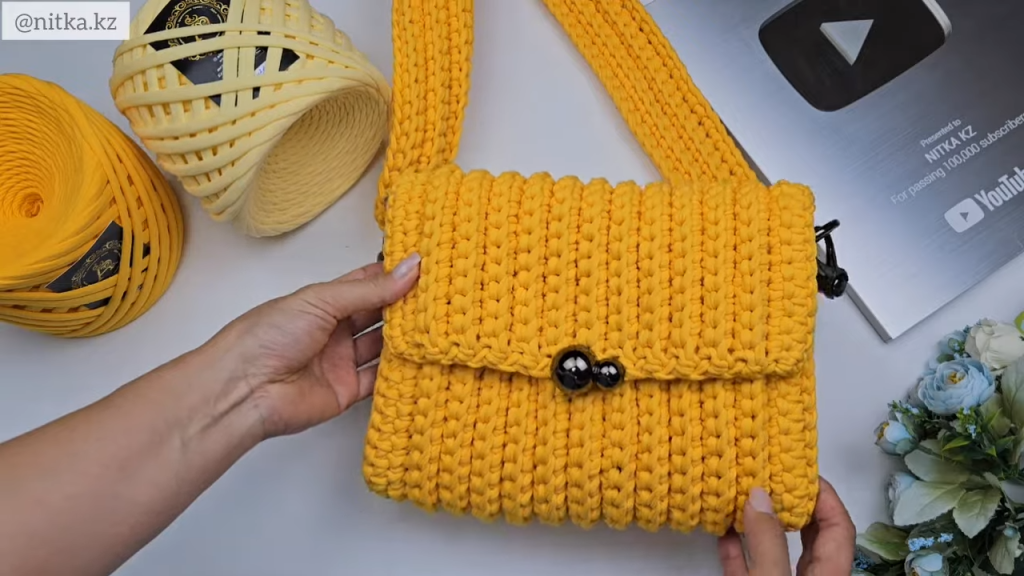
- Row 1 (SC Base): Continue from the 15 SC on the flap. Work SC across the top of the second gusset (6 stitches), across the top of the back panel (55 stitches), across the top of the first gusset (6 stitches), and finally SC across the top of the flap (15 stitches) to meet your starting point. Sl st to join.
- Decorative Edge: This edge adds structure and a finished look to the flap opening.
- Ch 1. Sl st into the next stitch.
- Ch 1. Sl st into the next stitch.
- Repeat [Ch 1, Sl st into next st] all the way around the entire flap opening.
- Fasten off and hide the tail inside the seam.
Flap Closure Installation:
- Positioning: Close the bag and determine the exact center of the flap and the bag front.
- Install Lock: Install the male part of the portfolio lock securely onto the center of the flap, following the hardware instructions.
- Install Base: Install the female magnetic base onto the front of the bag, ensuring it aligns perfectly with the flap when the bag is closed.
⛓️ Part 5: The Crossbody Strap
The strap is made separately and attached using the screw-on hardware.
- Foundation: Using the 6.0 mm hook, chain 66.
- Row 1: Sk 1 ch. Work 1 SC in each chain across. (65 SC).
- Rows 2 – 6: Ch 1, turn. Work 1 Modified SC (or regular SC) in the back loop of each stitch across. (65 SC).
- Note: This creates a flat strap approximately 95 cm long, which will stretch to approximately 100-105 cm with use.
- End Shaping:
- Ch 1, turn. Work 3 SC. Ch 1, turn. SC 1. Ch 1, turn. SC 1. Fasten off, leaving a very small tail (1 cm). This tapers the end for the screw-on hardware.
- Repeat End Shaping on the other side of the strap, using the beginning tail yarn.
Video Tutorial:
Hardware Attachment:
- Open the screw-on handle holders.
- Insert one end of the strap into one holder. Ensure the bolt will not hit a large clump of yarn.
- Place a D-Ring onto the holder’s loop.
- Screw the holder closed tightly.
- Repeat with the second holder, D-Ring, and the other end of the strap.
Attach the D-Rings on the strap to the rings already installed on your bag. Your elegant, seamless crossbody bag is now ready to use!


