
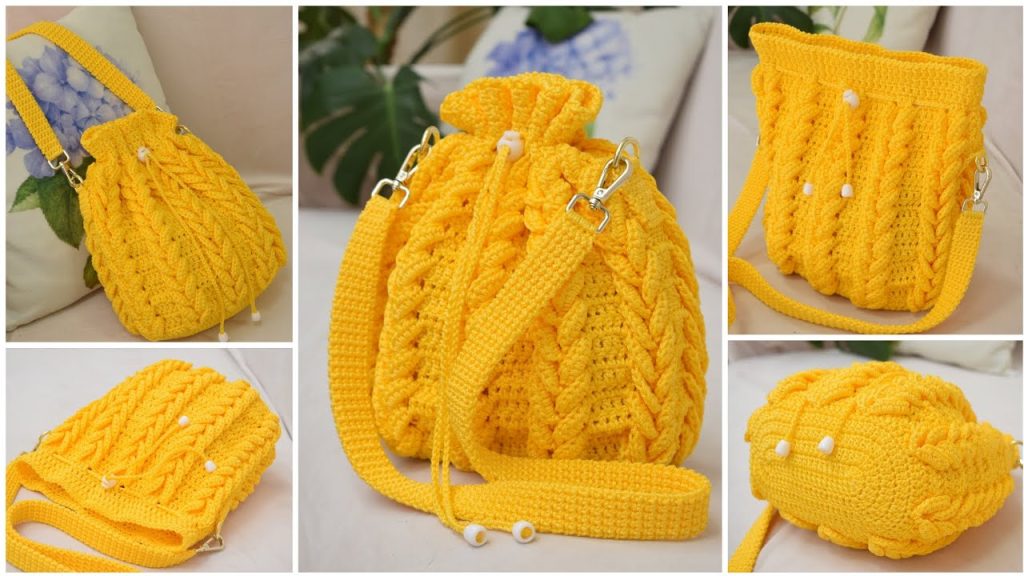
This bag is crocheted using a combination of foundational double crochet rows and a complex-looking, yet accessible, braid stitch motif. The drawstring top allows for a functional and adjustable closure, making it the perfect everyday project.
🧶 Materials & Sizing
| Icon | Item | Details |
| Yarn | Main Yarn (MC) | Approximately 560 meters (4 skeins of 140m each) of 2 mm Polypropylene Cord (or similar light, durable cord like Polyester or T-shirt yarn for a different drape). |
| Hook | Main Hook | 3.0 mm (or size needed to achieve a stiff fabric). |
| Finished Size | Bag Dimensions | Approx. 28 cm (Height) x 28 cm (Width). |
| Finished Size | Strap Length | Approx. 82 cm (210 rows) before stretching. |
| Hardware | Drawstring | 1 Plastic Cord Stopper, 2 Cord End Caps. |
| Hardware | Strap Attachments | 2 20 mm Carabiner Clips, 2 20 mm Half-Rings. |
| Notions | Markers & Needle | Stitch Markers, Scissors, and Tapestry Needle (sized for the cord). |
📚 Stitch Guide & Abbreviations
| Abbreviation | U.S. Terminology | Description |
| ch | Chain | |
| sl st | Slip Stitch | |
| sc | Single Crochet | |
| hdc | Half Double Crochet | |
| dc | Double Crochet | |
| st(s) | Stitch(es) | |
| rep | Repeat | |
| inc | Increase | Work 2 stitches into the same stitch. |
| FO | Fasten Off |
Special Stitch: Braid Motif (BM)
This motif is worked over 8 stitches of the previous DC row (or two rows below) and consists of two parts.
- BM Part 1 (Left Half):
- Ch 6.
- Locate the 5th DC post of the 8-st repeat, two rows below. Sl st behind the post of this DC to anchor the chain.
- Ch 1. Work 1 SC and 6 HDC into the Ch-6 loop just created.
- BM Part 2 (Right Half):
- Ch 6.
- Sl st behind the post of the same DC used to anchor Part 1.
- Ch 1. Work 1 SC and 6 HDC into the Ch-6 loop just created.This completes one Braid Motif.
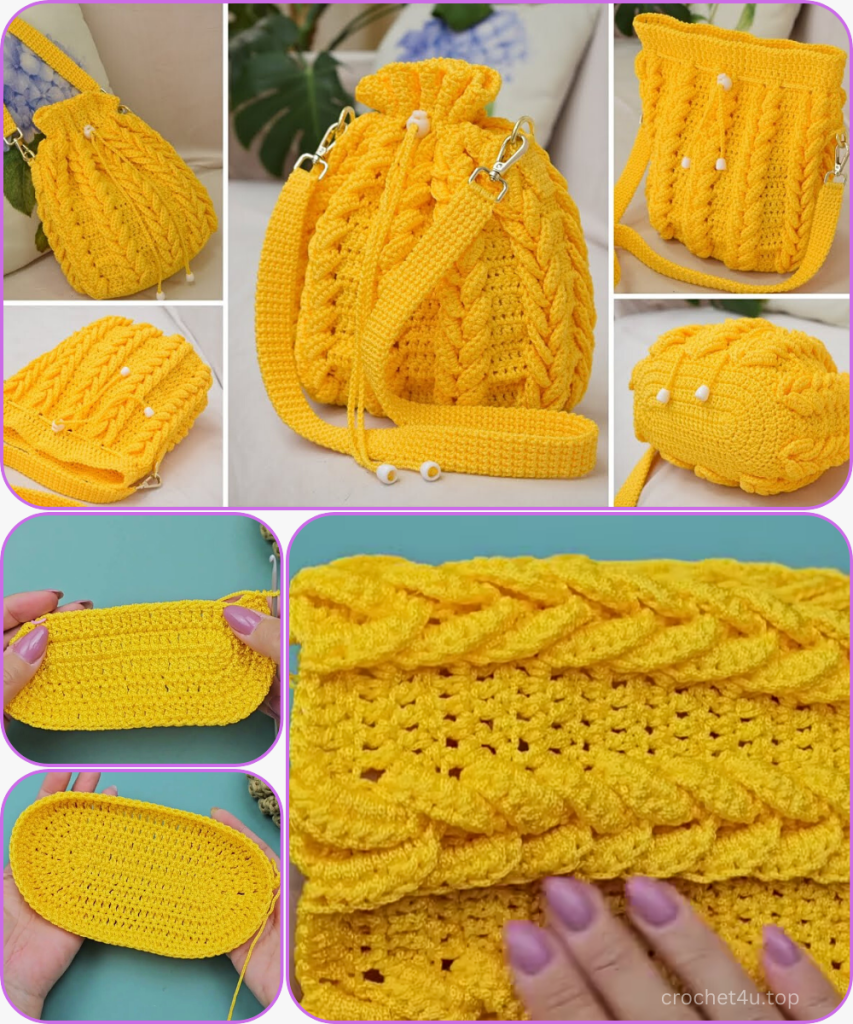
🟤 Part 1: The Oval Base (Working in the Round)
The base is worked in turned rounds (ch 3 counts as the first DC). The final stitch of each round is joined to the top of the initial Ch-3 with a sl st.

- Foundation: Ch 21.
- Round 1: DC in the 4th ch from hook (counts as 2 DC in the same st – an inc). DC in the next 16 chs (working into the back loop/bar). Work 6 DC in the last ch. Rotate to work along the opposite side of the foundation chain. DC in the next 16 chs. Work 3 DC in the starting chain space. Sl st to the top of the initial Ch-3. (44 sts total). Ch 3, turn.
- Round 2: DC inc in the same st as Ch-3 join. DC inc in the next 2 sts. (Total 3 incs). DC in the next 16 sts. Work DC inc in the next 6 sts. (Total 6 incs). DC in the next 16 sts. Work DC inc in the last 3 sts. (Total 3 incs). Sl st to the top of the initial Ch-3. (56 sts total). Ch 3, turn.
- Round 3: DC inc in the same st as Ch-3 join. DC in the next st. Rep [DC inc, DC] twice more. (Total 3 incs, separated by 1 DC). DC in the next 17 sts. Rep [DC inc, DC] 6 times. (Total 6 incs, separated by 1 DC). DC in the next 17 sts. Rep [DC inc, DC] 3 times. Sl st to the top of the initial Ch-3. (68 sts total). Ch 3, turn.
- Round 4 (Final Increase Round): DC inc in the same st as Ch-3 join. DC in the next 2 sts. Rep [DC inc, 2 DC] twice more. (Total 3 incs, separated by 2 DC). DC in the next 18 sts. Rep [DC inc, 2 DC] 6 times. (Total 6 incs, separated by 2 DC). DC in the next 18 sts. Rep [DC inc, 2 DC] 3 times. Sl st to the top of the initial Ch-3. (80 sts total). Ch 3, turn.
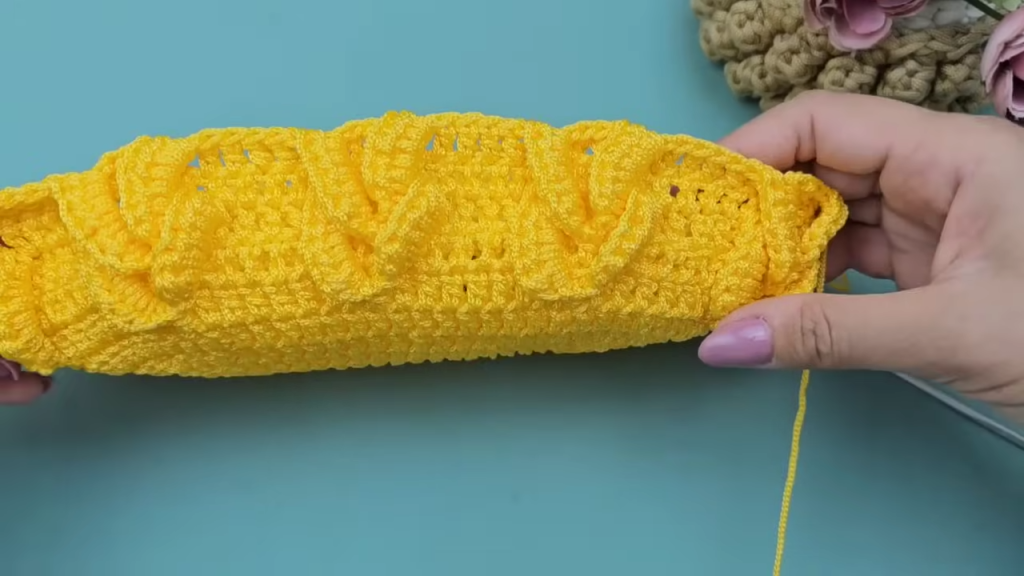
⬆️ Part 2: The Bag Body (Wall Construction)
All rows are worked in turning rows (Ch 3, turn). The stitch count remains 80 in every row.
- Row 5 (Base Wall): DC in the next 79 sts around. Sl st to the top of the initial Ch-3. Ch 3, turn. (80 sts).
- Row 6 (Turning Row): DC in the next 79 sts around. Sl st to the top of the initial Ch-3. Ch 3, turn. (80 sts).
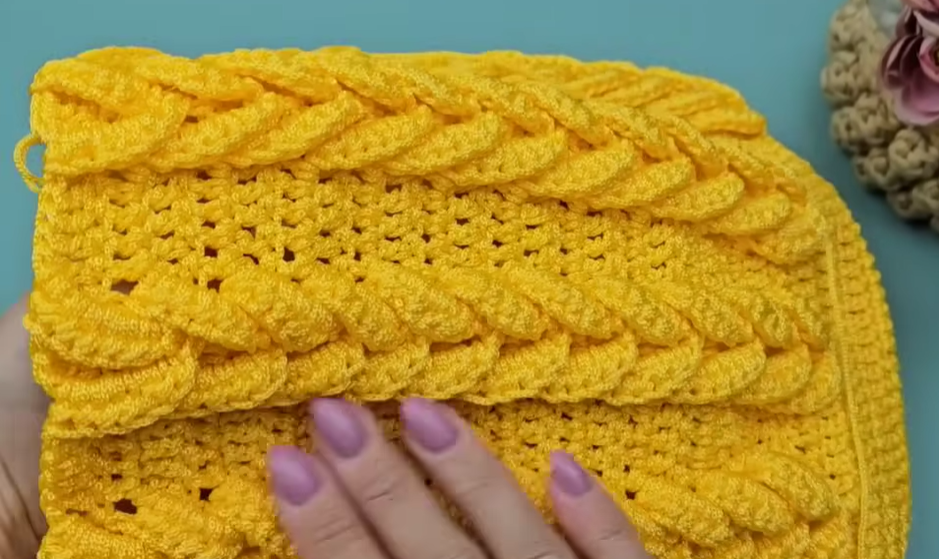
🌊 Part 3: The Braid Motif Pattern (11 Repeats High)
The pattern alternates between a Braid Row (BM) and a Solid DC Row, worked in opposite directions (turning rows).

- Row 7 (Braid Row 1):
- DC in the next 3 sts.
- Work BM Part 1 over the next 8-st segment (anchoring to the Row 5 DC post).
- DC in the next 3 sts.
- Work BM Part 2 over the same segment.
- Repeat: [DC in the next 5 sts (the spacing between motifs), work BM Part 1, DC in the next 3 sts, work BM Part 2].
- Continue the repeat until you have completed 10 full motifs and are near the end of the row.
- DC in the last st. Sl st to the top of the initial Ch-3. Ch 3, turn. (10 full BM repeats, 80 sts total).
- Row 8 (Solid DC Row): DC in the next 79 sts, working 1 DC into the top of every stitch from the previous row (including the tops of the SC and HDC stitches within the Braid Motif). Sl st to the top of the initial Ch-3. Ch 3, turn. (80 sts).
- Row 9 (Braid Row 2): This row is the same as Row 7, but the anchor for the Braid Motif (the Sl st) will be worked into the DC post of Row 7, directly below the central 5-DC gap from Row 7. This creates the staggered, braided look.
- DC in the next 3 sts.
- Work BM Part 1 (anchoring to the correct central DC post two rows below).
- DC in the next 3 sts.
- Work BM Part 2 (anchoring to the same DC post).
- Rep the pattern until 10 full motifs are complete. DC in the last st. Sl st to the top of the initial Ch-3. Ch 3, turn. (80 sts).
- Row 10 (Solid DC Row): DC in the next 79 sts. Sl st to the top of the initial Ch-3. Ch 3, turn. (80 sts).
- Rows 11 – 27: Continue alternating the Braid Row (BM) and the Solid DC Row until you have completed a total of 11 Braid Motifs rows. The final row should be a Solid DC Row (Row 28).
🔝 Part 4: The Drawstring Casing and Edging
This section is worked in continuous rounds (no turning) to create a consistent, sturdy top edge.
- Round 29 (SC Base): Ch 1 (does not count as st). Working in the same direction, SC in the next 79 sts. Sl st to the first SC. Ch 3, continue without turning. (80 sts).
- Round 30 – 32 (Casing): DC in the next 79 sts. Sl st to the top of the Ch-3. Ch 3. (80 sts). (3 rounds total).
- Round 33 (Decorative Edge): Ch 1 (does not count as st). Rep [Sl st in next st, Ch 1, Sk 1] around the entire top opening. This creates a chain-linked edging. Sl st to the first st and FO.
🔗 Part 5: The Drawstring & Hardware Assembly
The drawstring is a separate crocheted cord that runs through the top casing, about 3 rows down from the top edge.
- Drawstring Cord: Chain approximately 85 cm of ch sts (or 200+ chs). Pull yarn through the last loop and secure the end.
- Weaving: Starting at the center back, use a hook to weave the cord in and out, about 3 DC rows below the final decorative edge.
- Finishing: Thread both ends of the cord through the plastic stopper. Secure the cord end caps by tying a knot at each end of the cord and slightly melting/sealing the cord ends with a flame (for synthetic cord) or securing with glue. Crimp the cap over the knot.
⛓️ Part 6: The Strap & Side Loops
The strap is worked in simple SC rows, maintaining a tight, dense fabric by working into the back loops.
- Strap Foundation: Ch 6.
- Row 1: SC in the 2nd ch from hook and in each ch across. (5 SC). Ch 1, turn.
- Row 2: Working into the back loop only (BLO), SC in each st across. (5 SC). Ch 1, turn.
- Repeat Rows 3 – 210: Continue working BLO SC rows until the strap measures approximately 82 cm or your desired length. FO, leaving a long tail for sewing the carabiner clips.
Side Attachment Loops (x2):
- Take one 20 mm Half-Ring. Ch 1. SC 5 around the ring, enclosing the metal. Sl st to the first SC.
- Ch 1, turn. SC 5 into the BLO of the previous SCs.
- Continue working BLO SC rows until the loop is 5 rows high (matching the width of the main strap). FO and hide ends.
- Repeat for the second Half-Ring.
Final Assembly:
- Attach Strap: Use the long tails to securely sew the Carabiner Clips to the ends of the main strap.
- Attach Loops to Bag: Find the center sides of the bag (at the level of the drawstring casing). Use a tapestry needle and matching yarn to hand-sew the Side Attachment Loops (with the Half-Rings) securely to the bag wall, approximately 3 rows below the drawstring casing.
- Complete Bag: Clip the strap onto the Half-Rings. If desired, follow the video’s instructions for a sewn lining (using 28cm x 56cm fabric plus seam allowance) to prevent small items from falling through the crochet fabric.


