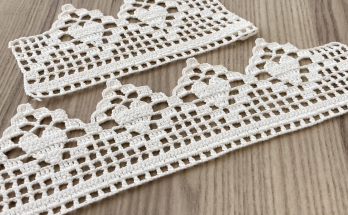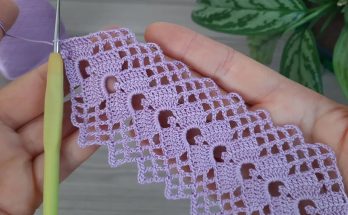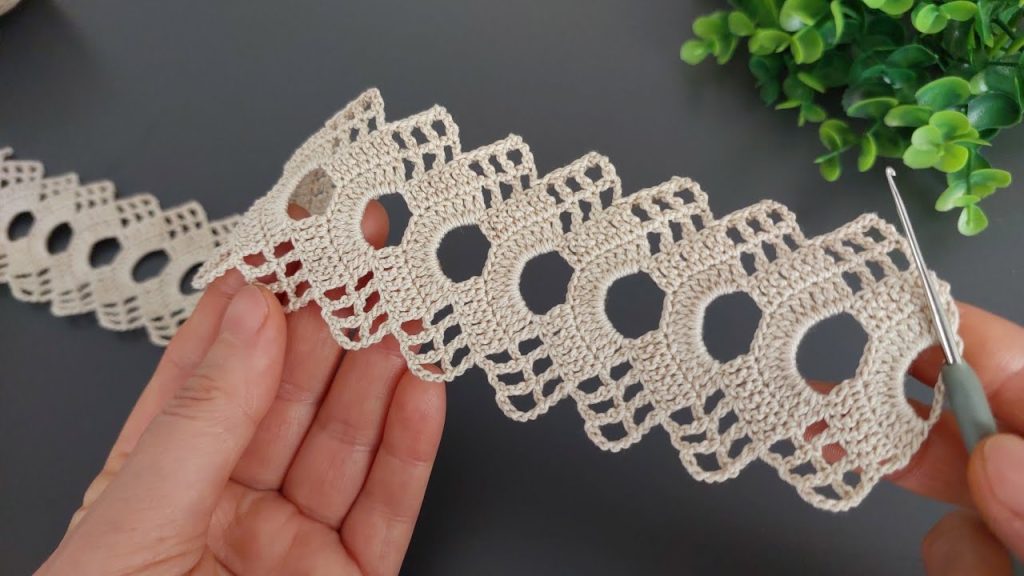
Hello, fellow makers! I’m delighted to share this pattern for a beautiful lacy border that’s perfect for a wide range of projects. This edging is made up of a repeating circle motif that cascades into a series of delicate stitches, creating a look that is both intricate and elegant. Whether you use it to trim a baby blanket, a scarf, a pillowcase, or to create a unique bookmark, this pattern is a fantastic way to add a professional, finished touch to your work.
This pattern is a great project for intermediate crocheters and a fun challenge for those new to working with lace. The simple repetition of the circle shape makes it easy to learn and to remember.
This pattern is written using US crochet terms.
Skill Level: Intermediate
Finished Size:
- The width of the lace is approximately 2.5 inches (6.5 cm).
- The length is customizable to fit your project.
Materials You’ll Need
- Yarn/Thread: Approximately 50-100g of a fingering weight yarn or a fine crochet thread (Size 10 or 20). Mercerized cotton is highly recommended for its crisp stitch definition and durability.
- Hook: A steel crochet hook in a size appropriate for your chosen thread. For fingering weight yarn, a US size C/2 (2.75 mm) or D/3 (3.25 mm) hook might work. For crochet thread (size 10), a US size 7 or 8 (1.5mm-1.65mm) hook is a good starting point. Adjust your hook to achieve the desired drape and density.
- Notions:
- A tapestry needle for weaving in ends.
- Scissors.
- A few stitch markers (optional, but helpful for repeats).
Gauge: Precision for Perfection
While gauge isn’t critical for sizing a customizable edging, it is important for the overall look and consistency of your lace. A consistent tension will ensure your circles are even and your openwork is beautifully defined.
Gauge Swatch for Reference:
- Create a small swatch: Chain 20. Double crochet (dc) in the 4th chain from the hook and in each chain across. (18 dc).
- Work 5 rows of double crochet.
- Measure your swatch. If it seems too loose or too dense for your liking, adjust your hook size. Aim for an open, yet firm, fabric.
Crocheting the Lace Edging: The Main Pattern
This lace edging is worked in rows. You can either attach it directly to an existing fabric (like a towel or blanket) by working the foundation row directly into the edge stitches, or you can create a standalone strip of lace by starting with a long foundation chain. For this pattern, we’ll assume you’re starting with a foundation chain.
The pattern repeat for this edging is a multiple of 12 stitches.
Part 1: The Foundation Row (Setting the Base)
We’ll begin by creating a sturdy base for our lace.
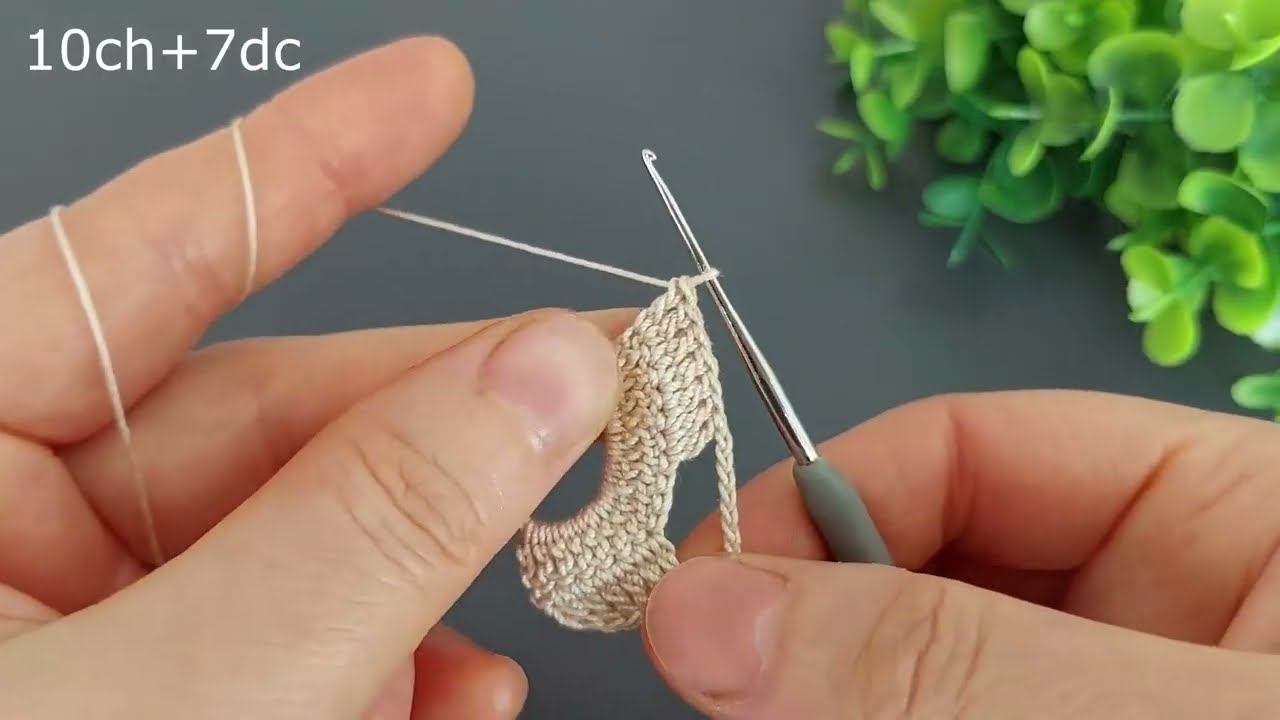
- Chain: Begin by chaining a multiple of 12. For a sample piece, chain 60.
- Row 1 (Foundation): Single crochet (sc) in the second chain from the hook, and then sc in each chain across. This creates a solid base row. (You should have 59 sc for a chain of 60).
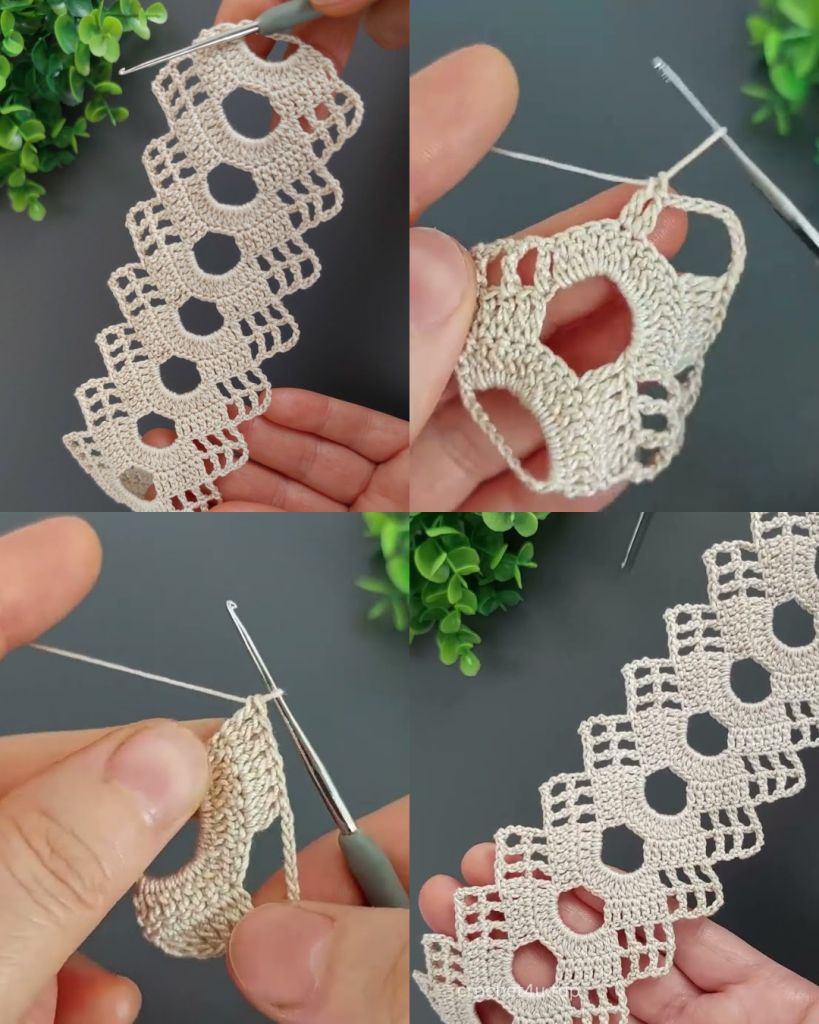
Part 2: Creating the First Lace Section (The Circles)
This section creates the arches that form the base of the fan shapes.
- Row 2: Chain 1. Turn your work. Single crochet (sc) in the first sc. *Chain 5, skip 5 sc, sc in the next sc*. Repeat from * to * across the row. You should end with a sc in the last stitch.
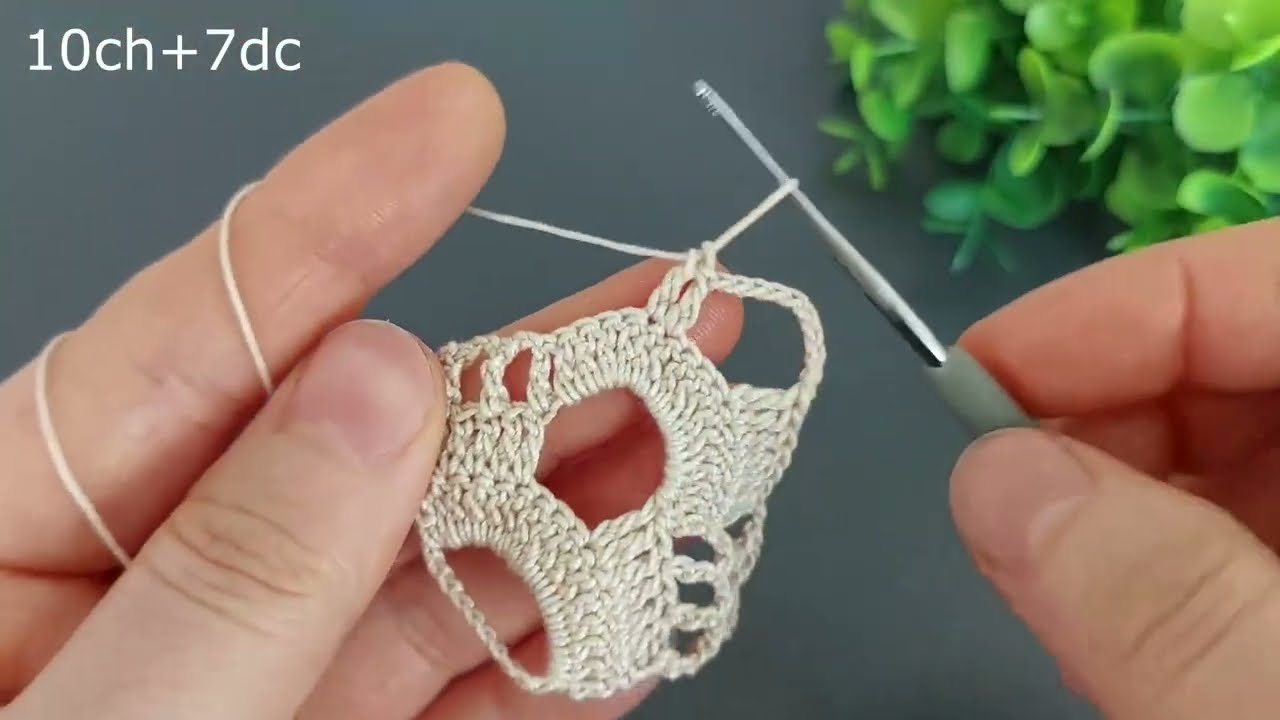
- Row 3: Chain 3 (counts as the first dc). Turn your work. *Work 7 double crochet (dc) into the next ch-5 space, dc in the next sc*. Repeat from * to * across the row. You should end with a dc in the last sc.
Part 3: The Circle and Meshwork
This is where the fan and meshwork pattern takes shape.
- Row 4: Chain 1. Turn your work. Single crochet (sc) in the first dc. *Chain 3, skip 3 dc, sc in the next dc (the center of the fan), chain 3, skip 3 dc, sc in the next dc (where the next fan begins)*. Repeat from * to * across the row. You should end with a sc in the last dc.
- Row 5: Chain 3 (counts as the first dc). Turn your work. *Work 5 dc into the next ch-3 space, dc in the next sc, 5 dc in the next ch-3 space, dc in the next sc*. Repeat from * to * across the row. You should end with a dc in the last sc.
Part 4: The Final Cascade and Edging
This section adds the final decorative layer to the lace.
- Row 6: Chain 1. Turn your work. Single crochet (sc) in the first dc. *Chain 3, skip 2 dc, sc in the next dc, chain 3, skip 2 dc, sc in the next dc (the center of the next fan)*. Repeat from * to * across the row. You should end with a sc in the last dc.
- Row 7 (Final Picot Edging): Chain 1. Turn your work. Single crochet (sc) in the first sc. *Work (sc, picot, sc) in the next ch-3 space (where a picot is: chain 3, slip stitch into the first chain). Work (sc, picot, sc) in the next ch-3 space. Sc in the next sc.* Repeat from * to * across the row. You should end with a sc in the last sc.

Finishing Your Lace Edging
- Weave in all ends: Use your tapestry needle to carefully weave in any loose yarn tails. Taking your time with this step will give your lace a professional and clean finish.
- Blocking is key: For lace work, blocking is essential. It opens up the stitches, evens out the scallops, and gives the piece its final shape and drape.
- Gently hand wash your lace or mist it thoroughly with water.
- Lay it flat on a clean towel or a foam blocking mat.
- Carefully stretch and pin out each fan and point, ensuring symmetry. Use rust-proof pins.
- Allow it to air dry completely. This can take several hours or overnight.
Video Tutorial:
Project Ideas & Customization
- Length: To make the edging longer or shorter, simply adjust the initial chain in Row 1, making sure it’s a multiple of 12.
- Attaching to Fabric: If you want to attach this directly to a fabric item, skip Row 1. Instead, work Row 2 by single crocheting directly into the edge stitches of your fabric. Ensure you have the correct stitch count along the edge (a multiple of 12).
- Color Choices: While the mint color is beautiful, this lace would be stunning in cream, white, or a pastel for a vintage feel. A darker, jewel-toned thread could create a more dramatic effect.
- Project Ideas: Use this lace to trim:
- Pillowcases or bed linens
- Baby blankets
- Hand towels
- Dresses or skirts
- As a standalone bookmark
- Joined together for a small table runner
I hope you enjoy every stitch of creating this beautiful lace edging! It’s a truly rewarding project that will add a touch of handmade elegance wherever you use it.