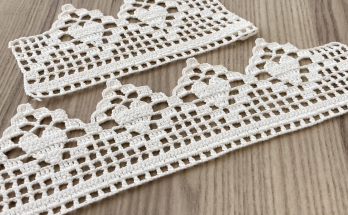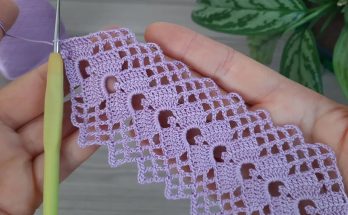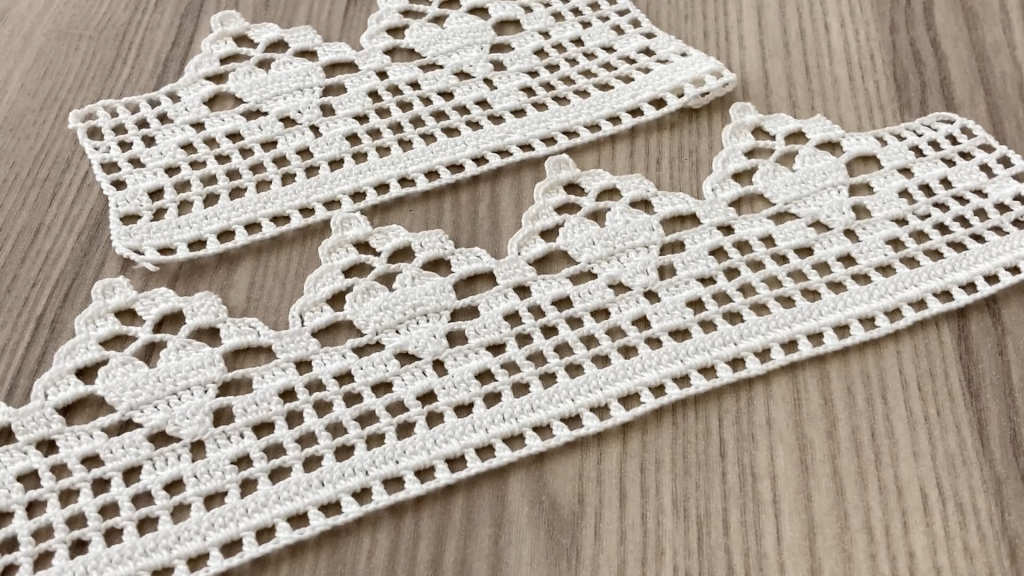
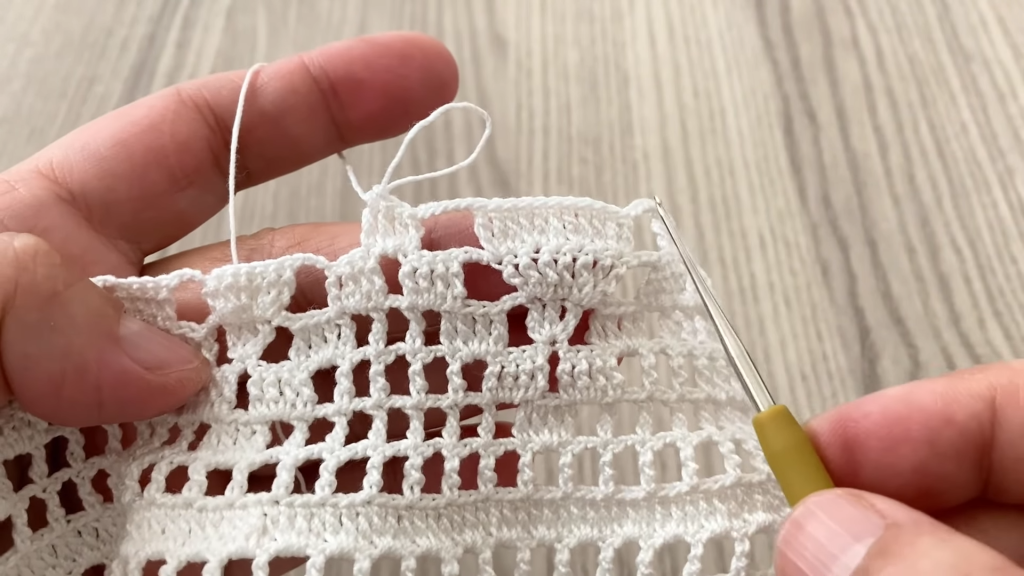
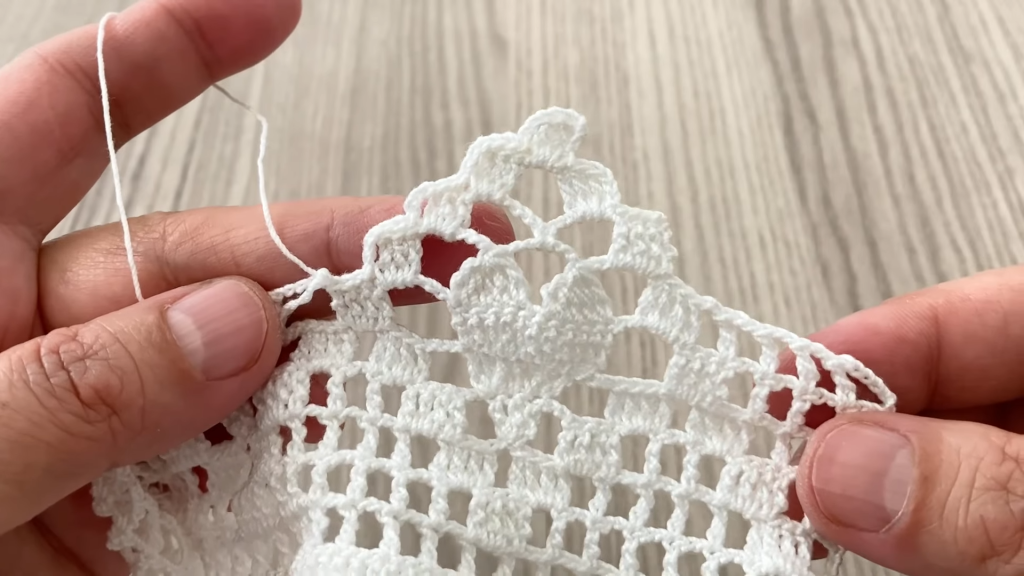
Welcome, lovely crocheters! Today, we are capturing the delicate and beautiful lacework shown in the video—a perfect border for adding a touch of romance and elegance to any textile project. I’ve designed the Sweetheart Trellis Lace Edging, a gorgeous, repetitive border featuring stacked ‘heart’ shapes and a delicate chain framework. This pattern is ideal for finishing blankets, shawls, garments, or even linens. It’s a wonderful way to give any piece an heirloom quality finish!

✨ Project Details
| Skill Level | Intermediate (Requires precise counting and comfort with shells/clusters) |
| Finished Height | Approximately 3.5 inches (9 cm) at its tallest point (using recommended materials) |
| Stitch Multiple | Works best over a base with a multiple of 16 stitches |
| Yarn Recommendation | Cotton or a cotton blend is best for stitch definition. |
| Project Use | Border/Edging for blankets, shawls, pillowcases, or cuffs. |
🧶 Materials and Preparation
The fine details of this lace shine best with lightweight yarn and a slightly larger hook to create open, airy chain spaces.
- Yarn: Sport Weight (Size 2) or DK Weight (Size 3) yarn. A smooth, mercerized cotton is highly recommended for defining the heart and shell shapes.
- Hook: Size E/4 (3.5 mm) or F/5 (3.75 mm), or one size larger than recommended for your chosen yarn to ensure the lace is open and drapes well.
- Notions: Tapestry needle for weaving in ends, scissors.
📝 Essential Stitch Abbreviations (US Terms)
This pattern uses a combination of clusters and shell stitches to achieve the rounded heart shape.
- Ch: Chain
- St(s): Stitch(es)
- Sl St: Slip Stitch
- Sc: Single Crochet
- Dc: Double Crochet
- Tr: Treble Crochet (Yarn over twice)
- 5-Tr Cl (5-Treble Crochet Cluster): [Yarn over twice, insert hook into specified stitch or space, yarn over, pull up a loop, yarn over, pull through 2 loops, yarn over, pull through 2 loops] 5 times in the same stitch/space (6 loops remaining on hook). Yarn over and pull through all 6 loops on hook. Ch 1 to secure.
- Shell: 5 Dc in the same stitch or space.
💜 Preparation: Foundation for the Edging
Before starting the main pattern, your project needs a clean, uniform foundation edge.
- Work a Base Row (Sc): Work a simple row of Single Crochet (Sc) evenly around the entire perimeter of your project. This ensures a consistent anchor for the lace.
- Adjust Count: After completing the Sc row, if your total stitch count isn’t already a multiple of 16, you must adjust it. Use a row of Sc (or Sl St) to subtly increase or decrease stitches until your count is a multiple of 16. This is crucial for the pattern repeat to align.
The Sweetheart Trellis Lace Edging Pattern
This pattern is a 6-Row Repeat worked along one edge of your project.
Row 1 (Foundation Arches – RS):
Ch 1 (does not count as a st), 1 Sc in the first St.
Ch 5, Sk 7 Sts, 1 Sc in the next St, Ch 5, Sk 7 Sts, 1 Sc in the next St.
Repeat from * to * across the row. The row should end with a final Sc in the last St. Ch 3 (counts as 1 Dc), turn.
(This row creates the large, open arches that the hearts will be built upon.)
Row 2 (Shell Base – WS):
2 Dc in the first St (the Sc from the previous row).
Ch 3, Sk Ch-5 Sp, 1 Sc in the next Sc. Ch 3, Sk Ch-5 Sp, Shell (5 Dc) in the next Sc.
Repeat from * to * across the row until the final Sc remains.
3 Dc in the last Sc. Ch 1 (does not count as a st), turn.
This row establishes the central shell cluster which will become the heart.
Row 3 (Top Frame – RS):
1 Sc in the first 3 Dc.

Ch 3, 1 Sc in the next Ch-3 Sp. Ch 3, Sk the Sc. 1 Sc in the next Ch-3 Sp. Ch 3. Sk the first 2 Dc of the Shell, 1 Sc in the next Dc (the center of the shell).
Repeat from * to * across the row until the final Shell remains.
Ch 3, 1 Sc in the next Ch-3 Sp. Ch 3, Sk the Sc. 1 Sc in the next Ch-3 Sp. Ch 3. Sk the first 2 Dc of the final 3-Dc cluster, 1 Sc in the top of the turning Ch 3. Ch 4 (counts as 1 Tr), turn.
This row begins to shape the top of the heart and creates the chain loops for the next layer.
Row 4 (Heart Peaks and Trellis – WS):
Work 2 Tr in the first Sc.
Ch 3, 1 Sc in the next Ch-3 Sp. Ch 3, 1 Sc in the next Ch-3 Sp. Ch 3, Sk the central Sc. 1 Sc in the next Ch-3 Sp. Ch 3, 1 Sc in the next Ch-3 Sp. Ch 3.
In the next Sc (the center Sc of the Shell), work a 5-Tr Cl.
Repeat from * to * across the row, ending the final repeat with a 5-Tr Cl in the last Sc. Work 3 Tr in the last Sc (the top of the Ch 3 from the previous row). Ch 1 (does not count as a st), turn.
The 5-Tr Cluster forms the rounded peak of the heart shape, standing out beautifully from the chain trellis.
Row 5 (Connecting Arch – RS):
1 Sc in the first 3 Tr.
Ch 5, 1 Sc in the next Ch-3 Sp. Ch 5, 1 Sc in the next Ch-3 Sp. Ch 5, 1 Sc in the next Ch-3 Sp. Ch 5. 1 Sc in the top of the 5-Tr Cl.
Repeat from * to * across the row, ending the last repeat with Ch 5, 1 Sc in the top of the turning Ch 4. Ch 3 (counts as 1 Dc), turn.
This row closes off the heart motif with large arches, setting up the pattern for the next repeat block.
Row 6 (Final Bar/Next Base – WS):
1 Dc in the first 2 Sts.
Ch 1, Sk Ch-5 Sp. 1 Dc in the next Sc. 1 Dc in the next Ch-5 Sp (by working 5 Dc into the loop). 1 Dc in the next Sc.
Repeat from * to * across the row until the final Ch-5 Sp remains.
Ch 1, Sk Ch-5 Sp. 1 Dc in the last Sc. 1 Dc in the top of the turning Ch 3. Ch 1, turn.
This row forms the solid bar at the base of the next heart repeat.
To Continue: Repeat Rows 1-6 until you have worked the edging around your entire project.
💡 Tips for Beautiful Lace
- Tension Control: Maintain consistent, relatively loose tension, especially on the chains. Too tight, and the lace will pucker instead of draping beautifully.
- Counting Clusters: The 5-Tr Cl is the anchor of the heart. Ensure you are securing it with a
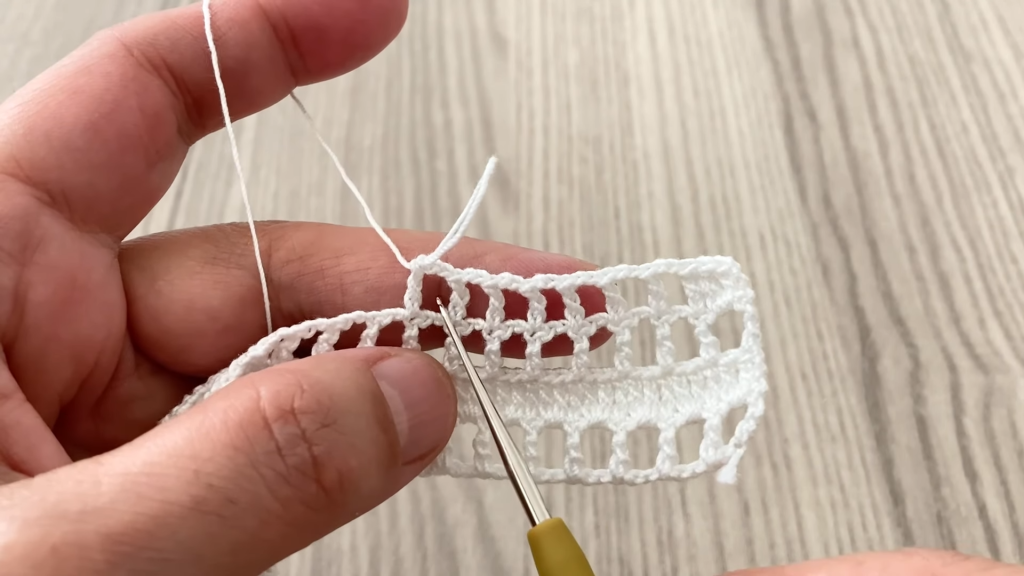
Ch 1and placing the subsequent chain loops correctly to frame the heart. - Working into Arches: When the pattern calls for working into a chain space (like in Row 6), insert your hook directly under the chain loop and work your stitches around the chain itself, not into the individual chain stitches.
Video Tutorial:
🛁 Finishing and Care
- Weaving: Use your tapestry needle to securely weave in all yarn tails. Due to the open nature of lace, be methodical about hiding tails within the solid parts of the design without showing through.
- Blocking (Essential): Blocking is absolutely crucial for any lace project. It opens up the chain spaces, smooths out any minor puckering, and fully defines the delicate heart motifs.
- Method: Wet the finished edging thoroughly (or steam it). Pin the entire edge tautly and precisely to a blocking mat, ensuring every heart is perfectly shaped and the overall edge is straight.
- Drying: Allow the piece to dry completely before unpinning.
Enjoy the luxurious, romantic feel of your project finished with the Sweetheart Trellis Lace Edging!