

If you love bold color and playful texture, this Peppermint Stripe Dress is your next project! This beautiful garment features a vibrant pink body contrasted by crisp white scalloped edges on the hem, sleeves, and neckline. The simple half double crochet stitch used for the main body gives the dress wonderful structure and coverage, while the large shell stitch border adds a fun, voluminous flare.
This long, detailed pattern is designed for an Intermediate crocheter ready to tackle classic top-down raglan shaping and a gorgeous statement border.
Materials Needed 🧶
- Yarn: Approximately 450-500 yards of DK Weight (Light Worsted / #3) or Worsted Weight (#4) yarn. A soft acrylic or cotton blend is recommended.
- Main Color (MC): Approx. 350-400 yards (Hot Pink)
- Contrast Color (CC): Approx. 100-150 yards (Snow White)
- Crochet Hook: 4.0 mm (US G-6), or the size needed to obtain gauge.
- Button: One small (1/2 inch) button for the back neck closure.
- Tapestry Needle: For weaving in ends and sewing the button.
- Stitch Markers: 4 markers for the raglan corners.
Skill Level & Notes 💡
- Skill Level: Intermediate. You must be comfortable with top-down raglan shaping, color changes, and working both flat and in the round.
- Construction: The yoke is worked flat in rows with a back opening, then joined for the seamless skirt.
- Chains: The starting chain (ch 2) at the beginning of HDC rows always counts as the first HDC unless noted otherwise.
Gauge 📏
In Half Double Crochet (HDC) (Yoke section) using a 4.0 mm hook: 14 HDC stitches and 10 rows = 4 inches (10 cm) square.
Abbreviations 📚
| Abbreviation | Description |
| ch | chain |
| sl st | slip stitch |
| sc | single crochet |
| hdc | half double crochet |
| dc | double crochet |
| st(s) | stitch(es) |
| rep | repeat |
| PM | Place Marker |
| ch-sp | chain space |
Special Stitch ✨
Large Scallop Shell (LSS)
This stitch creates the deep, dramatic scallop border on the hem.
- LSS: 7 double crochet (dc) stitches worked all into the same stitch or space.
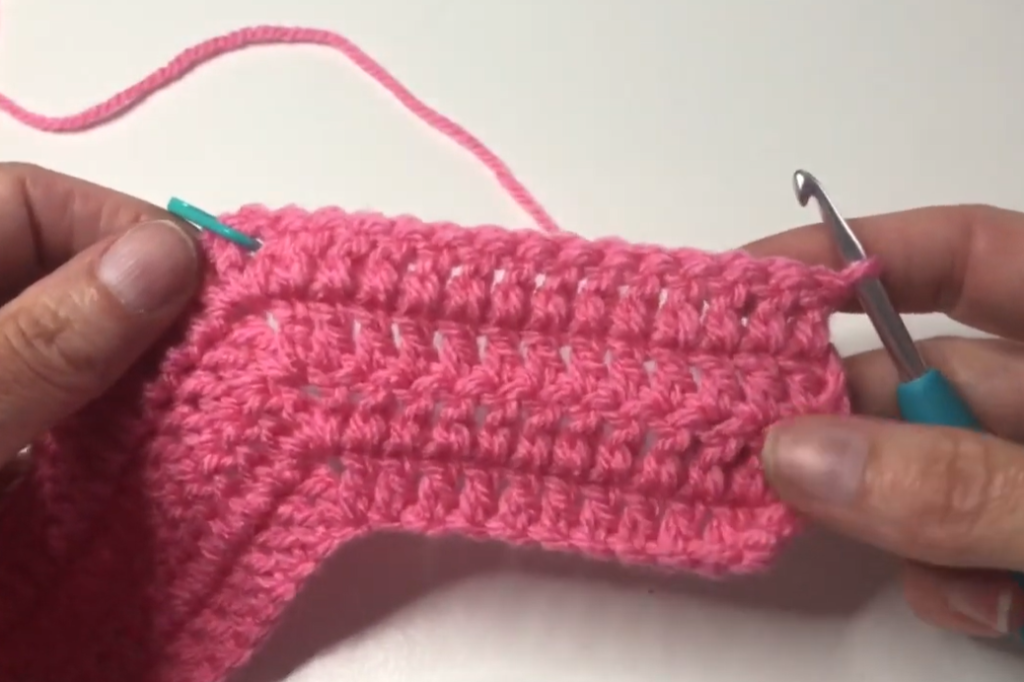
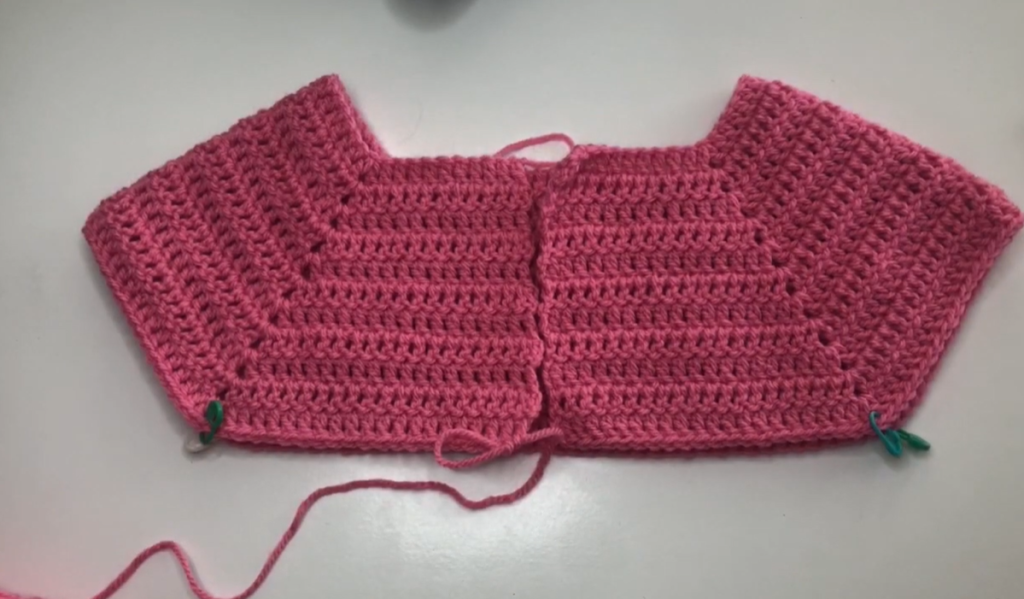
Part 1: The Yoke (MC – Hot Pink) ⬆️
Size: 9-12 Months. Yoke is worked flat with a back opening.
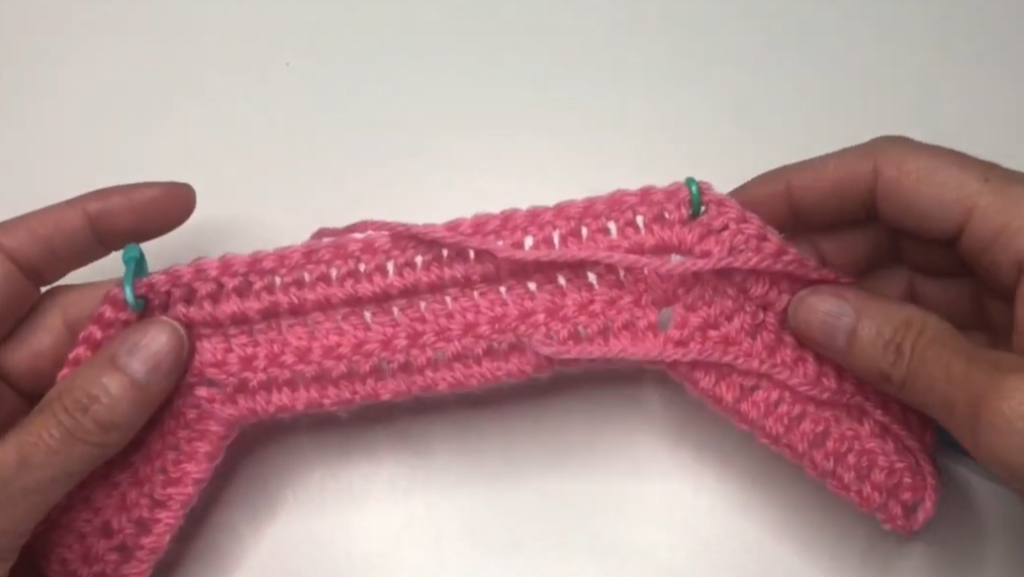
Row 1 (Foundation): Ch 62. Hdc in the 3rd ch from hook (counts as 2 hdc). Hdc in the next 5 ch (7 hdc for Right Back). [Hdc, ch 2, hdc] in the next ch (PM in ch-2 sp). Hdc in the next 10 ch (Shoulder). [Hdc, ch 2, hdc] in the next ch (PM). Hdc in the next 18 ch (Front). [Hdc, ch 2, hdc] in the next ch (PM). Hdc in the next 10 ch (Shoulder). [Hdc, ch 2, hdc] in the next ch (PM). Hdc in the last 7 ch (Left Back). (64 hdc, 4 ch-2 sps)
Row 2 (Increase Row): Ch 2 (counts as hdc), turn. Hdc in each st until the first ch-2 sp. [Hdc, ch 2, hdc] in the ch-2 sp. Rep [Hdc in each st to next ch-2 sp, (hdc, ch 2, hdc) in ch-2 sp] 3 times. Hdc in each remaining st. (Increases by 4 hdc each row.)
Rows 3-8: Repeat Row 2. Continue increasing by 4 hdc each row.
- End of Row 8 Stitch Count: 140 hdc, 4 ch-2 sps.
Row 9 (Armhole Joining Row): Ch 2, turn. Hdc in each st until the first ch-2 sp. Hdc in the ch-2 sp. Ch 4 (skips the sleeve stitches). Hdc in the second ch-2 sp. Hdc in each st until the third ch-2 sp. Hdc in the ch-2 sp. Ch 4 (skips the second sleeve stitches). Hdc in the fourth ch-2 sp. Hdc in each remaining st. Sl st to the top of the beg ch-2 to join the work into a continuous round. (78 hdc, 8 ch = 86 sts)
Part 2: The Skirt (MC – Hot Pink) 👗
The skirt is worked in the round using continuous HDC stitches, with periodic increases to create the A-line flare.
Round 10 (Skirt Setup): Ch 2. Work 4 hdc into each ch-4 sp. Hdc in each hdc around. Sl st to join. (94 hdc)
Rounds 11-14: Ch 2. Hdc in each st around. Sl st to join. (94 hdc)
Round 15 (Increase Round): Ch 2. [Hdc in the next 15 sts, 2 hdc in the next st] 5 times. Hdc in remaining sts. Sl st to join. (99 hdc)
Rounds 16-20: Ch 2. Hdc in each st around. Sl st to join. (99 hdc)
Round 21 (Increase Round): Ch 2. [Hdc in the next 16 sts, 2 hdc in the next st] 5 times. Hdc in remaining sts. Sl st to join. (104 hdc)
Rounds 22-26: Ch 2. Hdc in each st around. Sl st to join. (104 hdc)
Round 27 (Increase Round): Ch 2. [Hdc in the next 17 sts, 2 hdc in the next st] 5 times. Hdc in remaining sts. Sl st to join. (109 hdc)
Round 28: Ch 2. Hdc in each st around. Sl st to join. (109 hdc)
Fasten off MC. Attach CC (White).
Part 3: The Scalloped Hem (CC – Snow White) 🧵
This deep border creates the signature ruffled hem. We will work three rows of the Large Scallop Shell (LSS).
Round 29 (LSS Foundation): Ch 1 (does not count as st). Sc in each st around. Sl st to join. (109 sc)
Round 30 (LSS Shell Row): Ch 3 (counts as dc). Dc in the same st. [Sk 3 sc, LSS (7 dc) in the next sc, sk 3 sc, 3 dc in the next sc] rep around. Adjust the last few stitches if necessary to end with a sl st to the top of the beg ch-3. (Approx. 15 LSS shells)
Round 31: Ch 3. Dc in the next 2 dc. [Sc in the center (4th) dc of the next LSS shell, LSS (7 dc) in the center (2nd) dc of the next 3-dc group] rep around. After the last shell, sc in the center of the last LSS shell. Sl st to the top of the beg ch-3 to join.
Round 32 (Final Row): Repeat Round 31. This creates the final large scalloped edge.
Fasten off CC. Weave in ends.
Part 4: Edging and Finishing 🎀
A. Sleeve Edging (Make 2 – CC)
- Attach CC to the underarm. Ch 1, sc evenly around the armhole opening. Sl st to join.
- Scallop Row: Ch 1. Sc in the first st. [Sk 1 st, 5 dc in the next st (Small Shell), sk 1 st, sc in the next st] rep around. Sl st to join and fasten off.
B. Neckline Edging (CC)
- Attach CC at the bottom right corner of the back slit. Work a row of sc evenly up the right back edge. Sc evenly around the neckline. Work a row of sc down the left back edge. Do not join.
- Scallop Row (Neckline): Ch 1, turn. Sc in the first st. [Sk 1 st, 5 dc in the next st (Small Shell), sk 1 st, sc in the next st] rep across the entire neckline and back edges. Fasten off.
C. Back Closure
Sew the small button onto the Right Back edge, aligning it with a space between the scallops on the Left Back edge to use as a button loop.
Video Tutorial:
The Essential Step: Blocking 🫧
Blocking will set the shape of the yoke and make the large scallops of the hem lie flat and defined.
- Dampen: Gently soak the dress in water, squeeze out excess water (do not twist or wring!), and roll in a clean towel.
- Pin: Lay the damp dress flat on a blocking mat or towel. Pin the skirt hem, carefully defining each large scallop. Pin the yoke and straps flat and symmetrically.
- Dry: Allow the dress to air dry completely before unpinning.
Your beautiful Peppermint Stripe Baby Dress is ready to be worn! Enjoy the dramatic ruffle!


