

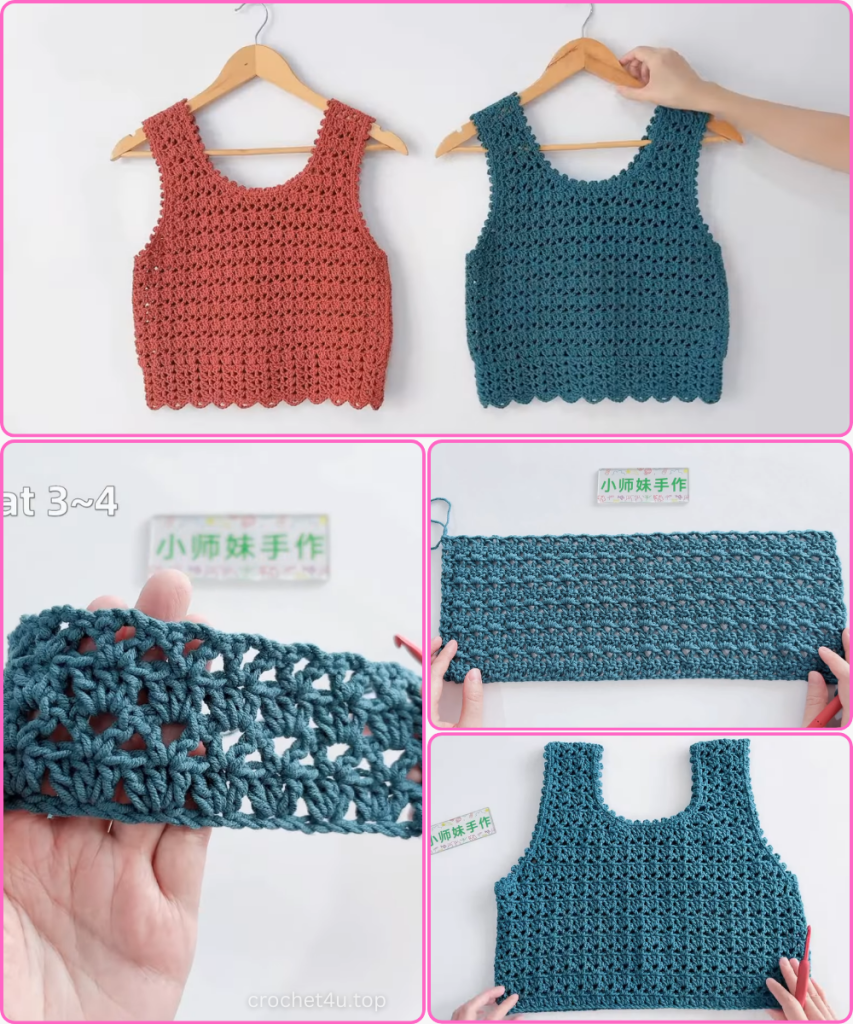
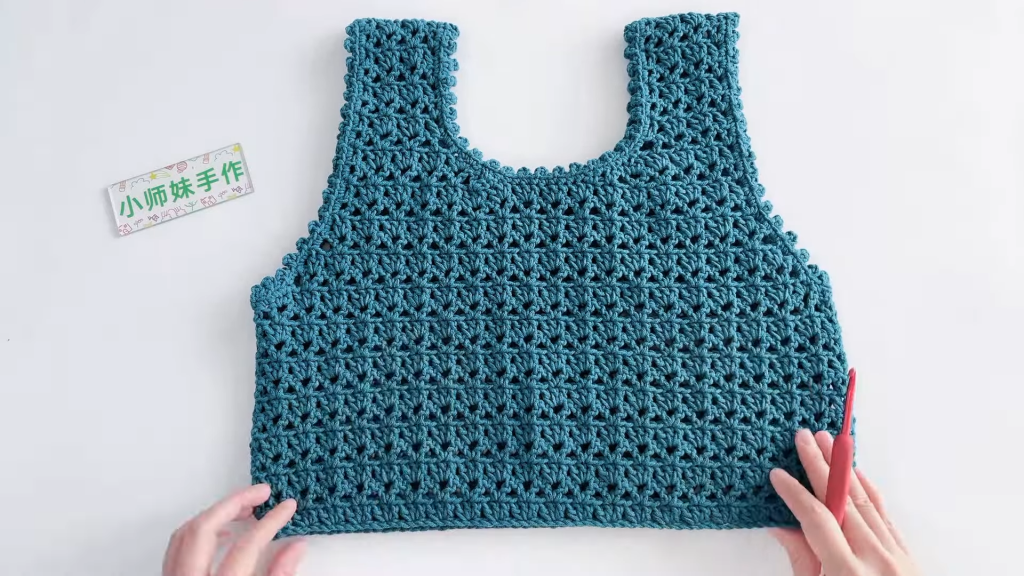
Welcome to a journey into vintage-inspired handmade fashion! Today, we are crafting the “Spring Breeze” Retro Vest, a charming waistcoat that captures the essence of classic crochet with a modern, airy feel. This piece features a beautiful interplay of “V-stitches” and “Granny Clusters,” topped off with delicate picot edging and a flared shell hem.
Whether you are making this for a toddler or scaling it up for yourself, this pattern offers the perfect balance of rhythmic repetition and intricate shaping. Let’s pick up our hooks and begin!
🧶 Materials & Essential Tools
Before we start our first chain, gather the following supplies to ensure a professional finish:
- Yarn: 5-ply Milk Cotton (approximately 150-200g). This yarn provides the softness needed for a comfortable garment while maintaining excellent stitch definition.
- Crochet Hook: 4.5 mm.
- Notions: A tapestry needle for weaving in ends, a pair of sharp scissors, and 2-4 stitch markers to help with armhole shaping.
- Sizing Note: The base chain for this pattern is 67 stitches, which follows a multiple of 3 + 1. You can adjust the width by adding or subtracting sets of 3 chains.
📐 Section 1: The Main Body Panels (Front & Back)
The vest is constructed of two identical main panels. We begin with the lower half of the torso, working from the bottom up toward the armholes.
- Foundation: Chain 67.
- Row 1 (Cluster Row): DC in the 4th chain from the hook (this counts as 2 DC). Skip 2 chains, work 3 DC into the next chain. Repeat from * to * until the end of the chain. You should have 20 groups of 3-DC clusters plus the edges.
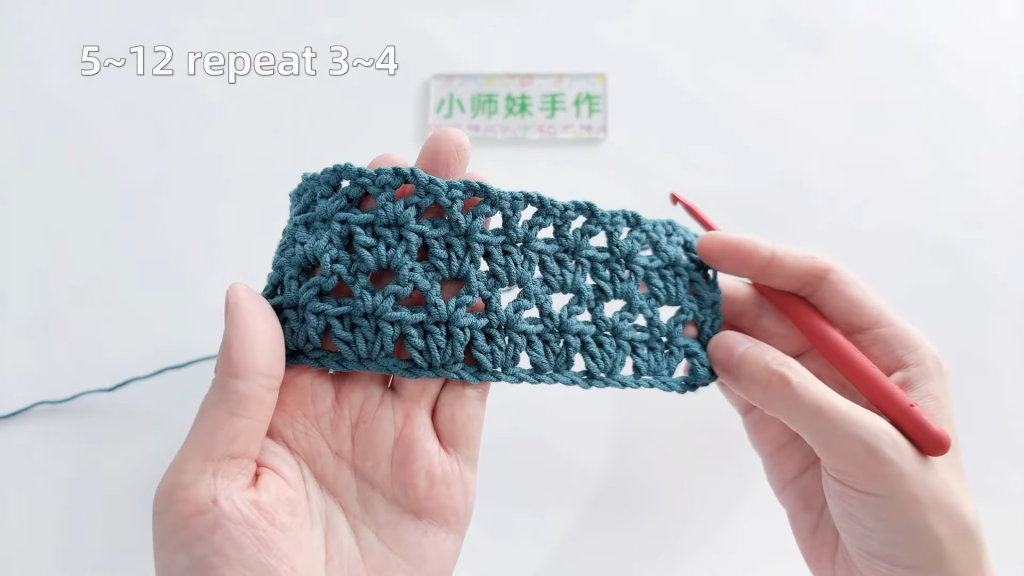
- Row 2 (V-Stitch Row): Chain 3 and turn. Work 1 DC in the very first stitch. Skip 2 stitches, work [1 DC, Chain 2, 1 DC] into the next stitch. This creates your “V” shape. Repeat across, ending with 2 DC in the last stitch.
- Row 3 (Cluster Row): Chain 3 and turn. Work 1 DC in the first stitch. Work 3 DC into the center of the Chain-2 space of the V-stitch below. Repeat across, ending with 2 DC in the last stitch.
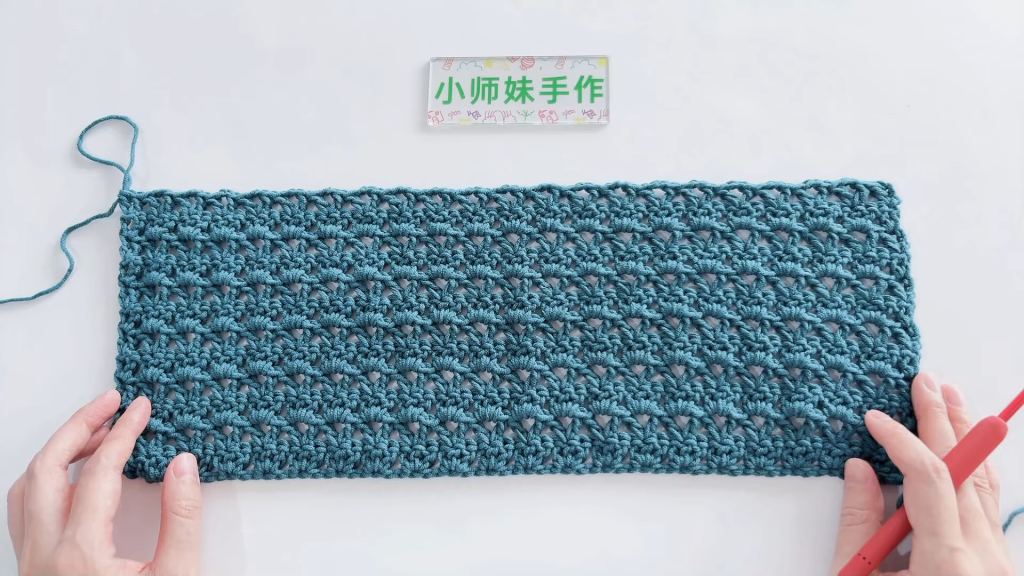
- Repetition: Continue alternating Row 2 and Row 3 until you have completed 12 rows total. This forms the solid rectangular base of the torso.
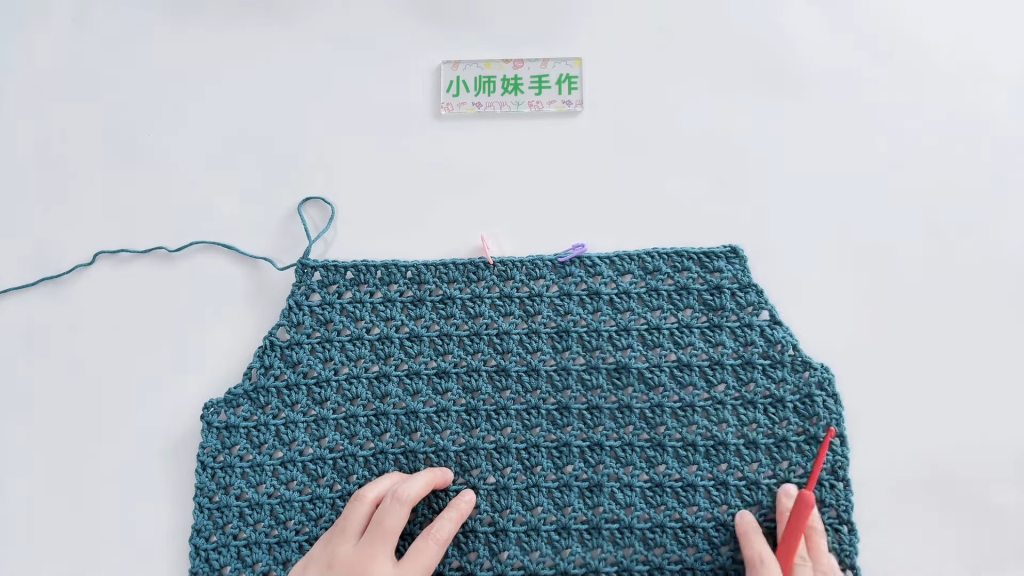
✂️ Section 2: Armhole Shaping & Decreases
To create the comfortable vest shape, we now reduce the width of the panel to allow for arm movement.
- The First Decrease Row: Chain 1 and turn. Skip the first two stitches and slip stitch into the third. In the first V-stitch gap, work [1 SC, 1 HDC]. Now, proceed with your 3-DC clusters across the middle, but stop before the last V-stitch. Mirror the beginning by working [1 HDC, 1 SC] and a slip stitch to finish the row.
- Continuing the Slant: In the following rows, you will continue to use slip stitches at the beginning and SC/HDC combinations to create a smooth, diagonal “staircase” effect for the armholes.
- Middle Support: By Row 5 of the shaping section, you should have narrowed the piece significantly. Work 2-3 rows with no further decreases (maintaining about 14 pattern groups) to build the height of the chest.
🎗️ Section 3: The Shoulder Straps
Once the chest height is reached, we divide the work to create the two straps, leaving a gap for the neckline.
- Right Strap: Attach yarn at the edge. Work 3 groups of the cluster/V-stitch pattern. At the neckline edge, use an SC or HDC to create a slight slope inward. Work vertically for 10 rows (or until the strap reaches the desired shoulder length).
- Left Strap: Skip 8 stitches in the center (for the neck) and repeat the same process as the right side, ensuring the decreases mirror each other.
- The Back Panel: Repeat Sections 1 through 3 to create a second identical piece.
🪡 Section 4: Assembly & Seaming
Now it is time to turn two flat pieces into a wearable garment!
- Shoulders: Place the front and back panels with “right sides” facing each other. Using your tapestry needle and a mattress stitch, sew the tops of the shoulder straps together.
- Sides: Sew the side seams from the bottom hem up to the base of the armhole shaping. Be careful to align the rows of V-stitches so the pattern looks continuous.
- Turning: Flip the vest right-side out. You will see the texture of the clusters and V-stitches perfectly aligned.
✨ Section 5: The “Petal” Edging & Picot Trim
The details make the vest! We will add a decorative border to the armholes and neckline.
- Armhole Border: Attach yarn at the underarm seam. Work 2 SC, then Chain 3 and slip stitch into the base of the last SC (this is your Picot stitch). Repeat this “2 SC + 1 Picot” pattern all the way around the armhole.
- Neckline Border: Repeat the picot edging around the entire neck opening. This prevents the edges from curling and adds a beautiful vintage lace effect.
👗 Section 6: The Flared Shell Hem
Finally, we finish the bottom of the vest with a dramatic flared hem.
- Round 1: Attach yarn to the bottom foundation chain. Work into the gaps: [2 DC, Chain 2, 2 DC] into one gap, then 1 SC in the next gap. This creates a “Shell.”
- Round 2: In each Chain-2 space of the shell, work [2 DC, Chain 2, 2 DC]. In the SC of the previous row, work 1 DC.
- Expansion: For the final rounds, increase the chains in the center of the shell to Chain-3 and change the single DC between shells back to an SC to pull the fabric into a soft wave.
Video Tutorial:
💡 Expert Tips for a Professional Look
- Block Your Work: Once finished, lightly steam the vest (especially the flared hem). This will open up the V-stitches and make the drape much more elegant.
- Yarn Tails: Weave in your ends as you go! There are many color changes and joins in this pattern; doing it at the end can be overwhelming.
- Sizing Check: Hold the panels against a favorite shirt of the wearer frequently during the shaping stage to ensure the armholes aren’t too tight.
Your Vintage Crochet Vest is complete! Wear it over a simple white blouse or a summer dress to bring a touch of handmade “Spring Breeze” wherever you go. Happy crocheting!


