
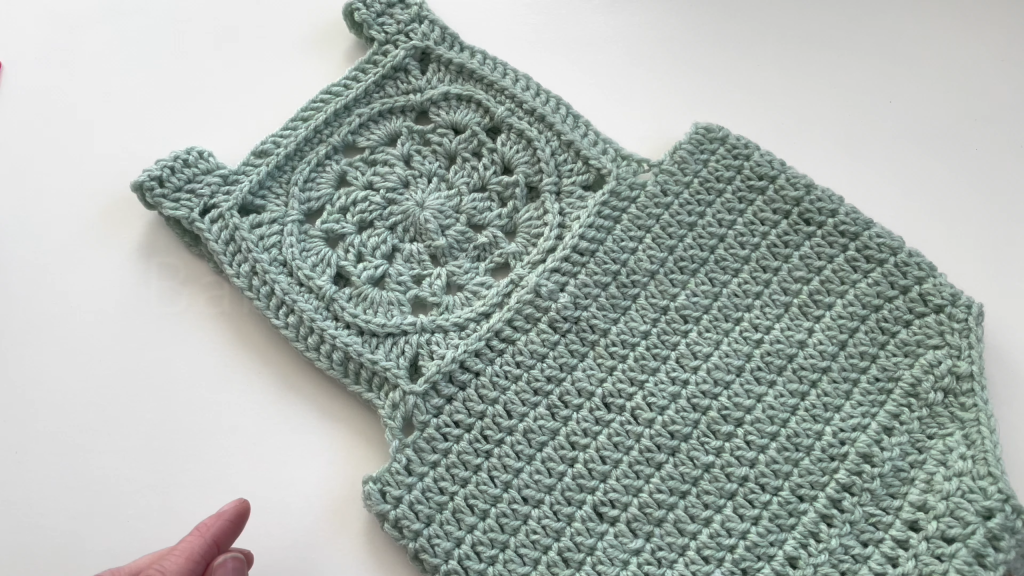
This romper is an absolute showstopper! Combining the vintage charm of a detailed Round-to-Square motif with a simple, modern bloomer bottom, this piece is truly unique. Perfect for layering over a simple bodysuit, its mint green color and intricate front bib make it look like a cherished heirloom.
This pattern is for an Advanced Intermediate crocheter due to the detailed motif work and garment assembly, but the result is well worth the effort!
Materials Needed 🧶
- Yarn: Approximately 300-350 yards of DK Weight (Light Worsted / #3) or Worsted Weight (#4) cotton or cotton blend yarn. This provides the best structure for the square.
- Main Color (MC): Mint Green/Sage Green
- Crochet Hook: 4.0 mm (US G-6), or the size needed to obtain gauge.
- Buttons: Two 3/4-inch buttons for the strap closure.
- Tapestry Needle: For weaving in ends and seaming.
- Optional: Small piece of elastic (approx. 1/2 inch wide) for the leg cuffs.
Skill Level & Notes 💡
- Skill Level: Advanced Intermediate. Requires familiarity with complex motif charts, working in multiple rounds, seaming, and garment construction.
- Construction: The garment is made in three parts: the Front Motif, the Back Panel, and the Shorts/Bloomers.
- Stitch Choice: We will use Half Double Crochet (HDC) for the back panel and shorts for a dense, stable fabric.
- Chains: The starting chain (e.g., ch 3 or ch 2) always counts as the first stitch unless noted otherwise.
Gauge 📏
In Half Double Crochet (HDC) (for the body section) using a 4.0 mm hook: 14 HDC stitches and 10 rows = 4 inches (10 cm) square. The final Front Motif should measure approximately 7 x 7 inches (18 x 18 cm).
Abbreviations 📚
| Abbreviation | Description |
| ch | chain |
| sl st | slip stitch |
| sc | single crochet |
| hdc | half double crochet |
| dc | double crochet |
| tr | treble crochet |
| st(s) | stitch(es) |
| rep | repeat |
| PM | Place Marker |
| sk | skip |
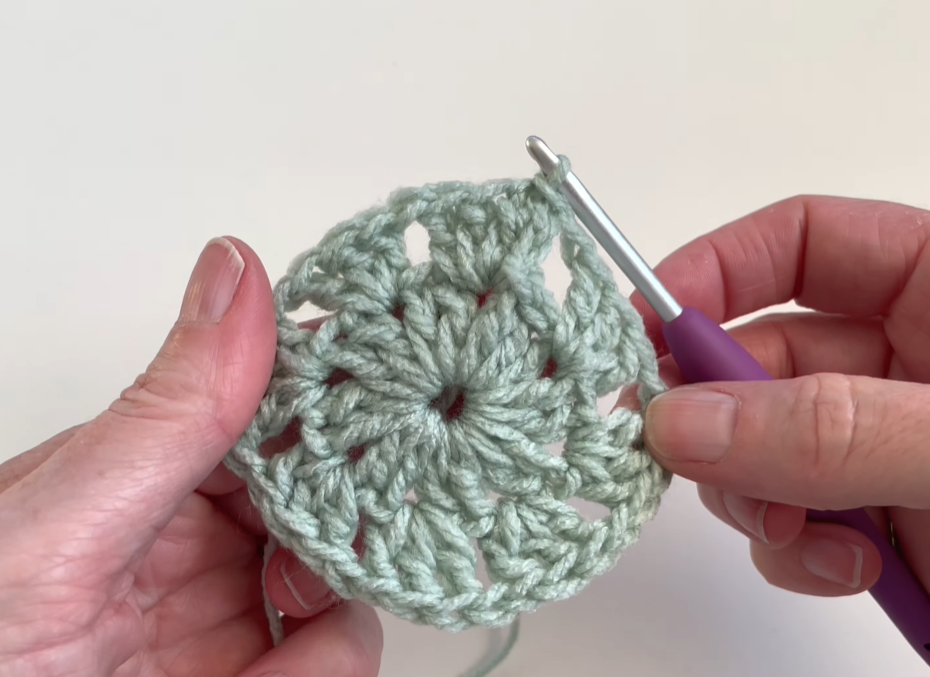
Special Motif Technique ✨
Round-to-Square Motif (RSM)
The motif starts in the round with delicate lace work and transitions to the square shape using a combination of dc, tr, and ch-sp stitches to build the corners.
Part 1: The Front Central Square Motif (RSM) ⬆️
Start: Make a Magic Ring.
Rnd 1: Ch 3 (counts as dc), 11 dc into the ring. Sl st to the top of the beg ch-3. (12 dc)
Rnd 2: Ch 5 (counts as dc, ch 2). [Dc in the next st, ch 2] 11 times. Sl st to the 3rd ch of beg ch-5. (12 dc, 12 ch-2 sps)
Rnd 3: Ch 3, 2 dc in the ch-2 sp. [Dc in the next dc, 2 dc in the next ch-2 sp] 11 times. Sl st to the top of the beg ch-3. (36 dc)
Rnd 4: Ch 1, sc in the same st. Ch 3, sk 2 sts. [Sc in the next st, ch 3, sk 2 sts] 11 times. Sl st to the beg sc. (12 sc, 12 ch-3 sps)
Rnd 5: Sl st into the ch-3 sp. Ch 3, 4 dc in the same sp. [Sc in the next sc, 5 dc in the next ch-3 sp] 11 times. Sl st to the top of the beg ch-3. (12 shells)
Rnd 6: Ch 3. Dc in the next 4 dc. [Ch 2, sc in the next sc, ch 2, dc in the next 5 dc] 11 times. Ch 2, sc in the next sc, ch 2. Sl st to the top of the beg ch-3.
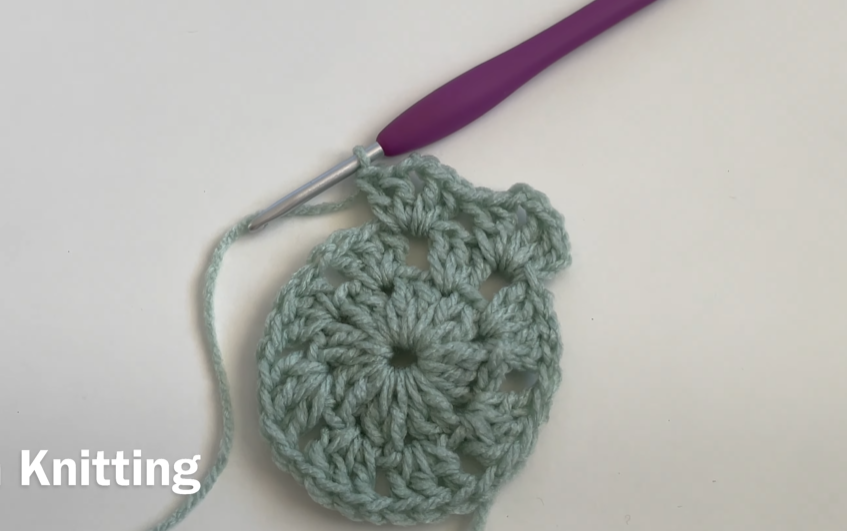
Rnd 7 (Start Corner Shaping): Ch 3. Dc in the next 3 dc. (2 dc, ch 2, 2 dc) in the next sc (Corner 1 made). [Dc in the next 5 dc, 2 dc in the next ch-2 sp, dc in the next dc, 2 dc in the next ch-2 sp, dc in the next 5 dc. (2 dc, ch 2, 2 dc) in the next sc (Corner made)] 3 times. Dc in the next 5 dc, 2 dc in the next ch-2 sp, dc in the next dc, 2 dc in the next ch-2 sp, dc in the last dc. Sl st to the top of the beg ch-3. (Approx. 104 dc)
Rnd 8 (Establish Square Frame): Ch 3. Dc in each st to the first ch-2 sp. [2 dc, ch 2, 2 dc] in the corner ch-2 sp. [Dc in each st to the next ch-2 sp. 2 dc, ch 2, 2 dc] 3 times. Dc in each remaining st. Sl st to join.
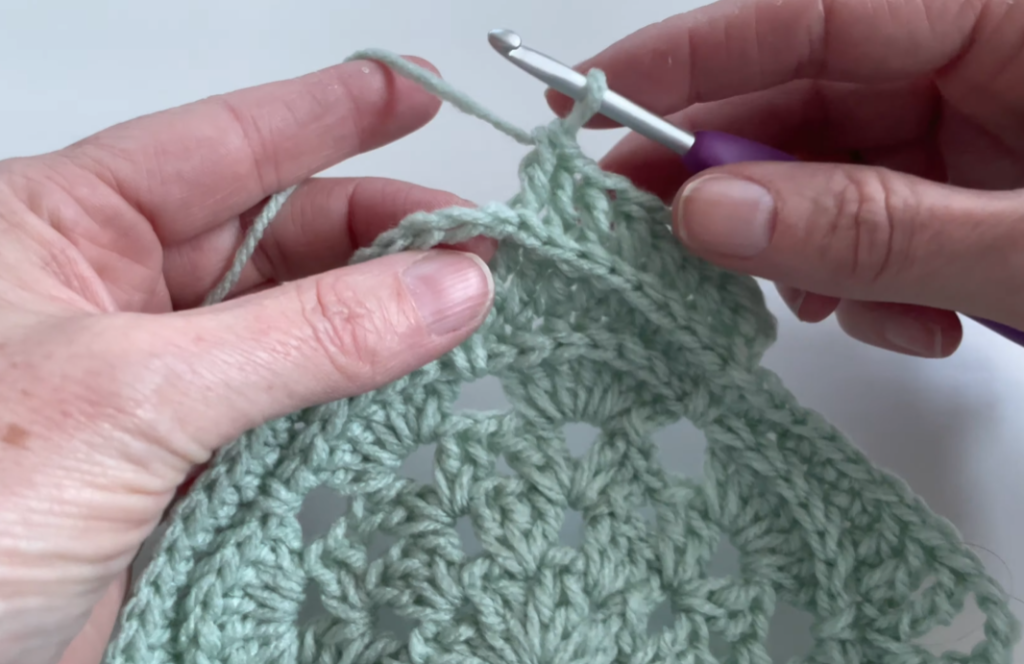
Rnd 9: Ch 1, sc in each st around, working 3 sc into each corner ch-2 sp. Sl st to join. (Approx. 124 sc)
Rnd 10 (Final Square Frame): Ch 2 (does not count). Hdc in each st around, working 3 hdc into each corner ch-3 sp. Sl st to join.
Fasten off. (Motif should now be approx. 7 inches wide).
Part 2: The Back Panel 🔙
This is a simple square panel to match the width and height of the front motif.
Row 1 (Foundation): Ch 31 (for a 7-inch width). Hdc in the 3rd ch from hook (counts as 2 hdc). Hdc in each ch across. (30 hdc)
Rows 2-15: Ch 2 (counts as hdc), turn. Hdc in each st across. (30 hdc)
- Panel should measure approximately 7 inches high.
Fasten off.

Part 3: The Shorts/Bloomers 👖
We will join the front and back panels and work down to form the shorts.
Joining Round (Seaming): Place the Front Motif and Back Panel side-by-side.
- Ch 2. Working along the top edge of the back panel: Hdc in the next 30 sts.
- Ch 4 (for the side seam/joining to front).
- Working across the bottom edge of the Front Motif: Hdc in the next 30 sts.
- Ch 4 (for the second side seam/joining to back).
- Sl st to the top of the beg ch-2. (60 hdc, 8 ch = 68 sts)
Body Rounds (HDC): Rnd 1: Ch 2. Hdc in each st and 4 hdc in each ch-4 sp. Sl st to join. (76 hdc)
Rnds 2-8: Ch 2. Hdc in each st around. Sl st to join. (76 hdc)
Rnd 9 (Leg Opening Split): Ch 2. Hdc in the next 37 sts. Leave the remaining 38 sts unworked. Sl st to the top of the beg ch-2 to join the first leg.
Leg 1: Rnds 10-18: Ch 2. Hdc in each st around. Sl st to join. (38 hdc)
Leg 1 Cuff: Ch 1, turn. Sc in each st around. Sl st to join. Fasten off.
Leg 2: Attach yarn to the first unworked stitch on Rnd 9. Rnds 10-18: Repeat Rnds 10-18 of Leg 1. Leg 2 Cuff: Repeat Leg 1 Cuff.
Part 4: Straps and Finishing 🧵
A. Straps (Make 2): Attach yarn to the top right corner of the Back Panel. Row 1: Ch 2. Hdc in the next 4 sts. (5 hdc) Rows 2-15: Ch 2, turn. Hdc in each st across. (5 hdc)
- Adjust length as needed for sizing.
Fasten off Strap 1. Repeat for Strap 2 on the top left corner.
B. Button Placement: Sew one button onto the end of each strap. These will button directly onto the top corners of the Front Motif.
C. Neckline Edge: Attach yarn to the top right corner of the Front Motif. Ch 1, sc evenly around the entire neckline (across the top of the Front Motif and the top of the Back Panel). Sl st to join. Fasten off.
Video Tutorial:
Finishing 🫧
- Weave in all ends securely using the tapestry needle.
- Seam: Use mattress stitch or whipstitch to seam the sides of the Back Panel and the Front Motif edges together above the Ch-4 side chains to reinforce the join.
- Blocking: Wet or steam block the entire garment. Pay special attention to the Front Motif to ensure it holds its clean square shape and the lace work is defined. Pin the leg cuffs for neatness.
Your stunning Granny Square Romper is complete and ready for the little one in your life!


