🌟 Introduction
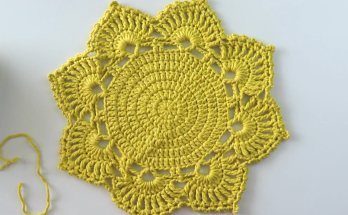
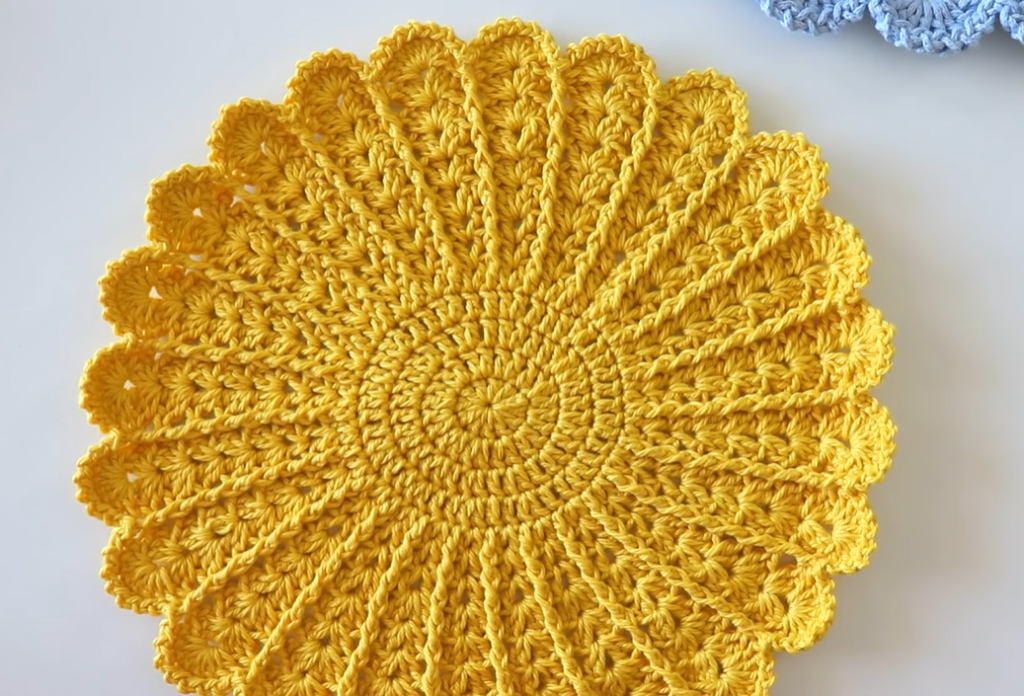
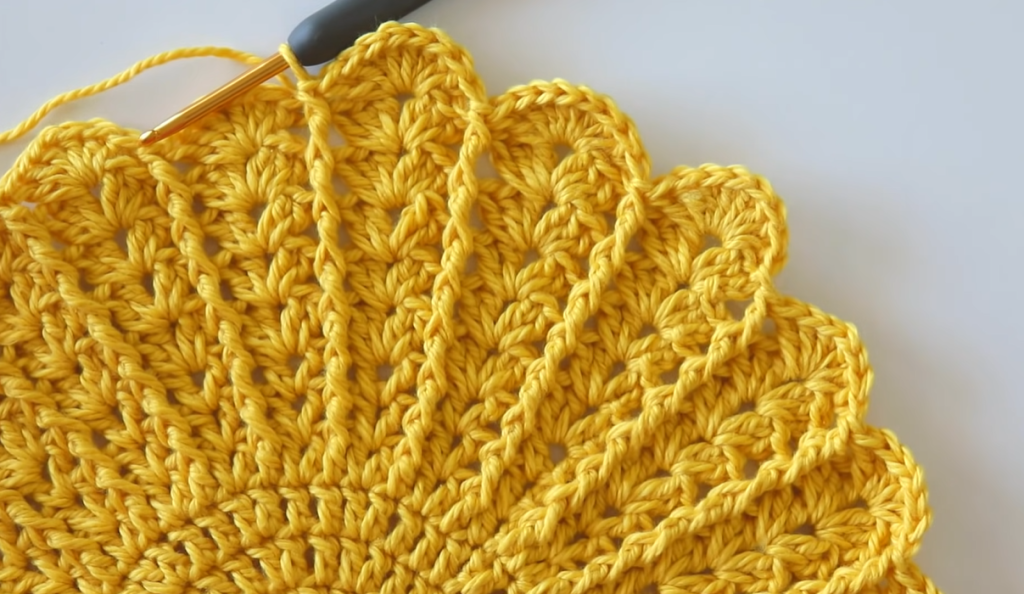
Bring a burst of sunshine to your table with the Golden Sunlight Placemat! This pattern is a fun, textural project that results in a beautiful, sturdy circular mat perfect for dining or decorative use. It begins with a tight spiral, utilizes Front Post Double Crochet (FPDC) stitches to create those beautiful radiating lines, and finishes with a dramatic, fluted shell border reminiscent of a sunflower or a scallop.
Skill Level: Intermediate (Familiarity with post stitches is helpful)
Finished Size (approximate): 14 inches (35 cm) in diameter.
🧵 Materials & Gauge
✨ Materials Needed
- Yarn: Approximately 250-300 yards of Worsted Weight (Aran/10-ply) cotton or cotton blend yarn. Cotton is strongly recommended for the best drape, stiffness, and heat resistance for a placemat. (The sample image color is a cheerful yellow.)
- Hook: Size H/8 (5.0 mm) crochet hook, or size needed to obtain gauge.
- Notions: Stitch marker, yarn needle for weaving in ends, and scissors.
📏 Gauge (Check Your Tension!)
- Rounds 1-4 should measure approximately 2.5 inches (6.5 cm) in diameter.
- Achieving a flat gauge is crucial for placemats; if your work is bowing, go up a hook size. If it’s ruffling, go down a hook size.
💡 Special Stitches & Abbreviations
📝 Pattern Abbreviations (US Terms)
| Abbreviation | Meaning | | Abbreviation | Meaning | | :—: | :— | :—: | :— | | ch | chain | | st(s) | stitch(es) | | sl st | slip stitch | | rep | repeat | | sc | single crochet | | inc | increase (work 2 sts into 1 st) | | dc | double crochet | | MR | Magic Ring | | FPDC | Front Post Double Crochet | | FPTC | Front Post Treble Crochet |
⭐ Special Stitches (Written Instructions)
- FPDC (Front Post Double Crochet): Yo, insert hook from front to back around the post of the indicated stitch in the previous round, yo, pull up a loop, yo, pull through 2 loops, yo, pull through last 2 loops.
- Shell: Work (dc, ch 1, dc, ch 1, dc, ch 1, dc, ch 1, dc) all into the same stitch or space.
☀️ The Pattern: Golden Sunlight Placemat
Note: The pattern is worked in joined rounds. The ch-3 at the beginning of each round counts as the first dc.
Part 1: The Spiral Base and Radial Lines
Foundation: Start with a Magic Ring (MR).

Round 1: Ch 3 (counts as 1 dc), 11 dc into MR. Sl st to the top of the starting ch-3 to join. (12 dc)
Round 2: Ch 3, dc in the same st (inc made). 2 dc in the next st (inc). Rep from * 10 more times. Sl st to the top of the starting ch-3 to join. (24 dc)
Round 3: Ch 3, FPDC around the post of the same starting ch-3 from Round 2. Dc in the next st, FPDC around the post of the next st. Rep from * 10 more times. Dc in the last st. Sl st to the top of the starting ch-3 to join. (12 FPDC, 12 dc, 24 sts total)
Round 4: Ch 3, dc in the next st. FPDC around the post of the FPDC from the previous round. Dc in the next 2 sts, FPDC around the post of the next FPDC. Rep from * 10 more times. Dc in the last st. Sl st to the top of the starting ch-3 to join. (12 FPDC, 24 dc, 36 sts total)
Round 5: Ch 3, dc in the next 2 sts. FPDC around the post of the FPDC. Dc in the next 3 sts, FPDC around the post of the next FPDC. Rep from * 10 more times. Dc in the last st. Sl st to the top of the starting ch-3 to join. (12 FPDC, 36 dc, 48 sts total)
Round 6: Ch 3, dc in the next 3 sts. FPDC around the post of the FPDC. Dc in the next 4 sts, FPDC around the post of the next FPDC. Rep from * 10 more times. Dc in the last st. Sl st to the top of the starting ch-3 to join. (12 FPDC, 48 dc, 60 sts total)
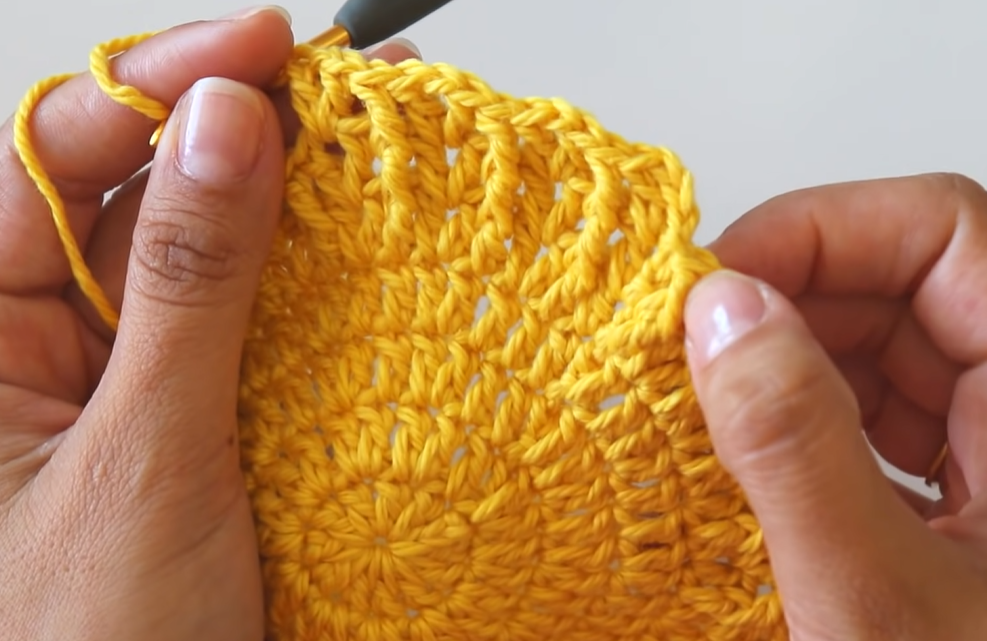
Round 7: Ch 3, dc in the next 4 sts. FPDC around the post of the FPDC. Dc in the next 5 sts, FPDC around the post of the next FPDC. Rep from * 10 more times. Dc in the last st. Sl st to the top of the starting ch-3 to join. (12 FPDC, 60 dc, 72 sts total)
Round 8: Ch 3, dc in the next 5 sts. FPDC around the post of the FPDC. Dc in the next 6 sts, FPDC around the post of the next FPDC. Rep from * 10 more times. Dc in the last st. Sl st to the top of the starting ch-3 to join. (12 FPDC, 72 dc, 84 sts total)
Round 9: Ch 3, dc in the next 6 sts. FPDC around the post of the FPDC. Dc in the next 7 sts, FPDC around the post of the next FPDC. Rep from * 10 more times. Dc in the last st. Sl st to the top of the starting ch-3 to join. (12 FPDC, 84 dc, 96 sts total)
Round 10: Ch 3, dc in the next 7 sts. FPTC around the post of the FPDC (using a treble crochet adds height to the radial line). Dc in the next 8 sts, FPTC around the post of the next FPDC. Rep from * 10 more times. Dc in the last st. Sl st to the top of the starting ch-3 to join. (12 FPTC, 96 dc, 108 sts total)
Part 2: Prepping the Border
We now work one final increase round to provide the space for the scalloped border.
Round 11: Ch 1, sc in the same st. Sc in the next 8 sts. 2 sc in the top of the FPTC st. Sc in the next 9 sts, 2 sc in the top of the FPTC st. Rep from * 10 more times. Sc in the last st. Sl st to the first sc to join. (132 sc)
Part 3: The Scallop Edge
This creates the beautiful, dramatic fluted border.
Round 12 (Scallops): Ch 1, sc in the same st. Sk 4 sts, work a Shell in the next st (see Special Stitches for Shell definition). Sk 4 sts, sc in the next st. Rep from * around. You should end with a Shell followed by skipping 4 sts, then sl st to the first sc to join. (12 Shells, 12 sc)
Fasten off.
Video Tutorial:
✂️ Finishing & Blocking
🧺 Blocking is Essential!
- Wet Blocking: Since this pattern is worked in the round with shell edging, blocking is crucial to make it lie flat and define the shell shape.
- Wet the placemat thoroughly (or use a steamer for acrylic).
- Pin the mat out to a perfect circle (approx. 14 inches diameter) on a foam mat or towel. Ensure each scallop/shell is individually pinned so the curves are smooth and defined.
- Allow the placemat to dry completely before unpinning.
✨ Conclusion
Weave in all your ends securely on the back of the work.
Congratulations on completing your Golden Sunlight Placemat! This beautiful, textured piece will add a handmade elegance to any setting. Want to make a set? Simply repeat the pattern in the same or complementary colors!