
🌟 Introduction
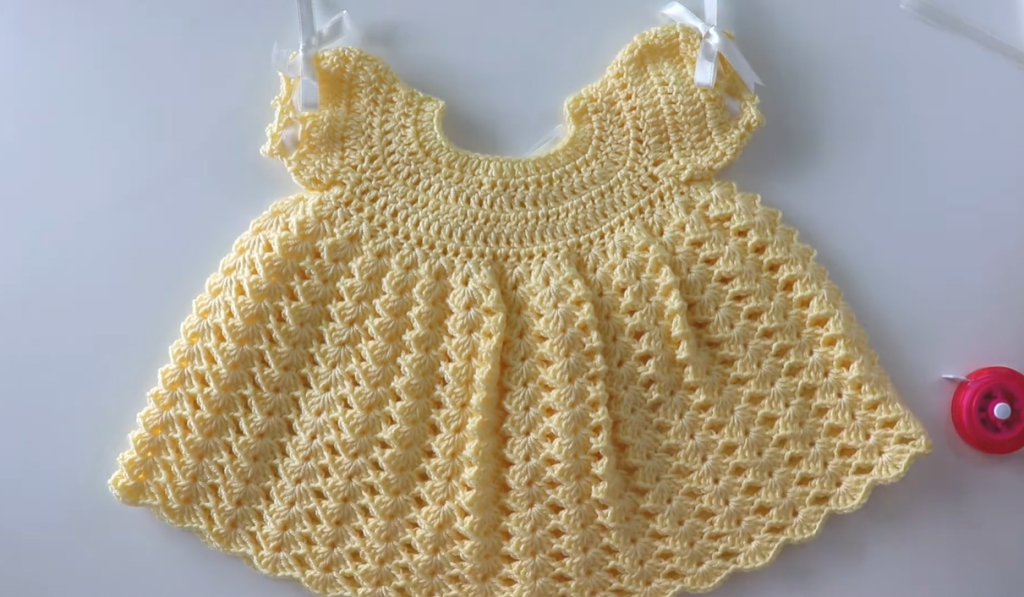
Welcome to a truly special project! The Buttercup Heirloom Dress is a sweet, timeless garment perfect for baby showers, christenings, or a beautiful photo prop. It features a solid, comfortable circular yoke that transitions seamlessly into a full, flowy skirt using a delicate V-Stitch Shell pattern. This blog will guide you through creating this delightful dress, sized for an average 6-12 month-old baby.
Skill Level: Intermediate
Finished Size: 6-12 Months (Chest Circumference: approx. 20 inches / 50 cm)
🧵 Materials & Gauge
✨ Materials Needed
- Yarn: Approximately 300-350 yards of DK Weight (Light Worsted/8-ply) soft baby yarn (acrylic, cotton, or a blend). Choose a yarn that is soft against baby’s skin. (The sample image uses a light yellow/buttercup color.)
- Hook: Size G/6 (4.0 mm) crochet hook, or size needed to obtain gauge.
- Notions: Small buttons (2-3), ribbon (about 1 yard of 1/4 inch wide), yarn needle for weaving in ends and sewing, and scissors.
📏 Gauge (Crucial for Sizing!)
- Yoke (DC rows): 5 rows of DC should measure approximately 1.5 inches (4 cm) tall.
- Yoke (DC rows): 4 inches (10 cm) square should be 18 DC sts wide.
- The final yoke circumference before dividing for the sleeves should measure about 10 inches (25 cm) laid flat, or 20 inches total.
💡 Special Stitches & Abbreviations
📝 Pattern Abbreviations (US Terms)
| Abbreviation | Meaning | | Abbreviation | Meaning | | :—: | :— | :—: | :— | | ch | chain | | st(s) | stitch(es) | | sl st | slip stitch | | rep | repeat | | sc | single crochet | | inc | increase (work 2 sts into 1 st) | | dc | double crochet | | sk | skip | | hdc | half double crochet | | ch-sp | chain space | | BLO | Back Loop Only | | RS/WS | Right Side / Wrong Side |
⭐ Special Stitches (Written Instructions)
- Shell (V-Shell): Work (2 dc, ch 1, 2 dc) all into the indicated stitch or space.
👗 The Pattern: Buttercup Heirloom Dress
Note: The yoke is worked in rows, turning at the end of each row, to allow for the back opening.
Part 1: The Circular Yoke (Top Down)
Foundation: Ch 74 (or adjust for neckline: multiple of 6 plus 2).
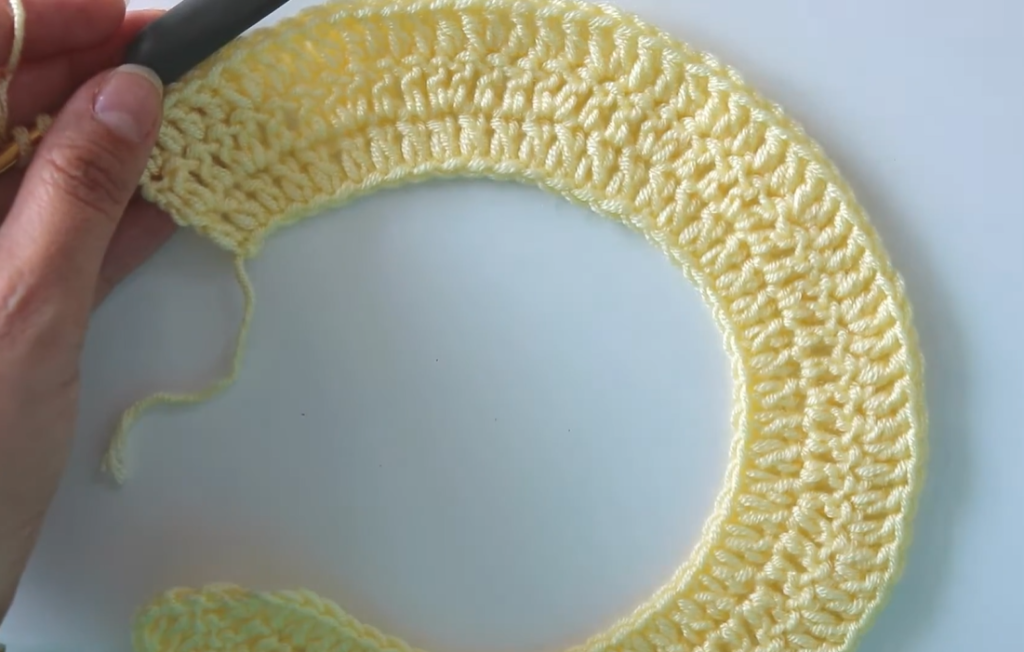
Row 1 (RS): Dc in the 4th ch from hook (first 3 ch counts as 1 dc) and dc in each ch across. Ch 3 (counts as 1 dc), turn. (72 dc)
Row 2 (WS – Increase): Dc in the same st. Dc in the next 5 sts, 2 dc in the next st. Rep from * 10 more times. Dc in the last 4 sts. Ch 3, turn. (84 dc)
Row 3 (RS – Increase): Dc in the same st. Dc in the next 6 sts, 2 dc in the next st. Rep from * 10 more times. Dc in the last 4 sts. Ch 3, turn. (96 dc)
Row 4 (WS – Increase): Dc in the same st. Dc in the next 7 sts, 2 dc in the next st. Rep from * 10 more times. Dc in the last 4 sts. Ch 3, turn. (108 dc)
Row 5 (RS – Increase): Dc in the same st. Dc in the next 8 sts, 2 dc in the next st. Rep from * 10 more times. Dc in the last 4 sts. Ch 3, turn. (120 dc)
Row 6 (WS – No Increase): Dc in the same st and in each st across. Ch 3, turn. (120 dc)
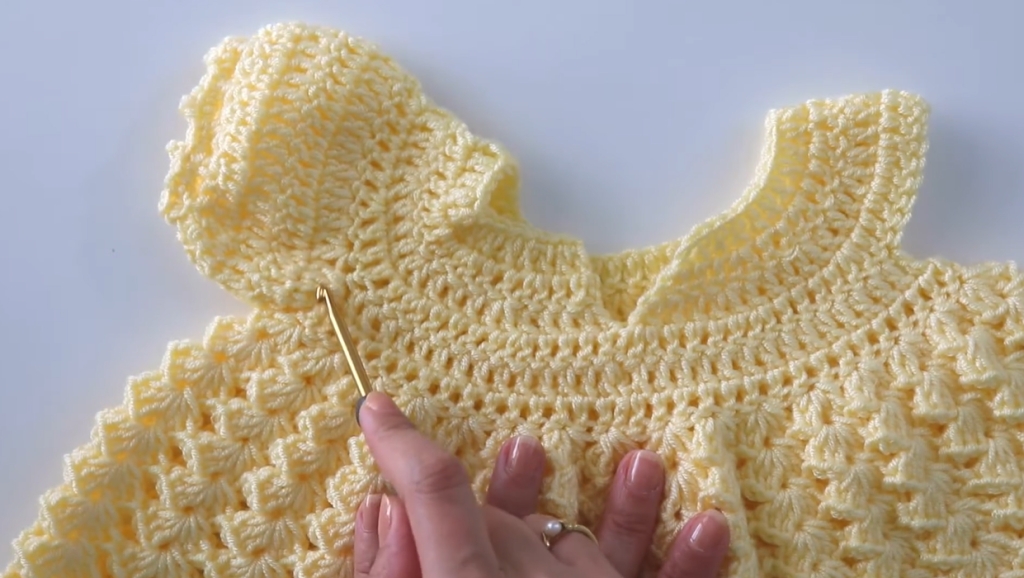
Row 7 (RS – Divide for Sleeves):
- Dc in the next 16 sts (Front Right).
- Ch 1, sk 28 sts (Sleeve 1).
- Dc in the next 32 sts (Back).
- Ch 1, sk 28 sts (Sleeve 2).
- Dc in the next 16 sts (Front Left).
- Ch 3, turn. (64 dc, 2 ch-1 sps)

Part 2: Joining the Body and Establishing Skirt
The body is now worked in joined rounds.
Round 8 (Skirt Foundation): Dc in the next 15 dc. Work 2 dc in the ch-1 sp. Dc in the next 32 dc. Work 2 dc in the ch-1 sp. Dc in the last 16 dc. Sl st to the top of the starting ch-3 to join. Ch 3 (counts as 1 dc). (68 dc)
Round 9 (Shell Setup): Dc in the same st (inc made). Dc in the next 2 sts, 2 dc in the next st. Rep from * around. Sl st to the top of the starting ch-3 to join. Ch 3 (counts as 1 dc). (90 dc)
Note: The final stitch count (90) is a multiple of the shell repeat (5 sts), which is perfect for the skirt pattern.
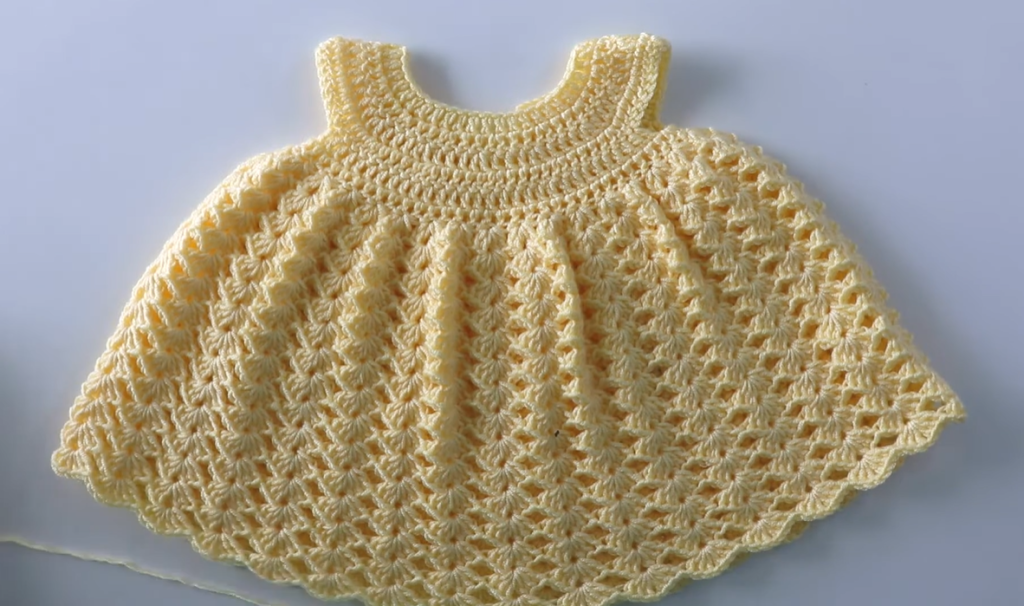
Part 3: The Shell Stitch Skirt
Round 10 (Shells): Dc in the next st. Sk 2 sts. Work a Shell (2 dc, ch 1, 2 dc) in the next st. Sk 4 sts, Shell in the next st. Rep from * around. Sk the last 2 sts. Sl st to the top of the starting ch-3 to join. Ch 3 (counts as 1 dc). (18 Shells)
Round 11: Dc in the next st. Sk 2 dc. Work a Shell into the ch-1 sp of the previous round’s Shell. Sk 4 dc, Shell in the ch-1 sp of the next Shell. Rep from * around. Sk the last 2 dc. Sl st to the top of the starting ch-3 to join. Ch 3 (counts as 1 dc). (18 Shells)
Repeat Round 11 until the dress reaches the desired length, approximately 12-14 rounds total (or about 10-12 inches from the yoke to the hem).
Part 4: Edging and Finishing
Final Hem Edge:
- Ch 1, sc in the first st and in the next st.
- In the ch-1 sp of the last shell: (sc, hdc, dc, hdc, sc) (Scallop made).
- Sc in the next 4 dc (the middle of the shell groups).
- In the ch-1 sp of the next shell: (sc, hdc, dc, hdc, sc). Sc in the next 4 dc. Rep from * around. Sl st to the first sc to join.
- Fasten off and weave in ends.
Neckline and Back Opening:
- Join yarn at the bottom corner of the back opening (RS facing).
- Sc evenly up the side of the opening, around the neckline, and down the other side of the opening.
- Button Loops: At the top of one side of the back opening, Ch 3, sl st back into the same space (button loop made). Repeat for 2 more button loops evenly spaced down the opening.
- Buttons: Sew 2-3 small buttons onto the opposite side of the back opening to align with the button loops.
Sleeve Edging:
- Join yarn in the underarm ch-1 sp.
- Ch 1, sc in the sp. Sc evenly around the armhole opening (about 30-35 sc total). Sl st to join.
- Scallop Edge: Ch 1, sc in the same st. Sk 1 st, (2 dc, ch 1, 2 dc) in the next st. Sk 1 st, sc in the next st. Rep from * around. Sl st to the first sc to join.
- Repeat for the second sleeve.
Video Tutorial:
Part 5: Final Touches
- Ribbons: Cut two small lengths of ribbon (about 6-8 inches each). Thread one ribbon through the top corner of each sleeve where the yoke meets the neckline and tie a small bow, as shown in the image.
- Blocking: Gently wet block the dress, ensuring the skirt and scalloped edges are pinned out to open up the lacework and smooth the fabric. Let dry completely.
Congratulations! You have created a stunning Buttercup Heirloom Dress that is sure to be cherished.


