
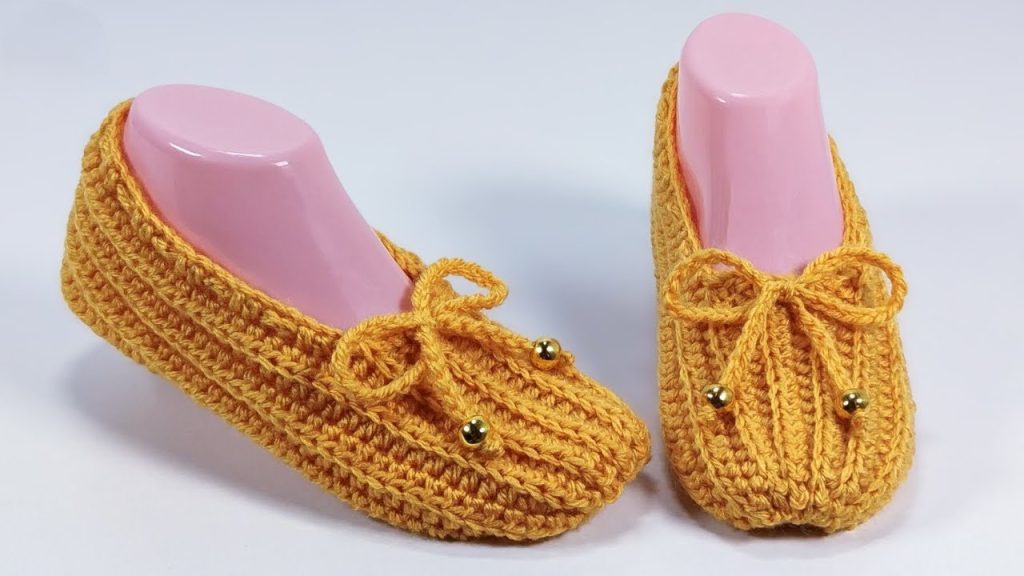
Welcome, crocheters! Get ready to create a pair of house shoes that combine style and comfort: The Golden Moccasin Slipper. This luxurious design uses simple techniques to achieve a professional, store-bought look. The gorgeous vertical ribbing is achieved by working the entire body in Half Double Crochet in the Back Loop Only (HDC BLO), which provides incredible warmth and stretch. The gathered toe and decorative cord finish the moccasin styling perfectly.
This pattern is written for Adult Medium (Women’s US size 7-9 / EU 38-40), with detailed instructions on sizing.
🛠️ Materials Needed
- Yarn: Approximately 150 – 180 yards (135 – 165 meters) of a soft Worsted weight (Aran/10-ply) yarn in your main color (Mustard Yellow/Gold).
- A smooth, robust yarn is best to define the ribbing texture.
- Hook: US size H/8 (5.0 mm) crochet hook.
- Notions:
- Tapestry Needle for seaming, weaving in ends, and weaving the cord.
- Sharp Scissors.
- 4 Small Gold Beads (or buttons) for the toe detail.
📏 Gauge (Critical for Ribbing and Fit)
- Gauge: 13 HDC stitches and 10 rows equals 4 inches (10 cm) in regular HDC (not worked in BLO).
- Why Gauge is Critical: The BLO ribbing stretches significantly. The initial width (chain length) determines the height/depth of the slipper, and the number of rows determines the circumference/length. Check both measurements carefully.
ℹ️ Key Techniques & Abbreviations
The slipper is constructed from a long, flat rectangle, with the ribbing running horizontally, which translates to a vertical pattern when worn.
- ch = Chain
- st(s) = Stitch(es)
- sl st = Slip Stitch
- sc = Single Crochet
- hdc = Half Double Crochet
- hdc2tog = Half Double Crochet two stitches together (a decrease).
- BLO = Back Loop Only (insert hook only into the loop furthest from you).
- RS = Right Side
- WS = Wrong Side
- FO = Fasten Off
🧶 The Pattern: Golden Moccasin Slipper (Adult M)
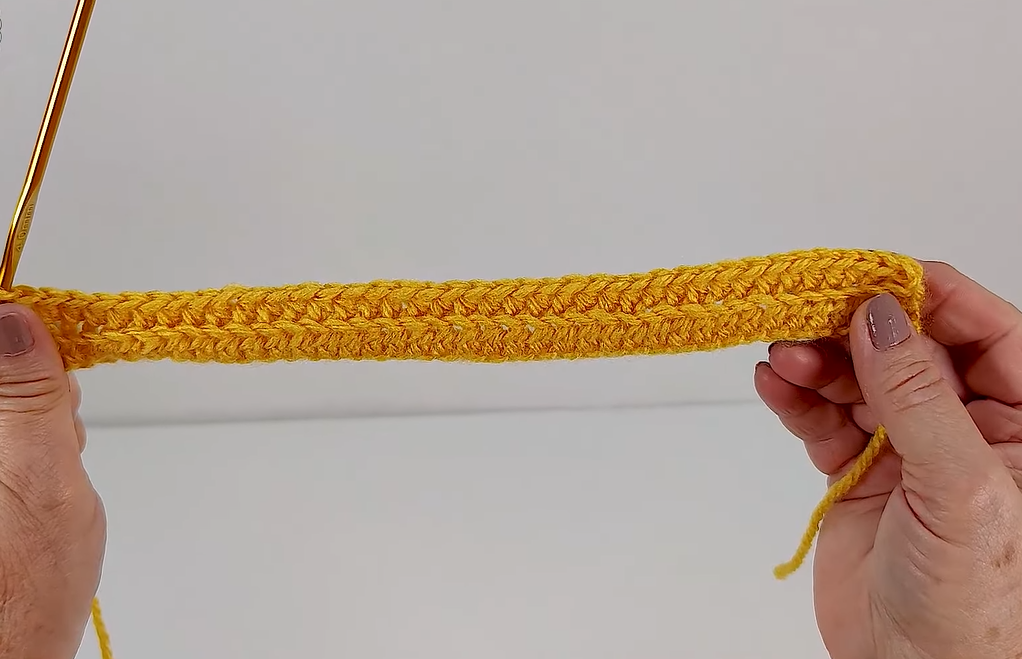
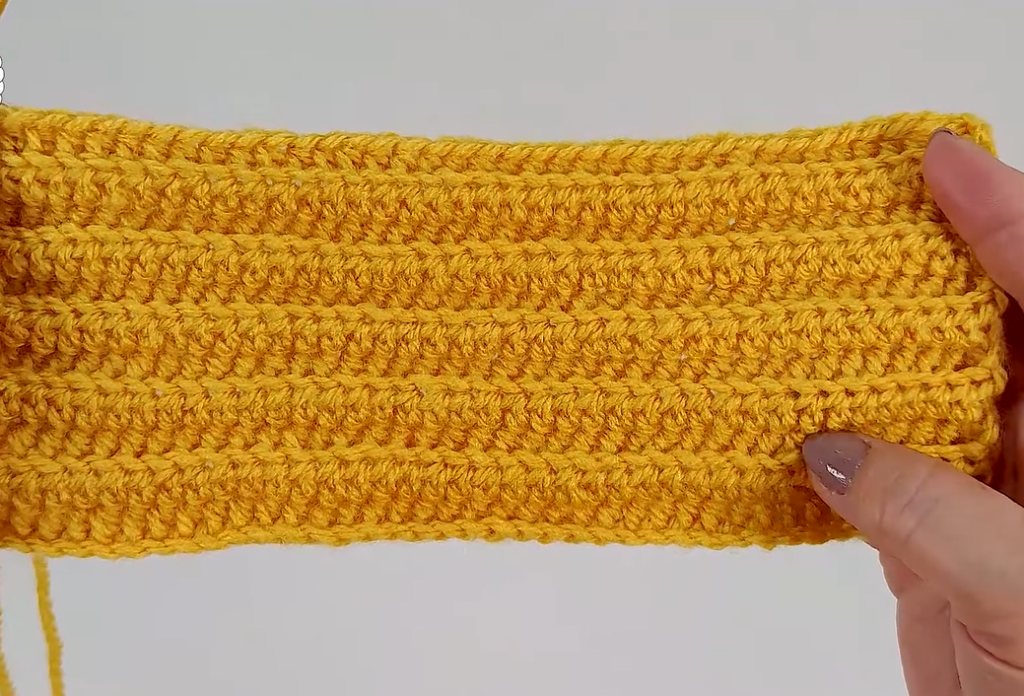
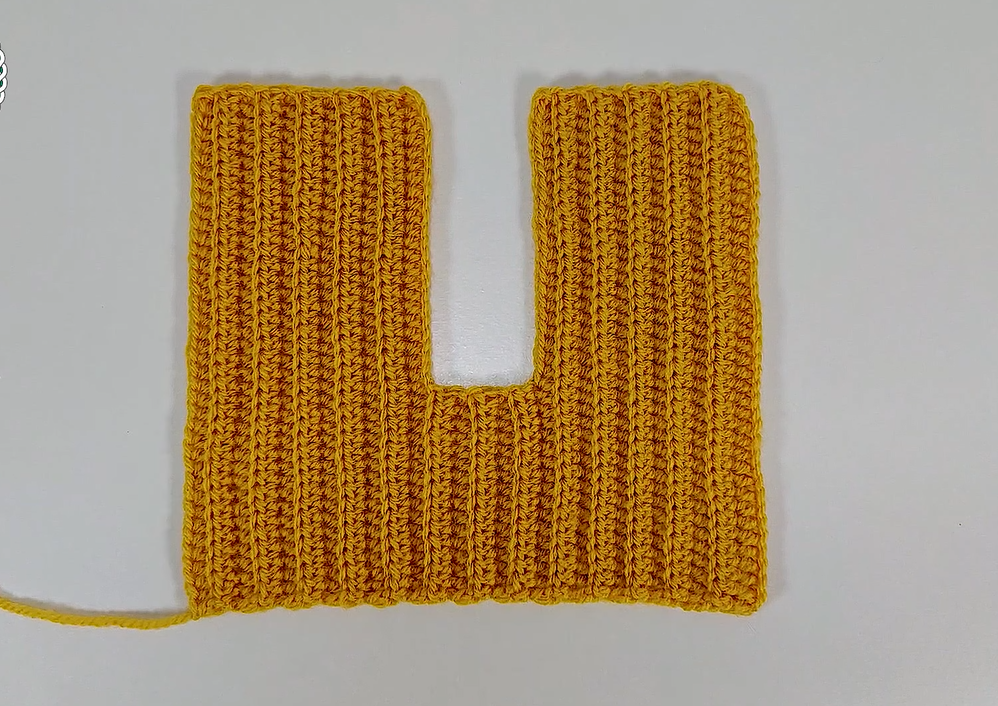
1️⃣ The Body Strip (Creating the Ribbing)
The entire body is worked in this section. The chain length determines the height/depth, and the number of rows determines the length around the foot.
| Row | Instructions | Stitch Count |
| Foundation | Ch 38. | 38 chs |
| Row 1 (RS) | Hdc in 2nd ch from hook and in each ch across. Ch 1, turn. | 37 sts |
| Row 2 (WS) | Hdc in the BLO of each st across. Ch 1, turn. This creates the first texture ridge. | 37 sts |
| Rows 3–54 | Repeat Row 2 (working in BLO) for a total of 54 rows, or until the piece measures approximately 12 inches (30.5 cm) long when lightly stretched lengthwise. This length wraps around your heel, sole, and toe. | 37 sts |
- Prepare for Seaming: Do not chain 1. FO the yarn, leaving a very long tail (40 inches / 1 meter) for seaming.
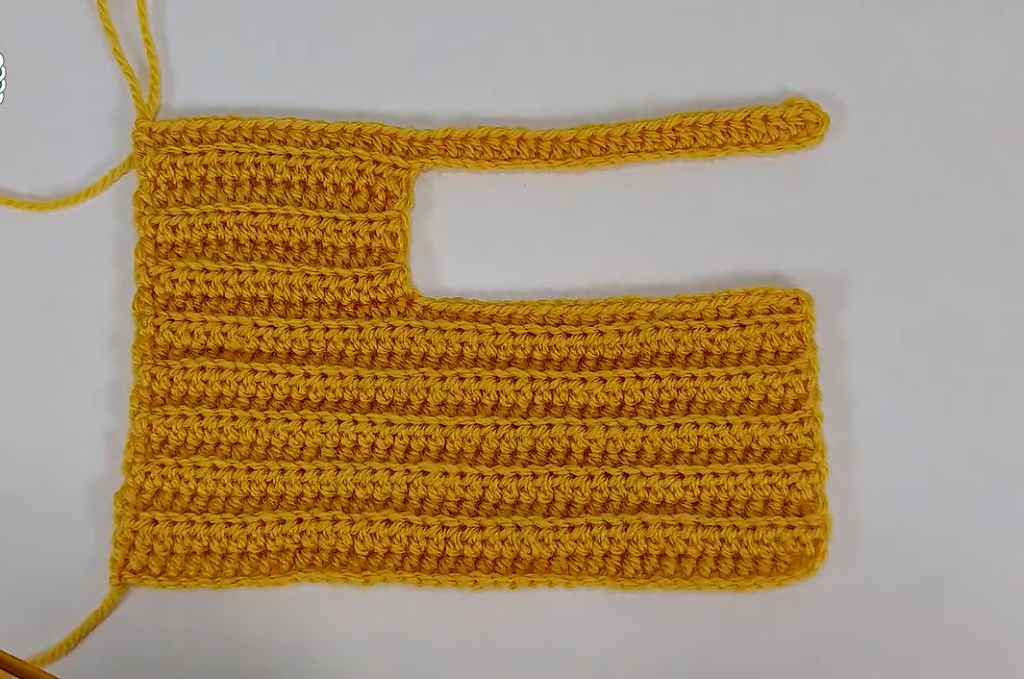
2️⃣ The Toe Gather (Shaping the Moccasin Tip)
The moccasin tip requires a distinctive gathered look achieved with strategic cinching.
| Step | Instructions | Result |
| Measure Toe | Starting from the opposite end of the long tail (the initial foundation chain), count in 10 rows from the edge. This marks the area for the toe box. | |
| Gather Stitches | Thread a new, separate piece of matching yarn (about 20 inches) onto your tapestry needle. Weave this needle in and out through the top loop of every stitch on the Row 1 edge (the foundation edge) for the first 10 rows of the strip. | |
| Cinch and Secure | Gently pull the yarn tail tightly to cinch the end closed, gathering the 10 rows together to form the rounded toe. Secure the yarn tail firmly on the inside of the piece. | Rounded Toe |
3️⃣ Seaming the Sole and Heel
We now fold and seam the rest of the piece to create the shoe shape.
| Step | Instructions | Result |
| Fold and Align | Fold the long crocheted strip in half, aligning the cinched toe at the front fold. | |
| Seam the Heel | Using the long yarn tail from the end of Row 54, start seaming the back edge (the heel). Seam the back 10 rows (approx. 4 cm / 1.5 inches) together using a whipstitch or mattress stitch. This creates the back of the heel. | Closed Heel |
| Seam the Sole | Continue the seam along the bottom edge (the sole) until you reach the center of the cinched toe tip. The unseamed section forms the V-shaped opening for the foot. | Slipper Formed |
| Secure Ends | Secure the final thread firmly and weave in all remaining yarn tails on the inside. | Clean Finish |
💎 Finishing Details (The Moccasin Cord)
This section creates the decorative woven cord and bead detail that defines the style.
| Step | Instructions | Result |
| Make the Cord | Chain 60 (or to desired length). Slip stitch back down the chain to create a thick, sturdy cord. FO, leaving long tails. | Cord Created |
| Weave the Cord | Starting at the front center of the toe (about 1 inch back from the cinch), use your tapestry needle to weave the cord in and out of the vertical ribbing across the top of the toe box. The weaving should span about 10-12 stitches wide. | Cord Woven |
| Add Beads | Before securing the ends, thread two gold beads onto each end of the cord. Tie a knot to hold the beads in place. | Beaded Cord |
| Final Tie | Tie the cord ends into a neat bow at the center front, right over the toe. Trim the ends. | Finished Moccasin |
✨ Customization and Sizing Adjustments
Adjusting Foot Size
The total size is primarily adjusted by the length of the ribbed strip (Rows 3–54).
- For Size S/M (US 5-6): Work the ribbed strip for approximately 46–50 rows, or until the piece measures 11–11.5 inches (28–29 cm) when lightly stretched.
- For Size L/XL (US 10-12): Work the ribbed strip for approximately 58–62 rows, or until the piece measures 13–13.5 inches (33–34 cm) when lightly stretched.
Video Tutorial:
Adjusting Foot Depth (Height)
The depth of the slipper is determined by the starting chain length.
- For a wider/deeper foot: Start with a foundation chain of 42 stitches instead of 38. This increases the total height and width.
- For a narrower/shallower foot: Start with a foundation chain of 34 stitches.
Enhancing Durability
- Non-Slip Soles: Since this is a house slipper, apply a thin layer or dots of liquid latex or non-slip fabric paint to the bottom of the sole and allow it to dry completely.
- Sole Insert: Cut an insole from craft foam or thick felt to the shape of the slipper sole and stitch it to the inside bottom for added comfort and resilience.


