
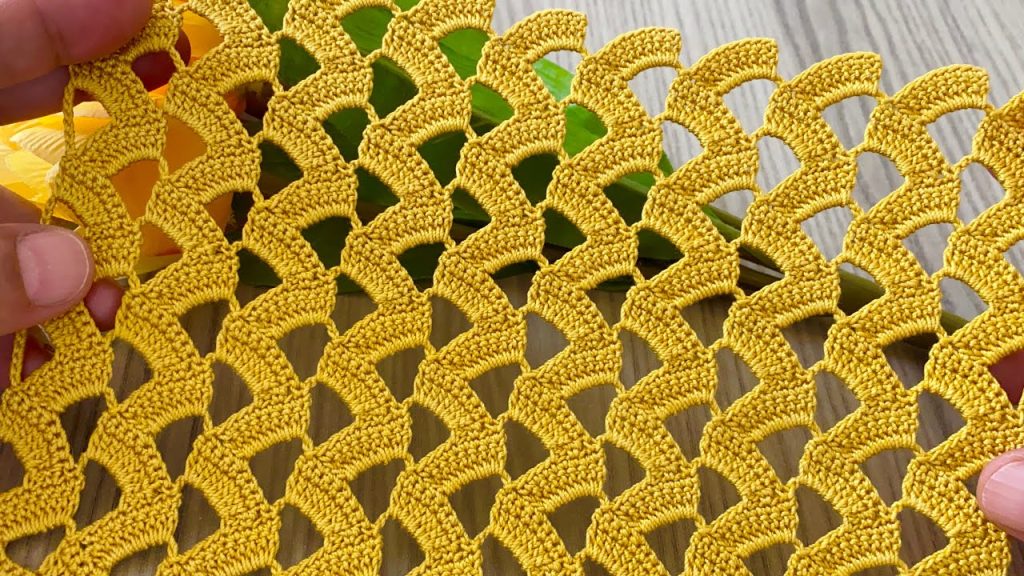
💡 Introduction: Weaving Continuous Waves
Welcome to the blog! The stunning fabric you see in the image features the Ripple Wave Lace Stitch. This pattern achieves its signature wavy look by alternating rows of tight, short stitches (single crochet) with rows of tall stitches (treble crochet) worked into the chain spaces of the previous row. This creates a highly textured, rhythmic fabric with a lovely drape.
This pattern is easily adaptable to any size, from a slender bookmark to a full blanket. We’ll focus on the two-row repeat that builds the entire fabric, ensuring you master the movement between the peaks and valleys. We’ll be using standard US crochet terms.
Skill Level: Intermediate
Requires comfort with basic stitches, chaining, and accurate stitch placement in previous rows’ chain spaces.
🛍️ Materials: Your Essential Supplies
For a clean, defined wave, choose a yarn that holds its shape well. The sample uses a vibrant yellow in what appears to be a cotton or mercerized cotton yarn.
- Yarn: Choose a lightweight yarn (Sport, DK, or light Fingering weight). Cotton or cotton blend is recommended for best stitch definition and drape.
- Hook: Select a hook size appropriate for your yarn weight. A hook that’s slightly smaller than suggested on the yarn label might help define the tight single crochet rows and enhance the wave texture. (e.g., a 3.5 mm [US E/4] hook for a Sport weight yarn).
- Tapestry Needle: For weaving in ends.
- Scissors
📋 Abbreviations (US Terms)
- ch: chain
- sl st: slip stitch
- sc: single crochet
- dc: double crochet
- tr: treble crochet (or triple crochet)
- sk: skip
- sp: space
- ch-sp: chain space
- Shell: Multiple stitches worked into the same space (here, 7 tr)
- **: Instructions between asterisks are repeated.
- ( ): Instructions in parentheses are worked into the same stitch or space.
📐 Pattern Instructions: The Golden Ripple Stitch
This pattern is worked in rows and uses a stitch multiple of 10 plus 1 for the foundation chain.
Foundation Chain
- Chain a multiple of 10 plus 1.
- Example for a small swatch: Ch $30 + 1 = 31$.
Row 1: The Single Crochet Base
This row establishes the rhythm of the waves.
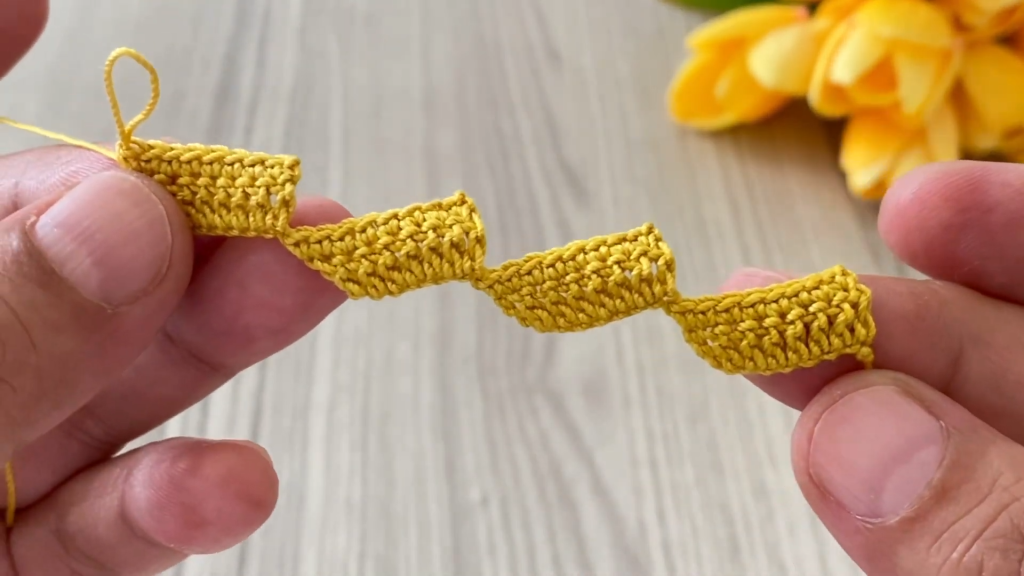
- Ch 1 (does not count as a stitch), sc in the 2nd ch from hook and in the next 3 chs. [4 sc total]
- *Ch 5, sk 5 chs, sc in the next 5 chs.*
- Repeat from * to * across the row.
- End with ch 5, sk 5 chs, sc in the last 4 chs. Turn.
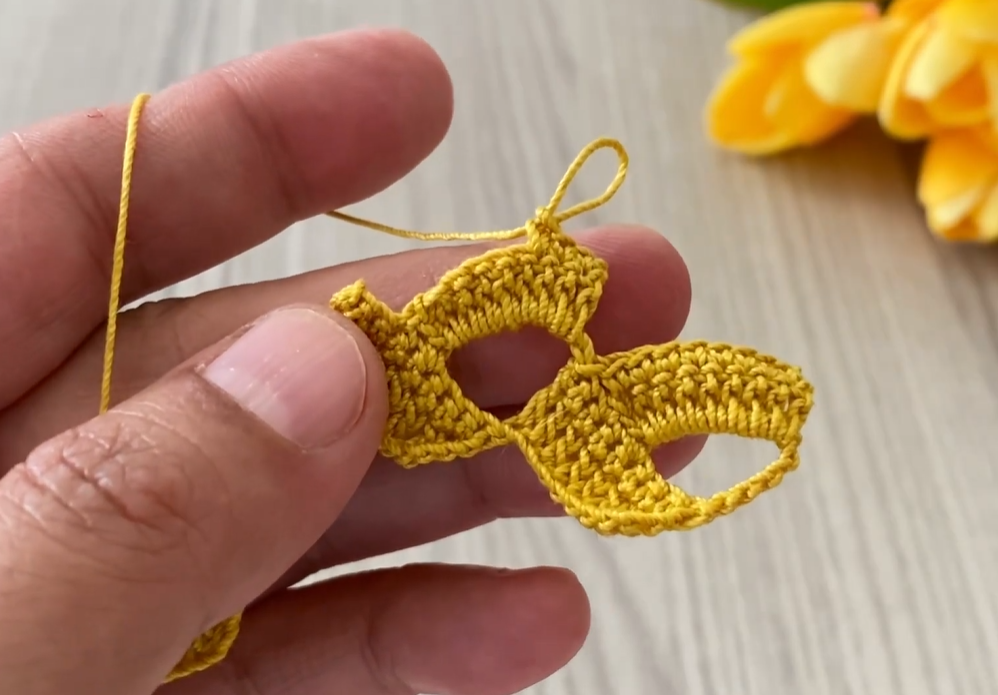
Row 2: Creating the Waves (Treble Shell Row)
This row builds the tall arches and the peaks of the waves.
- Ch 4 (counts as first tr), tr in the next 3 sc. [4 tr total]
- *Shell (7 tr) in the center of the ch-5 sp. Tr in the next 5 sc.*
- Repeat from * to * across the row.
- End with Shell (7 tr) in the final ch-5 sp, and tr in the last 4 sc. Turn.
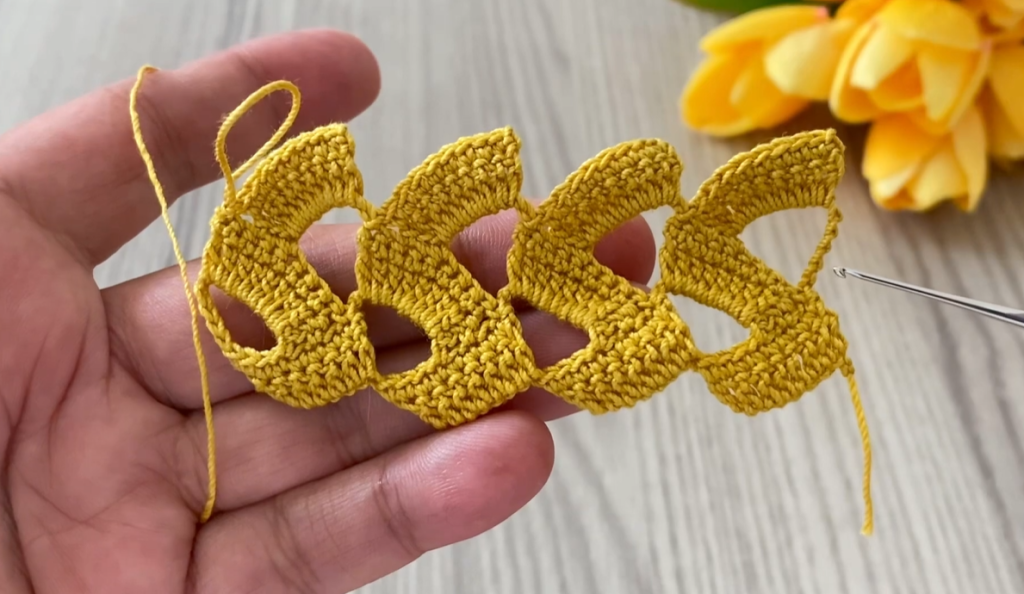
Row 3: Setting the Valleys (Single Crochet Base)
This row secures the curves and sets the foundation for the next wave row.
- Ch 1 (does not count as a stitch), sc in the first tr and in the next 3 tr. [4 sc total]
- *Ch 5, sk 5 tr. Sc in the next 5 tr.*
- Repeat from * to * across the row.
- End with ch 5, sk 5 tr, sc in the last 4 tr (the last sc goes into the top of the turning ch 4 from the previous row). Turn.

Row 4: Building the Next Peak (Treble Shell Row)
This row is worked exactly like Row 2, placing the Shells directly over the Shells of Row 2.
- Ch 4 (counts as first tr), tr in the next 3 sc. [4 tr total]
- *Shell (7 tr) in the center of the ch-5 sp. Tr in the next 5 sc.*
- Repeat from * to * across the row.
- End with Shell (7 tr) in the final ch-5 sp, and tr in the last 4 sc. Turn.
🔁 The Repeat and Continuing the Fabric
The core of the Golden Ripple Lace pattern is the two-row repeat that alternates between the tight base and the tall arches.
To Continue the Fabric:
- Repeat Row 3 (Single Crochet Base) and Row 4 (Treble Shell Row) until your piece reaches the desired length.
Important Notes on Repeat:
- Alternating Texture: The sc rows create the tight, curved valleys, and the tr rows create the loose, tall peaks.
- Shell Placement: The Shells (7 tr) are always worked into the ch-5 space of the previous row (Row 3), ensuring the peaks stack directly on top of each other.
- End Stitches: Always remember to end each row with 4 stitches (sc or tr) to keep the sides straight. The last stitch of the row always goes into the turning chain of the row before.
Video Tutorial:
✂️ Finishing: Edging and Blocking
Edging
For a clean finish, you may want to add a simple single crochet border around the perimeter.
- Side Edges: Work a neat, even row of sc stitches down the raw edges of your piece. Work 3 sc for the height of each tr row and 1 sc for the height of each sc row.
- Top/Bottom Edges: The established wave pattern already provides a lovely scalloped look. You can leave it as is, or work a final sc row to clean up any slight unevenness.
Blocking: Enhancing the Drape
Blocking is highly recommended to enhance the natural drape and fully open up the wave design.
- Dampen: Wet the fabric completely or use steam.
- Pin: Gently stretch the piece width-wise to open the wave pattern. Pin the straight side edges to ensure they are plumb, but do not overstretch the scalloped top/bottom edges, as the natural curve is the desired look.
- Dry: Allow the piece to dry completely before unpinning.
Your beautiful Golden Ripple Lace fabric is now ready! What stunning project will you turn this into?


