
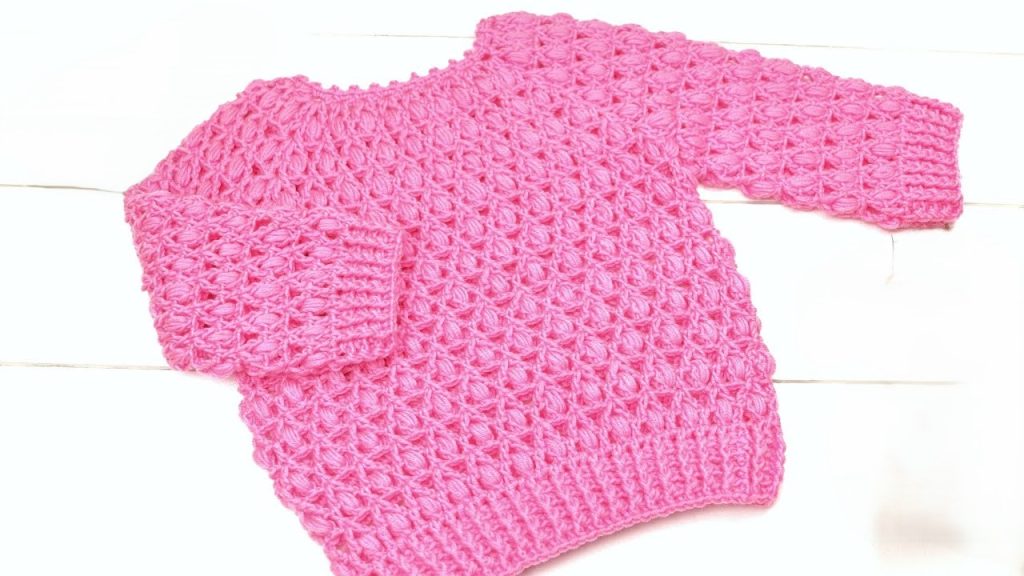
Hello, dearest makers! Today, we’re diving into a project that is pure warmth and charm: the Bubblegum Dreams Sweater. This cozy garment uses a beautiful, repeating Puff Stitch Cluster (which gives it that gorgeous bumpy texture) from a comfortable round yoke down to the hem. The ribbing on the sleeves and bottom edge adds a lovely structure, making this an ideal sweater for play or dress-up!
This pattern is designed for an Intermediate skill level, as it involves working the Puff Stitch, raglan increases, and joined ribbing. The beautiful result is well worth the effort!
🛍️ Section 1: Materials & Gauge
🧶 Supplies You’ll Need
- Yarn: Approximately 400 – 500 yards of DK weight (Category 3) yarn. The sample uses a solid, bright pink, but this texture would look stunning in any color! A soft, washable acrylic or wool blend is recommended.
- Hook:
- 4.0 mm (G/6) crochet hook for the main body and sleeves.
- 3.5 mm (E/4) crochet hook for the ribbing (cuffs and hem).
- Buttons: Not needed for this style, as it pulls over the head.
- Tools: Stitch markers (essential for marking the raglan corners!), a tapestry needle, and scissors.
📏 Gauge Check
Work in Double Crochet (DC): 16 DC and 8 rows = 4 inches (10 cm).
- Puff Stitch Gauge: 4 puff stitch repeats and 4 rows should measure 4 inches (10 cm) wide and 3 inches (7.5 cm) tall.
📝 Key Abbreviations
| Abbreviation | Meaning | Abbreviation | Meaning | |
| Ch | Chain | Dc | Double Crochet | |
| Sl St | Slip Stitch | Fpdc | Front Post Double Crochet | |
| Sc | Single Crochet | Bpdc | Back Post Double Crochet | |
| Hdc | Half Double Crochet | Ps | Puff Stitch (see special stitches) | |
| Sk | Skip | Sp | Space |
Export to Sheets
✨ Section 2: Special Stitches
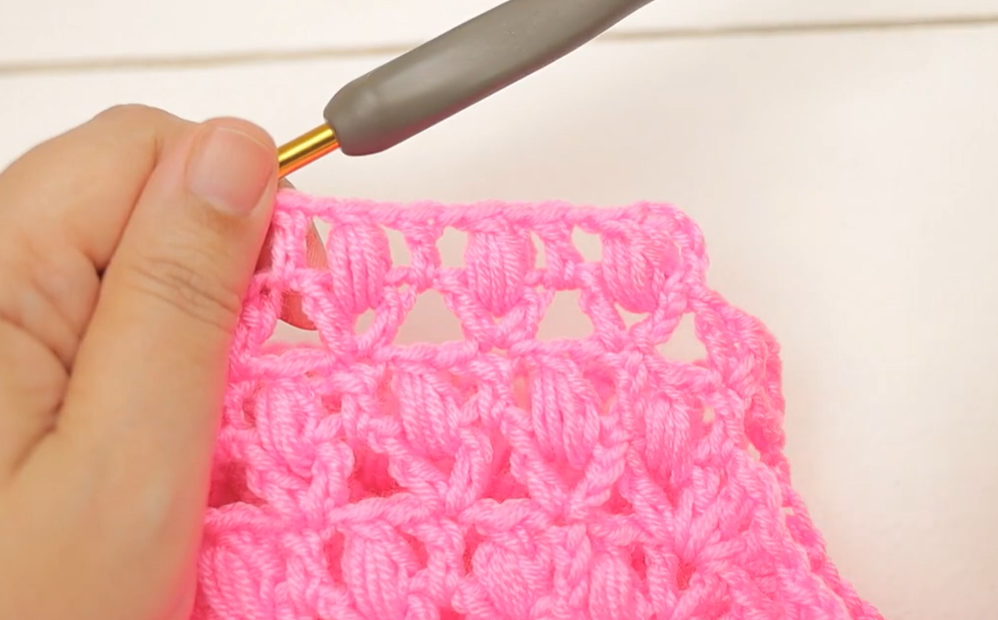
Puff Stitch (Ps)
- Yo, insert hook into the specified stitch/space.
- Yo, pull up a loop (3 loops on hook).
- Yo, insert hook into the same st/sp.
- Yo, pull up a loop (5 loops on hook).
- Yo, insert hook into the same st/sp.
- Yo, pull up a loop (7 loops on hook).
- Yo, pull through all 7 loops on the hook.
- Ch 1 to secure the stitch (this securing chain counts as a stitch/space in the next row).
🌸 Section 3: The Yoke (Top Down Raglan)
The yoke is worked in the round after a starting chain. This size is for 6-12 months.
Foundation & Raglan Setup
- Round 1 (Foundation): Ch 76. Sl St to the first Ch to form a large circle, taking care not to twist. Ch 2 (does not count as a st). Hdc in each Ch around. Join with Sl St to the first Hdc. (76 Hdc).
- Marking Corners: Divide the 76 stitches for the raglan: 12 (Sleeve) | 26 (Front) | 12 (Sleeve) | 26 (Back). Place a marker in the 12th, 38th, 50th, and 76th stitches.

Raglan Increases (Solid Base)
- Round 2: Ch 2. Hdc in each st to the first marked st. Work (Hdc, Ch 2, Hdc) in the marked st. Move marker to the Ch-2 sp. Rep Hdc across the next panel. Work (Hdc, Ch 2, Hdc) in the next marked st. Repeat this pattern around all 4 corners. Join with Sl St. (84 Hdc + 4 Ch-2 sps).
- Round 3: Ch 2. Hdc in each st to the Ch-2 sp. Work (Hdc, Ch 2, Hdc) in the Ch-2 sp. Move marker to the Ch-2 sp. Rep this pattern around all 4 corners. Join with Sl St. (92 Hdc + 4 Ch-2 sps).
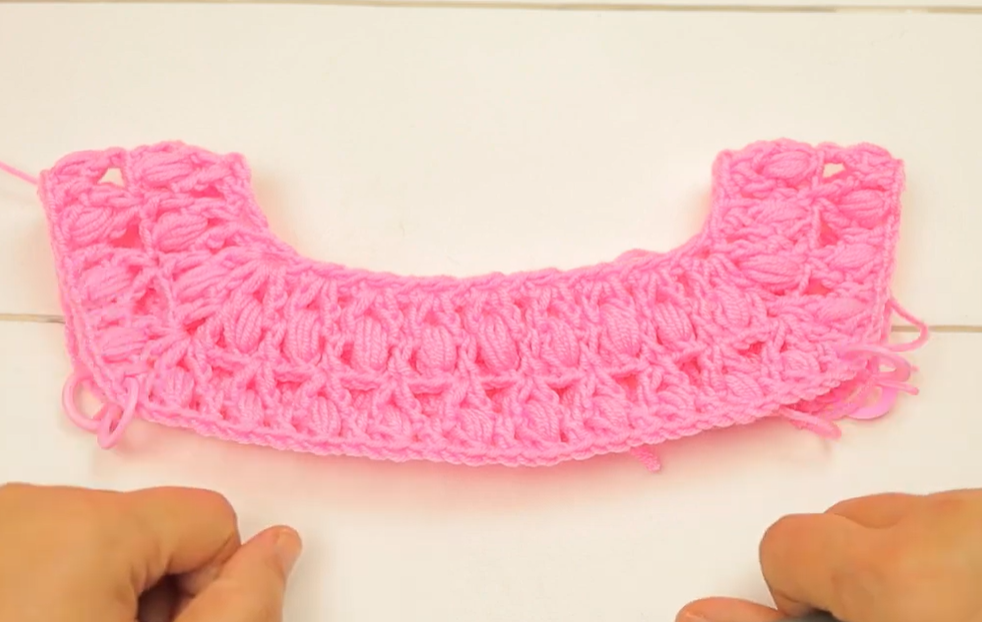
Integrating the Puff Stitch
- Round 4 (Puff Stitch Row): Ch 1, Sc in the same st. Ps in the next st. Sk 1 st, Sc in the next st, Ps in the next st. Rep from * to * up to the Ch-2 sp. Work (Ps, Ch 2, Ps) in the Ch-2 sp. Move marker to the Ch-2 sp. Continue the (Sc, Ps) pattern across the panel, placing (Ps, Ch 2, Ps) in each corner sp. Join with Sl St. (Ensure you end a panel on an Sc before the corner).
- Round 5 (Solid Row): Ch 2. Hdc in each Ps and Sc across the panel. Work (Hdc, Ch 2, Hdc) in each corner Ch-2 sp. Join with Sl St.
- Round 6 – 8 (Continue Yoke): Repeat Rounds 4 and 5 (alternating Puff Stitch rows and Solid Hdc rows), continuing to increase at the corners until the yoke measures approximately 5-6 inches (12.5-15 cm) from the neck, ensuring it fits under the baby’s arms.
Dividing for Body and Sleeves
- Next Round (Divide): Work the established pattern across the Back Panel up to the first corner Ch-2 sp. Work 1 Ps/Hdc into the Ch-2 sp (matching the pattern). Ch 3 (underarm chain). Sk all stitches across the Sleeve Panel up to the next corner Ch-2 sp. Work 1 Ps/Hdc into the Ch-2 sp. Continue the pattern across the Front Panel. Repeat the Ch 3, Sk Sleeve step for the second armhole. Continue the pattern to the end. Join with Sl St.
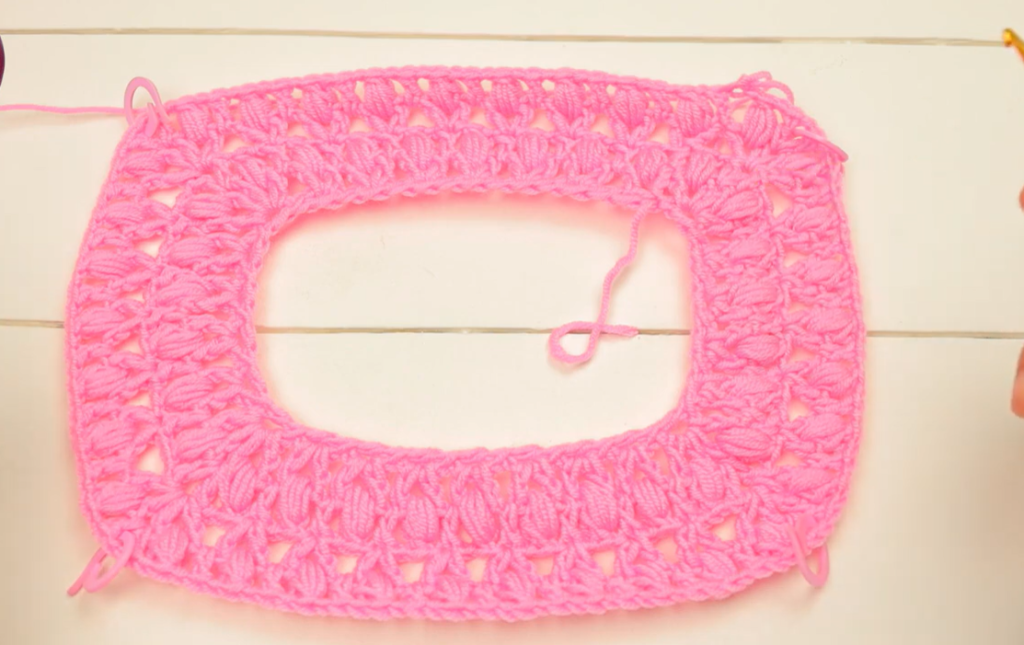
☁️ Section 4: Body of the Sweater
The body is now worked in the round using only the alternating Puff Stitch and Solid rows.
- Body Rounds: Continue alternating the Puff Stitch Row (Round 4 repeat) and the Solid Row (Round 5 repeat). Work the body pattern over the Ch-3 underarm chain (treating the chain as 3 stitches to be incorporated into the stitch count).
- Length: Continue until the body reaches the desired length before the ribbing—approximately 4-5 inches (10-12.5 cm) from the underarm.
Ribbing (Hem)
- Change Hook: Switch to the 3.5 mm hook.
- Ribbing Row 1: Ch 2. Dc in each st around. Join with Sl St.
- Ribbing Row 2: Ch 2. Fpdc around the first st. Bpdc around the next st. Rep (Fpdc, Bpdc) around. Join with Sl St.
- Ribbing Row 3 – 5: Repeat Ribbing Row 2 until the ribbing measures approximately 1.5 inches (4 cm). FO.
Video Tutorial:
🎀 Section 5: Sleeves and Finishing
The sleeves are worked in the round from the armhole edge inwards.
- Sleeve Start: Join yarn at the center of the Ch-3 underarm chain.
- Sleeve Rounds: Continue the established Puff Stitch/Solid Hdc pattern in the round. Work evenly around the armhole opening and the Ch-3 underarm.
- Tapering: To taper the sleeve, decrease 2 stitches (Sc2tog or Hdc2tog) in a random spot on the solid Hdc rows, every 3 or 4 rounds.
- Length: Continue until the sleeve reaches the desired length before the cuff—approximately 7-8 inches (18-20 cm) from the underarm.
Cuffs (Ribbing)
- Change Hook: Switch to the 3.5 mm hook.
- Cuff Row 1: Ch 2. Dc in each st around. Join with Sl St.
- Cuff Rows 2 – 5: Ch 2. Rep (Fpdc, Bpdc) pattern around. Join with Sl St.
- FO. Repeat for the second sleeve.
💖 Final Assembly
- Weave in all loose yarn ends securely using your tapestry needle.
Your gorgeous, cozy Bubblegum Dreams Sweater is complete! The puff stitch texture is absolutely beautiful in this bright pink yarn.
Would you like me to find a simple pattern for a coordinating baby hat or booties?


