
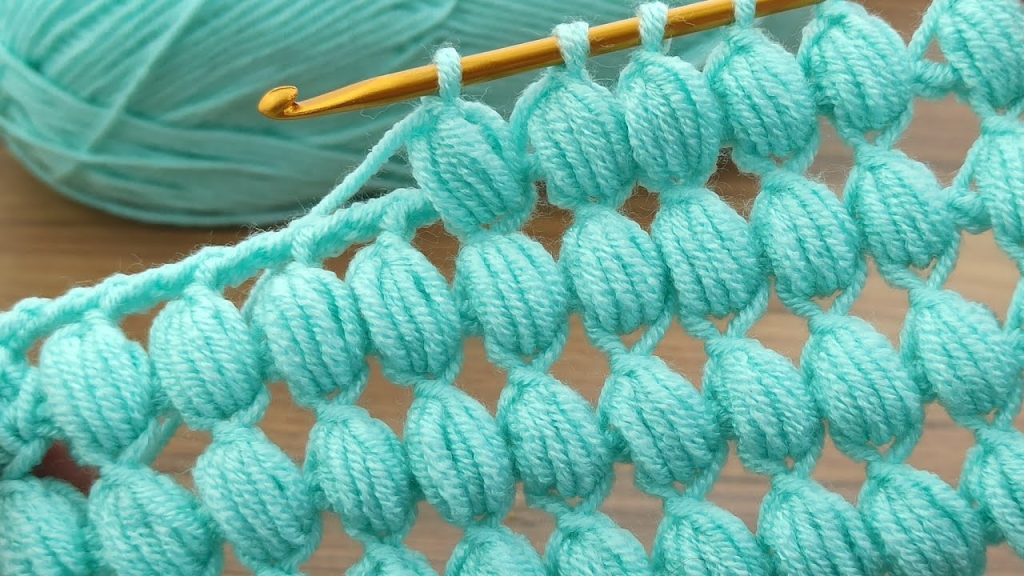
Welcome, texture enthusiasts! Today, we are diving into a stitch that delivers maximum squish and visual appeal. This Full Puff Stitch Grid (FPSG) creates a dense, solid fabric where every stitch is a plump, individual puff. The result is a delightfully textured textile that looks almost like repeating grapes or bubbles. It is exceptionally warm, perfectly reversible, and ideal for luxury blankets, floor pillows, and cozy scarves.
To meet your request for maximum detail, we will focus on mastering the tension of the puff stitch and the strategic placement of single crochet rows that lock the puffs into a perfect grid.
🛍️ Materials, Preparation, and Pro-Level Tips
Choosing Your Tools for Maximum Puff
- Yarn Selection: Select a soft, high-quality Worsted Weight (Aran/10-ply) or Bulky Weight (12-ply) yarn. A soft, light color like the mint shown is best for highlighting the three-dimensional quality of the puffs.
- Yarn Note: This stitch is one of the biggest “yarn eaters” in crochet. It will use at least twice the amount of yarn as a plain single crochet blanket of the same size. Plan accordingly!
- Hook Size: Use a 5.5 mm (I-9 US) to 6.5 mm (K-10.5 US) hook.
- Critical Detail: Your hook must be slightly larger than the size recommended for your yarn. If the hook is too small, the fabric will be stiff, dense, and difficult to work due to the many yarn-overs in the puff stitch.
- Notions Checklist: Sharp Scissors, a large-eye Tapestry Needle, and a Stitch Marker.
Gauge and Tension: The Key to a Perfect Grid
- Pattern Multiple: This stitch is worked over a multiple of 2 stitches, plus 1 for the foundation chain.
- Example Chain (for a swatch): Ch 27 (2 x 13 = 26, plus 1 = 27).
- Puff Tension: The most important factor is the tension of the loops pulled up during the puff stitch. Pull the loops up tall—to the height of a double crochet—to ensure the puff is plump and not pulled flat when secured.
- Swatch Requirement: Highly recommended. A blocked swatch will confirm the fabric has a soft drape and isn’t too rigid.
📌 Stitch Abbreviations & Technical Definitions (US Terms)
Core Stitches
- ch: Chain
- st(s): Stitch(es)
- sc: Single Crochet
- sl st: Slip Stitch
- rep: Repeat
The Key Stitch: Full Puff Stitch (FPS)
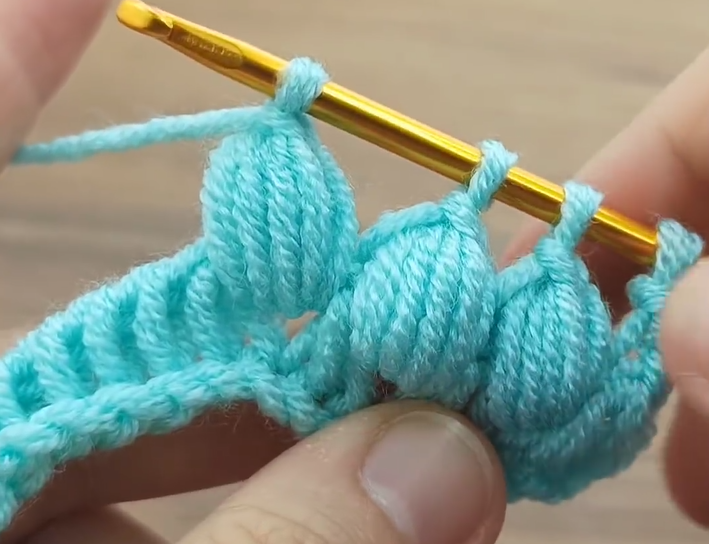
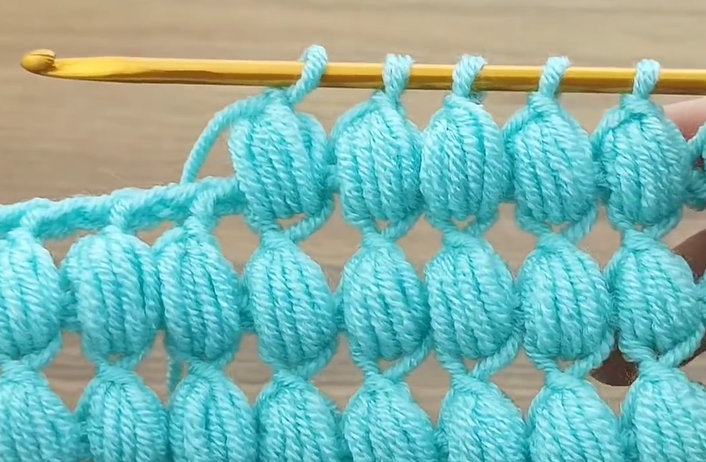
For this dense, repeating texture, we will use a substantial puff stitch with 4 pulls to create the fully rounded shape seen in the image.
Full Puff Stitch (FPS) Definition (4 pulls for maximum volume):
- Yo, insert hook into the designated stitch or space.
- Yo and pull up a loop, extending the loop fully to the height of the row (3 loops on hook).
- [Yo, insert hook into the same point, Yo, pull up a loop] 3 more times. (You will have 9 loops on the hook after 4 pulls).
- Yo and pull through all 9 loops on the hook.
- Ch 1 to close the puff stitch. This ch-1 does not count as a stitch but is vital for securing the puff.
➡️ Phase 1: Establishing the Foundation and Initial Grid
The foundation sets up the stable single crochet base required to lock the puffs into place.
Row 1: Foundation Single Crochet (Base)
- Ch the required number (multiple of 2, plus 1).
- Sc into the 2nd ch from the hook and in every ch across.
- Ch 1 (does not count as a stitch). Turn.
Row 2: The Puff Lock Row (Preparation)
This is the row that will secure the puff stitches.
- Sc into the first st and into every st across.
- Ch 1 (does not count as a stitch). Turn.
🫧 Phase 2: Building the Full Puff Grid
This is the core two-row repeat that creates the three-dimensional pattern.
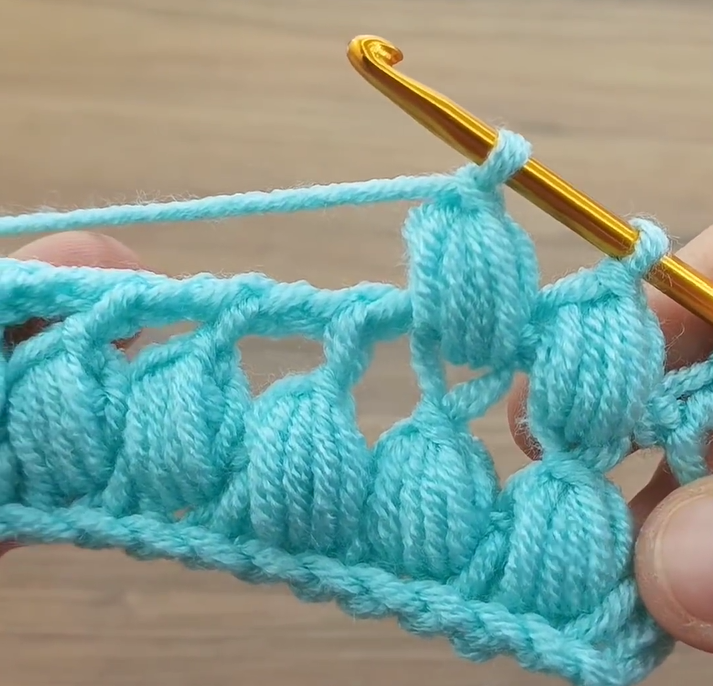
Row 3: First FPS Row (The Bubbles)
The puffs are worked into the single crochet spaces from Row 2.
- FPS into the first st.
- Sc into the next st.
- *FPS into the next st.
- Sc into the next st.*
- Repeat from * to * across the row.
- End by working a final FPS into the last st.
- Ch 1 (does not count as a stitch). Turn.
💡 Tension Check: Your row should alternate between plump puffs and flat single crochets. If the single crochets are tight, the puffs will look pinched.
Row 4: The SC Stabilizing Row (Locking the Puffs)
This row is crucial. It locks the puffs on the wrong side and sets up the staggered placement for the next row.
- Sc into the first st (this sc is worked over the top of the FPS from Row 3).
- Sc into every st across, placing one sc into the top of the previous FPS and one sc into the top of the previous Sc.
- Key Placement: Ensure you work the sc over the ch-1 that closes the puff to anchor it firmly.
- Ch 1 (does not count as a stitch). Turn.
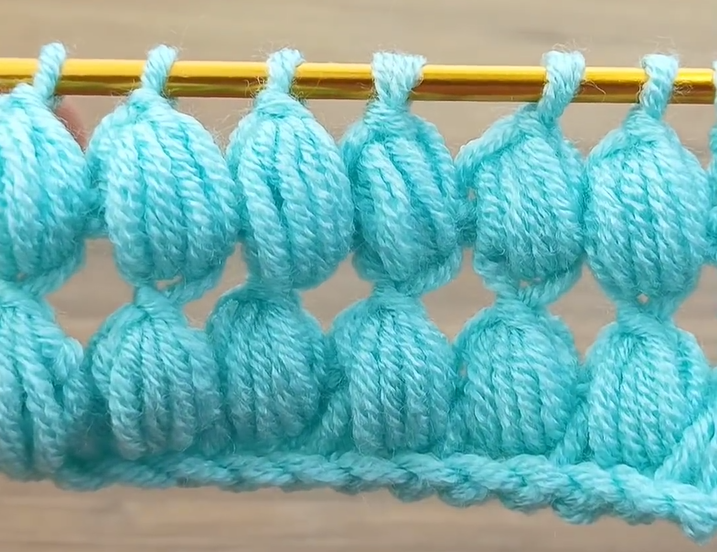
Row 5: Staggered FPS Row (Creating the Grid)
The puffs are now offset, lining up directly over the single crochets of Row 3, which creates the perfect grid.
- Sc into the first st.
- FPS into the next st (this stitch is directly above the sc space from Row 3).
- *Sc into the next st.
- FPS into the next st.*
- Repeat from * to * across the row.
- End by working a final Sc into the last st.
- Ch 1 (does not count as a stitch). Turn.
🔄 Phase 3: The Complete Pattern Repeat
The pattern is now fully established and consists of a simple two-row repeat.
- Repeat Row: Repeat Rows 4 and 5 until your piece reaches the desired length.
Stitch Sequence Breakdown:
- Even Rows (Row 4, 6, 8…): Sc into every stitch across (The Stabilizing Row).
- Odd Rows (Row 3, 5, 7…): Alternate FPS and Sc across, ensuring the FPS falls above the previous row’s Sc, and the Sc falls above the previous row’s FPS.
Video Tutorial:
✂️ Finishing and Structural Integrity
Fabric Characteristics
The finished fabric is incredibly thick, soft, and warm. It is essentially a reversible fabric, though the wrong side will show a clearer single crochet base with the puff texture slightly less defined. The thickness provides excellent insulation and minimal stretch.
Creating a Polished Edge
- Final Row: End after any SC Base Row (Row 4). This gives you a smooth, flat top edge for a border.
- Border: A simple Single Crochet border (or a few rounds of Half Double Crochet) is necessary to ensure the side edges are straight and to finish the texture neatly. Ensure your border tension matches the stability of the puff fabric.
Your Full Puff Stitch Grid is complete—a luxurious textile ready for the coziest projects!


