
✨ Introduction: Capturing Texture and Coziness
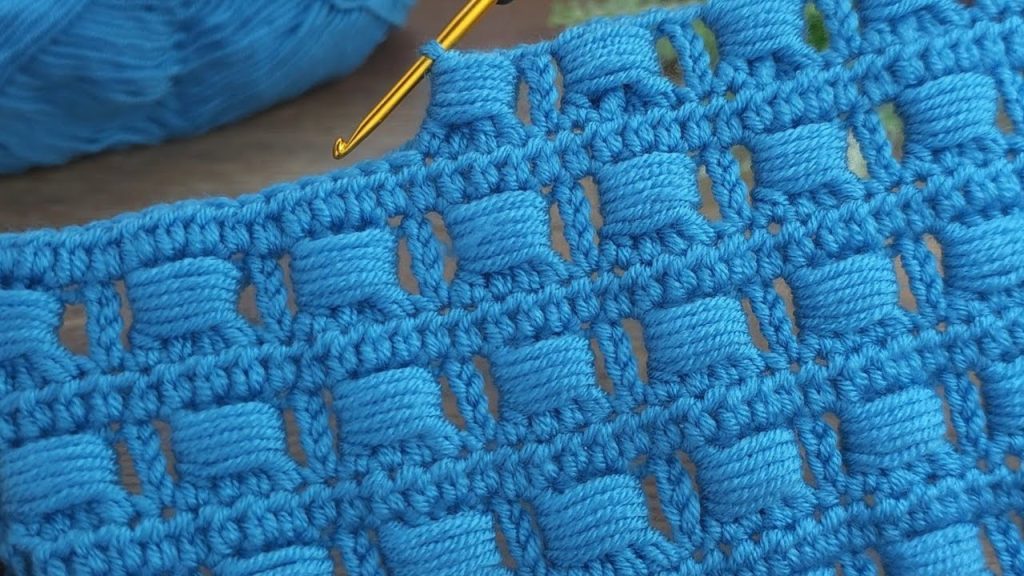
Welcome to a pattern that’s all about texture and depth! The stitch featured in your photo creates a spectacular three-dimensional look using simple crochet techniques. By alternating solid rows with rows of strategically placed Bobble Stitches and chain spaces, we achieve a stylish, modern grid that feels incredibly lush and cozy.
This pattern will guide you step-by-step through creating a decorative throw pillow cover that beautifully showcases the “Puffy Window Pane” stitch. It’s a wonderful project for intermediate crocheters or confident beginners ready to master the bobble!
📋 Materials You’ll Need
- Yarn: Approximately 500-600 yards of Worsted Weight (Category 4) yarn. A soft acrylic or cotton blend works perfectly to define the bobbles. The bright blue in your image is a fantastic choice!
- Hook: A US Size H/8 (5.0 mm) crochet hook, or the size needed to obtain gauge.
- Pillow Insert: One 16″ x 16″ (40.5 cm x 40.5 cm) pillow insert.
- Tapestry Needle (for weaving in ends and seaming).
- Scissors.
📐 Gauge and Finished Size
Getting the gauge right is important to ensure your cover fits the pillow insert properly.
- Gauge: 4 pattern repeats (4 bobbles and chain spaces wide) and 6 rows = 4 inches (10 cm) square, blocked.
- Finished Pillow Cover Size (when laid flat): Approximately 16″ x 32″ (40.5 cm x 81 cm). (This pattern creates a seamless cover that folds over the pillow, meeting at the back).
📝 Key Crochet Abbreviations (US Terms)
Familiarize yourself with these standard and special abbreviations before beginning.
| Abbreviation | Meaning |
| ch | Chain |
| st(s) | Stitch(es) |
| sk | Skip |
| sl st | Slip Stitch |
| sc | Single Crochet |
| dc | Double Crochet |
| Bobble | Bobble Stitch (Special Stitch – see tutorial below) |
| rep | Repeat |
🧵 Special Stitch Tutorial: The 5-DC Bobble Stitch
The Bobble Stitch is the key feature of this pattern. It’s worked on the wrong side of the fabric so that the ‘pop’ of the bobble pushes out onto the right side.
- YO, insert hook into the indicated stitch.
- YO and pull up a loop (3 loops on hook).
- YO and pull through 2 loops (2 loops remain on hook).
- Repeat steps 1-3 four more times into the same stitch (you will have a total of 6 loops on your hook).
- YO and pull through all 6 loops on the hook.
- Ch 1 to close the bobble (this chain helps lock it in place and stabilize the stitch).
🛋️ Pillow Cover Pattern Instructions
We will be working in rows to create a rectangle that is double the length of one pillow side. We’ll then fold it and seam the sides. The stitch pattern requires a starting chain that is a multiple of 4, plus 3.
Step 1: The Foundation
- Ch 67 (This provides 16 pattern repeats, plus the necessary end stitches, for a 16″ width).
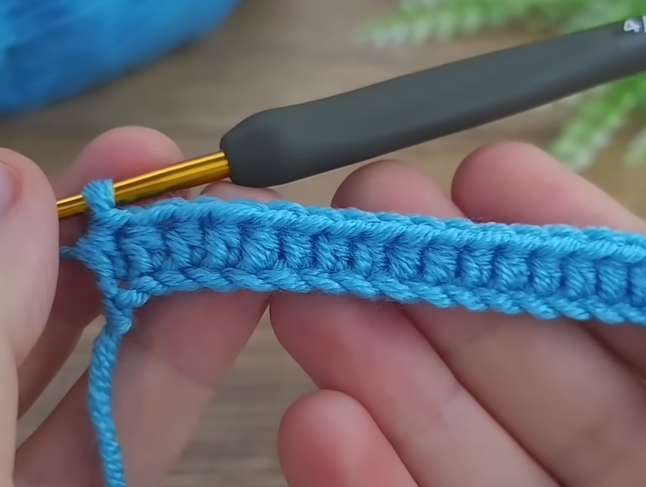
- Row 1 (Right Side – RS): Sc in the 2nd ch from hook and in each ch across. (66 sc).
- Row 2 (Wrong Side – WS): Ch 1 (does not count as st), turn. Sc in each sc across. (66 sc).
- Row 3 (RS – Solid Edge Row): Ch 3 (counts as a dc), turn. Dc in each sc across. (66 dc).
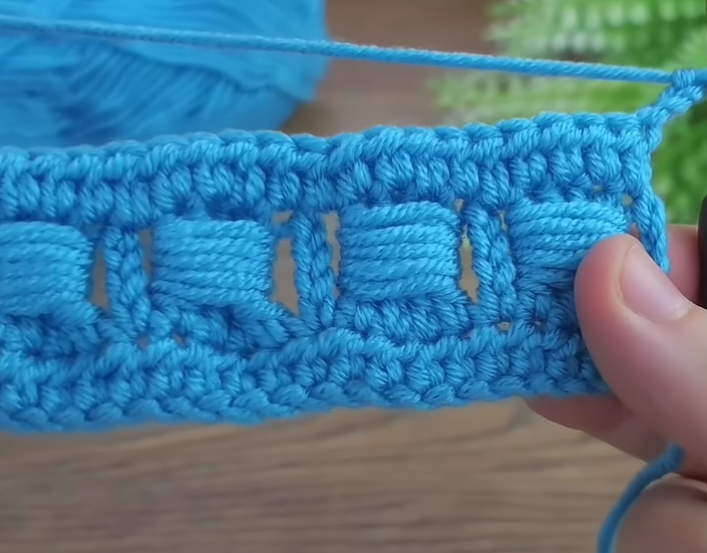
Step 2: The Bobble/Grid Repeat (The Puffy Window Pane)
This is the repeating section that creates the texture. Rows 4 and 5 form the core grid pattern.
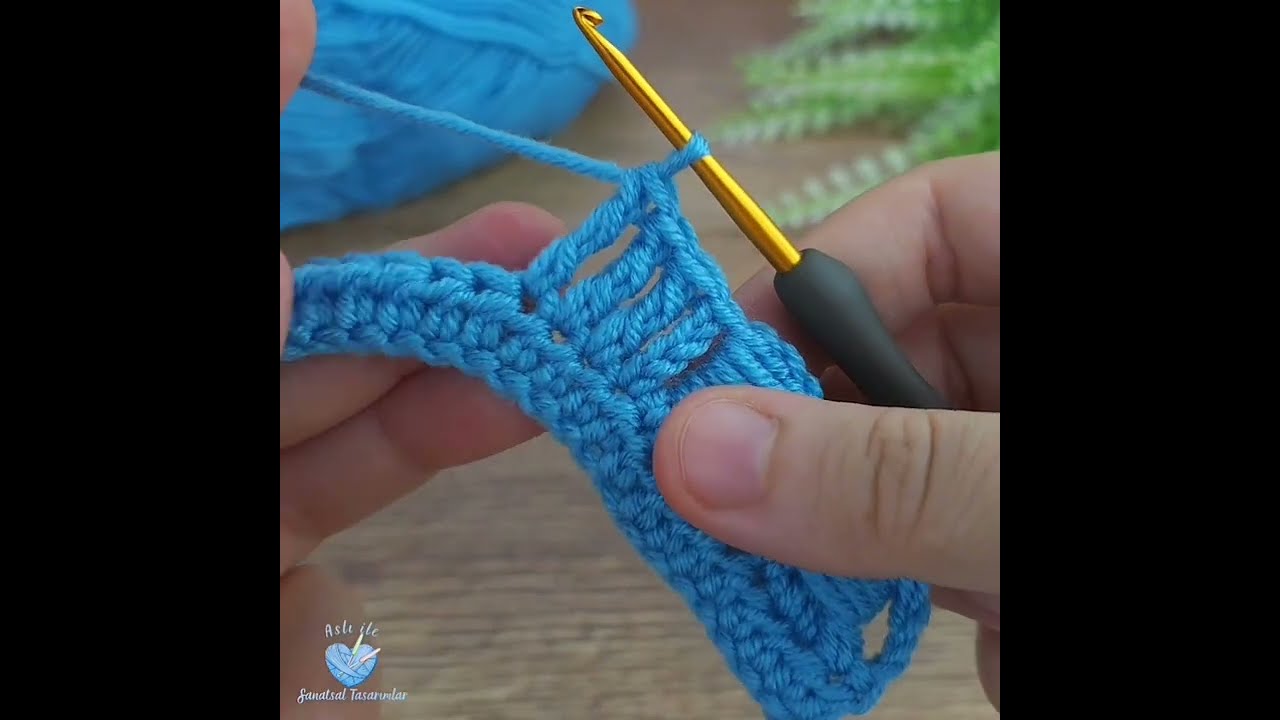
- Row 4 (WS – Bobble Row):
- Ch 1 (does not count as st), turn. Sc in the first 2 dc.
- *Bobble in the next dc, ch 1, sk the next 3 dc*.
- Repeat from * to * across the row until 4 dc remain.
- Bobble in the next dc, ch 1, sk the next dc, sc in the last 2 dc. (15 Bobbles separated by ch-1 spaces and 4-st skips, plus border sc).
- Row 5 (RS – Grid Top Row):
- Ch 3 (counts as a dc), turn. Dc in the next sc.
- *Ch 2, sk the ch-1 sp and the Bobble, dc in the next 3 skipped dc (from Row 3)*.
- Repeat from * to * across the row until 4 sts remain (you’ll end on a Bobble and a ch-1 sp).
- Ch 2, sk the ch-1 sp, dc in the last 2 sc. (The open chain-2 spaces should align directly above the bobbles).
- Row 6 (WS – Solid Row):
- Ch 1 (does not count as st), turn. Sc in the first 2 dc.
- *Sc in the ch-2 space, sc in the next 3 dc*.
- Repeat from * to * across, ending with sc in the last ch-2 sp, sc in the last 2 dc. (66 sc).
- Row 7 (RS – Base Row): Ch 3 (counts as a dc), turn. Dc in each sc across. (66 dc).
Step 3: Repeating for Length
- Repeat Rows 4 – 7 until the piece measures approximately 32 inches (81 cm) or until you have worked an even number of full pattern repeats and the piece is slightly more than double the length of your pillow insert (to account for seaming).
- Finish on a Row 7 (a solid dc row) to match the beginning edge.
Step 4: Finishing and Seaming
- Final Edge: Work Row 1 again: Ch 1, turn. Sc in each dc across. (66 sc).
- Fasten Off, leaving a long tail (about 50 inches / 127 cm) for seaming.
- Fold: Lay the crocheted rectangle flat with the Wrong Side (WS) facing up. Fold one end up 16 inches, and the other end up 16 inches, so the two solid edges meet.
- Insert Pillow: Gently slip your 16″ x 16″ pillow insert inside the cover before seaming.
- Seam Sides: Use the long tail and your tapestry needle to whipstitch or mattress stitch the two open side edges closed. Work through both layers of fabric for a secure seam.
- Weave in Ends: Securely weave in all remaining yarn tails.
Video Tutorial:
🧺 Care and Display
- Washing: Check your yarn label. For most acrylics, machine wash cold on a gentle cycle. Do not put your pillow insert in the wash—remove the cover first if possible, or hand-spot clean.
- Drying: Lay flat to air dry. The texture will pop even more once dry!
- Display: Toss this beautifully textured pillow on your couch or bed for an instant pop of color and coziness!


