✨ Introduction: Crocheting Your Way to Elegance
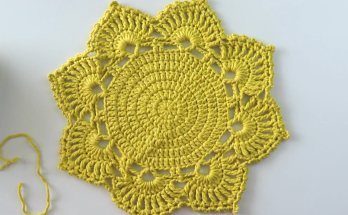
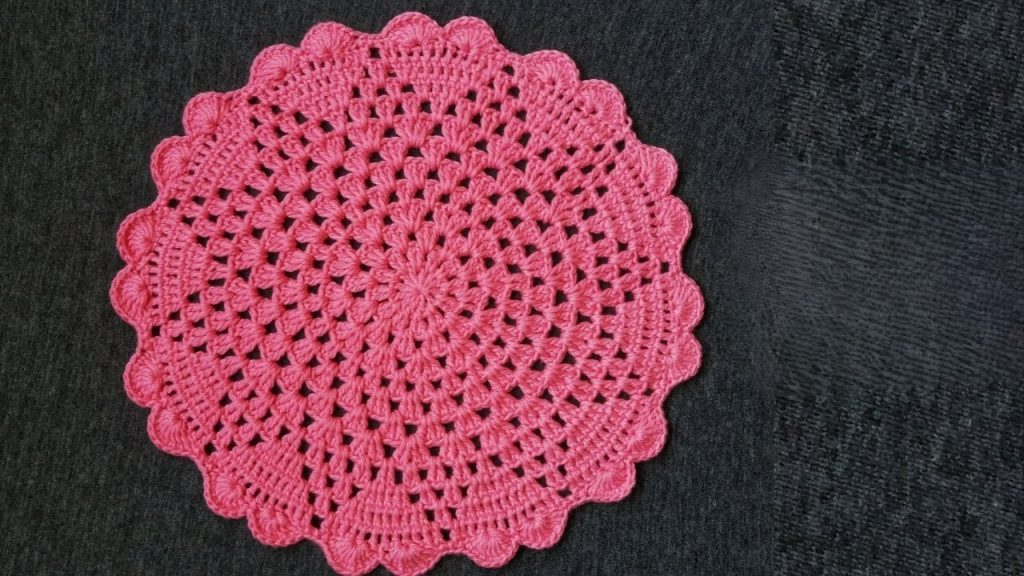
Welcome to a pattern that’s all about bringing vintage elegance and delicate lace into your home! The circular piece in your photo uses the timeless Shell Stitch motif, which radiates outward like perfectly formed rose petals. This is a wonderfully relaxing and rewarding project, perfect for practicing basic circular crochet and increasing, resulting in a beautiful doily that works as a centerpiece, a coaster, or a stunning piece of wall art.
This detailed blog post will guide you through creating a medium-sized doily, approximately 12 inches in diameter, using a series of repeating rounds to build that lovely textured fan pattern and finish with the distinctive scalloped border.
📋 Materials You’ll Need
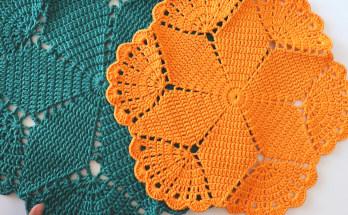
- Yarn: Approximately 150-200 yards of Size 10 Crochet Thread (or Fingering/Sock Weight yarn, Category 1). If you use a thicker yarn (like DK or Worsted), your doily will be much larger and more like a table mat. The bright pink is a beautiful choice!
- Hook: A steel crochet hook size 7 (1.65 mm) for crochet thread, or a US Size C/2 (2.75 mm) hook if using a Fingering/Sock weight yarn. Choose the hook appropriate for your chosen yarn weight.
- Scissors
- Tapestry Needle (for weaving in ends).
- Stitch Marker (helpful for marking the start of rounds).
📐 Gauge and Finished Size
For doilies, gauge is generally flexible and determined by the size of the final piece.
- Finished Size: Approximately 12 inches (30 cm) in diameter when using Sock/Fingering weight yarn.
- Gauge: Rounds 1–5 should measure approximately 2 inches (5 cm) in diameter.
📝 Key Crochet Abbreviations (US Terms)
This pattern relies heavily on the Double Crochet (dc) and the Shell Stitch.
| Abbreviation | Meaning |
| ch | Chain |
| st(s) | Stitch(es) |
| sl st | Slip Stitch |
| sc | Single Crochet |
| dc | Double Crochet |
| Shell | Shell Stitch: (3 dc, ch 1, 3 dc) worked into the same stitch or space |
| rep | Repeat |
| rnd | Round |
| sp | Space |
| sk | Skip |
🌸 Doily Pattern Instructions
This pattern starts small and expands outward in every round to maintain a flat circle.
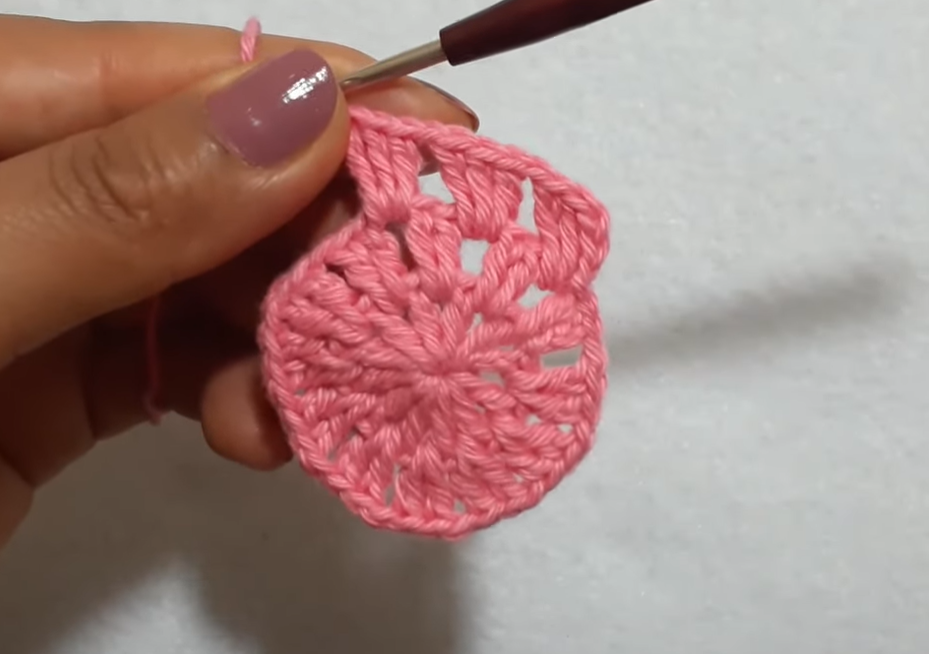
Section 1: The Center & First Shell Layer
- Rnd 1 (Foundation): Ch 4, sl st into the first ch to form a ring. Ch 3 (counts as first dc), work 11 dc into the ring. Join with sl st to the top of the beginning ch-3. (12 dc)
- Rnd 2: Ch 3 (counts as first dc), dc in the same st. Work 2 dc in each st around. Join with sl st to the top of the beginning ch-3. (24 dc)
- Rnd 3 (Shell Setup): Ch 1, sc in the same st. Ch 2, sk 2 sts. *Sc in the next st, ch 2, sk 2 sts*. Repeat from * to * around. Join with sl st to the first sc. (8 sc, 8 ch-2 sps)
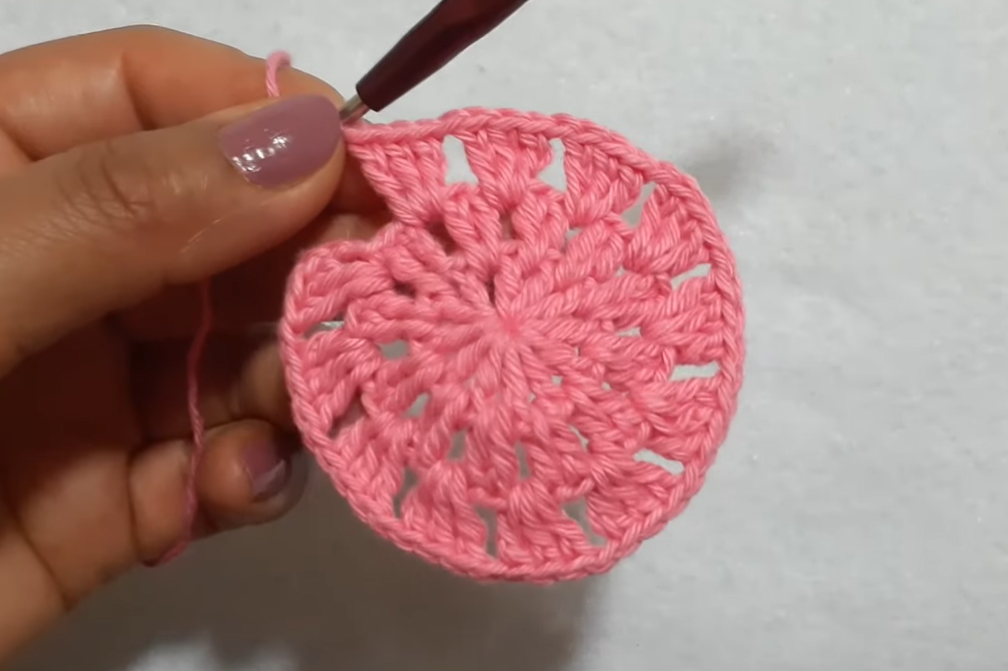
- Rnd 4 (First Shells): Sl st into the first ch-2 sp. Ch 3, (2 dc, ch 1, 3 dc) in the same ch-2 sp (first Shell made). *Sk the next sc, Shell (3 dc, ch 1, 3 dc) in the next ch-2 sp*. Repeat from * to * around. Join with sl st to the top of the beginning ch-3. (8 Shells)
- Rnd 5: Sl st into the first ch-1 sp of the Shell. Ch 3, (2 dc, ch 1, 3 dc) in the same ch-1 sp (Shell made). Ch 1. *Shell in the ch-1 sp of the next Shell, ch 1*. Repeat from * to * around. Join with sl st to the top of the beginning ch-3. (8 Shells, 8 ch-1 sps)
Section 2: Expanding the Shells
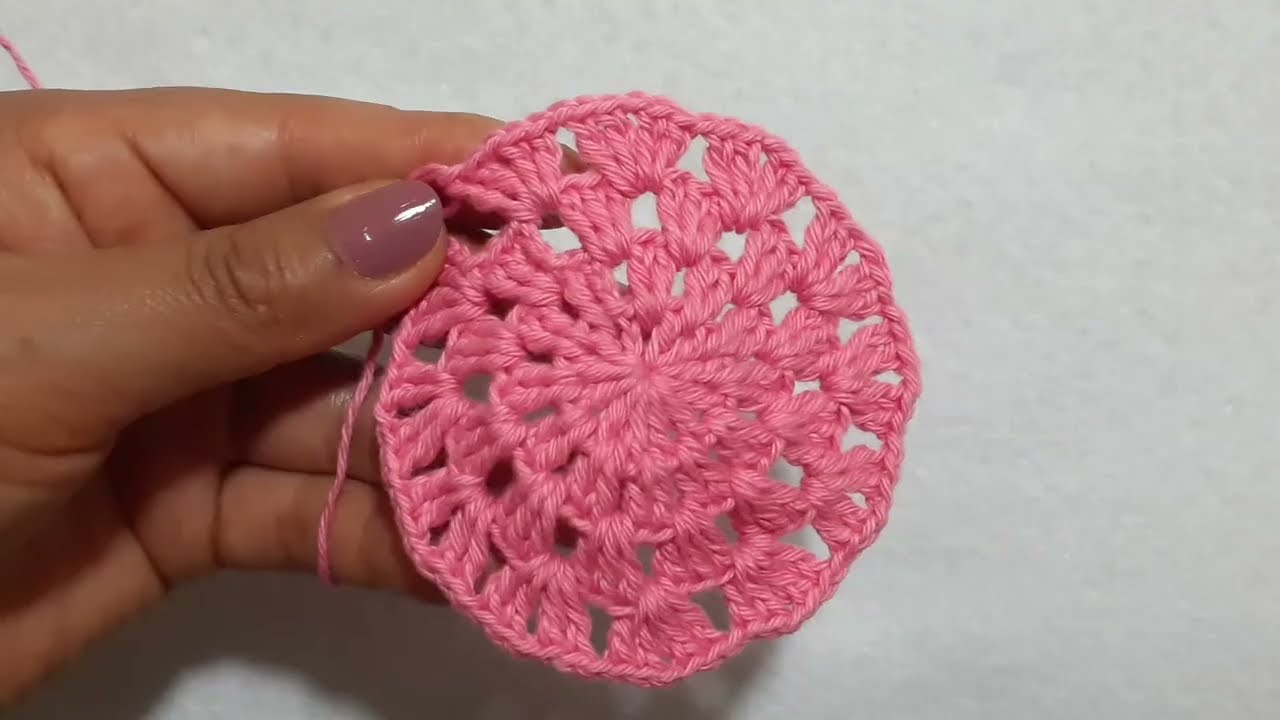
- Rnd 6: Sl st into the first ch-1 sp of the Shell. Ch 3, (2 dc, ch 1, 3 dc) in the same ch-1 sp (Shell made). Ch 2. *Shell in the ch-1 sp of the next Shell, ch 2*. Repeat from * to * around. Join with sl st to the top of the beginning ch-3. (8 Shells, 8 ch-2 sps)
- Rnd 7: Sl st into the first ch-1 sp of the Shell. Ch 3, (2 dc, ch 1, 3 dc) in the same ch-1 sp (Shell made). Ch 3. *Shell in the ch-1 sp of the next Shell, ch 3*. Repeat from * to * around. Join with sl st to the top of the beginning ch-3. (8 Shells, 8 ch-3 sps)
Tip for Growth: Notice how the chain space between the shells increases by one chain in each round (ch 1, ch 2, ch 3…). This is the key to expanding the doily into a flat circle!
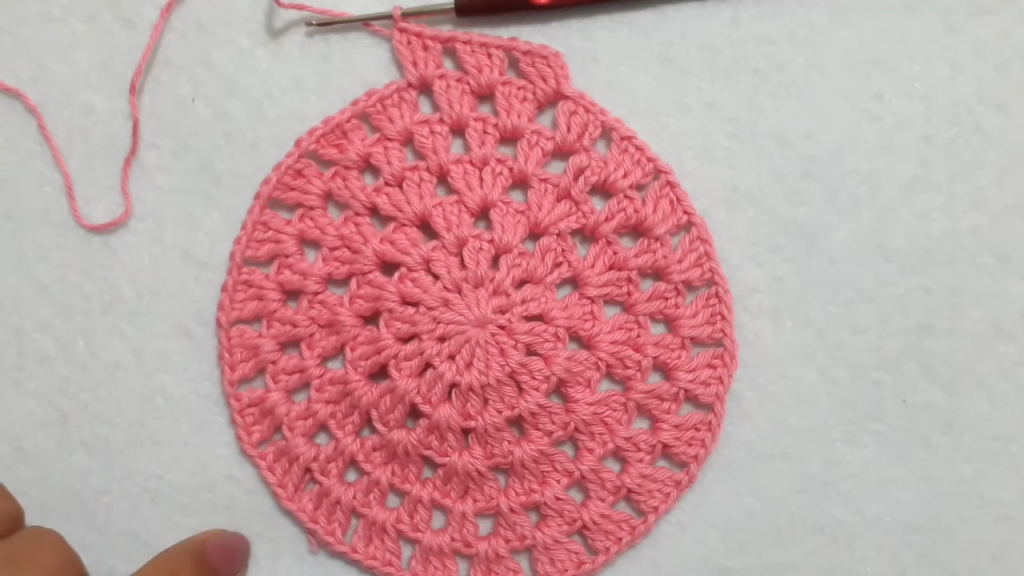
- Rnd 8 – 14: Continue this expansion: Sl st into the first ch-1 sp of the Shell. Work a Shell in the ch-1 sp. Work 4 ch between shells in Rnd 8, 5 ch between shells in Rnd 9, and so on, increasing the chain space by one chain in each successive round until you reach ch 10 between shells in Rnd 14. Join with sl st at the end of each round.
Section 3: The Solid Transition
This section prepares the edge for the final decorative border.
- Rnd 15: Ch 3 (counts as first dc). Work 1 dc in each of the next 2 dc of the Shell. Work 3 dc in the ch-1 sp of the Shell. Work 1 dc in each of the next 3 dc of the Shell. *Work 12 dc evenly across the ch-10 space, then work 1 dc in each of the next 3 dc of the Shell, 3 dc in the ch-1 sp, 1 dc in each of the next 3 dc of the Shell*. Repeat from * to * around. Join with sl st to the top of the beginning ch-3. (Approximately 192 dc)
Important: The goal of Rnd 15 is to create a flat, solid base. Adjust the number of DC worked in the chain space if your work starts to pucker or ruffle.
- Rnd 16: Ch 1, sc in each dc around. Join with sl st to the first sc. (192 sc)
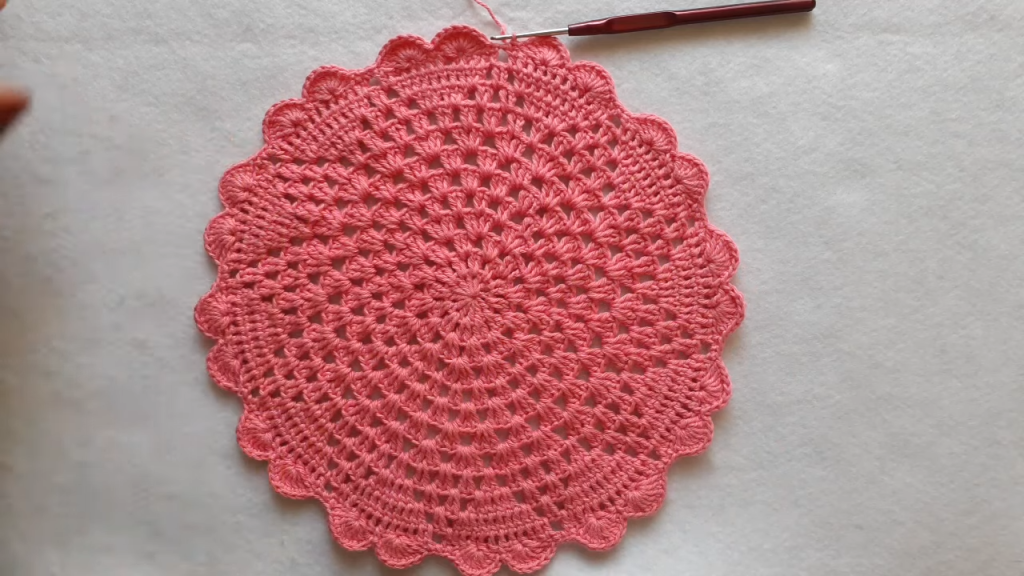
Section 4: The Scalloped Border
This final row creates the signature ruffled edge seen in the image.
- Rnd 17 (Border): Ch 1, turn (this will make the scallops stand out slightly). Sk the first 2 sc. *Work 7 dc into the next sc (Large Scallop made). Sk the next 3 sc*. Repeat from * to * around. Your last repeat will likely require you to skip a few more or fewer stitches to meet the first scallop perfectly. Adjust as needed. Join with sl st to the first sc (from Rnd 16) or the base of the first dc of the first scallop.
- Fasten Off, leaving a small tail.
Video Tutorial:
🧺 Finishing and Display
- Weave in Ends: Use your tapestry needle to carefully weave the starting tail in the center and the ending tail into the back of the border.
- Starching/Blocking (Essential): For a lace doily like this, blocking is absolutely essential for opening up the lace and ensuring it lays perfectly flat and round.
- Method 1 (Wet Blocking): Soak the doily in lukewarm water (with a dash of laundry starch if desired). Gently squeeze out excess water. Pin the doily onto a blocking mat or piece of Styrofoam, stretching the points and scallops until the doily is perfectly round. Allow it to dry completely.
- Method 2 (Iron/Steam Blocking): Lay the doily flat on an ironing board, spray lightly with water or starch spray, and hover a steam iron over the doily until the moisture is gone. Do not press down heavily.