
✨ Introduction: Texture and Definition
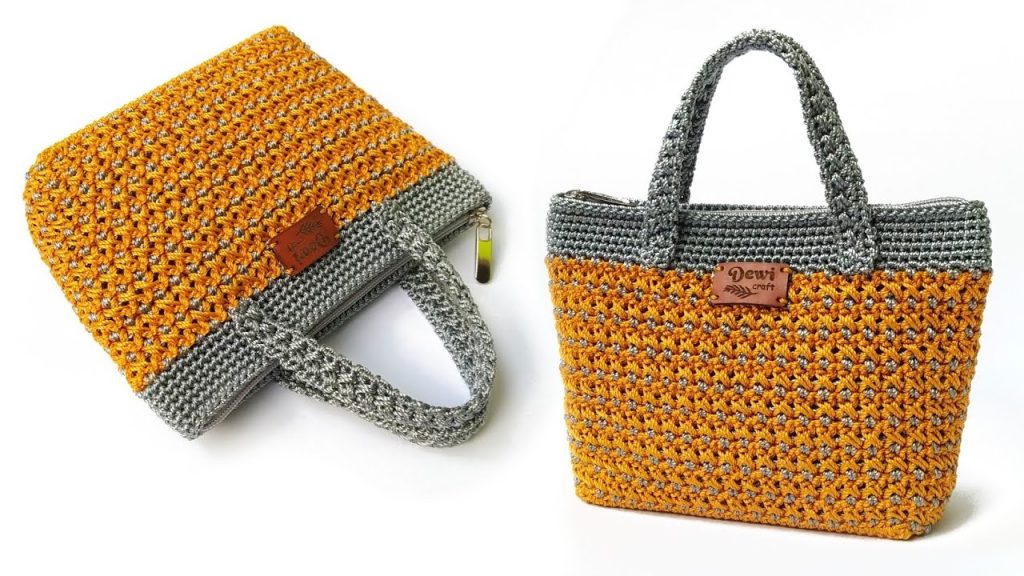
Welcome to the detailed crochet pattern for the Two-Tone Rice Stitch Tote (sometimes called the Crunch Stitch or the Woven Diamond Stitch). Inspired by the elegant and structured design in the video, this handbag is defined by its beautiful, interlocking two-color texture and its firm, self-supporting shape. Using a sturdy yarn, such as nylon or nautical cord, allows the bag to maintain its rectangular profile without the need for additional stiffening.
This project is suitable for intermediate crocheters familiar with working in the round, changing colors, and locating specific chain spaces. The pattern alternates between rows of Single Crochet (SC) and rows of Half Double Crochet (HDC) combined with chain spaces, which creates the dense, woven fabric that makes this tote so stunning.
Why Choose This Pattern?
- Distinct Texture: The alternating colors and offset stitches create a captivating “rice grain” or small cross motif that is dense and eye-catching.
- Excellent Structure: The foundation starts with a rectangular base, ensuring the bag sits flat and holds its contents securely.
- Color Play: This is a fantastic project for using two complementary colors to highlight the dimensional nature of the stitch.
- Skill Building: You will practice working into the chain space of the previous row and the row before that, a fun technique for creating depth.
📚 Materials & Terminology
| Abbreviation | Meaning |
| ch | Chain |
| st(s) | Stitch(es) |
| sl st | Slip Stitch |
| sc | Single Crochet |
| hdc | Half Double Crochet |
| sk | Skip |
| rep | Repeat |
| ch-sp | Chain space |
| ( ) | Repeat instructions inside parentheses |
Special Stitches
- Backward HDC: This HDC is worked into a Ch-1 space two rounds below the current working row. This creates the long, criss-crossing stitch that forms the motif’s depth.
Materials Needed
- Yarn: Approximately 150–200 grams of a sturdy yarn. Nylon, Polypropylene/Nautical Yarn, or a firm Cotton Worsted Weight (#4) is ideal.
- Color A: Main/Base Color (e.g., Cream).
- Color B: Contrast Color (e.g., Orange/Rust).
- Hook: 4.0 mm crochet hook (or one size smaller than suggested for your yarn to maintain a firm tension).
- Tools: Scissors, tapestry needle, and a stitch marker.
📏 Gauge & Sizing
The gauge is tight and firm. Your base dimensions should align closely with these targets:
- Base Dimensions (Target):
- Length: 17 cm (6.7 inches)
- Width: 7 cm (2.75 inches)
- Body Stitch Multiple: The final SC round around the base must be an even number (multiple of 2).
- Finished Bag Dimensions (Approximate):
- Length (Opening): ~20 cm
- Height (Excluding Handle): ~15 cm
🧱 Part 1: The Structured Rectangular Base
The bag starts with a flat rectangle worked in single crochet rows to create a firm bottom that helps the bag stand up.

Foundation and Base Rows (Color A)
- Start with Color A. Ch 36 (This gives you 35 working stitches across the width).
- Row 1: SC in the 2nd ch from the hook and in each ch across. [35 SC] Ch 1, turn.
- Rows 2–14: SC in each st across. [35 SC] Ch 1, turn.
Perimeter Round: Setting the Stitch Count
This round works SC all around the perimeter to prepare for the body motif. The final count must be an even number.
- Ch 1 (does not count as st). SC in each of the 35 stitches along the top edge.
- Corner 1: Work 2 SC into the last stitch.
- Work SC evenly down the 14 row ends of the short side (aim for 14–15 SC).
- Corner 2: Work 2 SC into the next corner space.
- SC in each of the 35 stitches along the bottom foundation edge.
- Corner 3: Work 2 SC into the next corner space.
- Work SC evenly up the 14 row ends of the short side (matching the count from the other side).
- Corner 4: Work 2 SC into the final corner space (next to the starting stitch).
- Sl st to the first SC of the round.
- Final Check: Count your stitches. If the count is not even, add or remove 1 SC in the corner groups until you reach an even number. (Example: If the count is 108, it’s correct. If it’s 109, add 1 more to reach 110).
〰️ Part 2: The Two-Tone Rice Stitch Body
The motif is worked in the round, changing colors every two rounds and turning the work after each round.

Motif Setup Round (Color B)
This round creates the ch-sp foundation for the textured rows.
- Join Color B with a sl st to any stitch. Ch 1 (does not count as st).
- SC in the same st.
- *Ch 1, sk 1 st, SC in the next st.*
- Rep from * around. You should end with a Ch 1 and sl st to the first SC to join.
- (Note: The number of SC stitches should be exactly half of the total stitch count from the base).
- Do NOT cut Color B. Keep it attached for the next HDC row.
Motif Row 1 (Color A): The HDC Crosses
- Join Color A into the first Ch-1 space (the space created between the joining point and the first SC). Ch 1, TURN your work.
- HDC Row Start: HDC into the Ch-1 space (where you joined).
- *Ch 1. Work a Backward HDC into the next Ch-1 space two rows below (the space from the Base Perimeter Round that sits directly below the current SC).*
- Tip: To make the Backward HDC easier, insert your hook into the ch-1 sp from the previous row (Color B), then push through to the SC round below to anchor the stitch.
- Work 1 HDC into the next Ch-1 space of Color B (the space between two SCs).
- Rep steps 3 and 4 around.
- Sl st to the top of the first HDC to join.
- Do NOT cut Color A. Drop the yarn and pick up Color B.
Motif Row 2 (Color B): The SC Shift
This row sets up the alternating texture by creating new ch-spaces over the previous HDC crosses.

- Pick up Color B. Ch 1, TURN your work.
- Work 1 SC into the first Ch-1 space of Color A (this is the space between the first two HDCs/Crosses).
- *Ch 1, sk 1 st, SC in the next Ch-1 space.*
- Rep from * around. End with a Ch 1 and sl st to the first SC to join.
- Do NOT cut Color B. Drop the yarn and pick up Color A.
Motif Row 3 (Color A): Repeat The Crosses
- Pick up Color A. Ch 1, TURN your work.
- HDC into the first Ch-1 space (where you joined).
- *Ch 1. Work a Backward HDC into the next Ch-1 space two rows below (the space from the Motif Setup Round that sits directly below the current SC).*
- Work 1 HDC into the next Ch-1 space of Color B (the space between two SCs).
- Rep steps 3 and 4 around.
- Sl st to the top of the first HDC to join.
- Do NOT cut Color A. Drop the yarn and pick up Color B.
Continuing the Pattern
Repeat Motif Row 2 (SC Shift) and Motif Row 3 (HDC Crosses) until you have a total of 9 motif repeats (18 total rounds of the pattern, or until the bag height is 15 cm).
💎 Part 3: Top Border and Finishing
The top of the bag is finished with a deep border of single crochet to add rigidity and a polished look.
Top Border Rounds (Color B)
- Motif Finish: After the final HDC Cross round (Color A), pick up Color B and work Motif Row 2 (SC Shift) one last time. Sl st to join.
- Round 1 (SC Prep): Ch 1, TURN your work. SC into the first Ch-1 space and 1 SC into the top of the next SC. Continue working 1 SC into each SC and 1 SC into each Ch-1 space around. [Total even stitch count] Sl st to first SC.
- Rounds 2–6 (Height): Ch 1. SC in each st around. Sl st to first SC.
- Round 7 (Final Edge): Work one final round of Slip Stitch (Sl St) around the entire edge. This creates a highly rigid, non-stretching rim.
- Fasten off and weave in the tail securely.
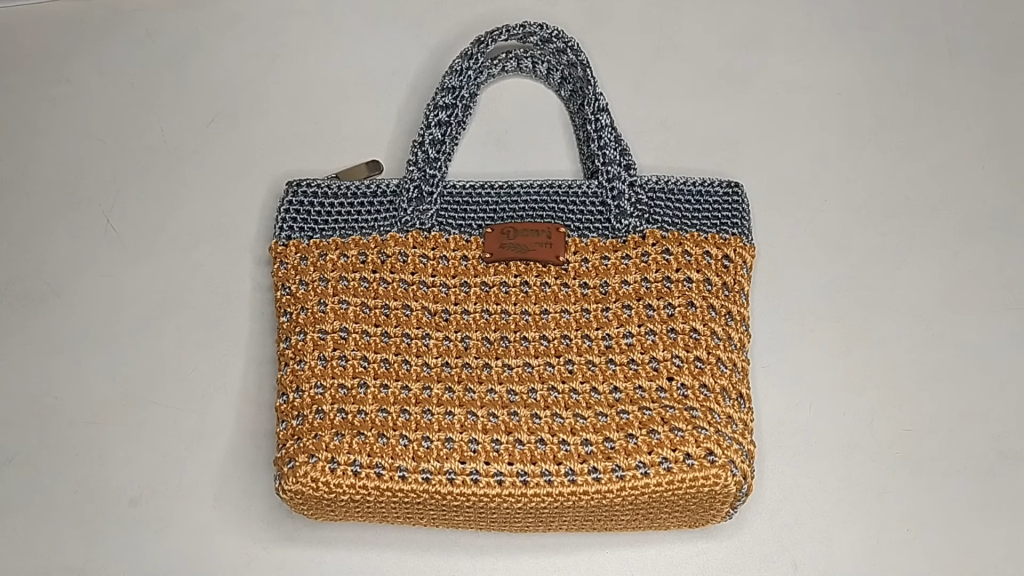
🧵 Part 4: The Flat Handles
The bag uses two short, flat handles sewn to the side panels. The video suggests a length of 23 cm for each handle.
Creating the Handles (Make 2)
- Ch 13 (or adjust for desired width).
- Row 1: SC in the 2nd ch from the hook and in each ch across. [12 SC] Ch 1, turn.
- Rows 2–55: SC in each st across. [12 SC] Ch 1, turn.
- Adjust the number of rows until the strap measures approximately 23 cm (9 inches).
- Fasten off, leaving a long tail for sewing.
Video Tutorial:
Handle Placement and Assembly
- Marking: Identify the center points on the front and back of the bag opening. Measure out approximately 5 cm (2 inches) on either side of the center mark. Place stitch markers to indicate the start and end of the handle attachment area.
- Sewing: Using the long tail and a tapestry needle, align the end of one handle with the marked area on the front panel. Sew the handle firmly to the bag over about 5 rows of the top SC border.
- Repeat the process for the second handle, ensuring both handles are placed symmetrically on the front and back panels.
Your Two-Tone Rice Stitch Tote is now complete—a durable, textured, and stylish piece ready for use!


