
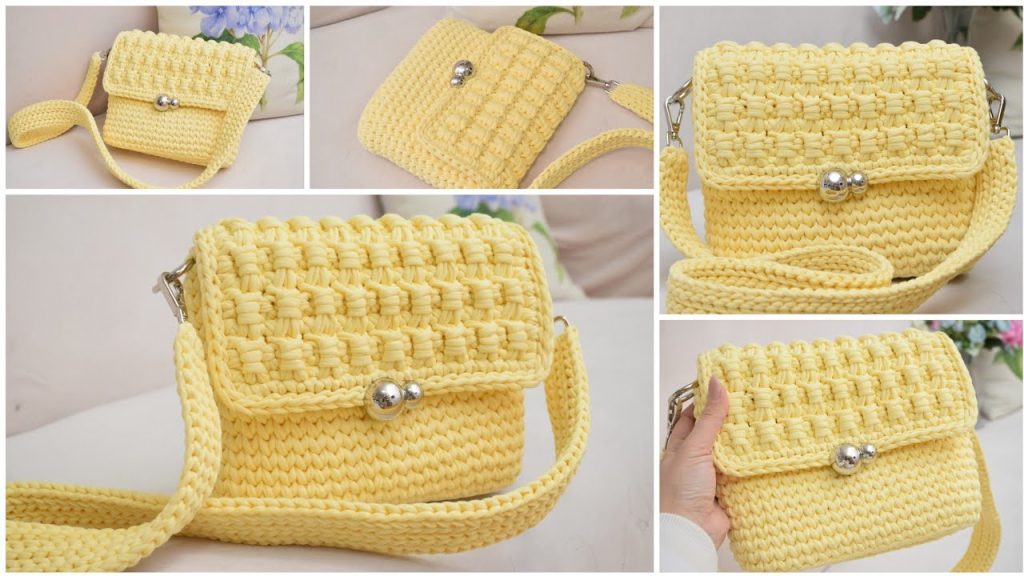
Hello, fellow fiber artists! Get ready to crochet a truly unique accessory: The Sculpted Bundle Bag. This pattern transforms simple T-shirt yarn into a luxurious, highly-textured crossbody bag using a clever combination of the V-Stitch Single Crochet for structure and a mesmerizing Layered Puff Cluster for the flap.
This pattern is specifically designed to be worked with T-shirt yarn, ensuring a firm, durable finish that requires minimal internal support. You’ll learn how to create a perfect oval base and work a complex-looking texture that is surprisingly simple once you get the hang of it.
🛒 Materials & Tools
| Icon | Item | Details |
| Yarn | Main Yarn (MC) | 2 Skeins of T-shirt yarn (7-9 mm thickness). Approximately 330-350g per 100m skein is common. Use a brand like Alize or similar durable cotton/blend. |
| Hook | Main Hook | 6.0 mm (for all major knitting, ensuring tightness). |
| Hook | Finishing Hook | 4.0 mm (or smaller hook for weaving in ends, seaming, and hardware attachment). |
| Hardware | Lock | 1 Magnetic Portfolio Lock (or a simple magnetic snap if preferred). |
| Hardware | Rings | 2 x 25 mm Split Rings or D-rings. |
| Hardware | Clasps | 2 x Carabiner Clasps (for the strap, ensuring the ring opening is at least 20 mm). |
| Notions | Finishing Tools | Scissors, Tapestry Needle, Stitch Markers (critical for the base). |
📐 Sizing & Gauge
The key to a successful bag is firm tension. Always stretch the T-shirt yarn slightly before and during knitting, as shown in the video.
| Measurement | Result |
| Finished Width | Approx. 24 cm (9.4 inches) |
| Finished Height | Approx. 20 cm (7.9 inches) |
| Oval Base | Approx. 22 cm x 7 cm (8.7 x 2.8 inches) |
| Strap Length | Approx. 110 cm (43.3 inches) |
📚 Abbreviations & Special Stitches
This pattern uses US terminology. The two main special stitches are essential for the unique look and feel of this bag.
| Abbreviation | U.S. Terminology | Description |
| ch | Chain | |
| sl st | Slip Stitch | |
| sc | Single Crochet | |
| sc-v | V-Stitch SC | Insert hook directly into the center of the “V” of the stitch below (splitting the yarn strands) and complete a Single Crochet. This is used throughout the body and base. |
| inc | Increase | Two stitches worked into the same stitch/space. |
| LPC | Layered Puff Cluster | A special cluster stitch worked over 2 stitches (detailed below). |
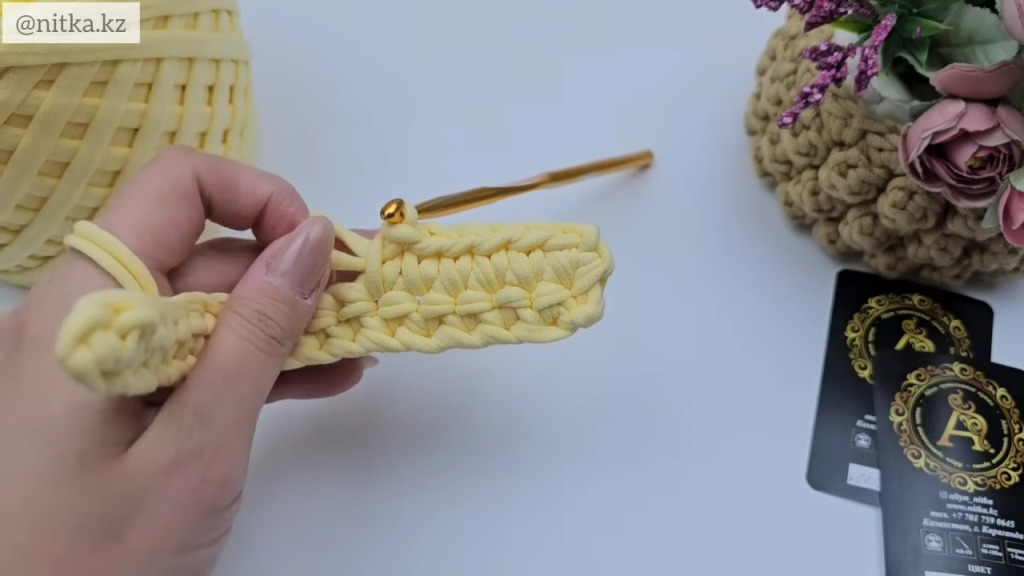
🌟 Special Stitch: Layered Puff Cluster (LPC)
This cluster is worked across two base stitches, using the loops of the current row and the previous rows to create a tight, textured “bundle.”
- Step 1 (First Leg): Insert hook into the base stitch, pull up a long loop. (2 loops on hook).
- Step 2 (Second Leg): Insert hook into the next base stitch, pull up a long loop. (3 loops on hook).
- Step 3 (Bundle Top): Yarn over (YO) and pull through all 3 loops on the hook.
- Step 4 (Lock): SC into the top of the cluster you just created.
This two-step sequence (Cluster + Lock) forms one complete LPC motif over two base stitches.
⬇️ Part 1: The Structured Oval Base (Bottom)
The base is worked in spiral rounds with a fixed increase schedule to create a flat oval. Use the 6.0 mm hook and the sc-v (V-Stitch SC) technique throughout.
- Foundation Chain: Leave a long starting tail (approx. 50 cm) for finishing. Ch 15.
- Round 1 (Foundation SC):
- Sk 1 ch. Sc in the next 13 ch. (13 SC).
- Corner 1: Work inc 3 (3 SC) into the last chain.
- Working along the other side of the chain: Sc in the next 13 ch.
- Corner 2: Work inc 3 (3 SC) into the first chain space.
- Join: Sl st to the top of the first SC. (Total 32 stitches).
- Round 1 Seam: Using the 50 cm tail and the 4.0 mm hook, sl st along the seam between the two sides of the foundation chain to create a neat finished edge at the center. Weave in the tail on the underside.
- Round 2 (Increase):
- Work sc-v in the first 13 sts.
- Corner 1 Increases: Work inc (2 sc-v) in each of the next 3 sts.
- Work sc-v in the next 13 sts.
- Corner 2 Increases: Work inc in each of the next 3 sts.
- Join: Sl st to the top of the first SC. (Total 38 stitches).
- Round 3 (Increase):
- Work sc-v in the first 13 sts.
- Corner 1 Increases: Rep [sc-v in next st, inc in next st] 3 times.
- Work sc-v in the next 14 sts.
- Corner 2 Increases: Rep [sc-v in next st, inc in next st] 3 times.
- Join: Sl st to the top of the first SC. (Total 44 stitches).
⬆️ Part 2: Building the Bag Body (Walls)
The walls are worked in continuous rounds using the sc-v technique.
- Round 4 (Body Start – Transition):
- This round creates the corner structure for the side walls. Instead of a normal sl st join, pull the last loop to the inside/wrong side of the work.
- From the inside, insert the hook into the center of the first SC of Round 3, pull the loop to the inside, and sl st through the loop to secure.
- Work sc-v in the BLO of every stitch around. This pushes the side walls outward. (44 sc-v).
- Join: Sl st to the top of the first SC.
- Round 5 (Increase):
- Work sc-v in the first 15 sts.
- Corner 1 Increases: Rep [sc-v in next 2 sts, inc in next st] 3 times.
- Work sc-v in the next 15 sts.
- Corner 2 Increases: Rep [sc-v in next 2 sts, inc in next st] 3 times.
- Join: Sl st to the top of the first SC. (Total 50 stitches).
- Rounds 6–18 (Straight Walls):
- Work sc-v in every stitch around, with NO INCREASES. Continue working in the sc-v technique for all 50 stitches.
- Total Height: Work a total of 15 rounds of straight walls (Rounds 6-18) on top of the foundation rounds (Rounds 1-5).
- Finish Body: On the last stitch of Round 18, cut the yarn, leave a tail, and weave the tail securely into the inside of the work using the 4.0 mm hook.
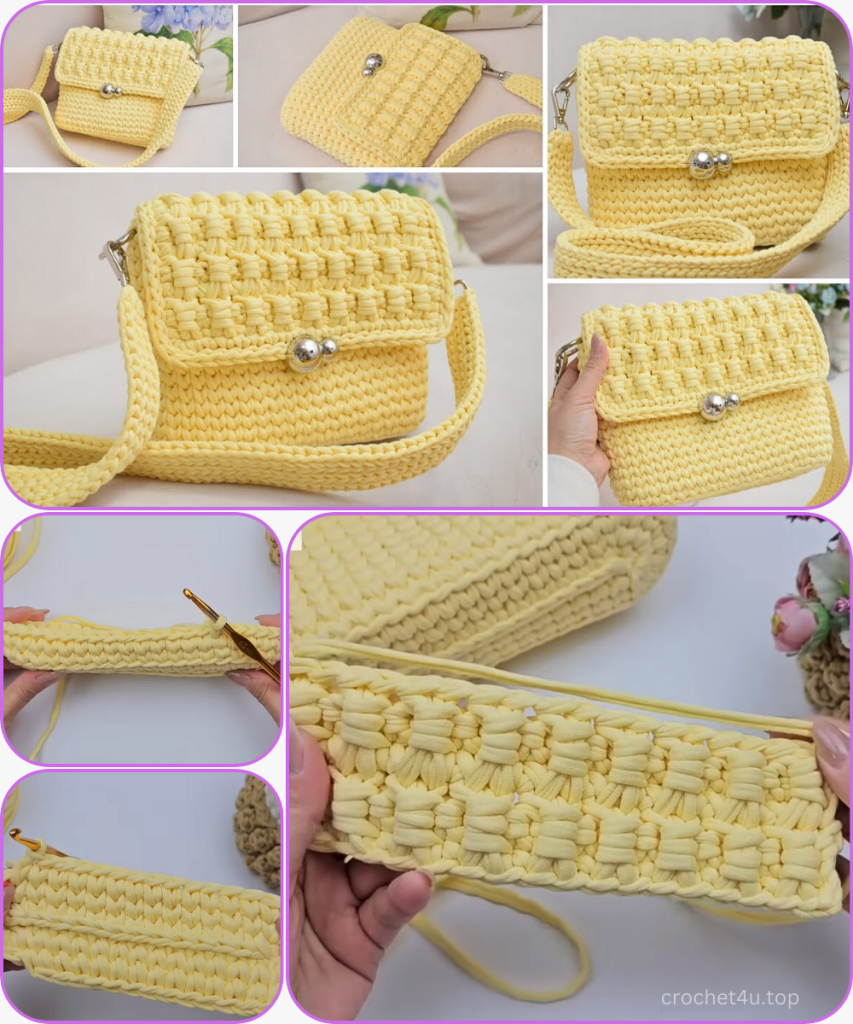
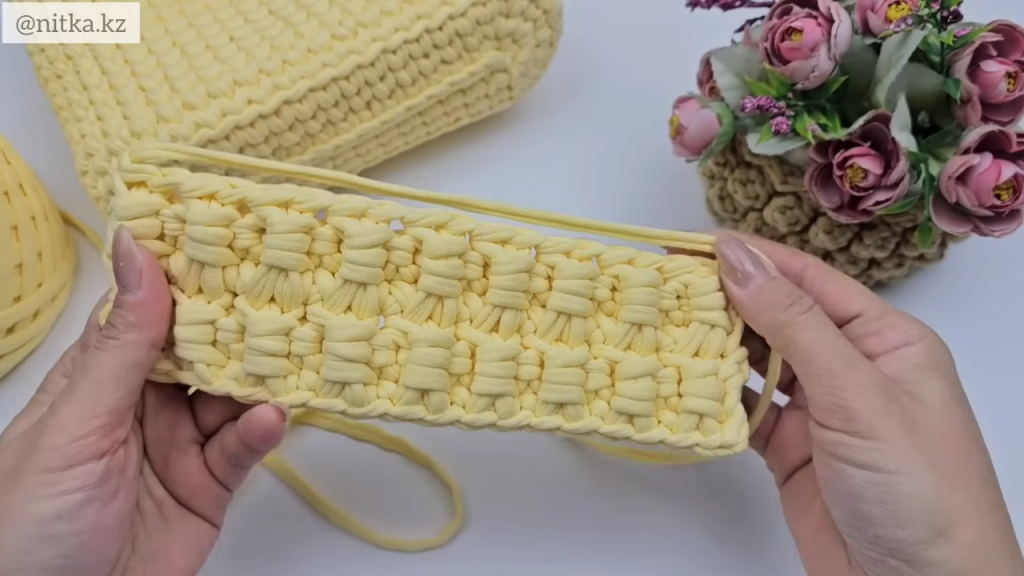
📜 Part 3: The Unique Textured Flap
The flap is worked in turned rows using the special Layered Puff Cluster (LPC) stitch for texture.
- Foundation Chain: Ch 19.
- Row 1 (Foundation): Sk 1 ch. SC into the BLO of the next 18 ch. (18 SC). Ch 1, turn.
- Row 2 (SC Prep): SC into the next 18 sts. (18 SC). Ch 1, turn.
- Row 3 (LPC Start):
- Sk the first st.
- Work the LPC sequence (Cluster + Lock) over the next 2 sts.
- Rep the LPC sequence 8 more times across.
- (Total 9 LPC motifs across the row).
- Row 4 (SC Prep):
- SC evenly across the tops of the clusters from the previous row. You should work 2 SC over the top of each LPC motif. (Total 18 SC). Ch 1, turn.
- Row 5 (SC Prep): SC into the next 18 sts. (18 SC). Ch 1, turn.
- Rows 6–15 (Continuing Texture): Rep the sequence of [Row 3, Row 4, Row 5] until you have a total of 4 rows of the LPC motif (Rows 3, 6, 9, 12). The flap should be approximately 12 cm high.
- After the last Row 5 (the final SC row), do not chain 1 or turn.
Flap Edging:
- Round 1 (SC Edging):
- Side 1 (Vertical): Work SC evenly down the side edge of the flap rows. Work 3 SC per side-edge-LPC-section. (Approx. 12 SC).
- Corner 1: Work inc 3 (3 SC) into the corner stitch.
- Bottom Edge: Work SC evenly across the bottom edge of the flap (the foundation row). (Approx. 16 SC).
- Corner 2: Work inc 3 into the corner stitch.
- Side 2 (Vertical): Work SC evenly up the second side edge. (Approx. 12 SC).
- Top Edge: Work SC across the top edge. (Approx. 16 SC).
- Sl st to the first SC to join the round.
- Round 2 (Sl St Edging): Sl st in the BLO of every stitch around the entire perimeter of the flap. FO and weave in the end.
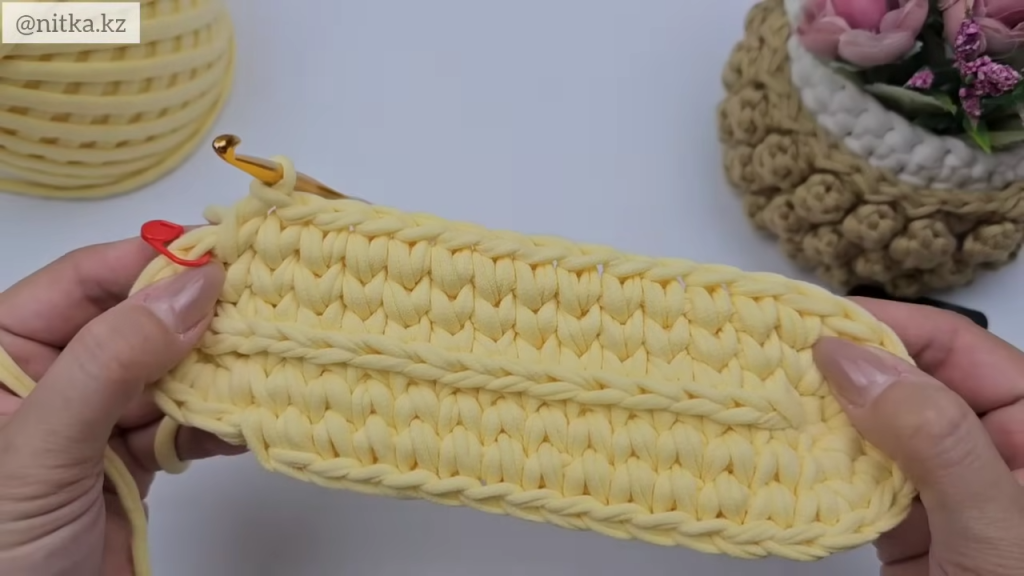
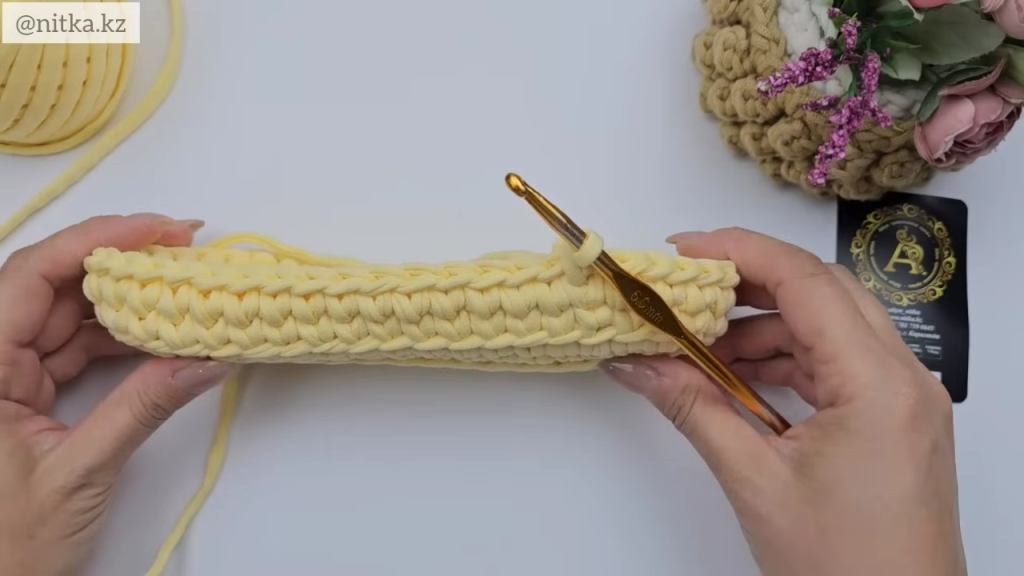
🛍️ Part 4: The Flat Shoulder Strap
The strap is made using only slip stitches and back loop SC to create a narrow, firm band.
- Foundation Chain: Leave a 20 cm tail. Ch 101.
- Row 1 (SC/Sl St): Sk 1 ch. Sl st in the BLO of the next 3 ch. SC in the BLO of the next 94 ch. Sl st in the BLO of the last 3 ch. (100 sts). Ch 1, turn.
- Rows 2–6 (Texture):
- Sl st in the BLO of the first 3 sts.
- SC in the BLO of the next 94 sts.
- Sl st in the BLO of the last 3 sts. (100 sts). Ch 1, turn.
- Finish Strap: After Row 6, cut yarn, leaving a 20 cm tail on the opposite side from the start tail. Secure the final loop.
🛠️ Part 5: Assembly & Finishing
- Flap Attachment:
- Mark the top back edge of the bag body. You need to center the 16-stitch width of the flap on the 50-stitch bag body. (50 – 16 = 34. 34 / 2 = 17).
- Count in 17 stitches from the side seam on the back panel and place a marker. Mark the next 16 stitches for the flap.
- Using the 4.0 mm hook, attach the flap to the bag by SC or Sl st through both layers along the marked 16 stitches. Weave in the final end securely.
- Hardware & Rings:
- Side Rings: Use the 4.0 mm hook to attach the 25 mm Split Rings to the corners of the bag body using the yarn. Secure the ring by sewing it firmly in place over the last few rounds of the bag wall.
- Lock Installation:
- Attach the female (main) part of the portfolio lock to the center of the flap.
- Close the bag and mark the spot where the male (base) part of the lock hits the front body of the bag.
- Install the lock pieces according to manufacturer instructions.
- Strap Attachment:
- Use the 4.0 mm hook and the long tails on the strap to sew the Carabiner Clasps securely to the strap ends.
- Clip the finished strap to the 25 mm Split Rings on the bag body.
Your beautiful, one-of-a-kind Sculpted Bundle Bag is ready to carry!


