
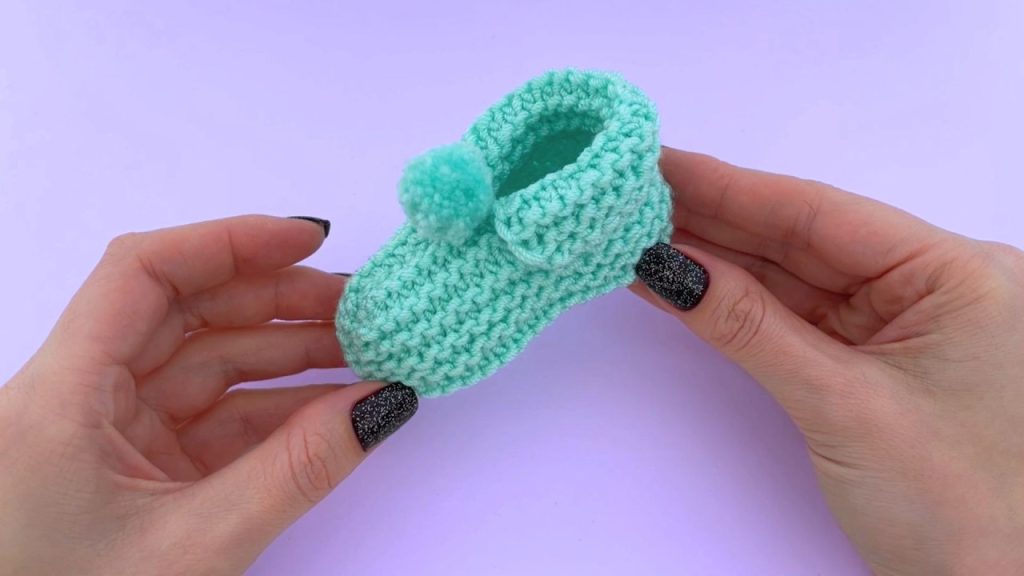
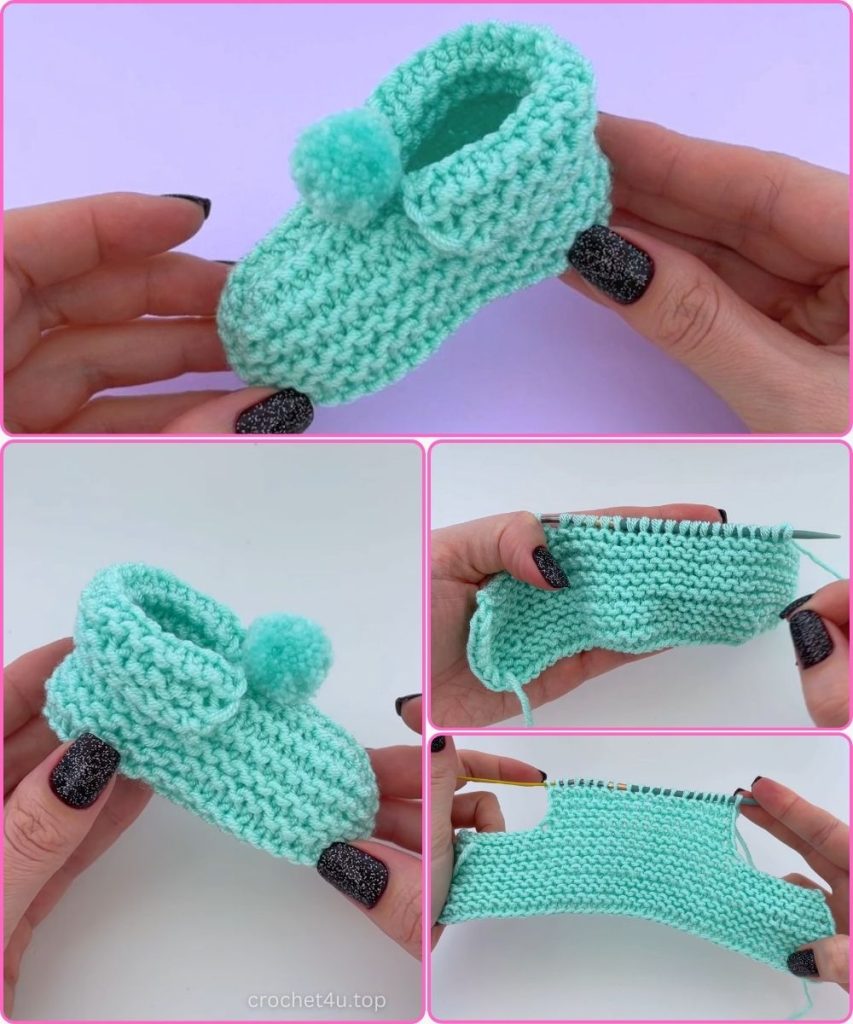
Welcome to a truly special pattern! Inspired by the clean lines and cozy texture of classic baby knitwear, this Cozy Ribbed Crochet Bootie uses a simple flat construction to create a wonderfully fitting and beautifully textured shoe. By using Half Double Crochet (HDC) worked into the back loop only, we achieve a dense, squishy fabric that perfectly mimics the look of the popular Garter Stitch (often seen in knitted booties).
This pattern is ideal for beginners and results in a bootie that is easily customizable and full of love. Prepare to be delighted by the final result!
🧶 Materials & Tools
Gather your supplies! For the best result, choose a soft yarn that is comfortable against a baby’s skin.
- Yarn: Approximately 50-70 grams of DK Weight (Category 3) or light Worsted Weight (Category 4) yarn. Soft acrylic, merino wool blend, or baby cotton is highly recommended.
- Hook: 3.5 mm (US size E/4) or 4.0 mm (US size G/6) crochet hook. Use the hook size that gives you a dense, tight fabric.
- Notions:
- Tapestry needle (essential for seaming and weaving in ends).
- Scissors.
- Measuring tape.
- Stitch markers (optional).
📏 Sizing & Customization
The size provided below is for a standard newborn size. The beauty of this flat design is its flexibility—the starting chain dictates the circumference and length of the sole.
Standard Size: Newborn (0-3 Months)
- Starting Chain: Chain 41. (This creates approximately 20 cm / 8 inches of circumference for the entire foot).
- Finished Height (Before Cuff Fold): Approximately 8 cm (3.15 inches).
- Finished Sole Length: Designed to fit a foot approximately 9-10 cm long.
Adjusting the Size
To adjust for a larger foot, use the golden rule of this construction method:
- Rule of Thumb: Measure the length of the baby’s foot from heel to toe. Your initial chain length should be equal to double that measurement in circumference.
- Stitch Count: Always ensure your starting chain count is an odd number (e.g., 39, 41, 43) for the decrease section to be symmetrical.
📘 Abbreviations & Special Stitches (US Terms)
This pattern relies heavily on working into the Back Loop Only (BLO) to achieve its ribbed texture.
| Abbreviation | Stitch Name |
| ch | Chain |
| st(s) | Stitch(es) |
| sl st | Slip Stitch |
| sc | Single Crochet |
| hdc | Half Double Crochet |
| BLO | Back Loop Only |
| HDCdec | Half Double Crochet Decrease |
| DCdec | Double Crochet Decrease |
Special Technique: Working in the Back Loop Only (BLO)
Insert your hook only under the back horizontal loop of the stitch, leaving the front loop unworked. This pushes the front loop forward, creating a raised ridge that forms the beautiful ribbing texture.
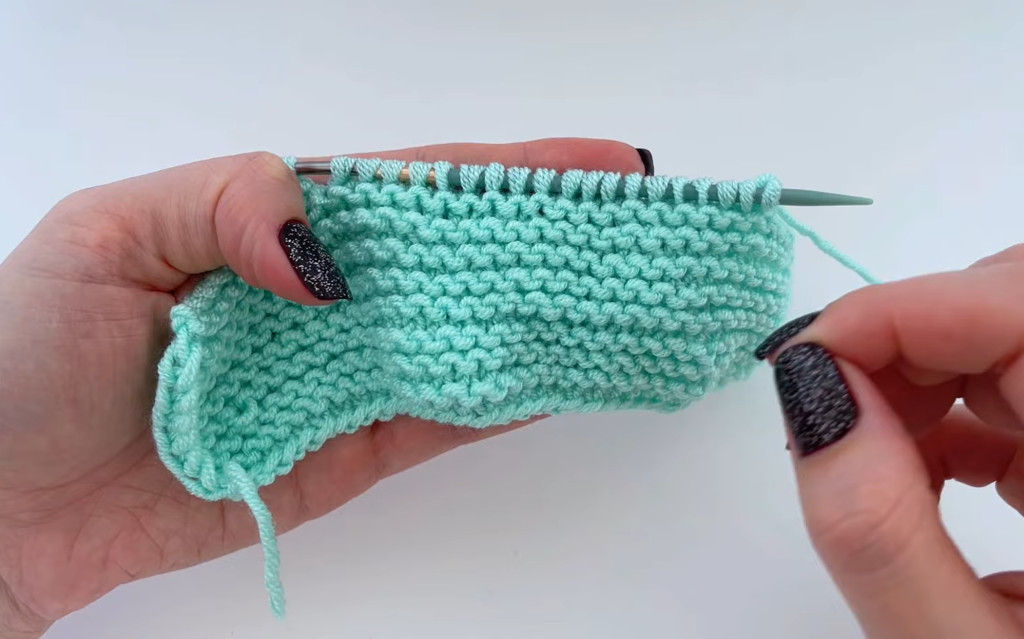
🧱 Part 1: The Textured Panel (Ribbed Fabric)
This entire bootie is created from a single flat rectangle worked in rows. We begin by establishing the ribbed fabric using HDC in the BLO.
Preparation: Chain 41.
Row 1 (Starting Row):
- HDC in the 2nd ch from the hook and in every chain across.(40 HDC)
Row 2 (Ribbing Row):
- Ch 2 (does not count as a stitch, but provides turning height). Turn your work.
- HDC in the BLO of the first stitch and in the BLO of every stitch across.(40 HDC)
Rows 3 – 12 (Ribbing Repeat):
- Repeat Row 2 until the piece measures approximately 5 cm (2 inches) in height. This should be about 10-12 rows, depending on your gauge.
The texture should now be clearly visible, resembling horizontal ridges (like garter stitch).
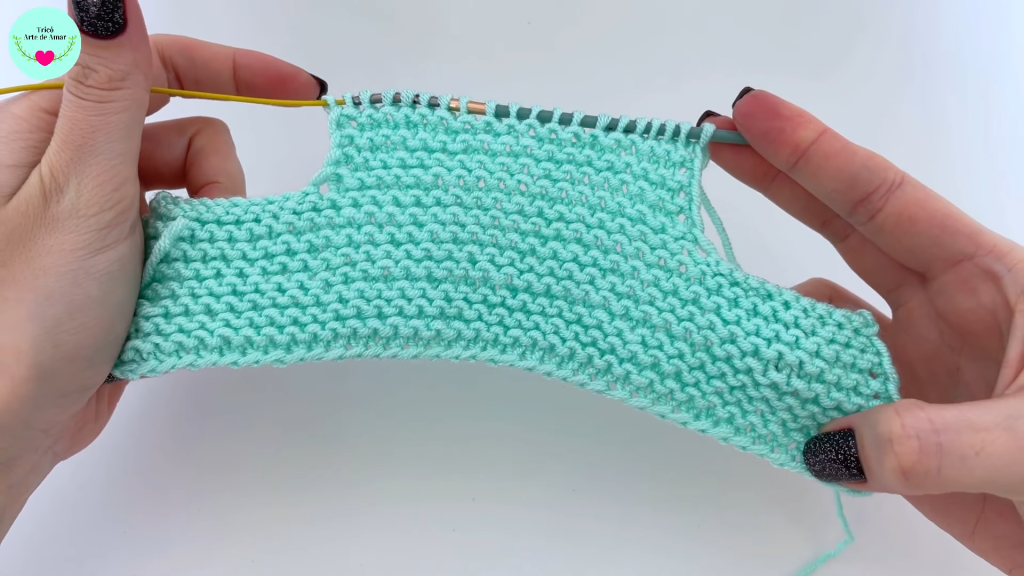
⬇️ Part 2: Shaping Decreases (Toe Shaping)
We will now begin the decreases, working only over a central section of the piece. This shaping gives the bootie its foot form before seaming.
Row 13 (First Decrease Row):
- Ch 2 (does not count as a stitch). Turn your work.
- HDC in the BLO of the next 10 stitches. (This is the heel/cuff side).
- Decrease Section: Work HDCdec over the next 2 pairs of stitches. (You are reducing 4 stitches down to 2).
- HDC in the BLO of the next 16 stitches.
- Decrease Section: Work HDCdec over the next 2 pairs of stitches.
- HDC in the BLO of the last 10 stitches.(36 HDC remaining)
Row 14 (Stabilizing Row):
- Ch 2. Turn your work.
- HDC in the BLO of every stitch across.(36 HDC)
Row 15 (Second Decrease Row):
- Ch 2. Turn your work.
- HDC in the BLO of the next 9 stitches.
- Decrease Section: Work HDCdec over the next 2 pairs of stitches.
- HDC in the BLO of the next 14 stitches.
- Decrease Section: Work HDCdec over the next 2 pairs of stitches.
- HDC in the BLO of the last 9 stitches.(32 HDC remaining)
Finishing:
- Ch 1. Cut the yarn, leaving an extremely long tail (at least 60 cm / 24 inches) for the entire seaming process. Pull the tail through the last loop to fasten off.
✂️ Part 3: Assembly & Finishing
The final shape of the bootie is achieved entirely through the strategic seaming of the rectangle.
1. Seam the Ankle/Cuff (Short Ends)
- Fold: Turn the entire piece to the Wrong Side (WS). Fold the piece in half so the two short ends (the row edges) align.
- Seam: Use the long tail and a tapestry needle to securely sew this short edge together. Start at the top (Row 15) and sew down to the bottom (Row 1). This seam forms the back of the heel/cuff.
- Secure: Knot securely at the bottom edge (Row 1).
2. Seam the Sole (Long Edges)
- Thread: Continue using the same long tail, or attach a new length of yarn if necessary.
- Sole Seam: Now, align the two long edges (the starting chain and the last row edge) and sew them together. Use a strong whipstitch or mattress stitch that holds the sides firmly. Sew about 4 cm (1.5 inches) from the heel seam toward the toe end.
- Stop and Cinch: Stop seaming when you are about 2.5 cm (1 inch) from the toe tip (the decreases you just made).
- Gather: Using a running stitch (or zig-zag), pass the needle through the last few stitch loops along the toe tip.
- Pull Tightly: Pull the thread firmly to cinch the entire toe tip closed, giving the bootie its rounded toe shape. Knot securely and weave the excess tail into the sole seam to hide it.
Video Tutorial:
💖 Final Touches & Variations
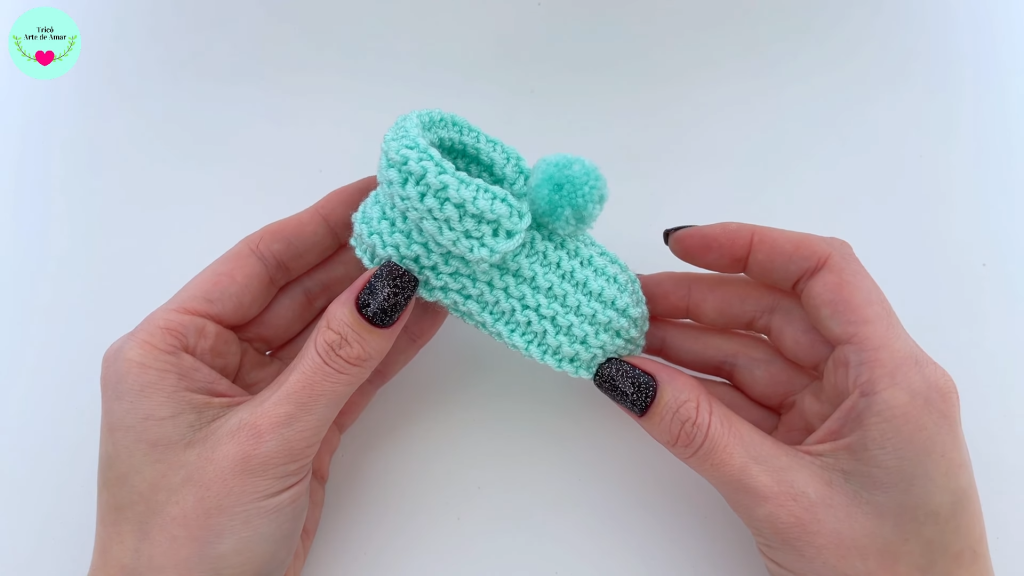
- Turn Right Side Out: Turn the bootie to the right side. The ribbed texture should be facing out.
- Model: Gently shape the toe and heel with your fingers.
- Cuff: Fold the top few rows of the cuff outward to create the signature folded ankle.
- Embellishments (Optional):
- Tie: Thread a thin ribbon or an I-cord through the third or fourth row down to create a simple tie-front closure.
- Pompom: Attach a small, handmade pompom to the center front of the folded cuff for a cheerful look.
Repeat all steps for the second bootie. Enjoy the beautiful simplicity and cozy fit of your new creation!


