
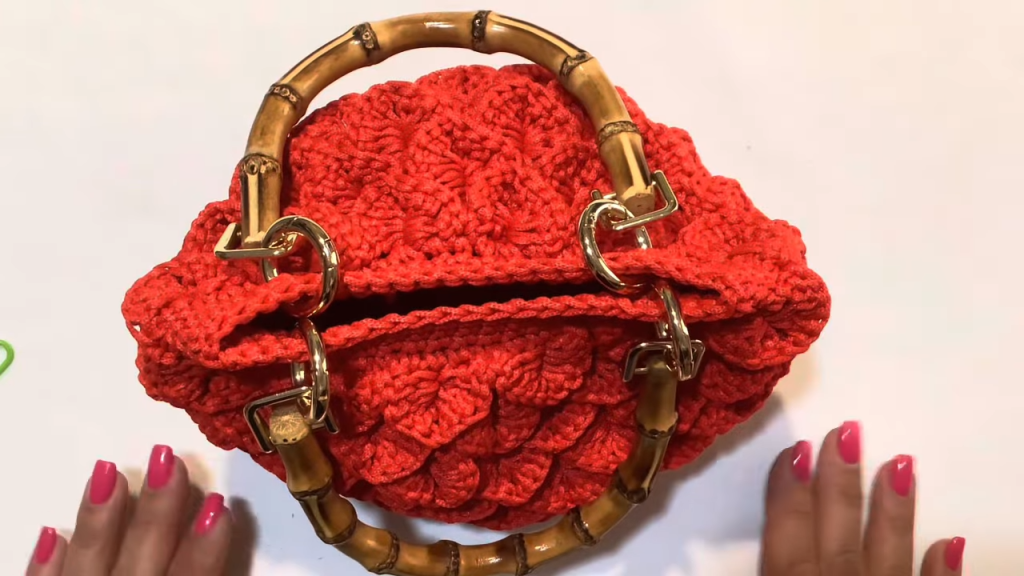
Welcome to your next favorite project! If you’ve been searching for a crochet pattern that balances structural elegance with a rich, tactile texture, you have found it. The “Royal Ribbon” Handbag is a standout accessory designed for those who appreciate the look of high-end boutique bags but want the soul and satisfaction of a handmade creation.
This design utilizes a unique, offset petal stitch that creates a dense, three-dimensional fabric, making it sturdy enough to hold its shape without a complex lining. Whether you’re heading to a festive celebration or a chic brunch, this bag is guaranteed to turn heads.
In this long-form guide, we will break down every movement, from the sturdy oval base to the final installation of the hardware. Grab your hook, and let’s get started!
🧶 Materials and Tools
To achieve the crisp definition seen in this bag, the choice of yarn is paramount. We are using a synthetic cord that provides “stitch memory.”
- Thread: 3mm Polyester Macrame Cord (or “Silsila” thread). You will need approximately 250–300 grams. This cord has a slight sheen and incredible durability.
- Hook: 5.0 mm (H-8) Crochet Hook. This size ensures the stitches are tight enough for structure but flexible enough to work through the thick cord.
- Hardware: * 2 Metal “Gate” Rings (easy-open rings).
- 1 Magnetic Snap Closure (sew-on or prong style).
- Optional: A decorative tassel or metal logo plate.
- Notions: * Stitch markers (absolutely essential for tracking rounds).
- Tapestry needle (extra large eye).
- A lighter (to carefully singe the ends of the polyester cord to prevent fraying).
- Sharp scissors.
📝 Abbreviations and Special Stitches
- Ch: Chain
- SC: Single Crochet
- DC: Double Crochet
- Sl St: Slip Stitch
- Inc: Increase (2 stitches in the same space)
- Petal Cluster: [1 SC, 2 Chains, 2 DC] worked into the same stitch or space.
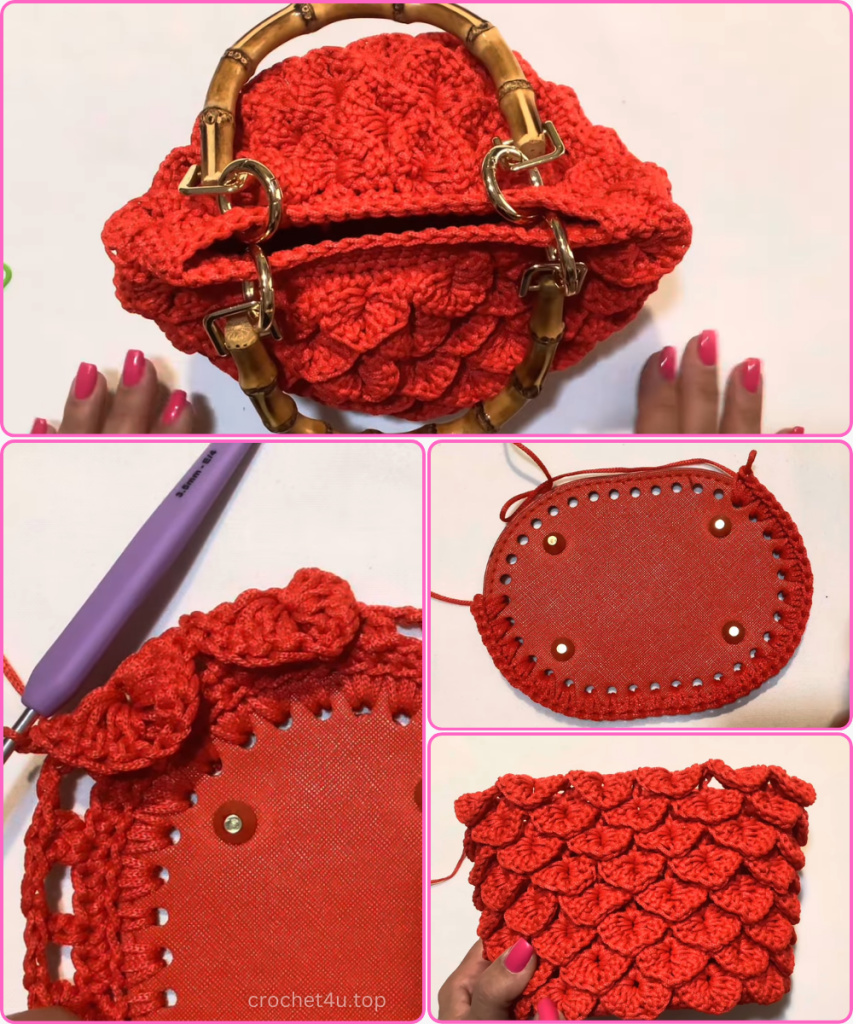
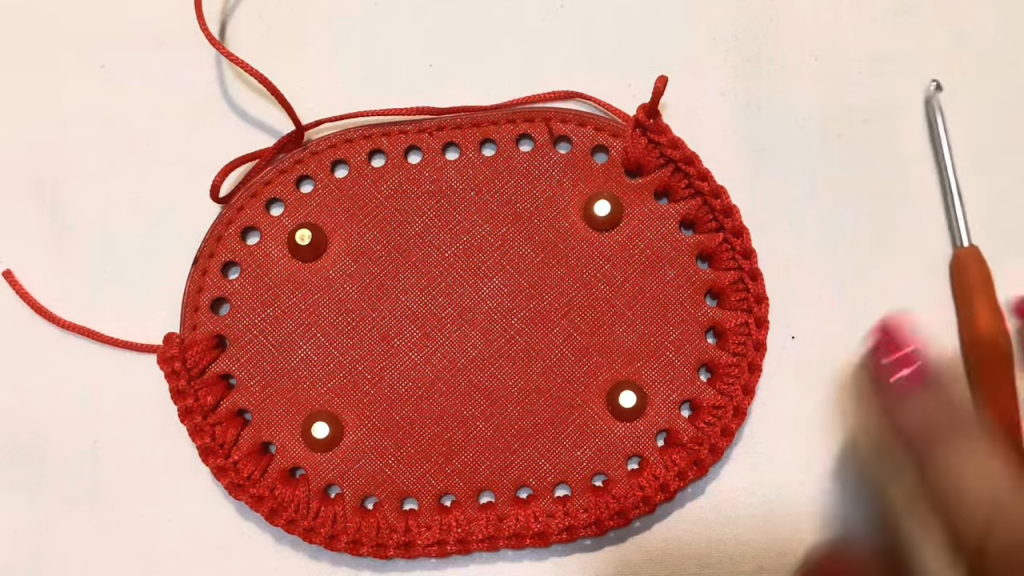
📐 Section 1: The Engineered Oval Base
A great bag starts with a solid foundation. We are creating a flat oval that will act as the “floor” of your handbag.
- The Foundation: Start with a slip knot and 15 chains.
- Round 1: * Starting in the 2nd chain from the hook, work 13 SC along the chain.
- In the very last chain, work 3 SC (this turns the corner).
- Rotate your work. Now working on the opposite side of the foundation chain, work 12 SC.
- In the final stitch (where you started), work 2 SC.
- Join with a Sl St to the first SC. (Total: 30 stitches).
- Round 2: * Ch 1. Work 13 SC along the straight side.
- Work an Inc (2 SC) in each of the next 3 corner stitches.
- Work 12 SC along the second straight side.
- Work an Inc (2 SC) in each of the remaining 2 corner stitches.
- Join with a Sl St. (Total: 36 stitches).
- Round 3:
- Ch 1. Work SC along the straight side.
- At the curves, work the sequence [1 SC, 1 Inc] three times.
- Work SC along the second straight side.
- Work the sequence [1 SC, 1 Inc] three times at the second curve.
- Join with a Sl St. (Total: 42 stitches).
- Round 4 (The Wall Transition): * Work one round of SC in the Back Loop Only (BLO). This creates a structural ridge that helps the walls of the bag stand up straight.
✨ Section 2: The “Petal Texture” Body
Now we begin the “meat” of the pattern. This texture is created by stacking clusters into the chain spaces of the previous row.
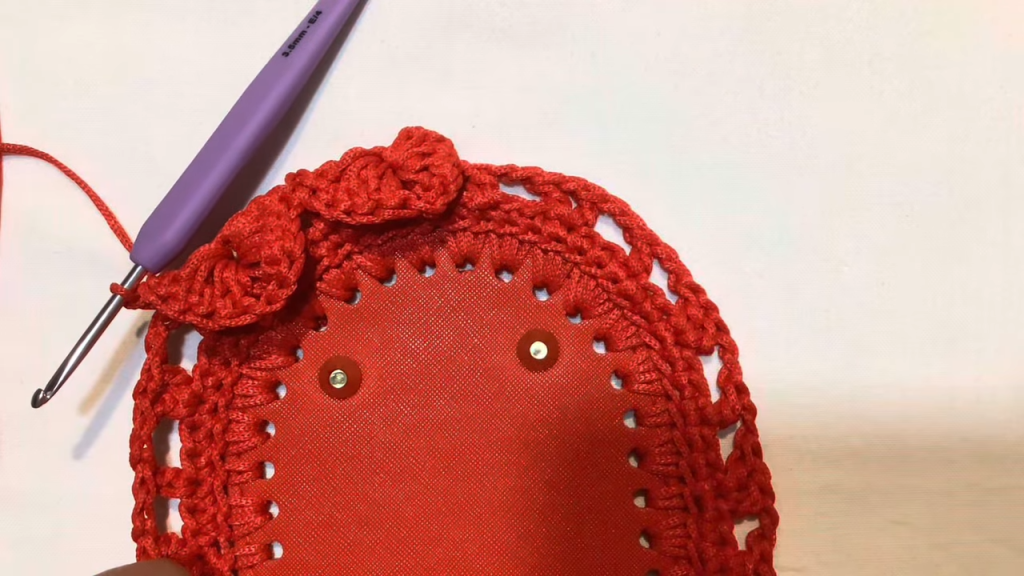
- Round 1 (The Setup):
- Ch 1. In the first stitch, work: [1 SC, Ch 2, 2 DC].
- Skip 2 stitches.
- In the 3rd stitch, work: [1 SC, Ch 2, 2 DC].
- Repeat this pattern [Skip 2, Petal Cluster] all the way around.
- Join with a Sl St to the very first SC of the round.
- Round 2 and Beyond:
- Slip stitch into the Chain-2 space of the cluster from the row below. This is where your new stitches will “live.”
- Ch 2 (counts as part of the first cluster) and work 2 DC into that same space.
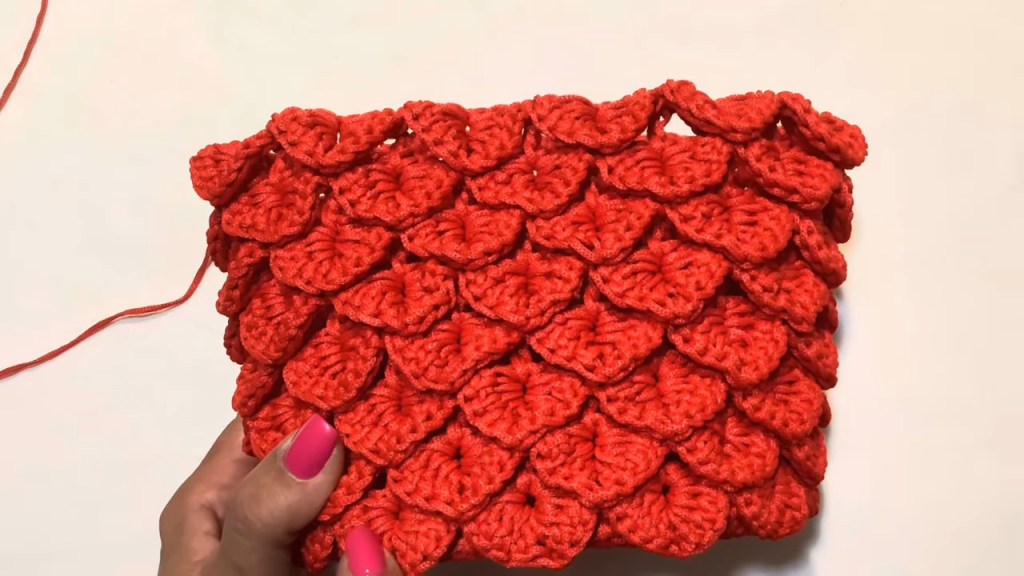
- Now, for the rest of the round: Work [1 SC, Ch 2, 2 DC] directly into every Ch-2 space around the bag.
- By working into the chain spaces, the “petals” naturally offset themselves, creating a thick, overlapping texture similar to scales or shingles.
- Height: Continue repeating Round 2 until the bag reaches approximately 18 cm (7 inches) in height. This is typically about 12–14 rounds of clusters.
🏛️ Section 3: The Reinforced Top Border
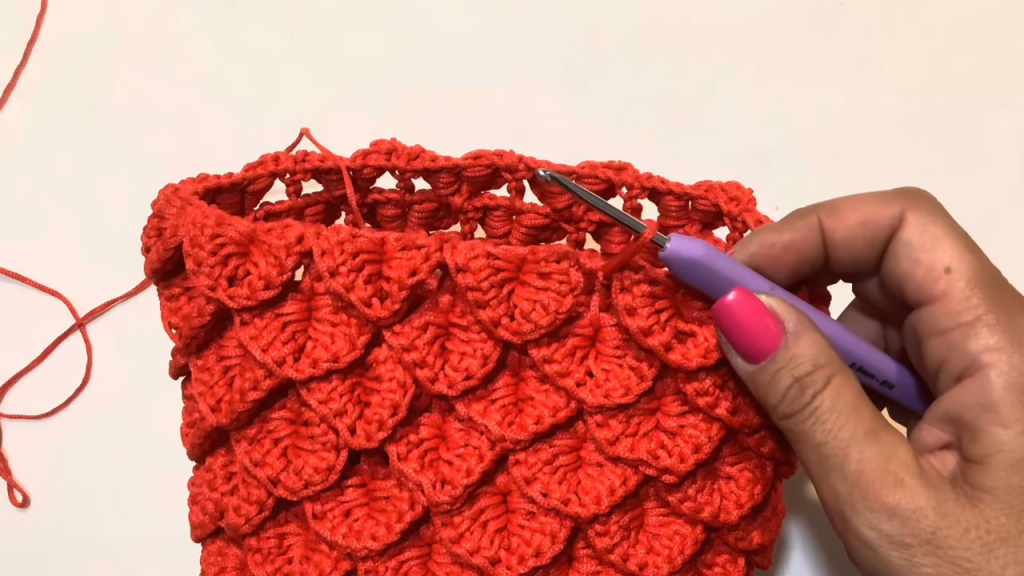
To give the bag a clean finish and a place to attach hardware, we transition back to solid stitches.
- Round 1: Ch 1. Work 2 SC into every Ch-2 space and 1 SC into every SC of the cluster round below. This flattens the edge.
- Rounds 2–4: Work 3 full rounds of standard SC in both loops.
- Round 5 (The Edge): For a professional look, work a round of Slip Stitches all the way around. Keep these loose! If they are too tight, the top of your bag will “pucker.”
- Finish: Cut the cord, pull it through, and use your lighter to singe the tip before weaving it invisibly into the inside of the rim.
🥨 Section 4: The “Thermal” Shoulder Strap
A luxury bag needs a strap that doesn’t stretch. We are using the Thermal Stitch, which creates a double-thick, woven-look fabric.
- Foundation: Chain 4.
- Row 1: SC in the 2nd chain from hook and in the next 2 chains. Ch 1, turn.
- The Thermal Move: * Insert your hook into the back loop of the stitch AND the unworked loop of the foundation chain (or the row below).
- Yarn over and pull up a loop, yarn over and pull through both loops (SC).
- This technique creates a strap that is twice as thick as a normal SC strap.
- Length: Continue until the strap measures 40 cm (16 inches) for a handbag or 100 cm for a crossbody.
- Final Row: To finish, work through both loops of the current row and both loops of the row below to “close” the thermal structure.
🧲 Section 5: Hardware and Finishing Touches
Now, we bring all the components together.
- Gate Rings: Open your metal rings and clip them directly through the crochet fabric on the sides of the bag. Aim for the section just below the SC border for maximum strength.
- Attaching the Strap: Sew the ends of your Thermal Strap around the metal rings using a tapestry needle and a length of the cord. Double-stitch this area, as it bears all the weight.
- Magnetic Lock: * Find the exact center of the bag opening.
- If using a sew-on magnet, use a thinner matching thread to secure it to the inside of the SC border.
- If using a prong-style magnet, insert the prongs through the stitches and fold them over on the inside, using the metal backing plate provided.
- The Final Singe: Check the inside of your bag for any loose tails. Trim them to 1cm, melt the tip with your lighter, and press it against the fabric to “glue” it in place forever.
Video Tutorial:
💡 Pro-Tips for a Boutique Finish
- Tension: If you notice your oval base is curling like a bowl, your SCs are too tight. Relax your hand!
- Stuffing: To make the “Petal Texture” really pop, stuff the bag with tissue paper once finished and let it sit for 24 hours. This “blocks” the cord into its final shape.
- The Lighter: Never skip singeing the ends. Polyester cord will unravel completely if not heat-sealed.
Congratulations! You have just hand-crafted a stunning, professional-grade handbag. The “Royal Ribbon” is a testament to your skill and patience. Enjoy the compliments you are about to receive!
If you enjoyed this detailed pattern, please share photos of your finished work! Happy Crocheting!


