
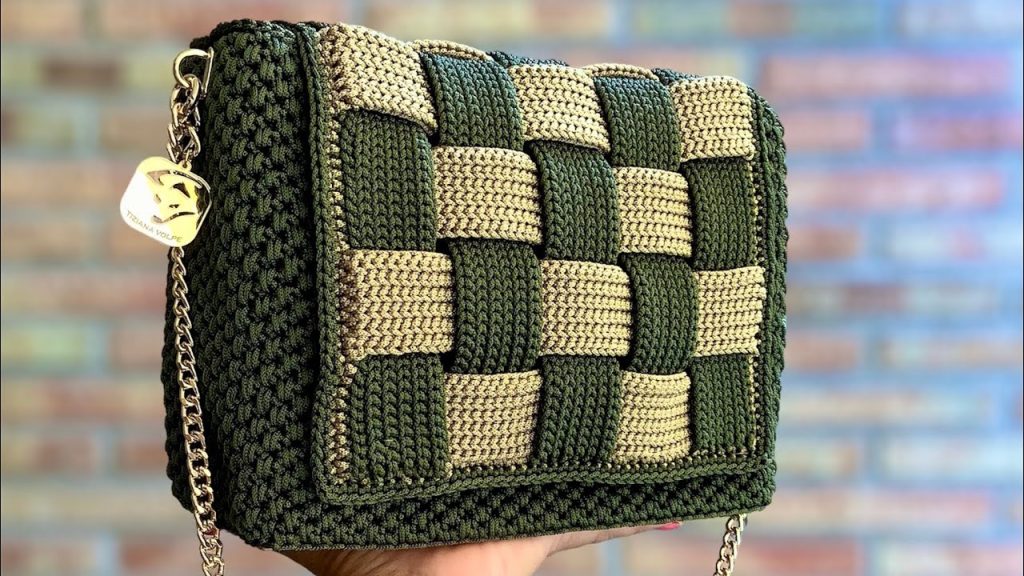
Welcome to your next favorite crochet project! If you’ve been looking for a statement piece that combines structural elegance with a unique woven texture, this Bicolor Woven Clutch is the answer. Designed by the talented Tiziana Volpe, this bag isn’t just an accessory; it’s a piece of wearable art.
This tutorial utilizes a pre-perforated base and a striking “basketweave” body, topped off with a sophisticated flap made of interlaced crochet strips. Whether you are heading to a wedding or a chic brunch, this clutch is guaranteed to turn heads. Let’s break down every single stitch!
🧶 Materials & Essential Kit
To achieve the crisp, high-end look of this clutch, the quality of the cord is paramount. Tiziana uses a “Thai cord,” which provides the rigidity needed for the bag to hold its shape perfectly.
- Thai Cord: Approximately 400g of Military Green and 150g of Gold.
- Base: A pre-perforated rectangular base (25 x 10 cm), ideally in a gold finish to match the accents.
- Hook: A 4.0 mm crochet hook (you may want a slightly smaller one for the flap assembly).
- Hardware: * 2 Magnetic snaps for a secure closure.
- Approx. 1 meter of chain for the strap.
- 2 “Bridge” connectors (ponticelli) to attach the chain.
- Tools: Scissors, tapestry needle, and a few crafting clips or pins to hold the woven strips in place.
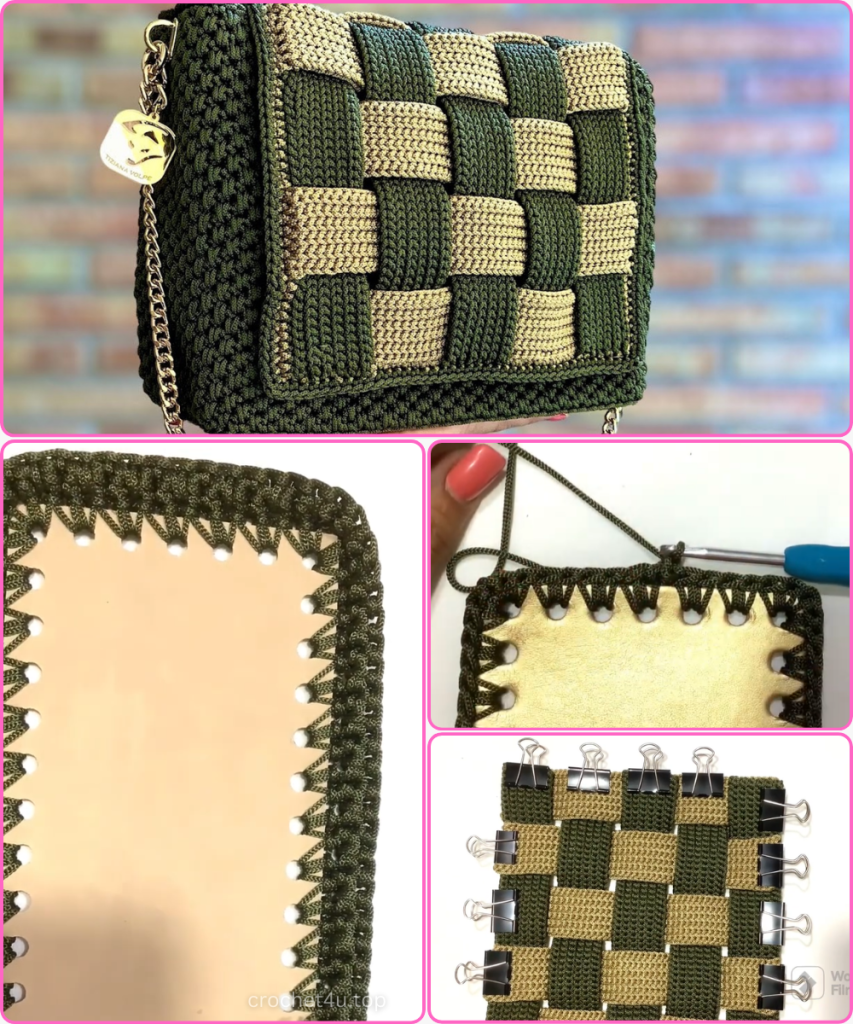
📐 Step 1: Preparing the Structural Base
We begin by working directly into the pre-perforated base. This provides a solid “floor” for your clutch.
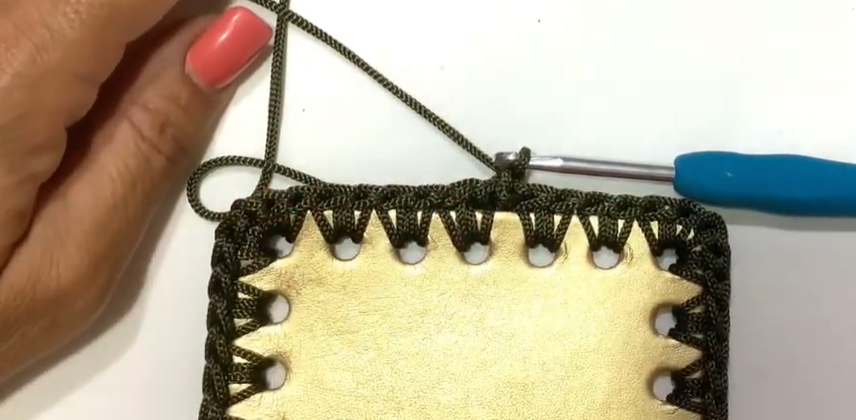
- The Setup: Using the Military Green cord, start on one of the shorter sides of the base. Create a slip knot and pull it through any hole.
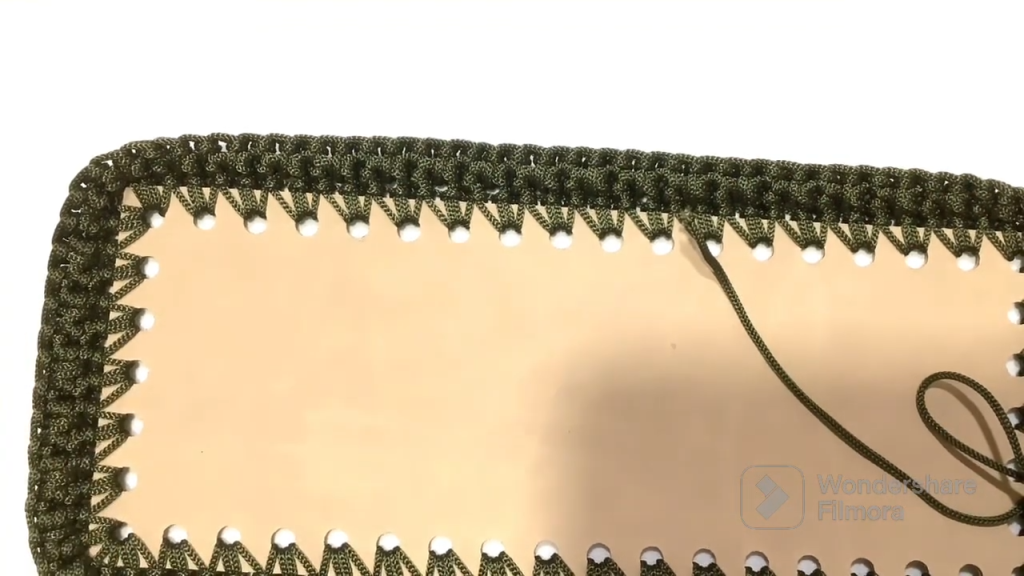
- Working the Holes: Work 2 single crochets (SC) into every hole around the perimeter.
- The Corner Secret: To ensure the corners don’t “pucker” and remain flat, work a specific sequence in each corner hole: 2 SC, chain 1, 2 SC.
- The First Transition Round: Once you finish the perimeter, join with a slip stitch. Chain 1, and work one full round of SC in the Back Loop Only (BLO). This creates a structural “ledge” that helps the walls of the bag stand upright.
🧱 Step 2: Sculpting the Basket Stitch Body
The body of this bag uses a beautiful, dense texture often referred to as the “Canestro” or basket stitch. It is worked in a continuous spiral, so no need to join rounds!
- The Technique: You will alternate between a standard single crochet and an “elongated” single crochet.
- Stitch 1: Work a standard SC into the top of the next stitch.
- Stitch 2: Insert your hook into the base of the stitch from the previous row (the space below the stitch), yarn over, and pull up a long loop to work an elongated SC.
- The Spiral: As you continue to the next round, you must “invert” the pattern. If a stitch was a standard SC in the row below, work an elongated SC into it now. If it was elongated, work a standard SC on top.
- The Height: Continue this rhythmic spiral until the body of the bag reaches a height of approximately 21 to 22 cm.
- The Final Rim: To finish the body, work one final round of Slip Stitches all the way around to create a firm, clean top edge.
🎗️ Step 3: Crocheting the Bicolor Strips
The “wow” factor of this clutch is the woven flap. This is created by making 10 individual strips: 5 in Military Green and 5 in Gold.
- Foundation: For each strip, start with 51 chains.
- Row 1: Turn your chain over and work 50 slip stitches into the back “bumps” of the chain. This gives both sides of the strip a clean, finished look.
- Rows 2–10: Work in rows of Slip Stitches in the Back Loop Only (BLO). This creates a ribbed, fabric-like texture that is very sturdy.
- Final Count: By the end, each strip should measure roughly 23 cm long and 4 cm wide. Weave in all your ends neatly on what will be the “wrong” side of the strips.
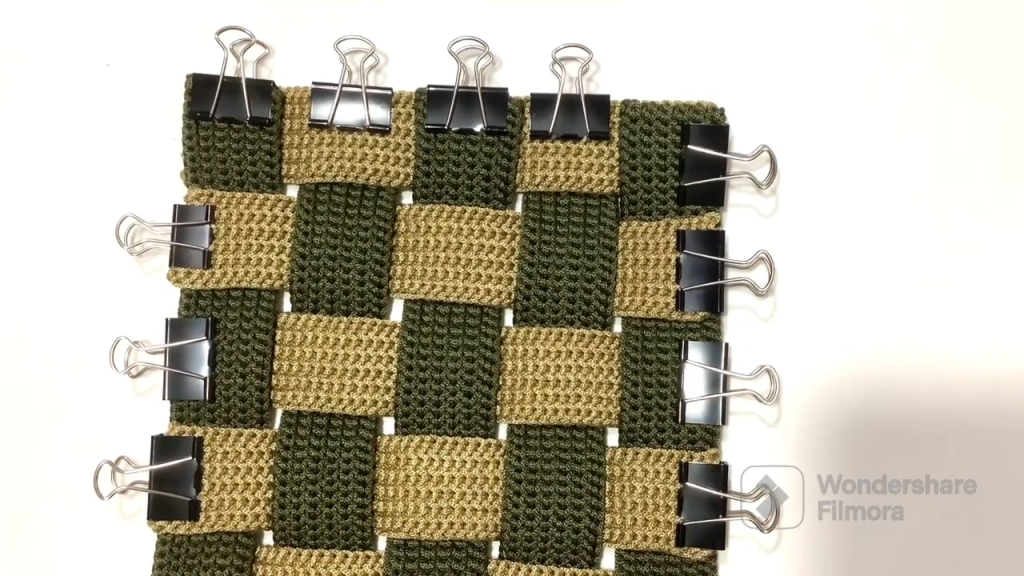
🥨 Step 4: Weaving and Framing the Flap
Now for the fun part: assembly! This is where those crafting clips come in handy.
- The Interlace: Lay 5 green strips vertically and weave the 5 gold strips horizontally through them in a classic over-under pattern. Ensure the colors alternate perfectly.
- Pinning: Once satisfied with the weave, use clips or pins to secure the edges so nothing shifts.
- The Border: Using your Gold cord (and perhaps a slightly smaller hook to get through the tight slip stitches), work a round of SC around the entire perimeter of the woven square. This “sews” all 10 strips together into a single panel.
- The Final Frame: Add one more round of SC in Military Green around the gold border to give the flap its final dimension. Your finished flap should be approximately 24 x 24 cm.
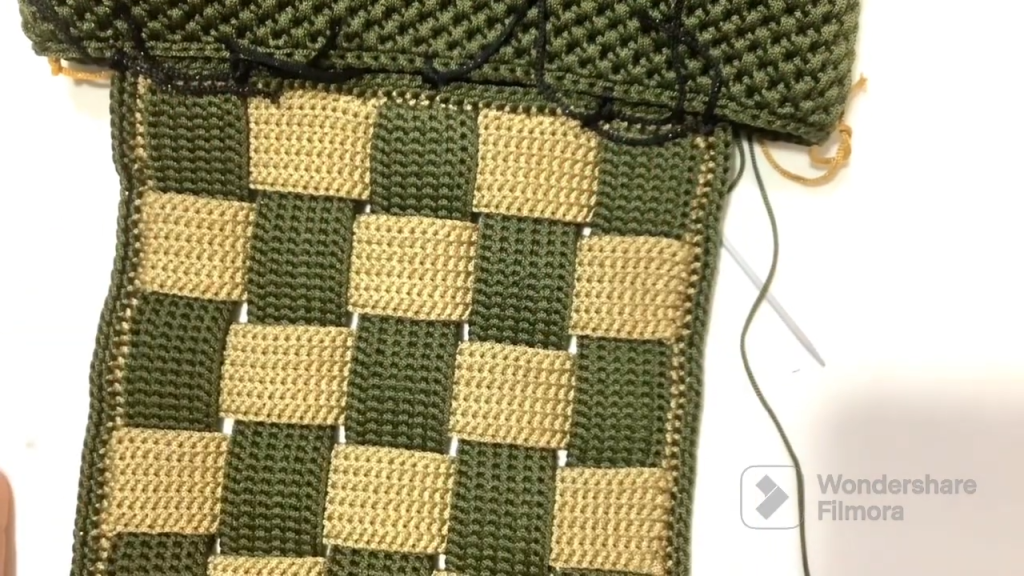
🪡 Step 5: Attaching the Flap to the Body
Joining the flap requires a strong, decorative seam to ensure it can withstand being opened and closed frequently.
- Centering: Align the flap against the back of the bag’s body. Use stitch markers to ensure it is perfectly centered.
- The Stitch: Tiziana recommends a bottom-to-top sewing technique. Insert your hook through all four loops (the two loops of the flap edge and the two loops of the bag’s rim). Pull the cord through to create a solid, decorative ridge.
- Security: Make sure the first and last stitches of the join are extra secure, as these points take the most tension.
💍 Step 6: Hardware and Finishing Touches
Your clutch is almost ready for its debut!
- Magnetic Snaps: Sew one part of the magnet to the underside of the flap and the corresponding part to the front of the bag body. Ensure they align perfectly when the bag is closed.
- Connectors: Attach the “bridge” hardware to the upper sides of the bag.
- The Chain: Snap your gold chain onto the connectors. This allows the clutch to be worn as a shoulder bag or held in hand.
- Final Measurements: The completed clutch should measure approximately 27 cm wide and 22 cm high.
Video Tutorial:
🌟 Pro-Tip for Success
When weaving the strips, make sure all the “wrong” sides (where you hid your yarn tails) are facing the same direction. This ensures that when the flap is opened, the interior looks just as professional as the exterior!
Congratulations! You have successfully engineered a high-fashion Bicolor Clutch. This project is a fantastic way to practice tension control and structural assembly. Enjoy your new masterpiece!


