

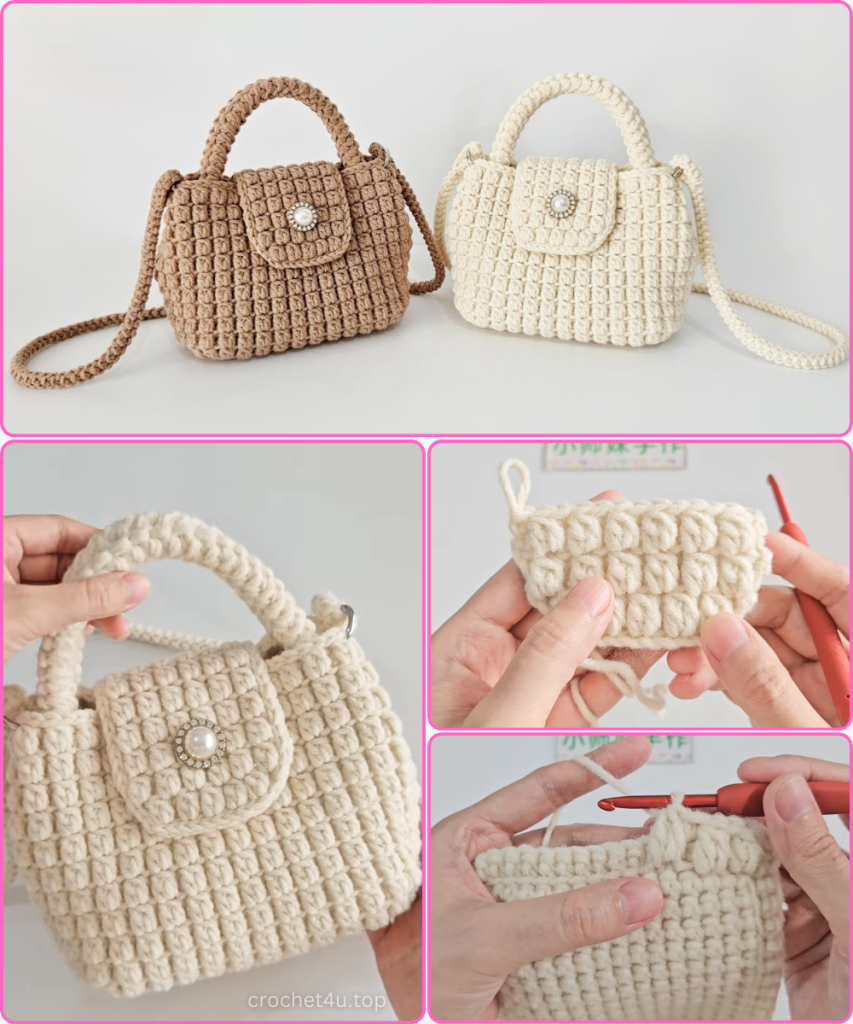
Welcome to your next favorite project! If you’ve been searching for a crochet pattern that balances elegance with a touch of whimsy, this Color-Block Bow Crossbody Bag is the perfect choice. Inspired by the meticulous craftsmanship of “Xiao Shi Mei,” this bag features a structured body, a sophisticated two-tone palette, and a statement bow that turns a simple accessory into a work of art.
In this long-form guide, we will break down every stitch and assembly step to ensure you create a boutique-quality piece right from your sofa.
🧶 Materials and Essentials
Before we pick up the hook, let’s gather our supplies. To achieve the crisp structure seen in the video, yarn choice is key.
- Yarn: 5-ply Milk Cotton or a sturdy Cotton Cord. You will need approximately 100g of the primary color (Petal Pink) and 50g of the secondary color (Cream/Off-White).
- Hook: A 3.0 mm or 3.5 mm crochet hook. Using a slightly smaller hook than recommended for the yarn creates a tighter, more durable fabric that won’t sag.
- Hardware: * One high-quality magnetic snap button.
- Two 1.5cm D-rings for the strap.
- A metal chain strap or materials to crochet a matching cord.
- Notions: Tapestry needle, sharp scissors, stitch markers, and a small amount of fabric for lining (optional but recommended).
📏 Abbreviations & Stitch Guide
- Ch: Chain
- SC: Single Crochet
- HDC: Half Double Crochet
- DC: Double Crochet
- Sl St: Slip Stitch
- Inc: Increase (2 stitches in the same space)
- BLO: Back Loop Only
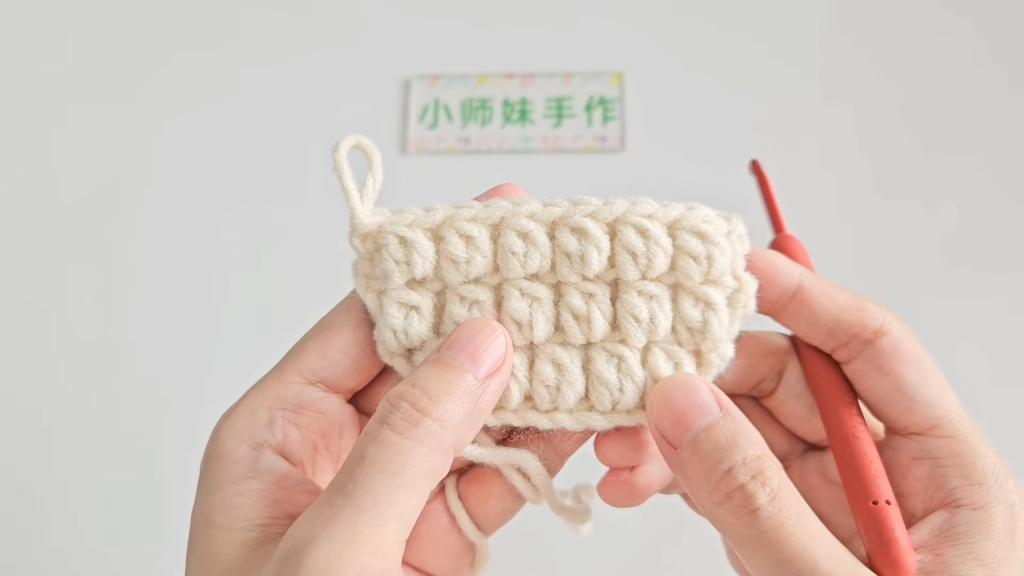
🧱 Section 1: The Main Body Panels (Make 2)
The bag consists of a front and back panel. We will use a dense stitch pattern to ensure the bag keeps its rectangular shape.
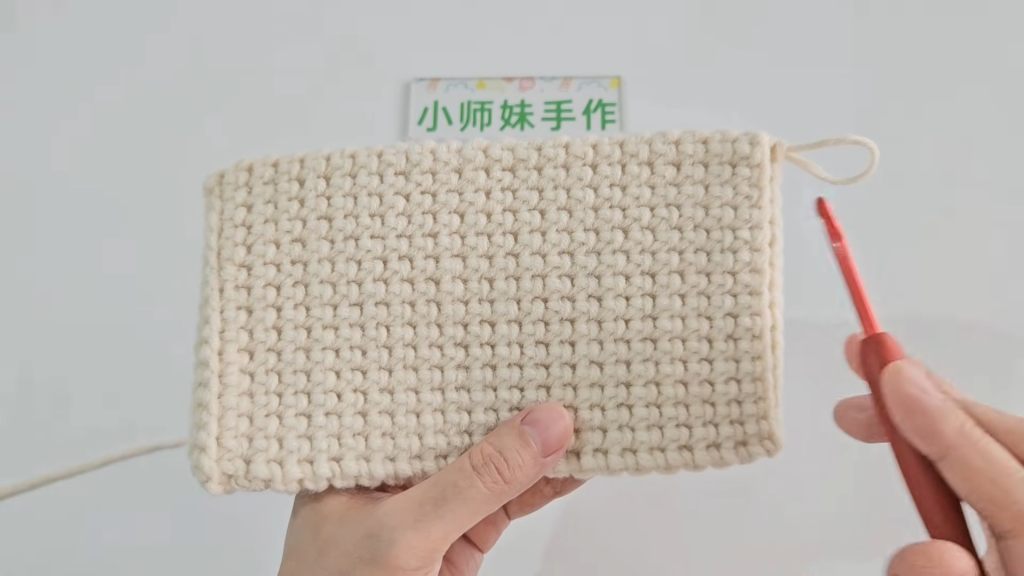
- Foundation: With the Pink yarn, Ch 31.
- Row 1: SC in the 2nd chain from the hook and in each chain across. (30 SC).
- Rows 2–40: Ch 1, turn. SC in each stitch across.
- Note: To give the bag a slightly textured look, you can alternate: one row of SC, one row of Sl St. However, for maximum structure, solid SC is best.
- Finishing: Once you reach the desired height (approx. 15cm), do not fasten off. Work a round of SC all the way around the edge of the rectangle to create a clean border. In the corners, work [1 SC, Ch 1, 1 SC]. Fasten off and weave in the ends.
🎞️ Section 2: The Side and Bottom Gusset
This is a long, narrow strip that connects the front and back panels, providing the “depth” of the bag.
- Foundation: With the Pink yarn, Ch 7.
- Row 1: SC in the 2nd chain from the hook and in the next 5 chains. (6 SC).
- Rows 2–Length: Ch 1, turn. SC in each stitch across.
- Sizing: Continue working rows until the strip is long enough to wrap around the two sides and the bottom of your main panels. Pin it as you go to ensure a perfect fit.
- Edging: Just like the panels, work a row of SC around the entire strip for a professional finish.
🦋 Section 3: The Statement Bow (The Centerpiece)
The bow is made in three parts: the large loop, the smaller inner loop (for a 3D effect), and the center tie.
Part A: The Large Loop
- Using the Cream yarn, Ch 45. Join with a Sl St to the first chain to form a large circle.
- Rounds 1–12: Ch 1, SC in each stitch around. Do not turn; work in a continuous spiral.
- Fasten off, leaving a long tail. Flatten the circle so the seam is in the center back.
Part B: The Inner Color-Block Layer
- Using the Pink yarn, repeat the steps for the large loop, but start with a Ch 35 and work for only 8 rounds.
- Fasten off. Center this pink rectangle on top of the cream rectangle.
Part C: The Center Knot
- With Pink yarn, Ch 6.
- Rows 1–10: SC in each stitch across.
- Pinch the two large rectangles in the center to create the bow shape. Wrap this small strip around the center and sew it tightly at the back to secure the “pinch.”
📐 Section 4: The Flap and Closure
The flap is worked directly onto the top edge of the back panel using the Cream yarn to create the color-block contrast.
- Row 1: Attach Cream yarn to the top of the back panel. Work SC across the entire width (30 stitches).
- Rows 2–15: Ch 1, turn. SC in each stitch across.
- The Curve: To create a rounded edge, work decreases at the beginning and end of the last 3 rows (SC2tog).
- Border: Work a final row of Sl St around the entire flap to give it a firm edge.
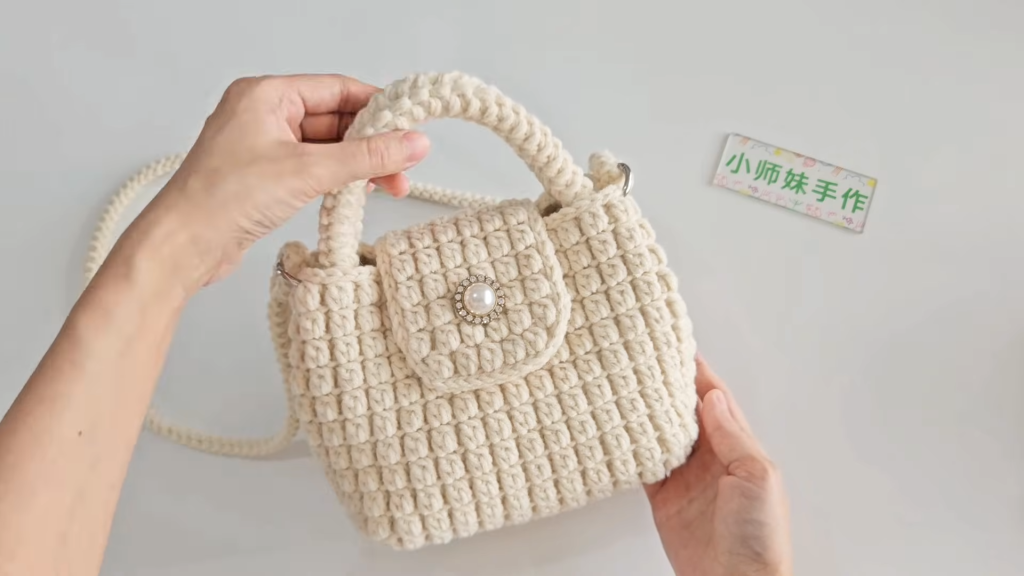
🪡 Section 5: Assembly and Final Touches
This is the most satisfying part—watching your pieces turn into a bag!
- Connecting the Panels: Using a tapestry needle and a length of Pink yarn, use the Whip Stitch or Mattress Stitch to attach the side gusset to the front panel, and then to the back panel. Ensure the stitches are tight and even.
- Attaching the Bow: Position your finished bow in the center of the Cream flap. Sew it securely through the center knot into the flap fabric. Make sure it is straight!
- Hardware: * Sew the top half of the magnetic button to the underside of the flap.
- Fold the flap down to see where it naturally hits the front panel, and sew the bottom half of the button there.
- Sew your D-rings to the top corners of the side gussets.
- The Strap: You can clip on a gold chain for a luxury look, or crochet a simple cord (Ch 200, Sl St back down the chain) and tie it to the D-rings.
Video Tutorial:
💡 Pro-Tips for a Boutique Finish
- Blocking: Before assembling, lightly steam your panels (but don’t press the iron onto the yarn!). This will flatten any curling edges and make sewing much easier.
- Lining: If you plan to carry heavy items like a phone or keys, sew a simple fabric rectangle and insert it before sewing the gussets. This prevents the crochet from stretching over time.
- Stitch Consistency: If your bow looks “floppy,” you can insert a small piece of plastic canvas or stiff felt inside the bow loops before sewing the center knot.
Congratulations! You have completed the Pastel Dream Bow Bag. This timeless design is perfect for spring outings, weddings, or as a heartfelt handmade gift. Happy Crocheting!


