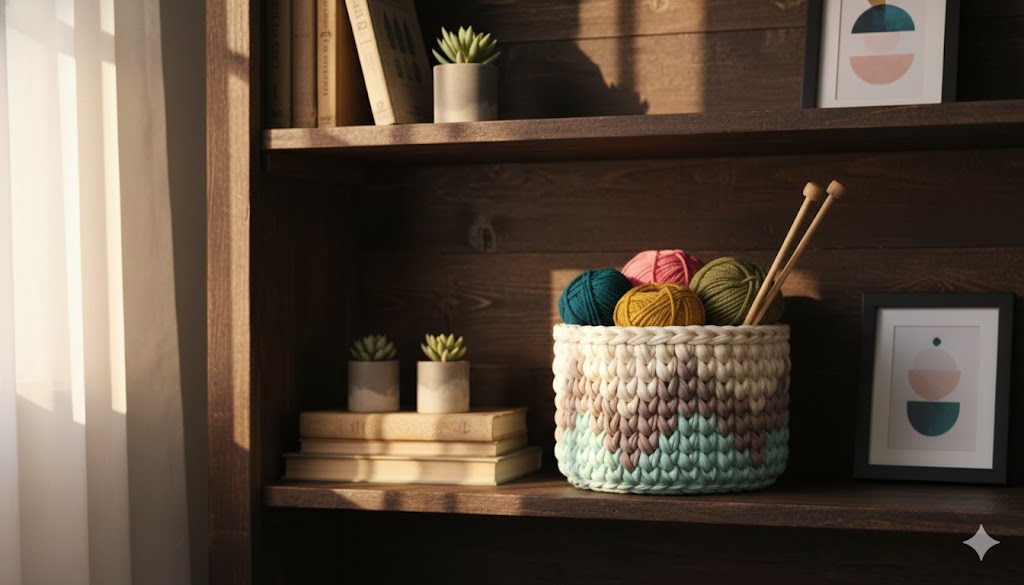
Hello, fellow yarn enthusiasts and crafting adventurers! Are you ready to add a touch of handmade charm and practical organization to your home? Today, we’re diving into a super satisfying project that’s perfect for both beginners and experienced crocheters alike: a beautiful, sturdy Chunky Chevron Crochet Basket!
This basket isn’t just a treat for the eyes with its modern chevron stripes and delightful texture; it’s also incredibly versatile. Imagine it holding your yarn stash, tidying up toys, collecting magazines, or even serving as a chic planter cover. Made with chunky T-shirt yarn, it works up quickly and provides a fantastic, robust finish that stands on its own.
I’ve carefully crafted this pattern to be as clear and detailed as possible, ensuring you can follow along with ease. So grab your biggest hook, pick out your favorite colors, and let’s get ready to create something wonderful together!
🧶 Materials You’ll Need
Before we begin our crochet journey, let’s gather all the essentials. Having everything on hand makes the process smooth and enjoyable!
- T-Shirt Yarn (or equivalent super bulky yarn, weight 6):
- Color A (Lightest/Cream): Approximately 150-200 yards
- Color B (Medium/Taupe): Approximately 150-200 yards
- Color C (Darkest/Mint Green): Approximately 150-200 yards
- Note on Yarn Quantity: T-shirt yarn can vary greatly in thickness and yardage per skein. It’s always a good idea to buy a little extra, especially if you want a larger basket or if your tension is looser. For a basket roughly 8-10 inches in diameter and height, the above estimates should work.
- Crochet Hook: 9.0 mm (N/P) or 10.0 mm (P/Q) – Choose a hook size that gives you a firm, tight fabric. T-shirt yarn can be very elastic, so a smaller hook helps maintain structure.
- Stitch Marker: Essential for working in the round!
- Yarn Needle (Tapestry Needle): For weaving in ends.
- Scissors: For cutting yarn.
📏 Finished Size (Approximate)
Once completed, your basket will be approximately:
- Diameter: 8 – 10 inches (20-25 cm)
- Height: 8 – 10 inches (20-25 cm)
Remember, your final size may vary based on your yarn thickness and personal tension. Don’t worry if it’s slightly different – that’s the beauty of handmade items!
📝 Abbreviations (US Terms)
Here’s a quick reference for the crochet terms we’ll be using in this pattern:
- ch: chain
- sl st: slip stitch
- sc: single crochet
- sc inc: single crochet increase (2 sc in the same stitch)
- st(s): stitch(es)
- fsc: foundation single crochet (optional, see notes)
- BLO: back loop only
💡 Important Notes Before You Start
Please take a moment to read these tips for the best results:
- Working in the Round: This pattern is worked in continuous rounds, meaning you will not join with a slip stitch at the end of each round unless specified. Use a stitch marker to keep track of the first stitch of each round.
- Tension is Key: T-shirt yarn can be heavy and stretchy. Try to maintain a consistent, firm tension throughout your work. This will help your basket stand up straight and hold its shape.
- Color Changes: We will be making invisible color changes for a clean look. I’ll explain how to do this when we get there.
- Foundation Single Crochet (fsc): For the base, I recommend starting with fsc if you’re comfortable with it, as it creates a less rigid and more flexible base compared to starting with a magic ring and traditional sc rounds. If you prefer, you can use the magic ring method (instructions provided for both).
- Chevron Stitch: The chevron pattern is created by working decreases and increases strategically. Pay close attention to the stitch counts in each round.
- Back Loop Only (BLO) for Side Walls: When transitioning from the base to the sides, we’ll crochet into the BLO to create a crisp edge that helps the sides stand up.
🌟 Let’s Get Crocheting! The Pattern
Alright, let’s get down to business! We’ll start with the base, then build up the sturdy walls of our basket.
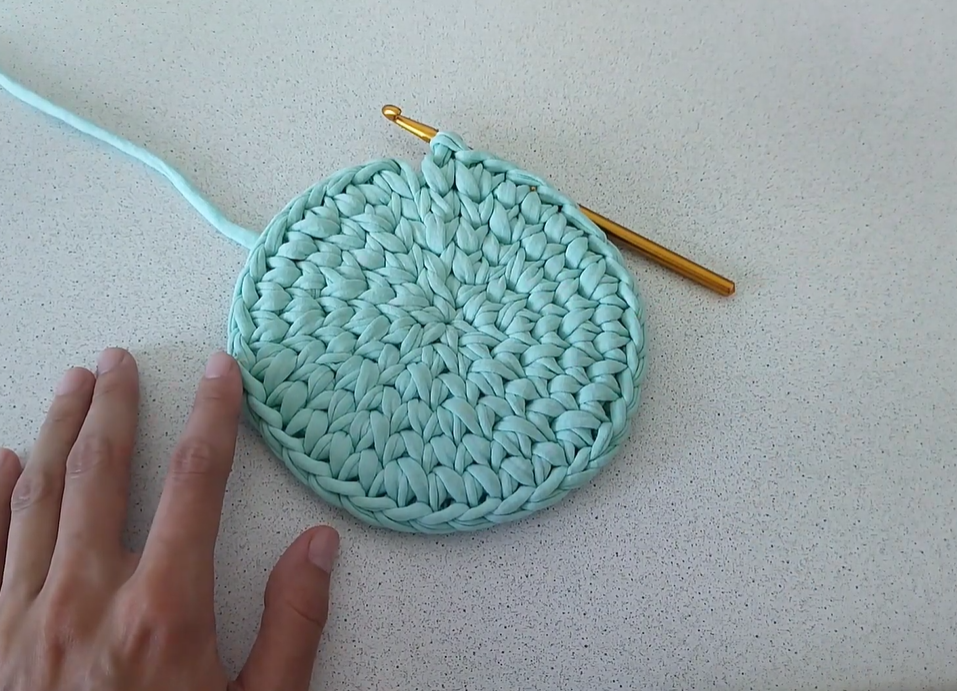
🌿 Part 1: The Base (Starting with Color C – Mint Green)
We want a nice flat, sturdy base for our basket. You have two options here: Foundation Single Crochet or Magic Ring.
Option A: Foundation Single Crochet (Recommended for a flexible base)
- Round 1: Using Color C, create a foundation single crochet (fsc) chain of 36 stitches. Carefully join with a sl st to the first fsc to form a ring, being careful not to twist. (36 sts)
- If you’re new to fsc, there are many great video tutorials available! It’s worth learning.
- Round 2: Ch 1 (does not count as a stitch). Work 1 sc in each fsc around. Join with a sl st to the first sc. (36 sts)
- We join here to ensure the base stays flat before transitioning to continuous rounds.
Option B: Magic Ring Method (Traditional)
- Round 1: Using Color C, make a magic ring. Ch 1 (does not count as a stitch). Work 6 sc into the magic ring. Pull the tail tight to close the ring. Do not join. Place a stitch marker in the first sc. (6 sts)
- Round 2: Work 2 sc in each st around (sc inc in each st). (12 sts)
- Round 3: [1 sc in the next st, sc inc in the next st] repeat around. (18 sts)
- Round 4: [1 sc in the next 2 sts, sc inc in the next st] repeat around. (24 sts)
- Round 5: [1 sc in the next 3 sts, sc inc in the next st] repeat around. (30 sts)
- Round 6: [1 sc in the next 4 sts, sc inc in the next st] repeat around. (36 sts)
- Round 7: [1 sc in the next 5 sts, sc inc in the next st] repeat around. (42 sts)
- Round 8: [1 sc in the next 6 sts, sc inc in the next st] repeat around. (48 sts)
- Round 9: [1 sc in the next 7 sts, sc inc in the next st] repeat around. (54 sts)
- Round 10: [1 sc in the next 8 sts, sc inc in the next st] repeat around. (60 sts)
Keep increasing until your base is roughly 8-10 inches in diameter, or until you have a multiple of 6 stitches for the chevron pattern. For our example, let’s aim for 60 stitches for a slightly larger basket.
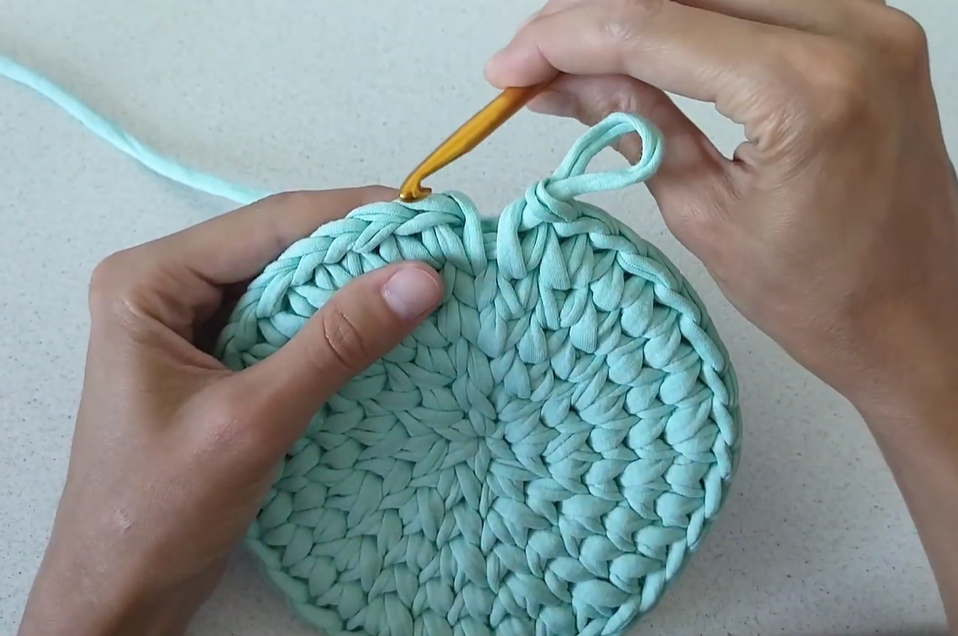
⬆️ Part 2: Establishing the Sides & First Chevron (Still Color C – Mint Green)
Now we’re going to transition from the flat base to the upright sides of the basket.
- Transition Round: Ch 1 (does not count as a stitch). Working in the BLO (back loop only) of each stitch from your last base round, work 1 sc in each st around. Do not join with a sl st; continue in continuous rounds. Place your stitch marker in the first sc of this round. (e.g., 36 sts from fsc base, or 60 sts from magic ring base)
- Working in the BLO creates a defined ridge that helps the basket stand up. It’s crucial for shaping!
- Round 1 (Sides): Work 1 sc in each st around. (e.g., 36 or 60 sts)
- You are now working into both loops again for the side walls.
Now, let’s introduce the chevron! This pattern works over a multiple of 6 stitches. We’ll be creating a “peak” and a “valley” within each repeat.
Chevron Pattern Repeat: [sc in the next 2 sts, sc3tog over the next 3 sts, sc in the next 2 sts, sc inc in the next st]
- Round 2 (Chevron Start): (Still with Color C) Work the chevron repeat around. Make sure to move your stitch marker up with the first stitch of each round. (e.g., 36 or 60 sts – stitch count remains the same in chevron rounds as long as you maintain the repeat)
- sc3tog: Single crochet 3 together. This creates the “valley.” Insert hook into next st, pull up a loop (2 loops on hook). Insert hook into next st, pull up a loop (3 loops on hook). Insert hook into next st, pull up a loop (4 loops on hook). Yarn over and pull through all 4 loops on hook.
- sc inc: Single crochet increase. This creates the “peak.” Work 2 sc into the same stitch.
- Round 3: (Still with Color C) Continue working the chevron repeat around. (e.g., 36 or 60 sts)

Work 2-3 rounds per color for a nice stripe thickness, or adjust as desired.
🎨 Part 3: Color Changes & Building Up the Walls
Now for the exciting part – bringing in our other colors! We’ll make an “invisible” color change to keep the seam tidy.
Color Change from C (Mint Green) to B (Taupe):
When you are about 2-3 stitches away from the end of your last Color C round, stop. Work your sc stitches until you have just one stitch left before your stitch marker.
- Invisible Join for Color Change: Remove your hook from the loop. Insert your hook from back to front into the first sc of the round (the one with your stitch marker). Pick up the dropped loop with your hook and pull it through to the back of your work. This creates a neat “false stitch” that blends in.
- Attach New Color: Grab Color B (Taupe). Insert your hook into the same stitch where you just pulled through the loop (the first sc of the round, currently holding the stitch marker). Yarn over with Color B and pull up a loop. Ch 1 with Color B. You are now ready to start with Color B.
- Secure Ends: Tie a small knot with the tails of Color C and Color B on the inside of the basket to secure them. Don’t pull too tight. You can weave these in later.
Continuing the Chevron with Color B (Taupe):
- Round 4 (Color B): Start with Color B. Work 1 sc into the first stitch (where you just did your ch 1). Place your stitch marker in this sc. Continue with the chevron repeat around. (e.g., 36 or 60 sts)
- Round 5 (Color B): Continue with the chevron repeat around. (e.g., 36 or 60 sts)
Work 2-3 rounds of Color B, just as you did with Color C.
Color Change from B (Taupe) to A (Lightest/Cream):
Repeat the “Invisible Join for Color Change” steps described above, switching from Color B to Color A.
Continuing the Chevron with Color A (Lightest/Cream):
- Round 6 (Color A): Start with Color A. Work 1 sc into the first stitch. Place your stitch marker. Continue with the chevron repeat around. (e.g., 36 or 60 sts)
- Round 7 (Color A): Continue with the chevron repeat around. (e.g., 36 or 60 sts)
🔄 Part 4: Repeating the Stripes & Achieving Height
Keep repeating the 2-3 rounds of chevron pattern per color, following the sequence: C -> B -> A -> C -> B -> A… until your basket reaches your desired height.
- Important: Remember to make an invisible color change at the end of the last stitch of the previous color’s final round, before starting the next color.
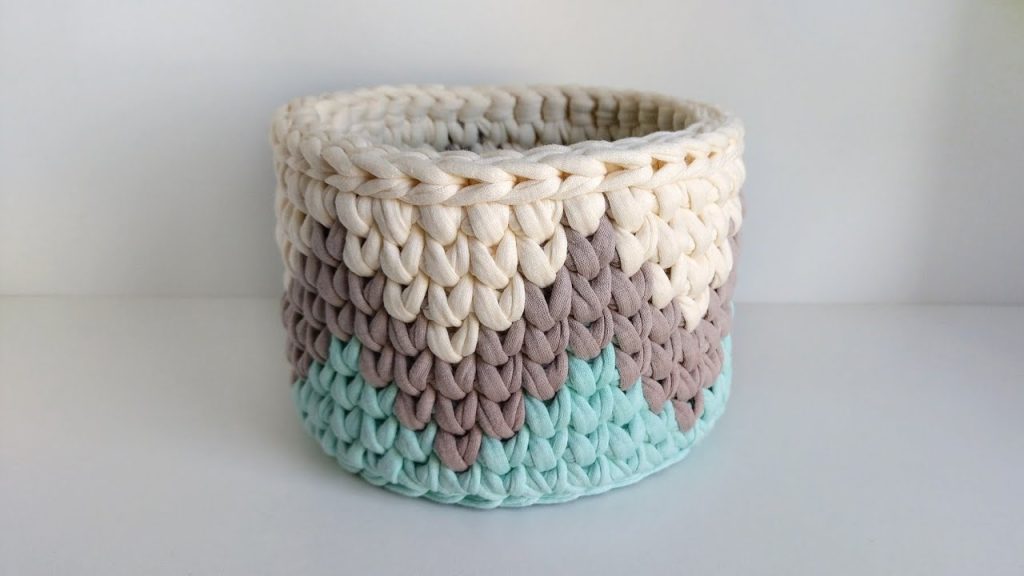
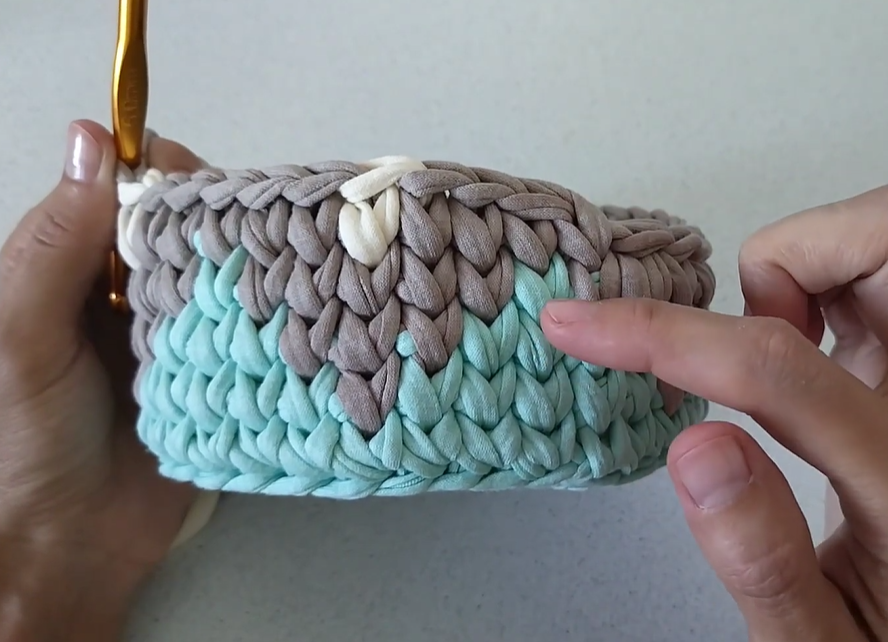
For a basket similar to the inspiration image, you’ll likely want to do at least 2 full repeats of the three-color sequence, possibly finishing with an extra stripe of your lightest color (Color A) for the rim.
For example, if you do 2 rounds per color:
- Color C: 2 rounds
- Color B: 2 rounds
- Color A: 2 rounds
- Color C: 2 rounds
- Color B: 2 rounds
- Color A: 2 rounds
- (Optional: Color C: 2 rounds for a top border)
🔝 Part 5: Finishing the Rim (Using Color A – Lightest/Cream)
Once your basket reaches the desired height, we’ll create a neat and sturdy rim to finish it off. I recommend finishing with Color A, as in the example image.
- Last Chevron Round: Complete your final chevron round with Color A.
- Slip Stitch Round: When you finish the very last stitch of your last chevron round, instead of continuing in continuous rounds, join with a sl st to the first sc of that round. Ch 1.
- Scalloped Edge (Optional but pretty!): To give the rim a slightly finished look, work 1 sc in each stitch around. When you reach the end, sl st to the first sc of this round.
- Final Slip Stitch Border (Optional for extra sturdiness): For an even firmer rim, you can work one more round of sl sts. Ch 1 (does not count as a st). Work 1 sl st into each sc around. When you reach the end, sl st to the first sl st of the round.
- Fasten Off: Cut your yarn, leaving a 6-inch tail. Yarn over and pull the tail completely through the loop on your hook to secure.
Video Tutorial:
✨ Finishing Touches
Almost done! Just a couple more steps to make your basket perfect.
- Weave in Ends: Using your yarn needle, carefully weave in all yarn tails on the inside of your basket. Take your time to hide them securely within the stitches so they don’t unravel.
- Shape Your Basket: Gently pull and shape your basket to ensure it stands up straight and holds its form. T-shirt yarn can be a bit forgiving, so you can mold it a little.
🎉 Congratulations!
You’ve done it! You now have a beautiful, handmade Chunky Chevron Crochet Basket!